Prescitech X12 Fiche technique

AC 1200 High Power Dual Band Wi-Fi Range Extender
GET STARTED

Quick Installation Guide
Preparing .................................................................
Web-Browser Method ..............................................
WPS - Method .........................................................
User Manual
Overview .................................................................
Using as a Extender................................................
When to Use Your Extender..................................
How the Extender Works.......................................
Power on the Extender..........................................
Connect to an Existing WiFi Network ...................
Method 1: Connect with a web browser ...........
Method 2: Connect with WPS ..........................
Connect an Ethernet-Enabled Device ..................
Using as a Access Point ........................................
Cable Your AP ..........................................................
Setting .....................................................................
To change the admin password ...........................
Save/Reload your Extender setting .....................
Update the Extender Firmware ............................
Hide extender's wireless network .........................
Troubleshooting .....................................................
01
01
02
03
05
05
05
06
07
07
10
12
13
14
17
17
17
18
18
20

01
Preparing
Below setup guide just for EXTENDER Mode. If you
need setup by AP mode, please refer to User Manual.
More details about troubleshoots please go to User
Manual.
1) Confirm your router works.
Web-Browser Method
1) Place your extender in the same room as your WiFi
router.
2) Use your Smart-Phone to connect with the extender
(find "Prescitech X12_2.4G or Prescitech X12_5G"
and connect with it, if password request try PIN number
of the rear panel.)
3) Visit http://extenderlogin.com/ or the IP address
192.168.19.252 from a web browser.
4) Log-in to setup the password for the Admin Page.
5) Select the SSID (network name) you like to extend.
2) Switch the side button of extender into “ON” & “Ex-
tender”
3) Plug the extender into an electrical outlet.
Quick Installation Guide

02
WPS - Method
You can also use the WPS function as an alternative
Set-up method, if you have a WPS button available on
your primary router. Hold the WPS button of your Prima-
ry Router/WiFi AP till the WPS LED starts blinking.
Press and hold the WPS 3 seconds on the Rear Panel.
Once WPS light starts blinking on it as well, please wait
for a minute for The primary router/AP and the Extender
Prescitech X12 to pair up and then connect to the
"Prescitech X12_2.4G_EXT or
Prescitech X12_5G_EXT" SSID in your Smart Phone
using your primary router's WIFI password.
6) Enter your Router's/AP's WIFI password in the Pass-
word/WIFI Key/Security key column and click on
"Apply"
7) Open the list of available networks again using your
smartphone. Find out the New SSID "Prescitech
X12_2.4G_EXT or Prescitech X12_5G_EXT" and con-
nect with it using the same password as of your primary
router/AP.
8) If the internet works, unplug Prescitech X12 and plug
it halfway between your Router and the Device intended
for the internet usage/dead zones in your home where
you were getting low to no WIFI signals.
03
Overview
The Prescitech X12 WiFi Range Extender is a network
device with multifunction, which can be using for in-
creasing the distance of a WiFi network by boosting the
existing WiFi signal and enhancing the overall signal
quality over long distances. An extender repeats the sig-
nals from an existing WiFi router or access point.
The Prescitech X12 WiFi Range Extender also can be
used as an Access Point.
Package Contents
Prescitech X12 Mini WiFi Range Extender x 1
User Manual x 1
Reset Pin x 1
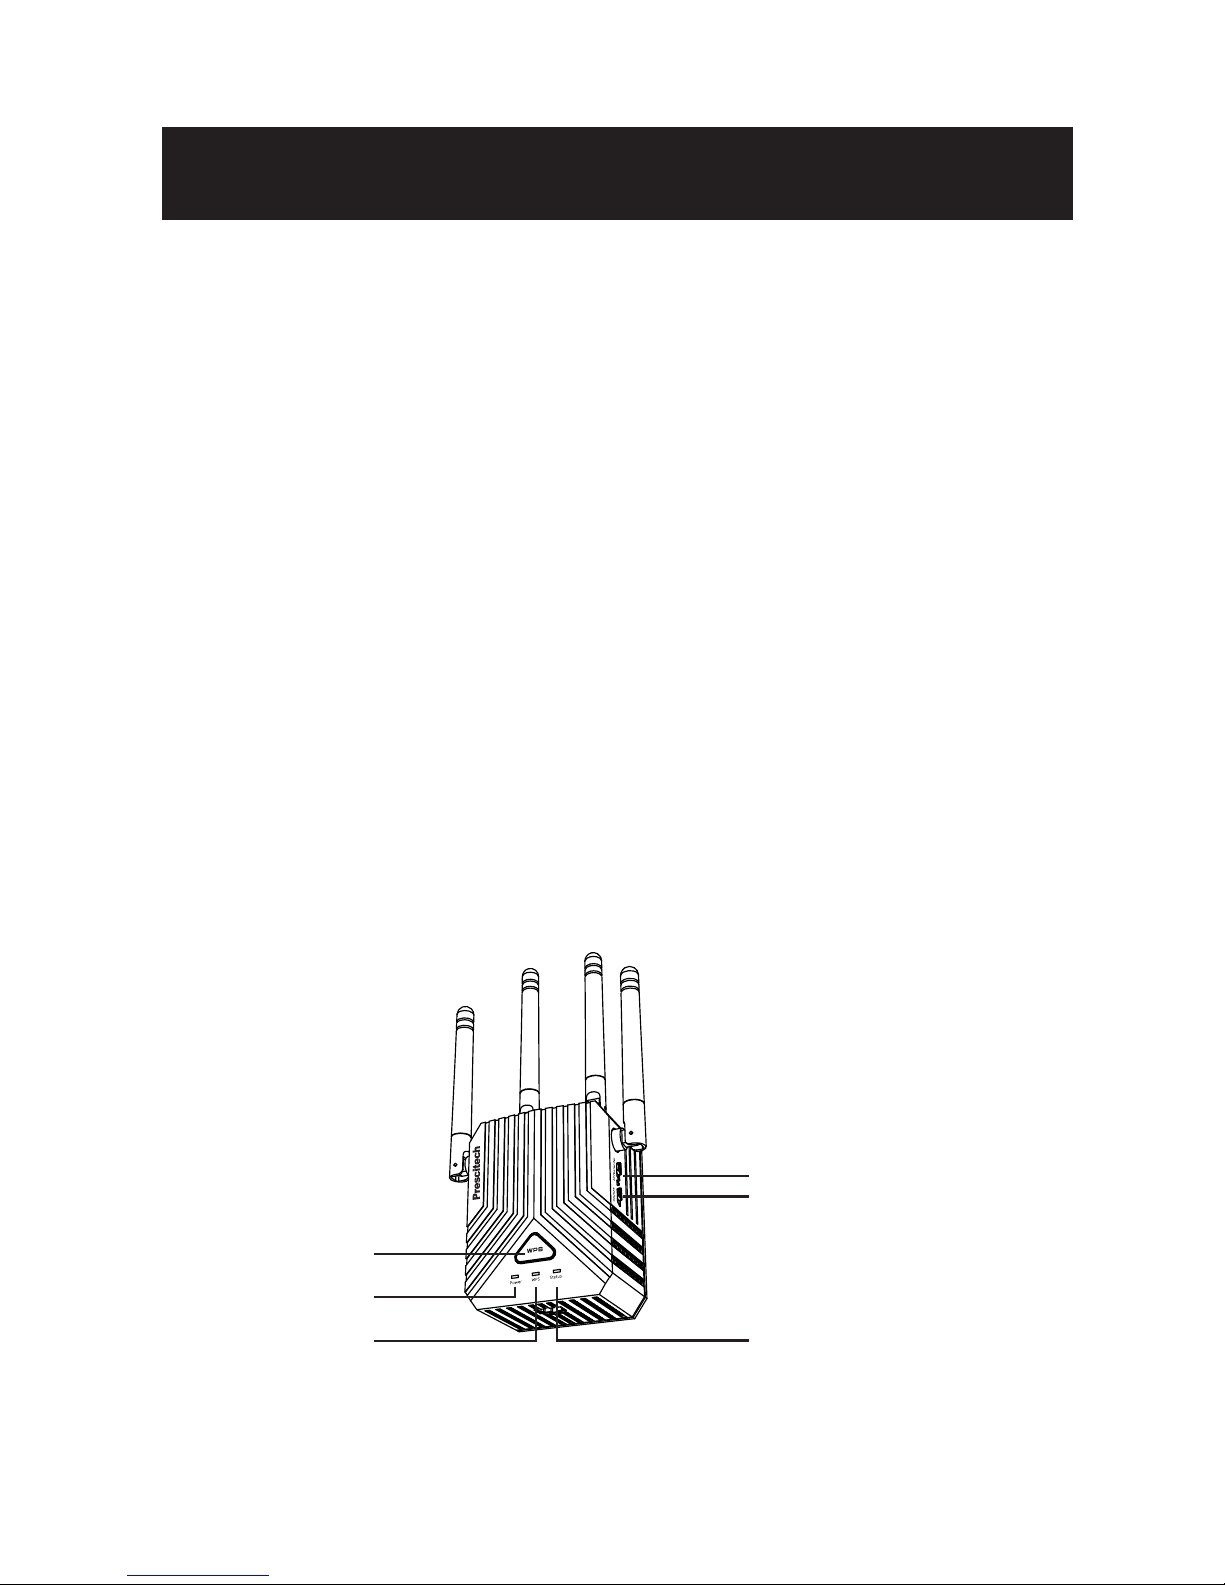
Before you install your extender, familiarize yourself with
its LEDs, buttons, and port.
Front Panel
WPS Button
Power LED
WPS LED
AP/Extender
ON/OFF
Status LED
User Manual

04
Blinking. Press and hold the WPS 3 seconds on the
Rear Panel lets you use WPS to join the WiFi network
without typing the WiFi password. The WPS LED blinks
amber during this process.
LED Descriptions
Power LED
WPS LED
Lit Blue. Best Connection.
Lit Amber. Poor Connection.
Lit Red. Disconnected.
Status LED
Lit amber. The Prescitech X12 is starting.
Off. Power is not supplied to the router.
Rear Panel
ResetWan/Wlan

05
Using as a Extender
We recommend that you connect through the extender
network only when the WiFi device is in a “dead zone”
where connection from the existing network is poor or
nonexistent. Data traffic routed through the extender is
inherently slower than traffic routed directly from the net-
work.
When to Use Your Extender
The extender works like a bridge between a WiFi router
(or a WiFi access point) and a WiFi device outside the
range of the WiFi router. The extender performs two
main jobs:
The extender connects to a working WiFi network. When
the extender connects over WiFi to an existing network,
it functions as a network client, similar to how a WiFi
device connects to a network.
The extender acts as an access point for WiFi devices.
The extender broadcasts its own WiFi network that WiFi
devices can join. In its role as an access point, the ex-
tender performs tasks that WiFi routers do, such as
broadcasting its network name (SSID).
The extender must do each of these jobs so that both
ends of the bridge are in place.
How the Extender Works
06
Turn the Power On/Off button to “On” and Mode Switch
Button to “Extender” on the side of the extender, plug the
extender into an electrical outlet, place your extender in
the same room as your WiFi router.
Proximity to the WiFi router is required only during the
initial setup process.
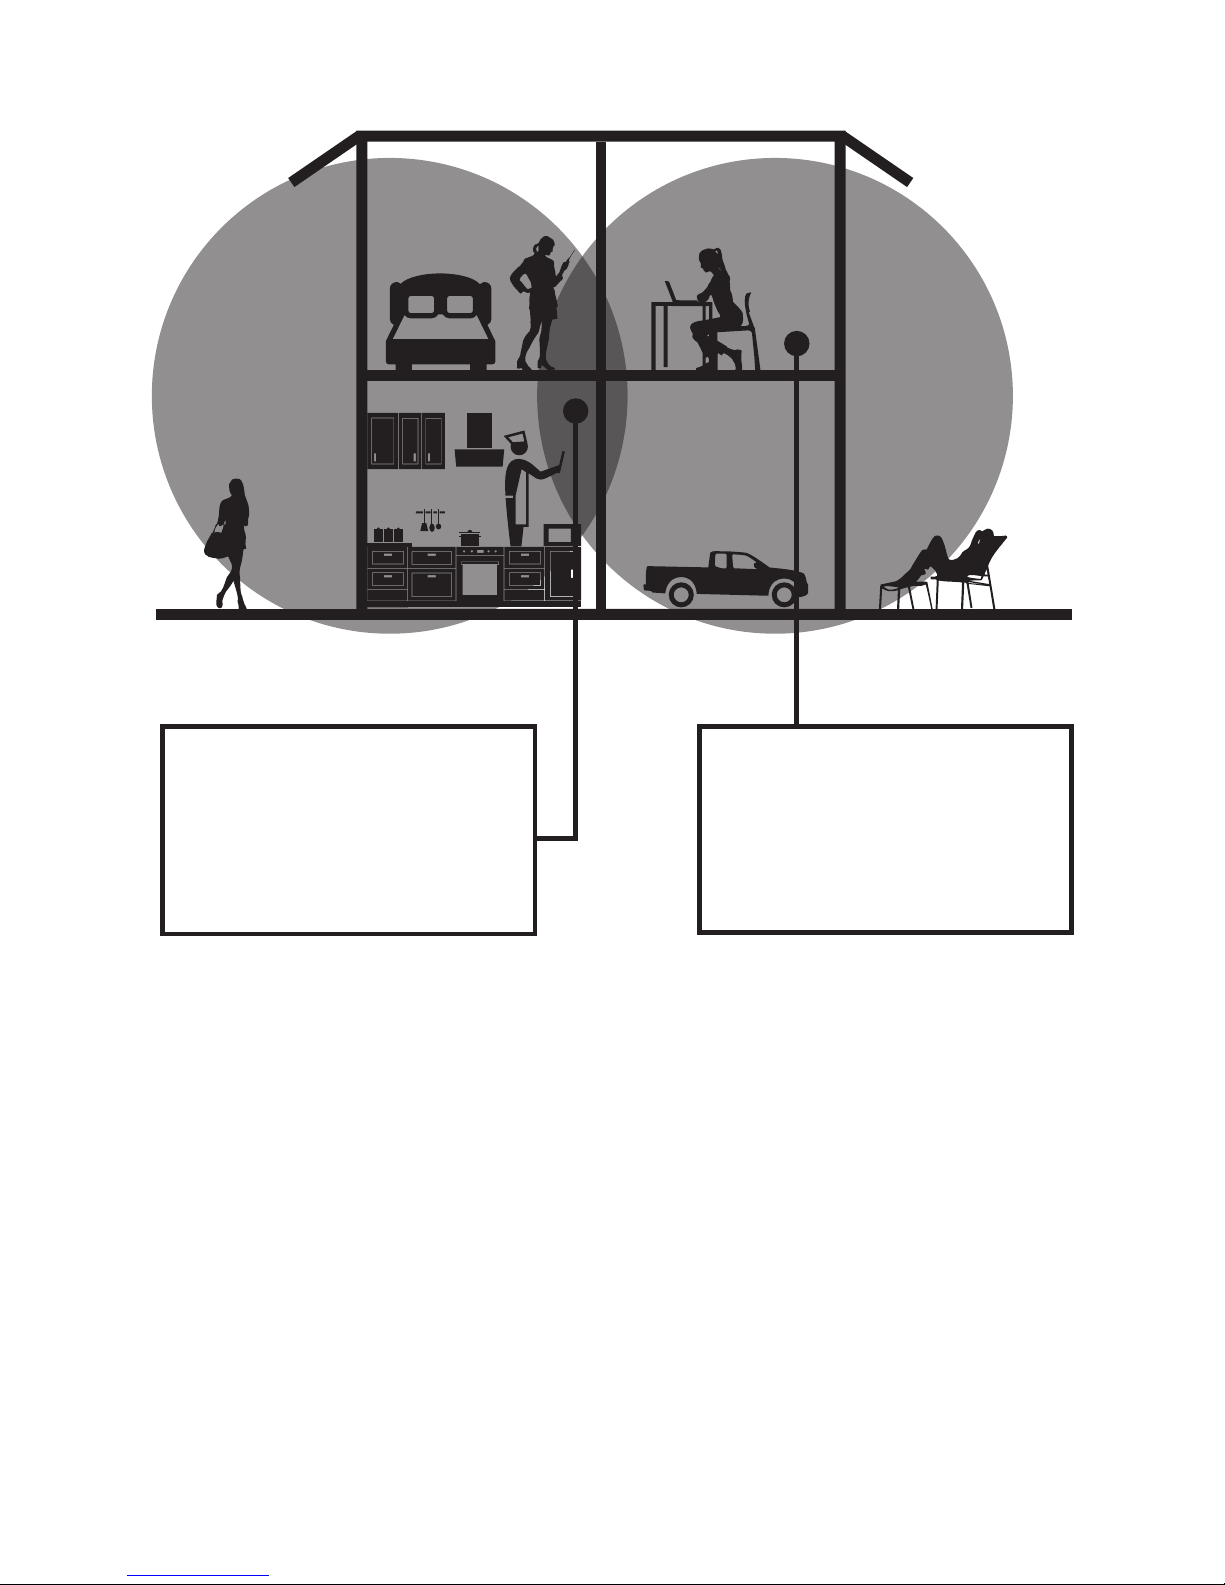
1 Power on the Extender
Boosts the range of your
existing WiFi and creates
a stronger signal in hard
to reach areas.
WiFi Range Extender
sometimes your router
does not provide the
WiFi coverage you need.
Existing WiFi

07
To extend the range of your WiFi network, you must con-
nect the extender to your existing WiFi network. You can
do this in one of two ways:
Method 1. Connect with a web browser.
Method 2. Connect with WPS.For more information,
see Method 2: Connect with WPS. For more page 11.
2 Connect to an Existing WiFi
Network
1) Use a WiFi network manager on a computer or mobile
device (recommended) to find and connect to the ex-
tender WiFi network “Prescitech X12_2.4G or Presci-
tech X12_5G”
Method 1: Connect with a web browser

08
2) Launch a web browser, enter
http://extenderlogin.com or http://192.168.19.252/ in
the address field of the web browser, when prompted,
setup the password for admin page during the initial
setup process.
3) Click the “Start Extend” button.
4) Then choose a WiFi network to extend.
Note: Click the Refresh button if the wireless Network
list couldn't loads completely or successfully.
5) In the Key (Network password) field, type the existing
WiFi network password (also called the passphrase or
security key) and click the Apply button, wait 1 minute to
reboot the extender.
6) Find and connect to the new extended WiFi network
on your computer or WiFi device. The extender creates
a new extended WiFi network. The extender’s new WiFi
network name is “Prescitech X12_2.4G_EXT or
Prescitech X12_5G_EXT”, use the same WiFi pass-
word that you use for your WiFi router.
Autres manuels pour X12
1
Table des matières
Autres manuels Prescitech Extenseur


