
Palsonic PMSM-225 Manuel utilisateur
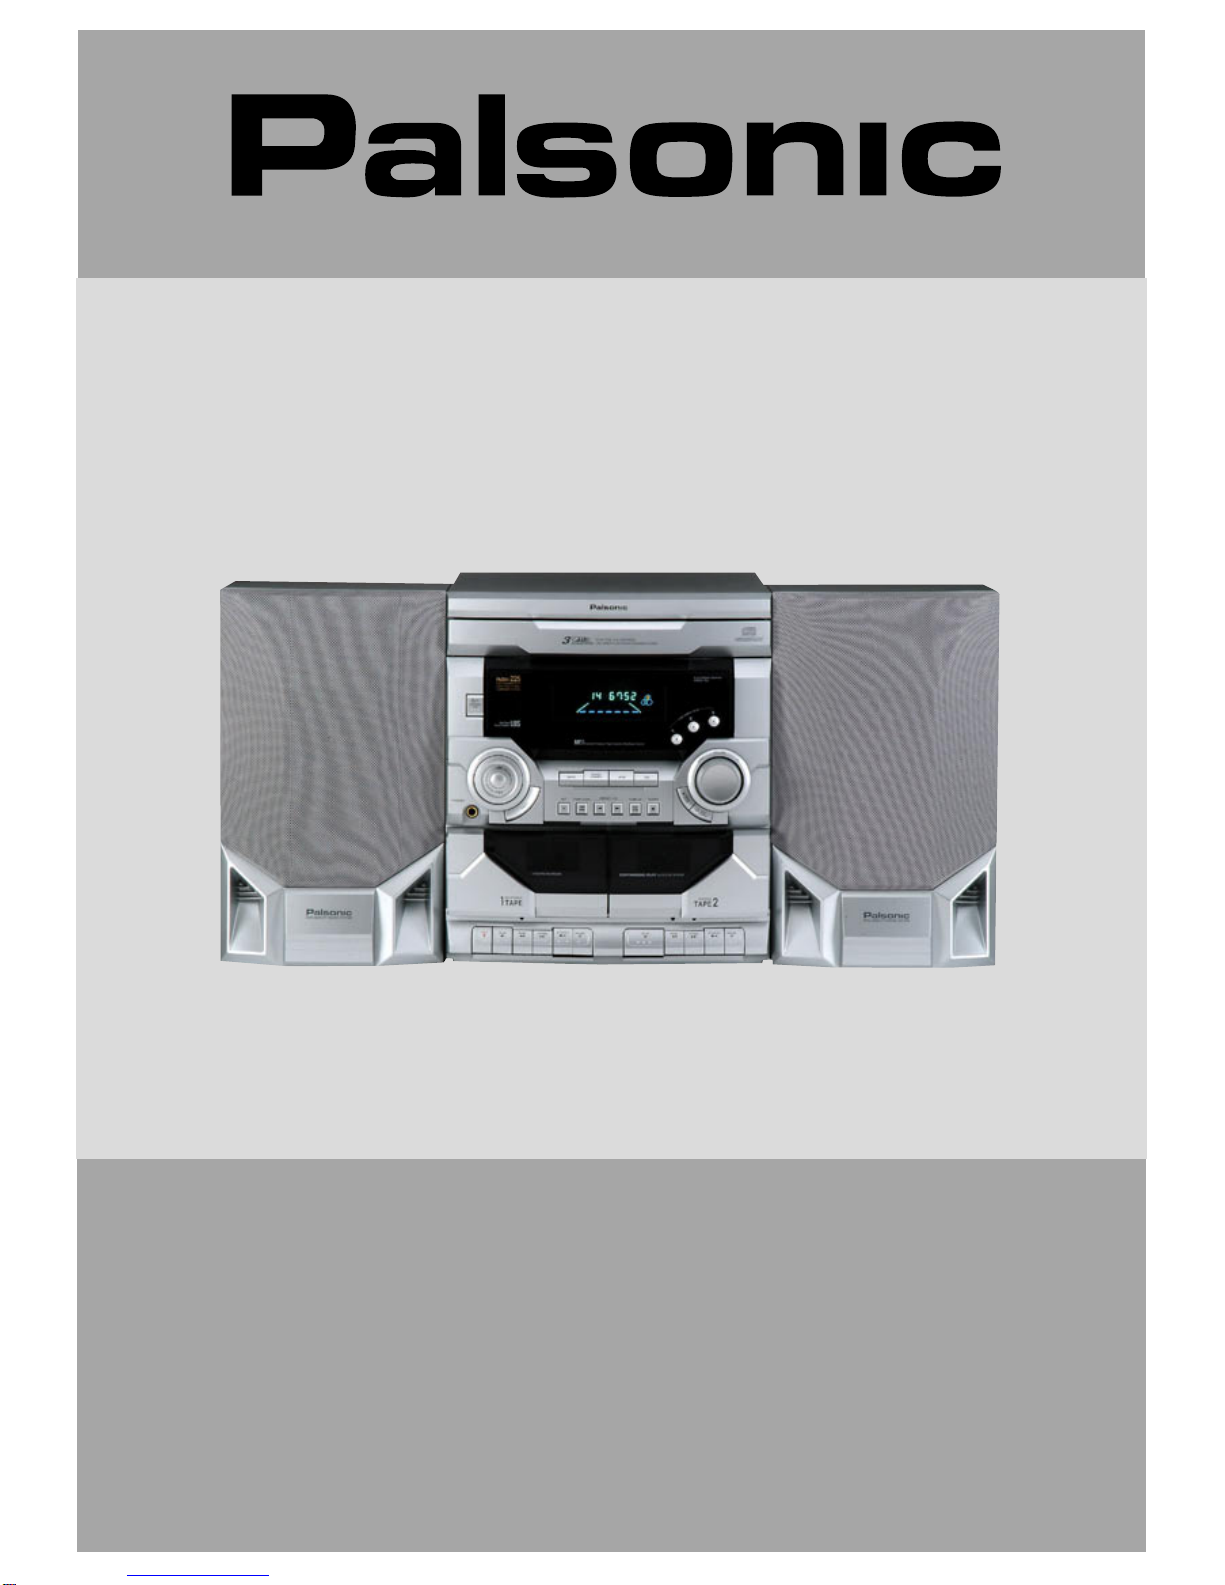
Instruction manual
Mini Component Sound System
PMSM-225
PALSONIC CORPORATION PTY LTD
1 JOYNTON AVENUE
WATERLOO NSW 2017 AUSTRALIA
TEL: (02) 9313 7111
FAX: (02) 9313 7555
www.palsonic.com.au
PALSONIC CUSTOMER SERVICE
TELEPHONE
AUSTRALIA:1300 657 888
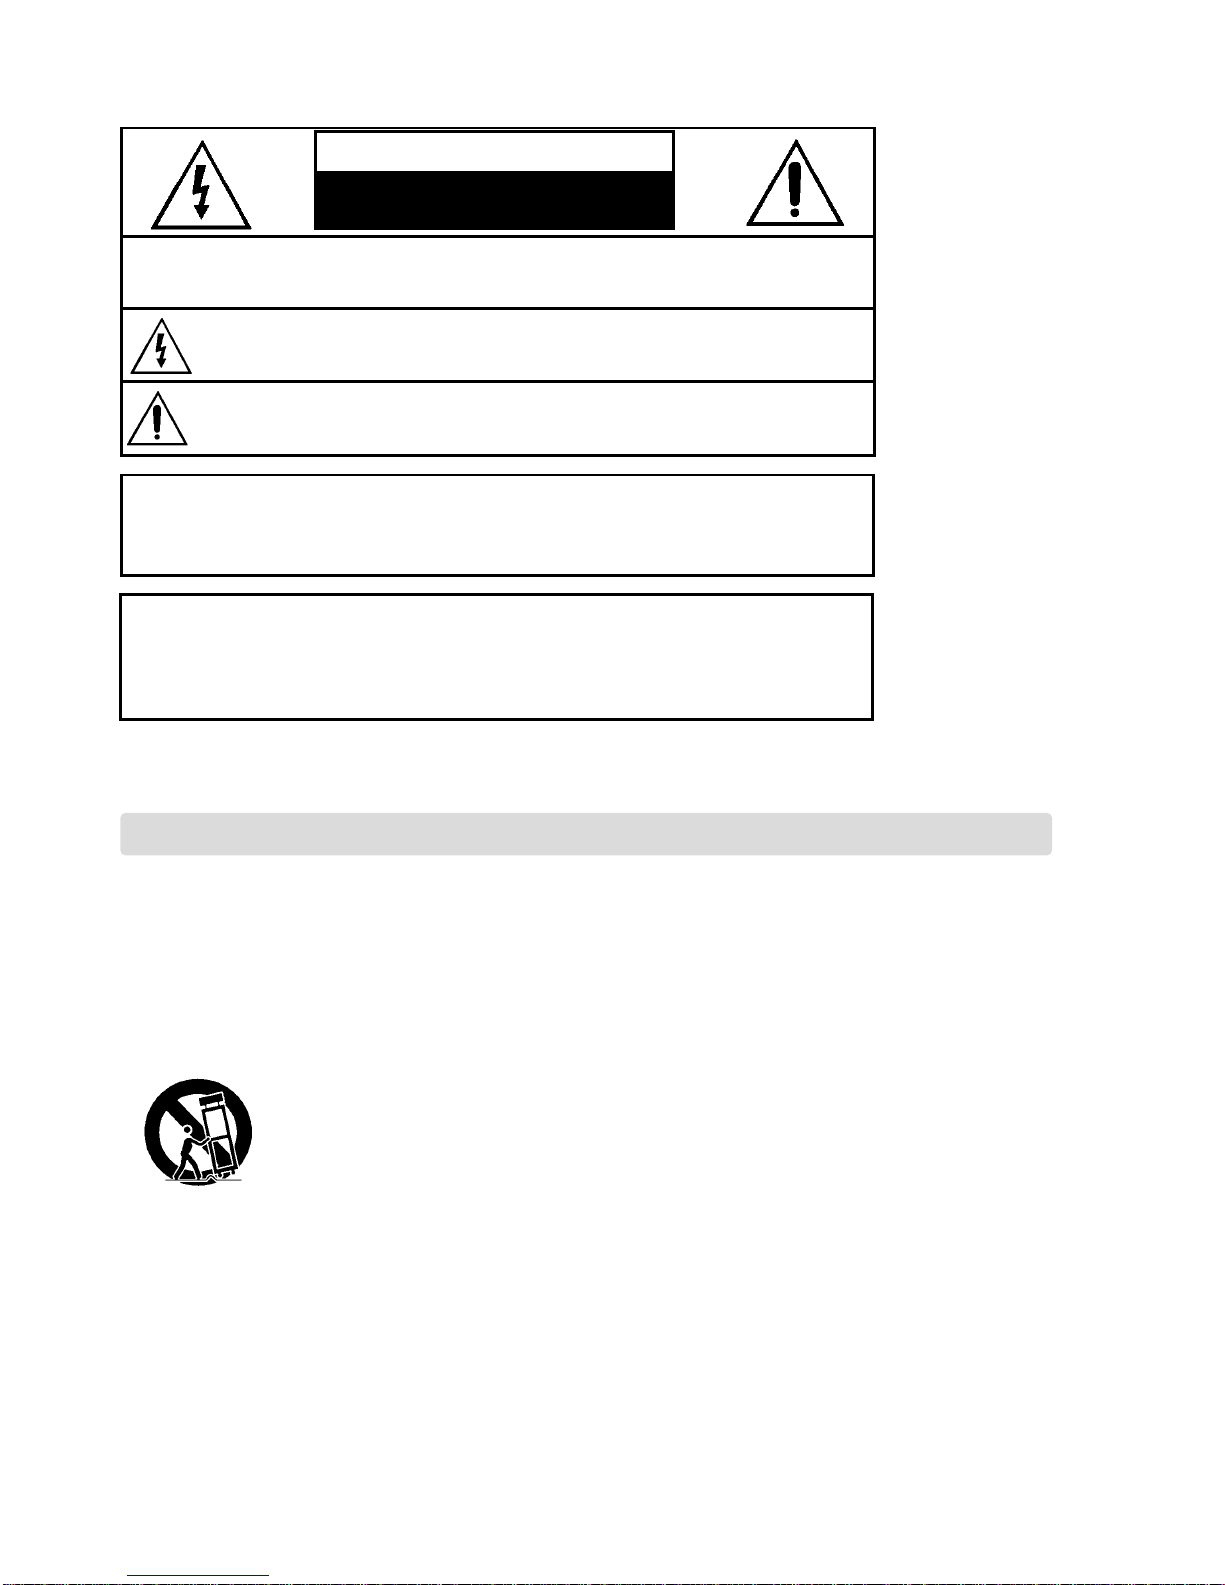
THIS SYMBOL IS INTENDED TO ALERT THE USER TO THE PRESENCE OF IMPORTANT
OPERATING AND MAINTENANCE (SERVICING) INSTRUCTIONS IN THE LITERATURE
ACCOMPANYING THE APPLIANCE.
TO REDUCE THE RISK OF ELECTRICAL SHOCK, DO NO OPEN COVER (OR BACK).
NO USER SERVICEABLE PARTS INSIDE.
REFER SERVICING TO QUALIFIED SERVICE PERSONAL.
- All the safety and operating instructions should be read before the appliance is operated.
- The safety and operating instructions should be retained for future reference.
- All warnings on the appliance and in the operating instructions should be adhered to.
- All operating and use instructions should be followed.
FIGURE 2
WARNING: TO PREVENT FIRE OR ELECTRIC SHOCK, DO NOT EXPOSE THIS APPLIANCE TO RAIN OR MOISTURE.
THIS SYMBOL IS INTENDED TO ALERT THE USER TO THE PRESENCE OF UNINSULATED
"DANGEROUS VOLTAGE" WITHIN THE PRODUCT'S ENCLOSURE THAT MAY BE
SUFFICIENT MAGNITUDE TO CONSTITUTE A RISK OF ELECTRIC SHOCK TO PERSONS.
CAUTION
TO PREVENT ELECTRIC SHOCK, DO NOT USE THIS POLARIZED AC PLUG WITH AN
EXTENSION CORD, RECEPTACLE OR OTHER OUTLET UNLESS THE BLADES CAN BE
FULLY INSERTED TO PREVENT BLADE EXPOSURE.
LASER SAFETY
THIS UNIT EMPLOYS A LASER. ONLY QUALIFIED SERVICE PERSONNEL SHOULD REMOVE
THE COVER OR ATTEMPT TO SERVICE THIS DEVICE DUE TO POSSIBLE EYE INJURY.
CAUTION: USE OF ANY CONTROLS, ADJUSTMENTS, OR PROCEDURES OTHER THAN
THOSE SPECIFIC HEREIN MAY RESULT IN HAZARDOUS RADIATION EXPOSURE.
CAUTION: TO PREVENT ELECTRIC SHOCK, MATCH WIDE BLADE OF PLUG TO WIDE SLOT,
FULLY INSERT.
ATTENTION: POUR EVITER LED CHOCS ELECTRIQUES, INTRODUIDE LA LAME LA PLUS LARGE DE LA
FICHE DANS LA BORNE CORRESPONDANTE DE LA PRISE ET POUSSER JUSQU'AU FOND.
2.
3.
4.
5.
Carts and Stands - The appliance should be used only with a cart or stand that is recommended
by the manufacturer.
An appliance and cart combination should be moved with care. Quick stops, excessive force,
and uneven surfaces may cause the appliance and cart combination to overturn.
Wall or Ceiling Mounting - The appliance should be mounted to a wall or ceiling only as
recommended by the manufacturer.
Ventilation -The appliance should be situated so that its location or position does not interfere
with its proper ventilation. For example, the appliance should not be situated on a bed, sofa, rug,
or similar surface that may block the ventilation openings; or, placed in a built-in installation, such
as a bookcase or cabinet that may impede the flow of air through the ventilation openings.
PORTABLE
CART
WARNING
2
1. Water and Moisture - The appliance should not be used near water - for example, near a bathtub, washbowl, kitchen
sink, laundry tub, in a wet basement, or near a swimming pool, and the like.
CAUTION:
CAUTION
RISK OF ELECTRICAL SHOCK
DO NOT OPEN
Important Safety Instructions
POWER SERVICING GROUNDING
ELECTRODE SYSTEM
(NEC ART 250, PART H)
6.
7.
8.
9.
10.
11.
12.
13.
14.
15.
16.
17.
Heat - The appliance should be situated away from heat sources such as radiators, heat registers, stoves, or other
appliances (including amplifiers) that produce heat.
Power Sources -The appliance should be connected to a power supply only of the type described in the operating
instructions or as marked on the appliance.
Grounding or Polarisation -The precautions that should be taken so that the grounding or polarisation means of
an appliance is not defeated.
Power - Cord Protection - Power-supply cords should be routed so that they are not likely to be walked on or
pinched by items placed upon or against them, paying particular attention to cords at plugs, convenience
receptacles, and the point where they exit from the appliance.
Protective Attachment Plug - If the appliance is equipped with an attachment plug having overload protection. This
is a safety feature. See Instruction Manual for replacement or resetting of protective device. If replacement of
the plug is required, be sure the service technician has used a replacement plug specified by the manufacturer
that has same overload protection as the original plug.
Cleaning - The appliance should be cleaned only as recommended by the manufacturer.
Power Lines - An outdoor antenna should be located away from power lines.
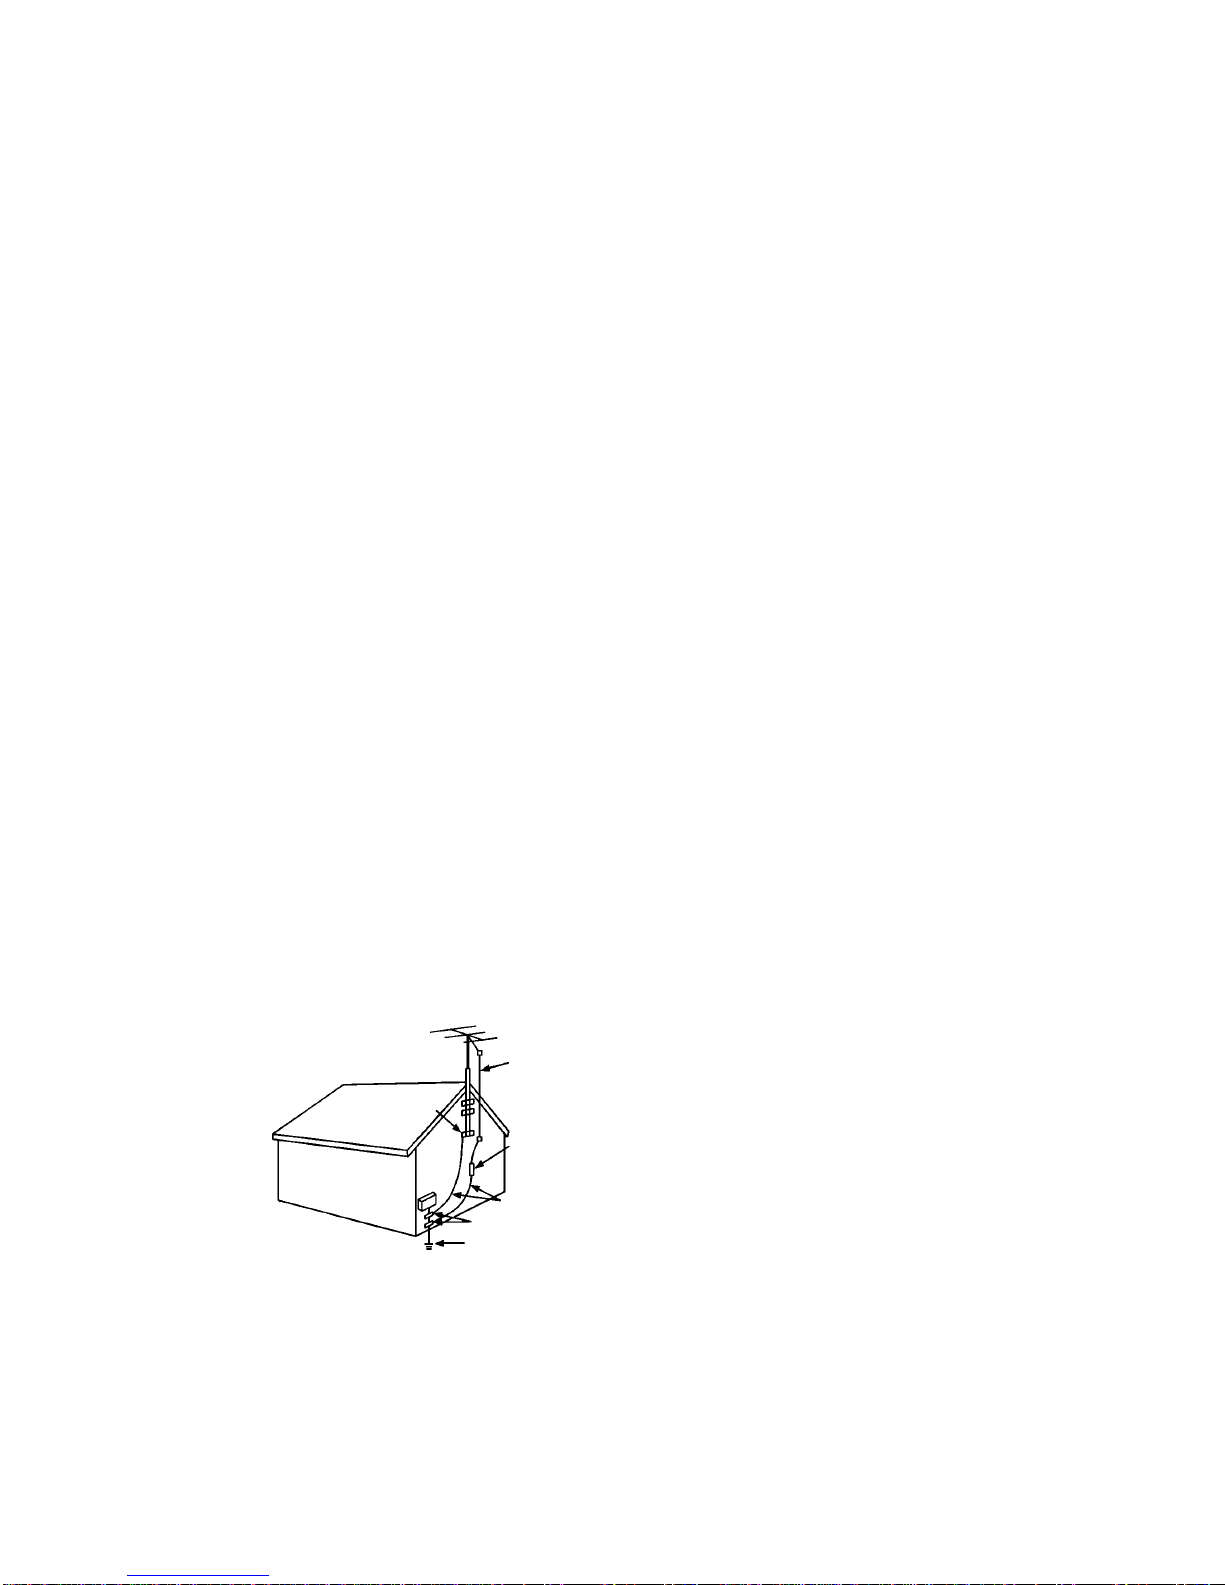
Outdoor Antenna Grounding - If an outside antenna is connected to the receiver be sure the antenna system is
grounded so as to provide some protection against voltage surges and built-up static charges. Article 810 of the
National Electrical Code, ANSI/NFPA 70, provides information with regard to proper grounding of the mast and
supporting structure, grounding of the lead-in wire to and antenna-discharge unit, size of grounding conductors,
location of antenna-discharge unit, connection to grounding electrodes and requirements for the grounding
electrode. See Figure 1.
Non-use Periods -The power cord of the appliance should be unplugged from the outlet when left unused for a
long period of time.
Object and Liquid Entry - Care should be taken so that objects do not fall and liquids are not spilled into the
enclosure through openings.
Damage Requiring Service -The appliance should be serviced by qualified service personnel when:
a) The power-supply cord or the plug has been damaged; or
b) Objects have fallen, or liquid has been spilled into the appliance; or
c) The appliance has been exposed to rain; or
d) The appliance does not appear to operate normally or exhibits a marked change in performance; or
e) The appliance has been dropped, or the enclosure damaged.
Servicing -The user should not attempt to service the appliance beyond that described in the operating
instructions. All other servicing should be referred to qualified service personnel.
FIGURE 1
EXAMPLE OF ANTENNA GROUNDING
AS PER NATIONAL
ELECTRICAL CODE
ANTENNA
LEAD IN
WIRE
ANTENNA
DISCHARGE UNIT
(NEC SECTION 810-20)
GROUND CLAMPS
NEC NATIONAL ELECTRICAL CODE
3
GROUNDING CONDUCTORS
(NEC SECTION 810-31)
Precautions
WORTH
knowing
4
Please keep the sound system's guarantee card and receipt safe for
warranty purposes, if guarantee card is supplied to you.
Read carefully through this manual to familiarise yourself with this
high - quality sound system.
Make sure the rating of your household electricity supply matches that
shown on the back of the sound system.
Refer to this chapter and the "Installation/connections" chapter (page
18/19) to help you install and adjust your sound system.
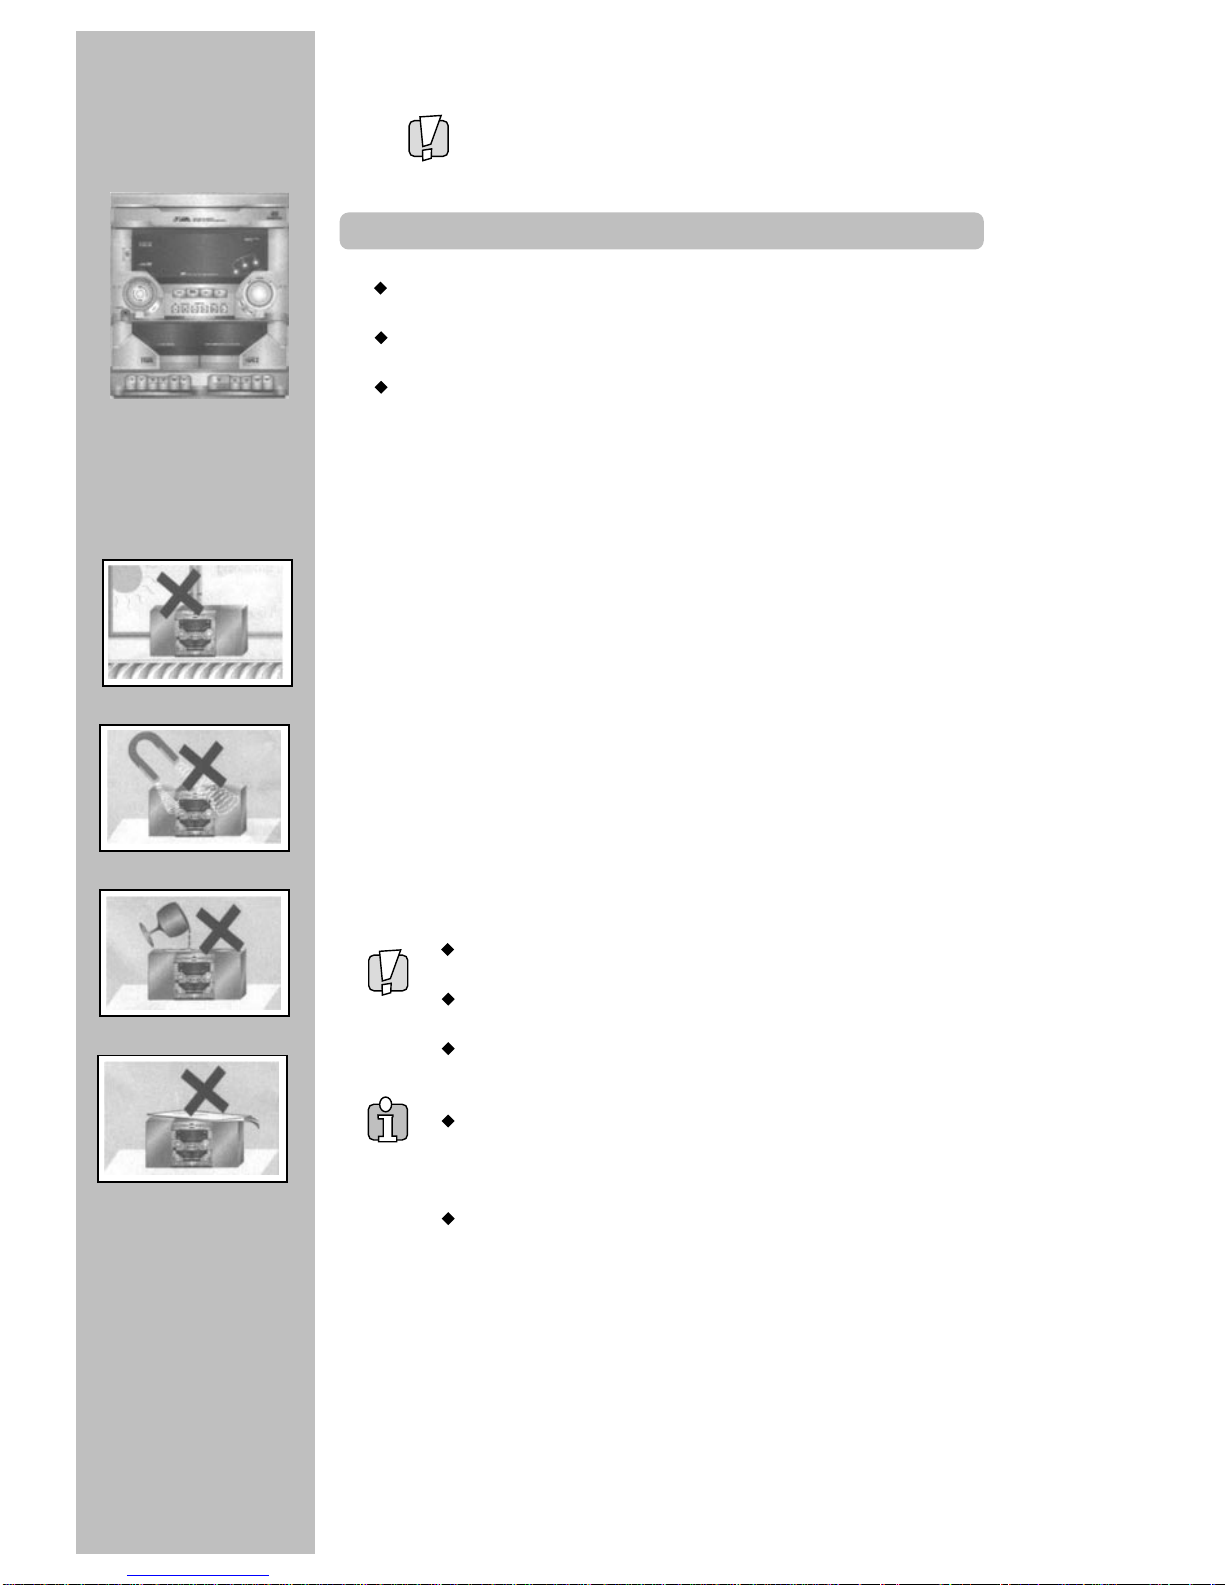
Do not ...
... expose the sound system to high levels of humidity and heat, to avoid
the risk of fire and electric shock.
... connect the sound system to the power supply if you have just moved
it from a cold to a warm environment. This can result in condensation
inside the system and cause serious damage to the machine and
cassettes. Wait around two hours to allow it to reach room
temperature.
Make sure ...
...
...
...
...
...
the system is placed on a stable, flat surface.
you place the system where there is good ventilation all around.
you clean the system only with a soft, line-free cloth, do not use
aggressive or alcohol-based cleaning agents.
you disconnect the power supply if the system appears to be working
incorrectly, is making an unusual sound, has a strange smell, has
smoke emitting from it or liquids have got inside it.
Have a qualified technician check the system.
you disconnect the power supply and aerial if you will not be using the
system for a long period or during a thunderstorm.
For your own safety!
There are no components in this sound system you can
service or repair yourself.
Do not open the case of the sound system. Only allow
qualified personnel to repair or service your set.
"Class 1 Laser Product" : Do not override the safety locks
around the laser unit of the CD player : Laser beams can
damage your eyes!
This sound system is designed for continuous operation.
Switching it off does not disconnect it from the mains
(stand-by). To disconnect it from the mains, you have to
unplug it.
Recording any copyright protected material may infringe
a copyright.
"CAUTION : Replace fusible resistor with the same type and rating."

Contents
WORTH
knowing
5
Before doing anything with this machine, please
read the chapter "Installation / connections".
Controls
The remote control unit ...................................................................................................
The sound .......................................................................................................................
The machine ...................................................................................................................
6
7
8/9
Radio listening
Tuning station, Programming station presets, Selecting station presets ........................ 10
Tape playing
Playing tapes, Winding, Continuous playback ................................................................
CD Playing
Playing CDs, Searching, Skipping ..................................................................................
Programmed CD tracks playback, Repeat playback, Random playback ........................
Recording
Recording Recording stations, from a connected device ...............................................
Recording CDs with synchro start, Recording from another tape (dubbing) ..................
Timer and clock
Installation / connections
Appendix
Setting the clock, Displaying the time .............................................................................
Setting the timer, Timer tape (play or record) function, Timer stand-by on/off.
Checking the timer ..........................................................................................................
Placing your sound system components, Remote control and batteries ........................
Installation ......................................................................................................................
Before you ask a specialist, Cleaning the audio heads of the tape deck ........................
Compact discs, Technical data .......................................................................................
On the following pages, the pictures show the buttons you press on the remote control or on the set to
perform the function. Some pictures show what you should see in the displays of the machine (if present).
11
12
13
14
15
16
17
18
19
20
21
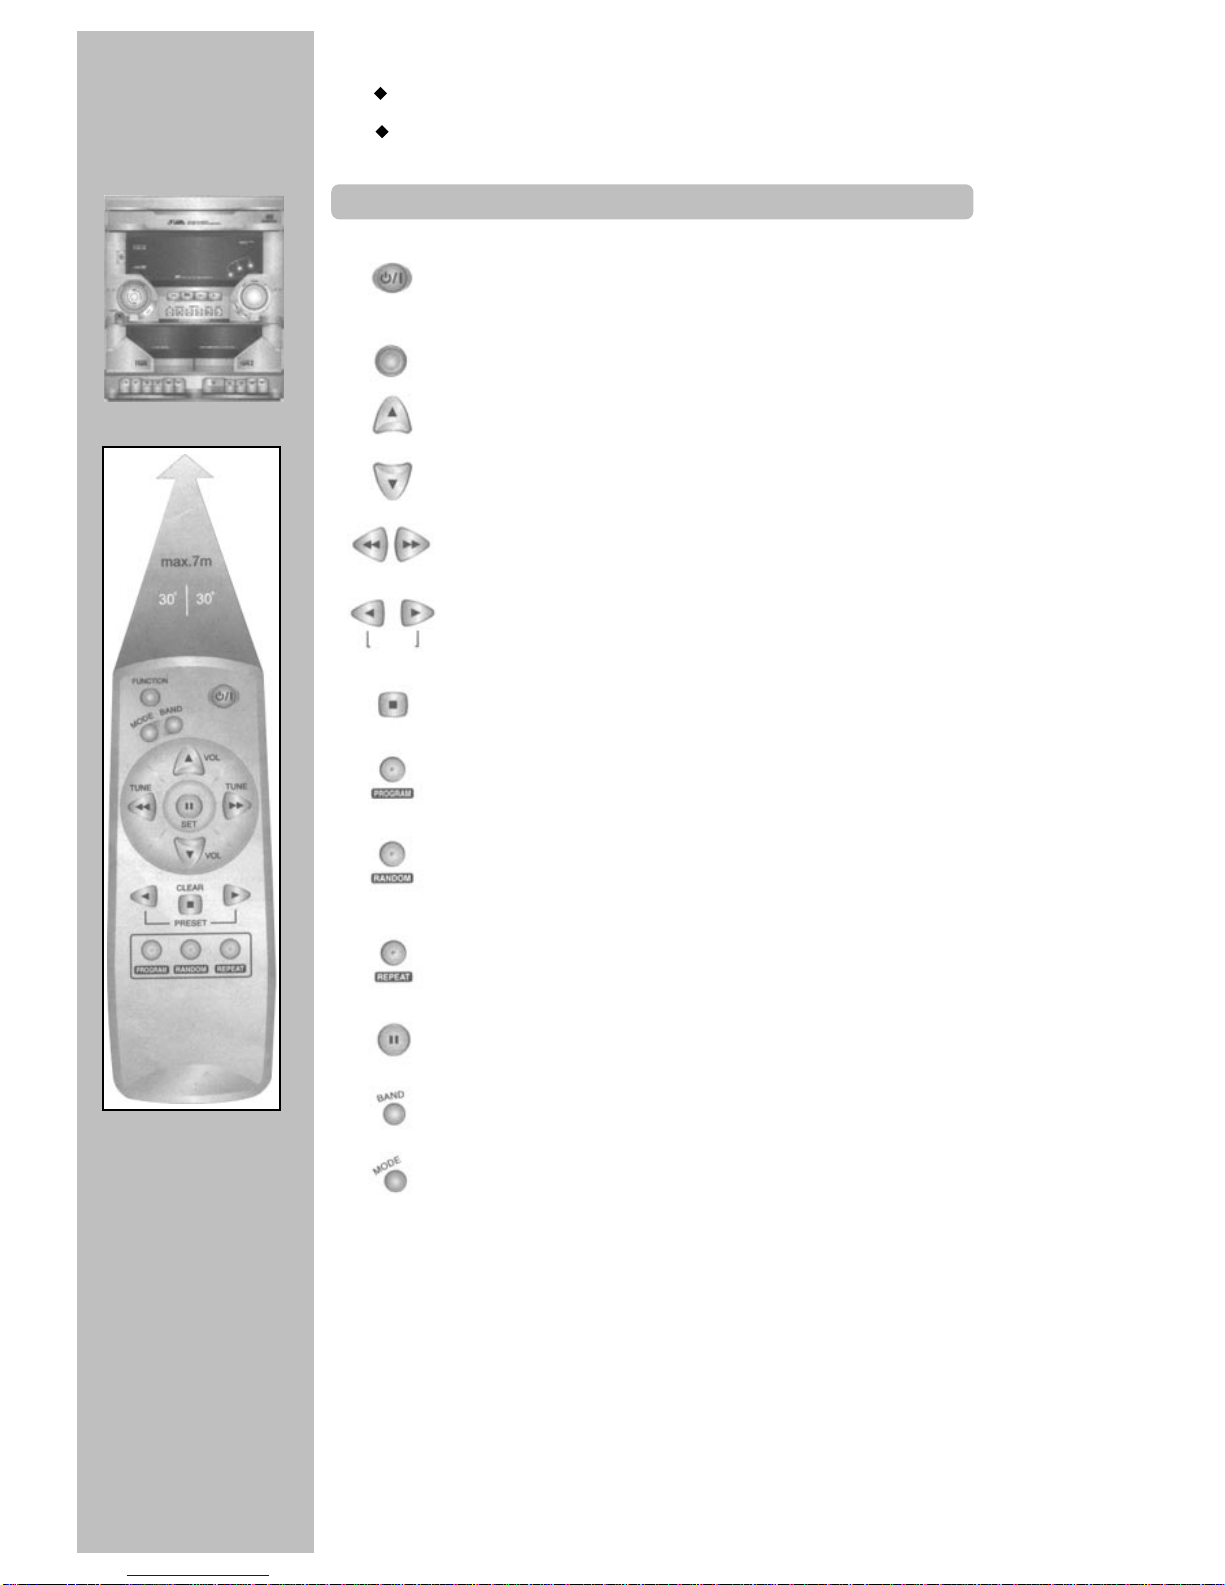
The Remote Control unit
CONTROLS
6
The remote control is the principal means of control, but the main functions are also
available on the front of the machine.
Press the buttons POWER or FUNCTION (TAPE, TUNER, AUX, CD) to turn on the
power.
Power on / off (stand-by).
To select tape, tuner, a connected device (video ...) or CD
player.
To set the volume level.
To tune in stations, to set values in programming, to fast
reverse or advance CD.
To start play CD or to select station presets.
To stop play or to cancel values and functions.
To enter programme play.
To select random play for all CDs or tracks of the selected
disc.
Press repeatedly
To select repeat play for a track, a CD, or all CDs.
For a short pause during CD play or to advance in a
programming (e.g. clock set).
To select FM or AM radio.
To select FM mono for weak stereo reception.
PRESET
TUNE TUNE
FUNCTION
VOL
VOL
CLEAR
SET
MAX.
4M
MAX.
4M
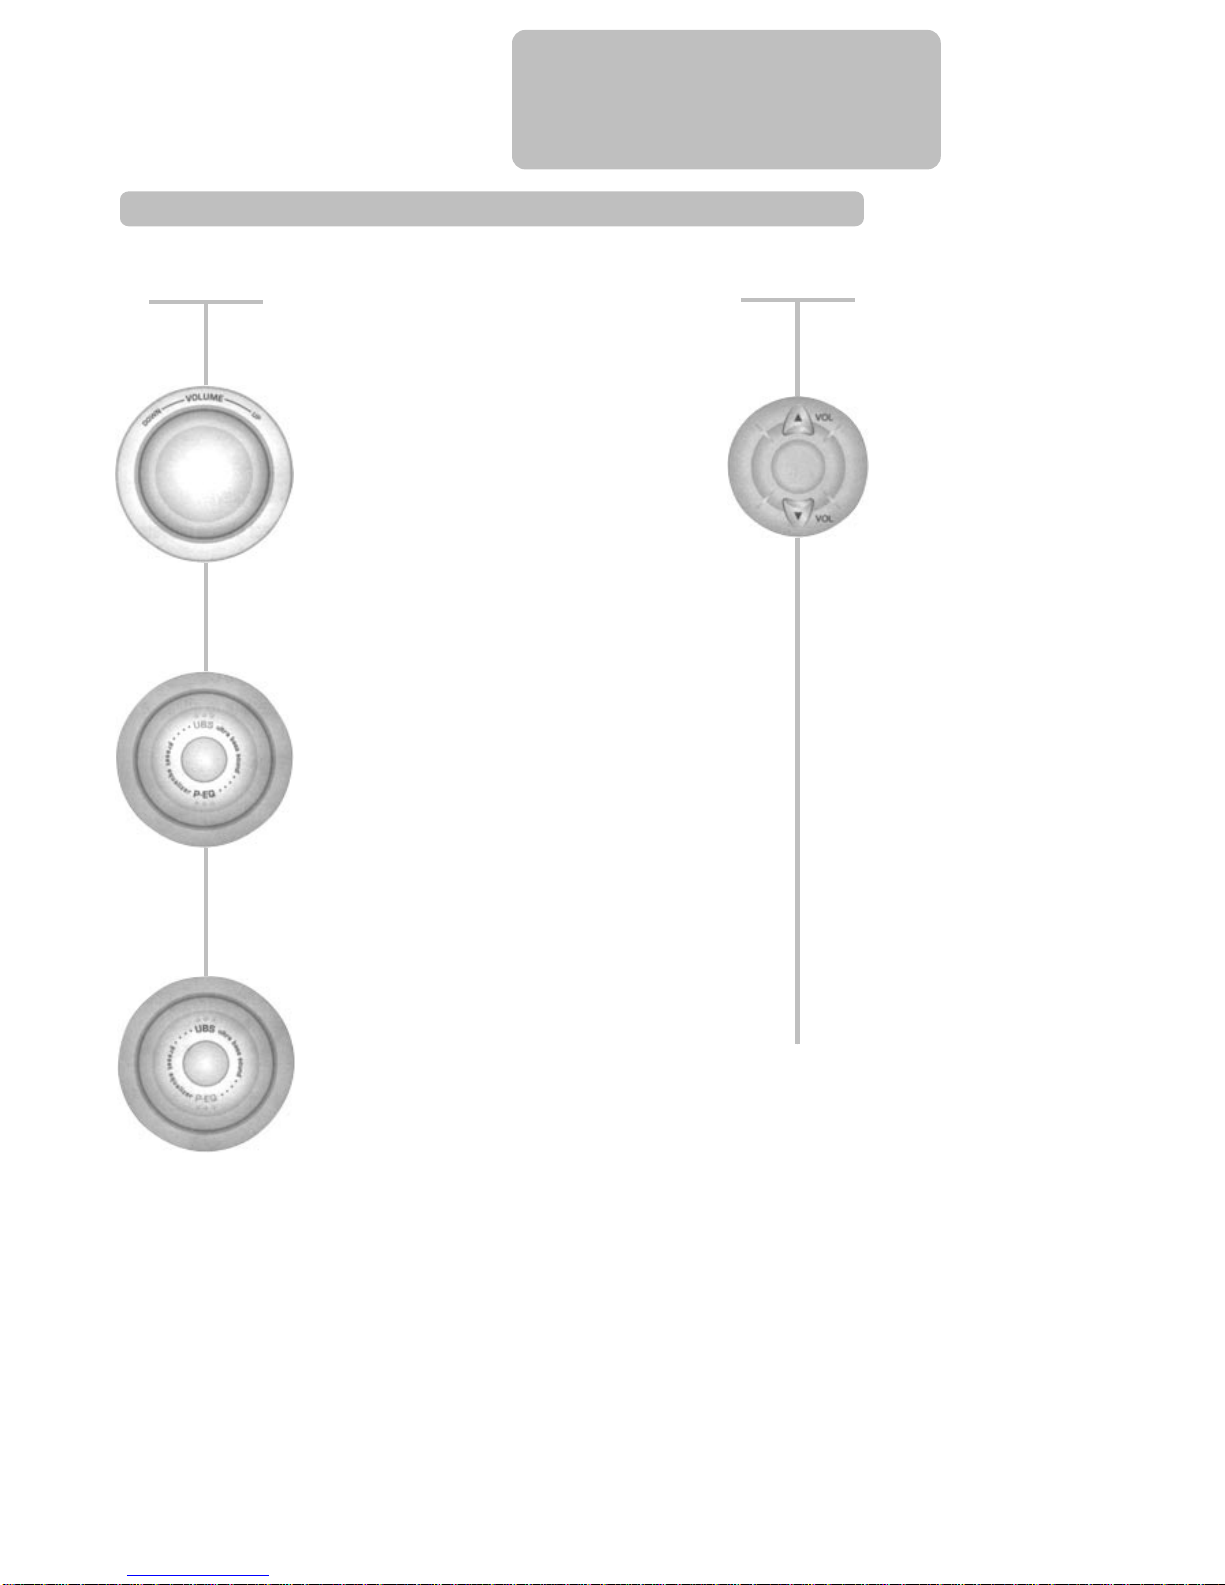
With your sound sound system you have unique possibilities
to modify the sound of your music
The sound
CONTROLS
7
On the
machine
Volume level
Handy buttons serve for comfortable volume
control both on the machine as well as on the
remote control.
Music styles
This adjustment section lets you adjust your
system's sound to the music style you are
listening to such as Classic, Jazz, Rock and
Pops (Flat means no style).
Press the buttons repeatedly for the desired
mode and watch the display.
Ultra Bass Sound system
Use this button on the machine to give music
more volume and power by boosting its bass
section (on/off).
On the
remote control
horizontally on a flat, steady base so that air can circulate around it for ventilation.
away from humidity and heat, magnetic fields, such as those from loudspeakers etc.,
and with no heavy objects placed on top.
Place your sound system
The machine
CONTROLS
8
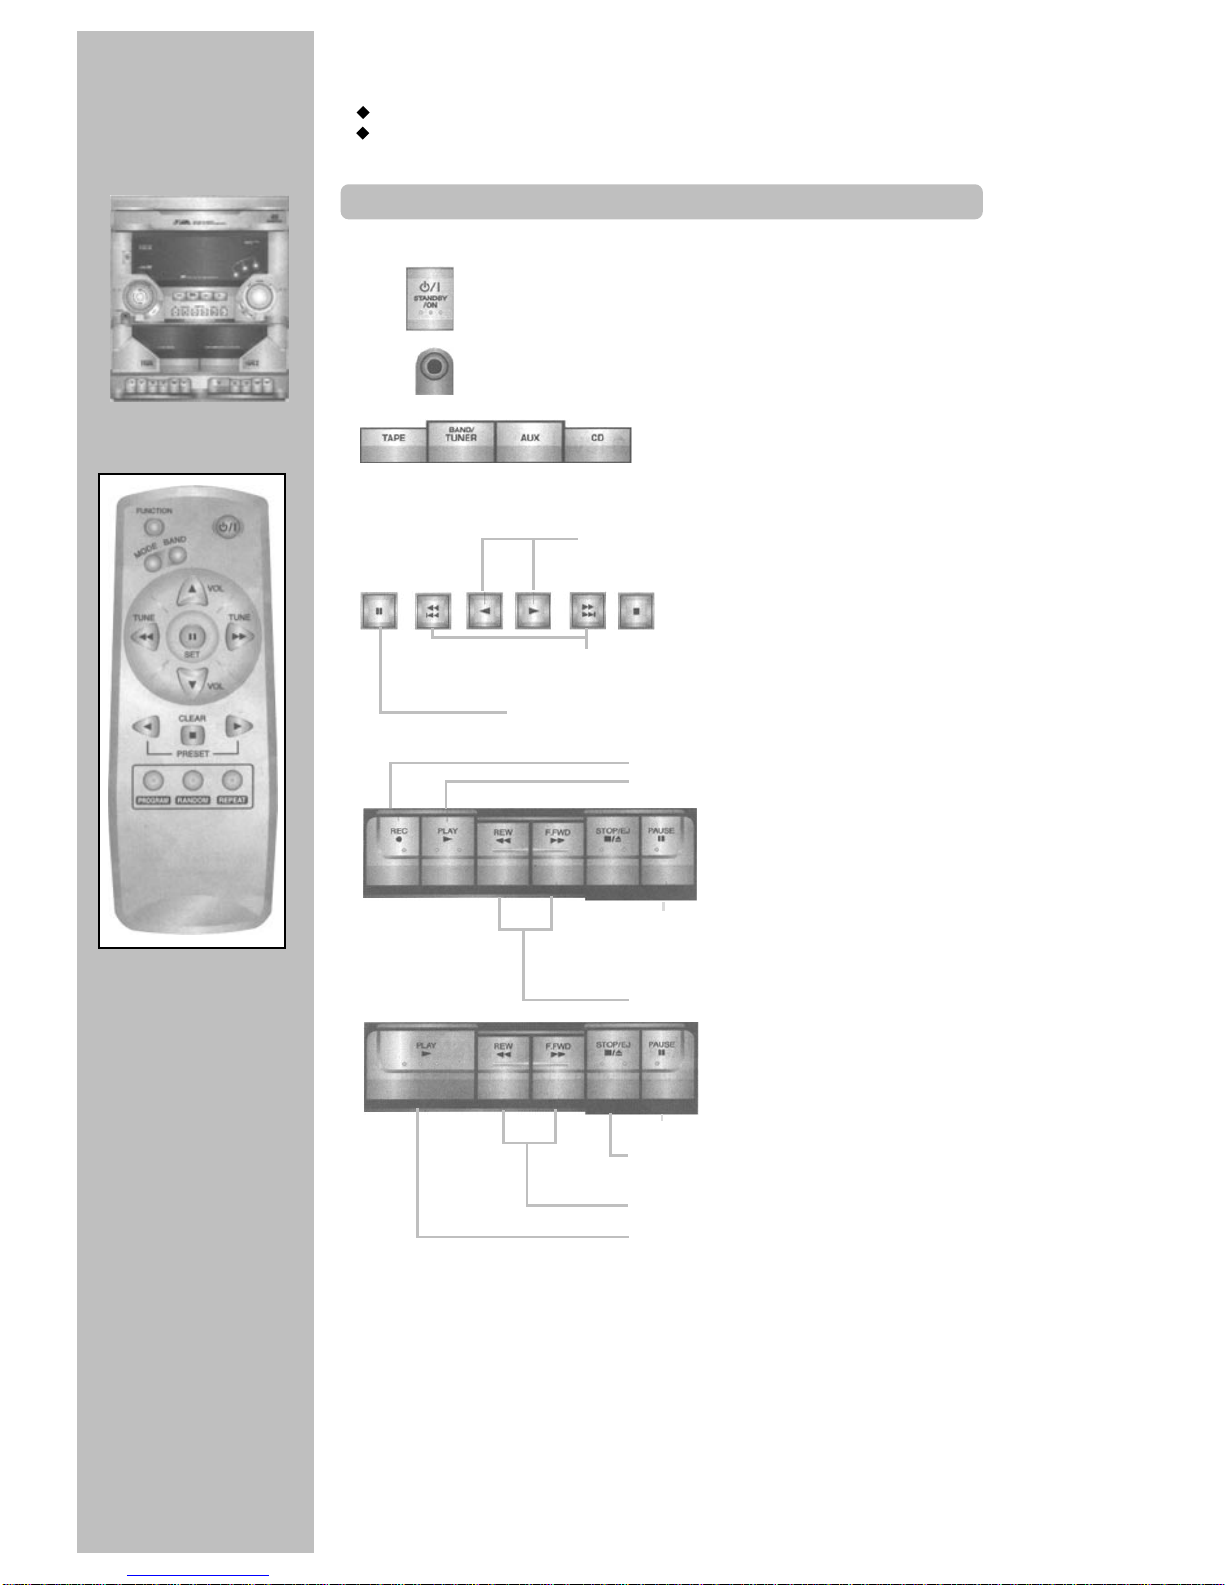
POWER ON/OFF (stand-by)
Headphone socket. Plugging in a headphone
switches the speakers off.
To select tape, tuner and band,
a connected device (video ...), or CD player.
To start play CD or to select station presets.
SET
To
stop CD play or
to
cancel
values and functions.
To tune in stations, to set values in
programming, to fast reverse or advance CD.
For a short pause during CD playback or to advance
in a programming (e.g. clock set).
To start a recording.
To play a tape.
For a short pause.
To stop tape and to open the tape
compartment.
To fast reverse or advance the tape.
For a short pause.
To stop tape and to open the tape
compartment.
To fast reverse or advance the tape.
To play a tape.
PHONES
TUNE-DOWN
PRESET/CD
TUNE-UP CLEAR
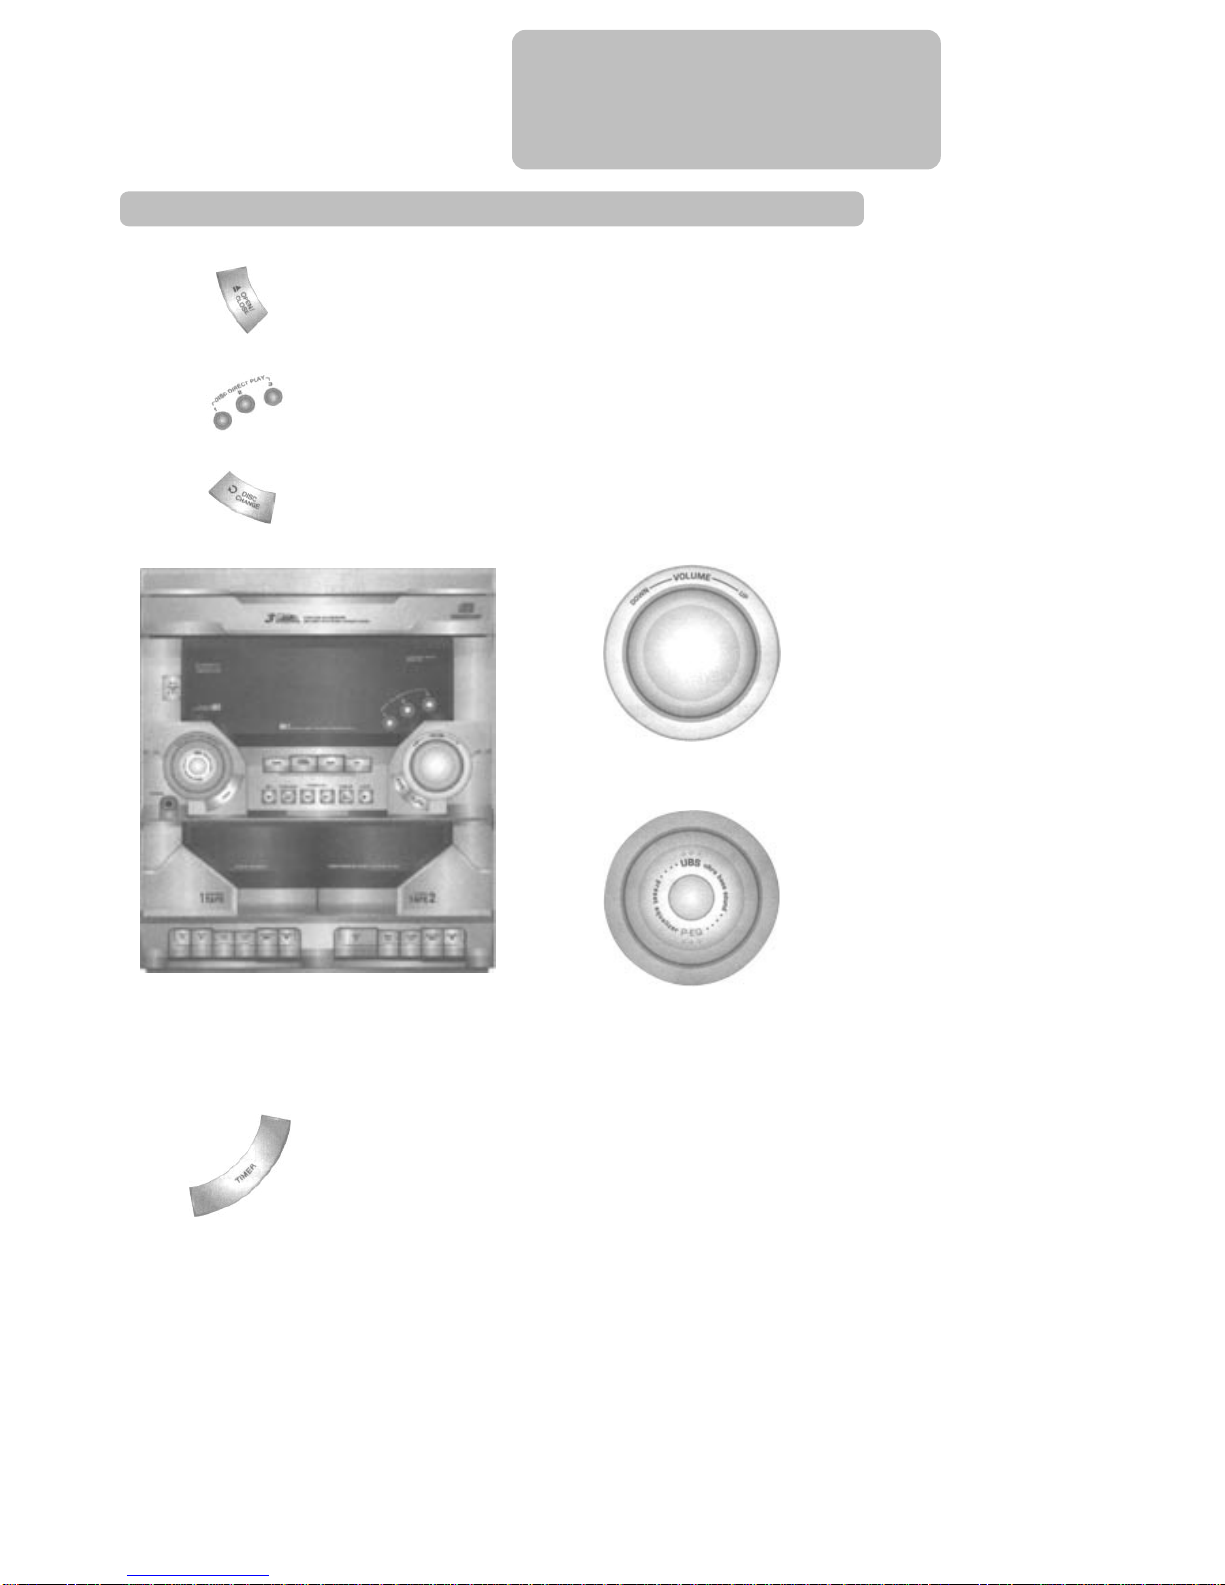
The machine
CONTROLS
9
To open or close the disc compartment to load /unload CDs
Direct access to one of the three discs that you can load into
your sound system.
To play the next disc and to turn disc tray for loading up to 3
discs.
Also to load a disc while another is playing.
Tape compartment 1
for playing tapes and
recording tapes.
Tape compartment 2
for playing tapes.
To set the volume level.
UBS enhancement, see page 7.
To select timer setting and to activate/ deactivate timer stand
-
by.
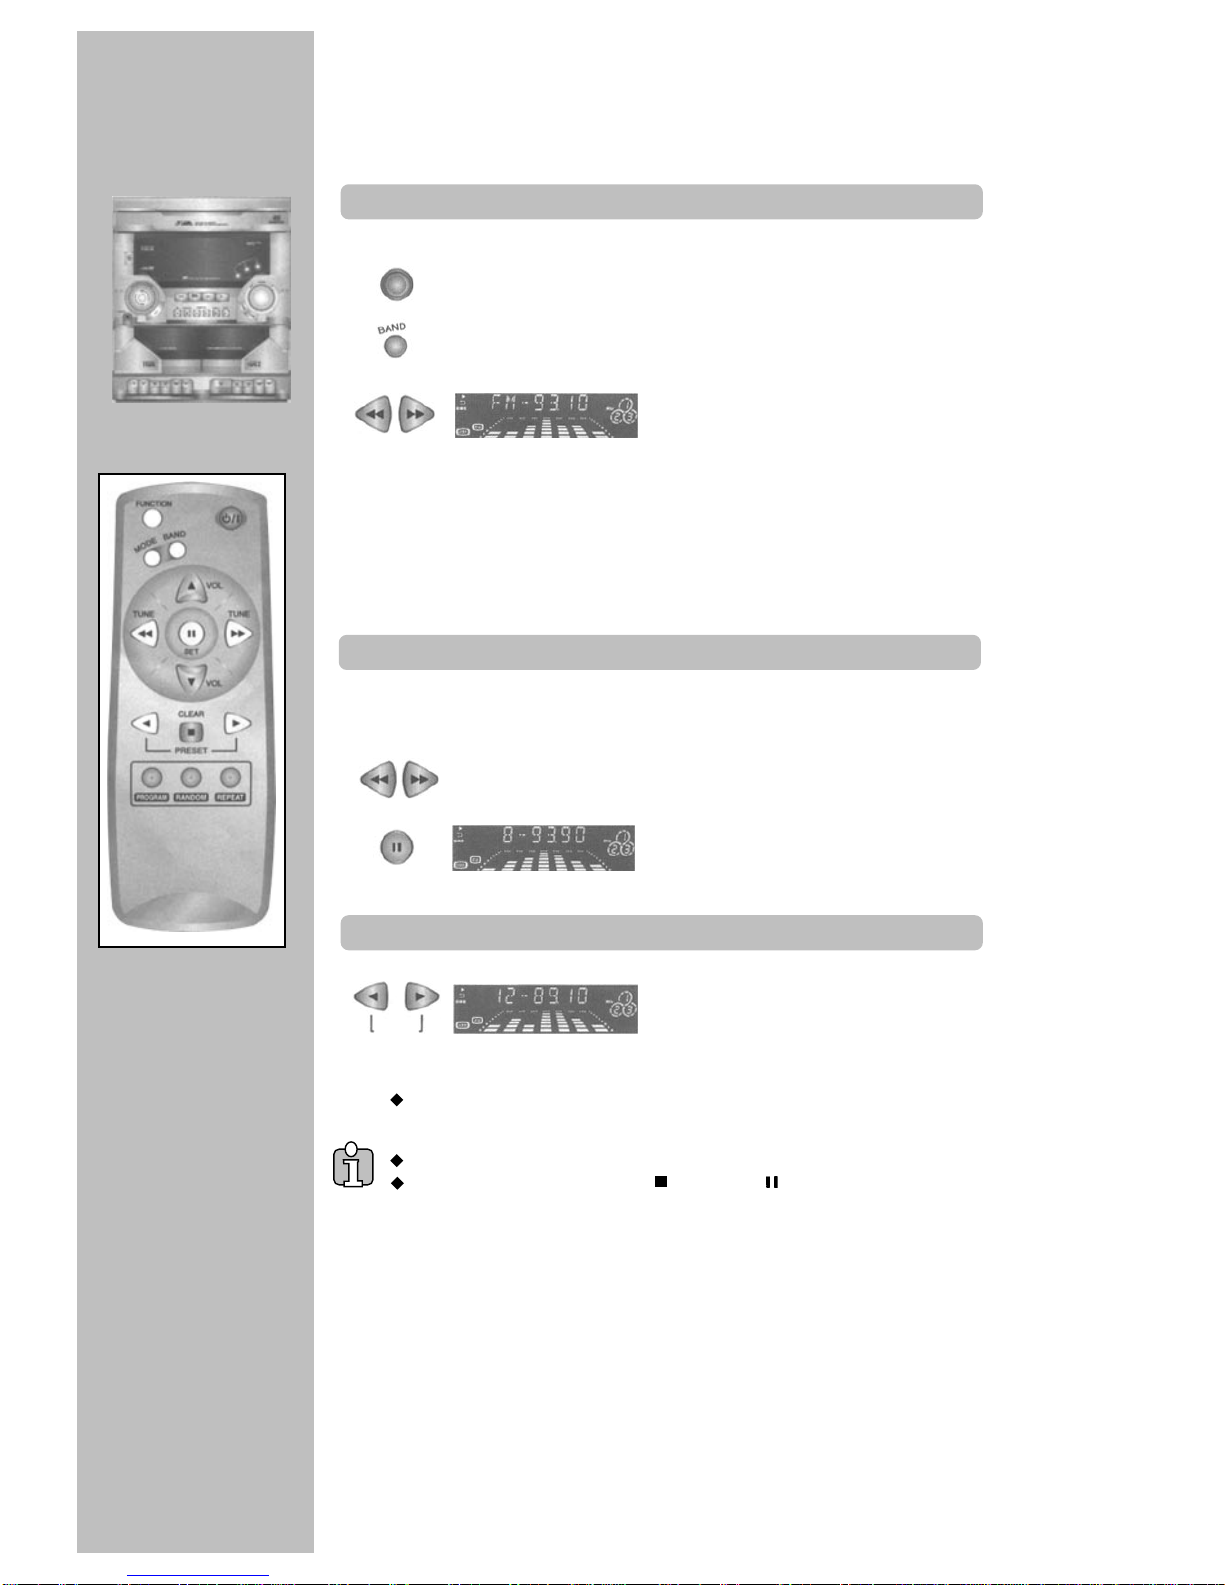
Tuning stations
RADIO
listening
10
FUNCTION
Select the tuner function.
Select the band.
To find weak stations too, press
repeatedly while tuning.
To find powerful stations quickly,
automatically keeping either button
pressed until tuning starts.
A
station is being received.
FM stereo broadcasts with too
much noise can be switched to
mono for less noise.
You can store up to 30 FM /
15 AM stations.
TUNE TUNE
Find a station as under "Tuning
stations".
Select lower or higher preset
numbers.
On the machine select the tuner function and the band by pressing
BAND / TUNER button. The other buttons are on the machine too except MODE
button.
If you try to store a 31st FM / 16th AM station, the display will show "FULL".
To clear a preset station, select it, press / CLEAR, then / SET for 3 seconds.
You can use the MODE button of the remote control to switch back to stereo.
Programming station presets
Store.
The system assigns a station to
a number beginning with 1, one
after another.
Selecting station presets
TUNE TUNE
SET
PRESET
Table des matières
Autres manuels Palsonic Système stéréo

Palsonic
Palsonic PMC-211 Manuel utilisateur

Palsonic
Palsonic PSML-926 Manuel utilisateur

Palsonic
Palsonic PMC-191 Manuel utilisateur

Palsonic
Palsonic PMCL-521 Manuel utilisateur

Palsonic
Palsonic PSML-826 Manuel utilisateur

Palsonic
Palsonic PMS255USB Manuel utilisateur

Palsonic
Palsonic PMSL-329 Manuel utilisateur


