ONNLINE CGS927 Manuel utilisateur

1
Instruction manual 2
Käyttöohje 7
Bruksanvisning
12
Driftsinstruks 17
Kasutusjuhised 22
Instrukcja obsługi 27
Lietošanas instrukcija 32
Naudojimo instrukcija 37
2
Operation instruction GB
Please read the use instructions carefully before use and keep this instruction for future reference.
1. Specification:
2. Installation:
- Suitable power cable for the luminaire are H05RN-F 3G*1.5 mm2 、 H07RN-F 3G*1.5mm2 or
H07RN-F 3G*2.5mm2H07RN-F 3G*2.5mm2、
- Luminaire must be connected to a circuit controlled by an RCD.
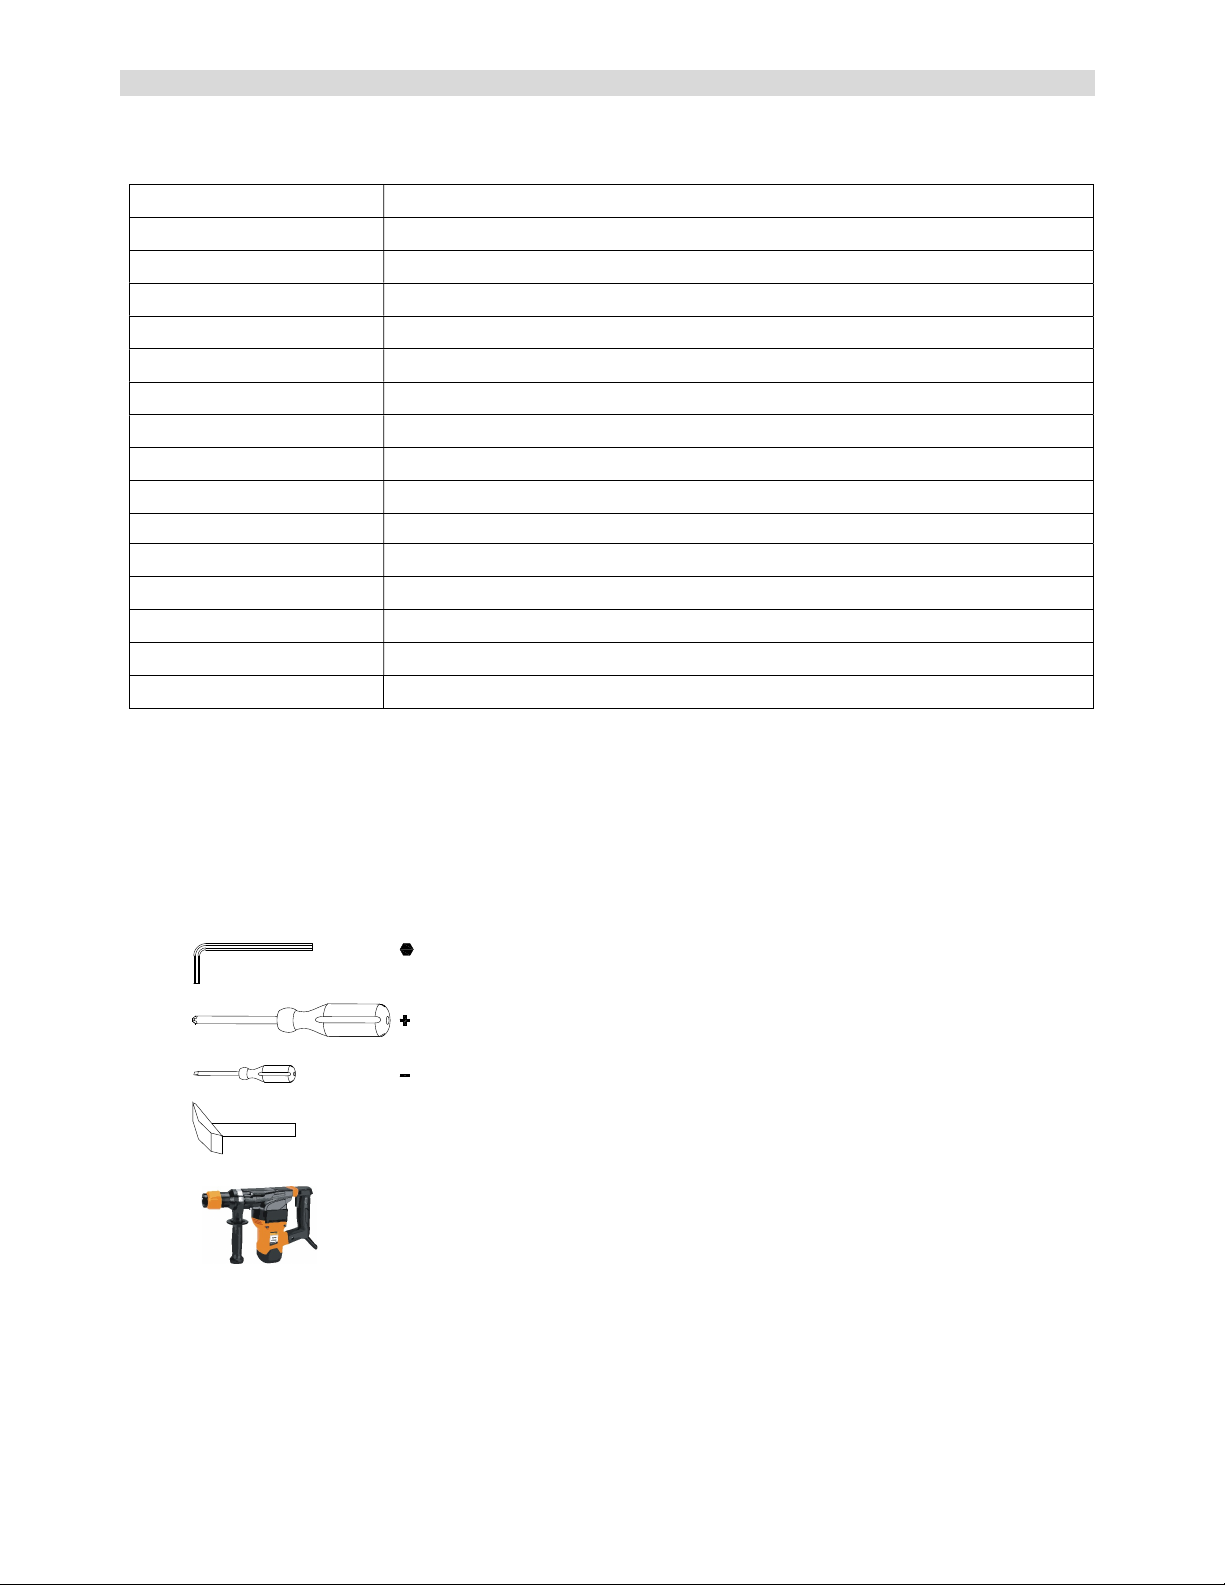
Installation tool:
Product code CGS927 / 4548141
Supply Voltage 100-240V 50/60Hz
Power Consumption 50W
Lumen Output 6000lm
Color Temperature 4000K
CRI >70
Beam angle 120×80°
Power Factor >0.9
Operating Temp Range -35°C ~+50°C
IP Rating 65
IK IK10
Safety Classification Class I
Lifetime 50,000 Hours
Dimensions(mm) 182*228*105
Weight 2.3kg
Color Anthracite

3
Installation step:
1. Loosen 2 sides screws.
2. Adjust the angle to 90°.
3. Open the 2 sides screws and place them properly.
4. Open the electrical box.
5. Loosen the wire screws and place them properly.
6. Remove the luminaire holder and place it properly.
7. Select the appropriate mounting hole position and tap to break the hole. Use a pencil to mark the hole in
the mounting wall.
8. Drilling with a diameter of 6.0mm and a depth of 28mm.
9. Insert the expansion tube into the hole and tap the wall horizontally.
10. The wire passes through a hole at the bottom of the electrical box.
11. Install the screw + flat gasket + washer in turn at the bottom of the electrical box.
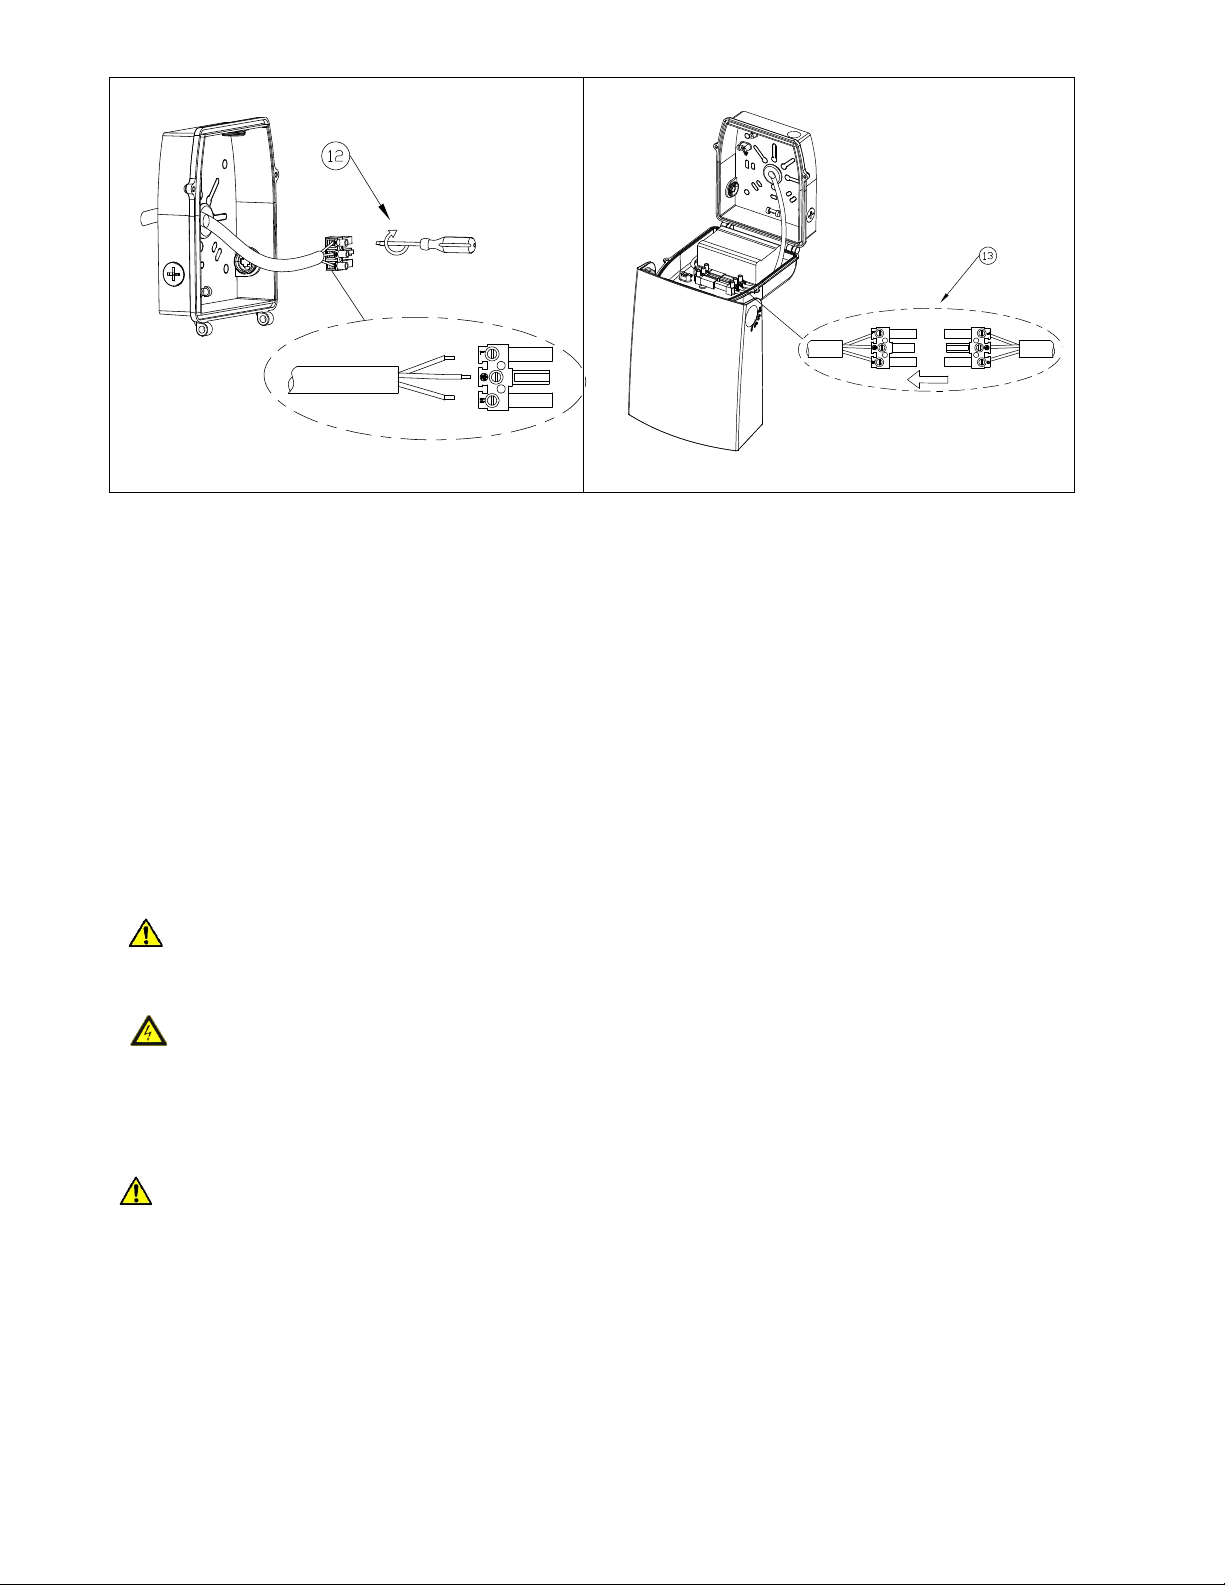
12. Brown:L Blue:N Yellow Green:
Note:The lenth for yellow green wire is 5cm longer than brown and blue wire.
13. Insert the male side of the socket into the female side, and install the luminaire in reverse order
according to disassembly steps.
3. Installation diagram
L×W×H(mm)
182×228×105mm
Adjustment angle range:0-90°

4
Step 1,2 Step 3
Step 4,5 Step 6
Step 7,8 Step 9,10,11

5
4. Safety note:
The luminaire must be installed by qualified professionals.
Do not use the luminaire if there is any crack or damage.
Do not install the luminaire too close to any flammable surfaces.
The distance between the luminaire and lighting surface must be more than 0.5m.
Repairs should only be carried out by qualified person and using genuine spare parts. Inappropriate repairing
could cause significant danger.
Before installation or maintenance the electrical supply to the product must be isolated.
WARNING:
Risk of fire or electric shock. Do not alter, relocate, or remove wiring, or any other electrical
component. If necessary, contact a qualified electrician for assistance.
Always disconnect power for your safety when performing the luminaire modification steps below!
In some cases, it may be necessary to test the power feed with the power connected. Only
connect the power when doing the testing, then disconnect the power from the luminaire when
performing the steps below.
ONNINEN cannot and will not be liable for any modifications or results of modifications to electrical devices or
luminaires.
These instructions are provided as a reference. By using the included instructions, you are solely responsible
for following all applicable electrical safety procedures, codes, methods, and materials. If you are unsure
about any electrical modification or installation, please consult a licensed electrician or electrical contractor in
your area.
Step 12
Step 13

6
5. Symbols explanation
(1 m) minimum safe distance between theluminaire and an easily combustible surface.
This marking indicates that this product should not be disposed with other household wastes throughout the
EU. To prevent possible harm to the environment or human health from uncontrolled waste disposal, recycle it
responsibly to promote the sustainable reuse of material resources. To return your used device, please use
the return and collection systems or contact the retailer where the product was purchased. They can take this
product for environmental safe recycling.

7
Käyttöohje FI
Lue käyttöohje huolellisesti ennen käyttöä. Säilytä ohje tulevaa käyttöä varten.
1. Erittely:
2. Asennus:
- Valaisimeen sopiva johto: H05RN-F 3G*1,5 mm2, H07RN-F 3G*1,5 mm2, H07RN-F 3G*2,5 mm2 tai
H07RN-F 3G*2,5 mm2
- Piirin, johon valaisin kytketään, tulee olla vikavirtasuojattu (RCD).
Asennustyökalut:
Asennusvaiheet:
1. Löysää 2 sivuruuvia.
2. Säädä kulmaksi 90°.
3. Avaa 2 sivuruuvia ja siirrä ne syrjään.
4. Avaa sähkökotelo.
5. Löysää johtojen ruuvit ja siirrä ne syrjään.
Tuotekoodi CGS927 / 4548141
Syöttöjännite 100-240V 50/60Hz
Tehonkulutus 50W
Valovirta 6000 lm
Värilämpötila 4000 K
Värintoistoindeksi >70
Leviämiskulma 120×80°
Tehokerroin >0,9
Käyttölämpötila-alue -35 °C ~ +50 °C
Kotelointiluokka IP65
IK IK10
Suojausluokka Luokka I
Käyttöikä 50.000 tuntia
Mitat (mm) 182*228*105
Paino 2,3 kg
Väri Antrasiitti

8
6. Irrota valaisinpidike ja siirrä syrjään.
7. Valitse sopiva kiinnitysreikä ja riko sen pinta. Merkitse kiinnitysreiän paikka seinään lyijykynällä.
8. Poraa reikä, jonka halkaisija on 6,0 mm ja syvyys 28,0 mm.
9. Aseta proppu reikään ja napauta paikoilleen.
10. Johto kulkee sähkökotelon pohjassa olevan reiän kautta.
11. Asenna ruuvi + tiiviste + aluslevy vuorollaan sähkökotelon pohjaan.
12. Ruskea: L Sininen: N Keltavihreä:
Huom.! Keltavihreä johto on 5 cm pidempi kuin ruskea ja sininen johto.
13. Työnnä urospuoli naaraspuoleen ja asenna valaisin paikoilleen vastakkaisessa järjestyksessä kuin
missä se irrotetaan (ks. ohje).
3. Asennuskaavio
P×L×K (mm)
182×228×105 mm
Säätökulman vaihteluväli: 0-90°

9
Vaihe 1, 2 Vaihe 3
Vaihe 4, 5 Vaihe 6
Vaihe 7, 8 Vaihe 9, 10, 11
10
4. Turvallisuushuomautus:
Valaisimen saavat asentaa ainoastaan pätevät ammattilaiset.
Haljennutta tai muuten vaurioitunutta valaisinta ei saa käyttää.
Älä asenna valaisinta liian lähelle syttyviä pintoja.
Valaisimen ja valaistavan pinnan välimatkan tulee olla yli 0,5 m.
Korjauksia saa tehdä ainoastaan ammattitaitoinen henkilö alkuperäisiä varaosia käyttäen. Epäasianmukainen
korjaus voi aiheuttaa huomattavan vaaran.
Ennen asennusta tai huoltoa tuotteen virransyöttö on katkaistava.
VAROITUS:
Tulipalon tai sähköiskun vaara. Älä muuta tai irrota johtoja tai muita sähköosia tai vaihda
niiden paikkaa. Ota tarvittaessa yhteyttä pätevään sähköasentajaan.
Ennen mitä tahansa alla kuvattuja säätötoimia katkaise virta valaisimesta! Joissakin tapauksissa
virransyöttöä pitää testata kytkemällä virta päälle. Kytke virta vain testauksen ajaksi ja kytke se
sitten pois ennen toimenpiteiden jatkamista.
ONNINEN ei vastaa sähkölaitteisiin tai valaisimiin tehdyistä muutostöistä tai niistä aiheutuneista vahingoista.
Nämä ohjeet ovat viitteelliset. Käyttäjä on vastuussa siitä, että käytetyt menetelmät ja materiaalit vastaavat
asianmukaisia sähköturvallisuusmäärittelyjä ja -säännöksiä. Jos et ole varma muutostöistä tai sähkölaitteen
asennuksesta, ota yhteyttä omalla alueellasi toimivaan sähköasentajaan tai -urakoitsijaan.
Vaihe 12 Vaihe 13
Ce manuel convient aux modèles suivants
1
Table des matières
Langues :
Autres manuels ONNLINE Projecteur


Manuels Projecteur populaires d'autres marques

VIZULO
VIZULO Micro Martin Guide de l'utilisateur

EuroLite
EuroLite LED IP FL-100 SMD Manuel utilisateur

Cooper Wheelock
Cooper Wheelock XB12 Manuel utilisateur

Allen + Roth
Allen + Roth 17624-000 Manuel utilisateur

ADJ
ADJ 4 STAGE PAK Manuel utilisateur

Cooper Lighting
Cooper Lighting EGL91SW233 Manuel utilisateur


