Nixie Clock Spectrum 18 Guide de configuration

Nixie Tube Clock ‘Spectrum 18’
Issue 2 (15 February 2015
www.pvelectronics.co.uk
- 1 -
Assembly Instructions
And
User Guide
Nixie Clock Type
‘Spectrum 18’

Nixie Tube Clock ‘Spectrum 18’
Issue 2 (15 February 2015
www.pvelectronics.co.uk
- 2 -
REVISION HISTORY
Issue
Number
Date Reason for Issue
2 15 Feb 2015 Errors in Resistor values corrected
Resistor networks not polarized
1 10 Feb 2015 New document

Nixie Tube Clock ‘Spectrum 18’
Issue 2 (15 February 2015
www.pvelectronics.co.uk
- 3 -
1. INTRODUCTION
Here are the key features of the SPECTRUM 18:
• Hours Minutes and Seconds display on Six IN-18 Nixie Tubes
• 40mm (1.5”) Digit height
• Noiseless Direct Drive giving optimum digit clarity
• Dedicated plug-in High Voltage Module (Included)
• Uses a Quartz Crystal Oscillator as the timebase
• 12 or 24 hour modes
• Programmable leading zero blanking
• Date display in either DD.MM.YY or MM.DD.YY or YY.MM.DD format
• Programmable date display each minute
• Scrolling display of date or standard display
• Alarm with programmable snooze period
• Optional DCF / MSF / GPS synchronisation with status indicator LED
• Dedicated DST button to switch between DST and standard time
• Supercapacitor backup. Keeps time during short power outages
• PIR Motion Sensor input and accessory available. Configurable timeout
period
• Temperature display in Celsius or Fahrenheit. Configurable. (every
minute/ every 10 minutes / every hour)
• Simple time setting using two buttons
• Programmable leading zero blanking
• Double dot colon neon lamps
• 11 colon neon modes including AM / PM indication (top / bottom or left /
right) railroad (slow or fast) etc.
• Seconds can be reset to zero to precisely the set time
• Programmable night mode - blanked or dimmed display to save tubes or
prevent sleep disturbance
• Rear Indicator LEDs dim at night to prevent sleep disturbance
• Weekday aware ‘Master Blank’ function to turn off HV/ tubes and LEDs on
weekends or during working hours
• Separate modes for colon neons during night mode
• Standard fading or crossfading with scrollback display modes
• ‘Slot Machine’ Cathode poisoning prevention routine
• Programmable RGB tube lighting – select YOUR favourite colour palette
• 729 colours possible. Have a different colour or your choosing every
hour or autochanging colours
• Configurable Auxiliary Alarm Output for activating additional peripherals
on Alarm
• Provision for adding switches for independently switching off RGB LEDs
and / or tubes
• Not AC frequency dependent – works in all countries
• All user preferences stored to non-volatile memory

Nixie Tube Clock ‘Spectrum 18’
Issue 2 (15 February 2015
www.pvelectronics.co.uk
- 4 -
1.4 SAFETY
DANGER: The clock pcb includes a switched-mode voltage booster
circuit. This generates nominally 170 Volts DC. Assembly may only be
undertaken by individuals who are suitably qualified and experienced in
electronics assembly and are familiar with safe procedures for working
with high voltages. If in doubt refer to a suitably qualified engineer
before proceeding.
The voltages generated by this circuit can give a potentially
LETHAL ELECTRIC SHOCK.
DISCLAIMER: This product is supplied as a kit of parts intended only for
suitably qualified electronic engineers who are suitably qualified and
experienced in electronics assembly and are familiar with safe
procedures for working with high voltages. The supplier his agents or
associates accept no liability for any damage injury or death arising from
the use of this kit of parts.
This is not a finished product and the person assembling the kit is
responsible for ensuring that the finished product complies with any
applicable local regulations governing electrical equipment eg. UL CE
VDE.

Nixie Tube Clock ‘Spectrum 18’
Issue 2 (15 February 2015
www.pvelectronics.co.uk
- 5 -
2. TOOLS AND EQUIPMENT REQUIRED
2.1 Tools required to assemble the PCB.
The following tools will be required to assemble the PCB:
- Soldering iron with a small tip (1-2 mm).
- Wire cutters to trim the excess component leads after soldering.
(TIP: A small pair of nail clippers works very well for this function).
- Wire strippers (TIP: A small pair of scissors is quite suitable).
- Multimeter for voltage tests and for identifying the resistors.
- A small hot air gun will be needed to shrink the heat shrink tubing
over the neon lamp wires.
2.2 Materials you will need.
Solder – lead / tin solder is highly recommended.
USE LEAD/ TIN SOLDER!
Lead free solder as now required to be used in commercial products in
Europe has a much higher melting point and can be very hard to work
with.
Desoldering wick (braid) can be useful if you accidentally create solder
bridges between adjacent solder joints.
2.3 Other items you will need.
The clock kit does not include a power adapter.
The following type of adapter should be obtained and used with the kit:
Output 12V DC regulated, minimum power output capability of 1A
Output plug: 2.1mm pin, centre positive.
A suitable adapter is shown below:

Nixie Tube Clock ‘Spectrum 18’
Issue 2 (15 February 2015
www.pvelectronics.co.uk
- 6 -
3. LIST OF COMPONENTS
3.1 Table of Components – Driver Board
Circuit Designation Part Description
Resistors
R1 6.8 KΩ ¼ Watt
R2 – R7 10 KΩ ¼ Watt
R8 – R11 270 KΩ ¼ Watt
R12 – R14 270 Ω ¼ Watt
R15 6.8 KΩ ¼ Watt
R16 15 KΩ ¼ Watt
R17 – R19 270 Ω ¼ Watt
R20 6.8 KΩ ¼ Watt
RN1 – RN6 Quad Resistor Network 220Ω
Capacitors
C1 C2 220uF Electrolytic 16-25V
C3 10pF Ceramic
C4 15pF Ceramic
C5 100nF Ceramic
C6 0.1F or 0.22F Supercapacitor
C7 – C9 100nF
Transistors
Q1 MPSA42
Q2 – Q4 2N7000 MOSFET
Q15 MPSA42
Diodes
D1 – D3 1N5819
D4 5mm Yellow LED
D5 5mm Green LED
D6 5mm Yellow LED
RGB1 – RGB8 RGB 5mm LED common anode
Integrated Circuits
IC1 LM2576 5V voltage regulator
IC2 PIC16F1938 in socket
IC3 IC4 HV5622 in socket
IC5 DS18B20
Miscellaneous
L1 100uH inductor
AM1 PM1 AM2 PM2 6mm wire ended neon lamp
ALARM SET ADJ DST Miniature push button
IC2 Socket 28 Way narrow IC socket for IC2
IC3 IC4 Socket PLCC44 IC socket for IC3
J1 2.1mm PCB power socket
GPS / RFT and GPS2 Surface mount 3.5mm jack socket
PIR and PIR2 Surface mount 3.5mm jack socket
LS1 Piezo sounder
FUSE 500mA fuse
VR1 1KΩ Potentiometer
X1 32.768KHz watch crystal
HV Module High Voltage Module in header

Nixie Tube Clock ‘Spectrum 18’
Issue 2 (15 February 2015
www.pvelectronics.co.uk
- 7 -
3.2 Parts list / Packing Sheet - Component Bag
Part Description Quantity
Resistors
270 Ω ¼ Watt 6
6.8 KΩ ¼ Watt 3
10 KΩ ¼ Watt 6
15 KΩ ¼ Watt 1
270 KΩ ¼ Watt 4
220 Ω Resistor Network 6
Capacitors
10pF Ceramic 1
15pF Ceramic 1
100nF Ceramic 4
220uF 16-25V Electrolytic 2
0.1F or 0.22F 1
Transistors
MPSA42 2
2N7000 MOSFET 3
Diodes
1N5819 3
5mm Green LED 1
5mm Yellow LED 2
5mm RGB LED 6
Integrated Circuits
LM2576 5V voltage regulator 1
PIC16F1938 8-bit microcontroller 1
HV5622 2
DS18B20 1
Miscellaneous
100uH inductor 1
6mm wire ended neon lamp 4
Miniature push button 4
28 way narrow IC Socket for IC2 1
PLCC44 IC Socket 2
2.1mm PCB power socket 1
Surface mount 3.5mm jack socket 2
Piezo sounder 1
1A fuse 1
1KΩ Potentiometer 1
2 way header with jumper 1
6 way female header 0.1” 1
32.768KHz watch crystal 1

Nixie Tube Clock ‘Spectrum 18’
Issue 2 (15 February 2015
www.pvelectronics.co.uk
- 8 -
3.3 Parts list / Packing Sheet - Additional parts
• PCB
• 6 X 15mm M3 hex spacers with screws
• HV Module with male header and glue dot
• 2 X Glass neon covers
• 30cm Clear heat shrink insulation for neons
• 6 X Socket holders and 66 sockets
The resistors used in the kit are 1% tolerance metal film. They are
marked with 4 coloured bands to identify the value. However it is
sometimes unclear in which direction the bands should be read.
Therefore we recommend that the resistors be identified with a
multimeter.
Please note the fuse will look like one of the pictures below. It can
easily be confused for a capacitor. It is a self-resetting fuse.
3.4 Special Note:
Please note that several components can be possibly mounted on
either side of the PCB and white component print for the part is on
both sides of the PCB. This is to offer maxiumum flexibility of the
kit: For our clear cases most components will be soldered on the
top (tube) side of the PCB so they are visible on the finished clock.
However for the Viso case and for customers making their own
case it is possible to mount some of the taller components on the
bottom of the PCB so that the PCB can fit inside a case with the
tubes protruding. Please follow carefully the instructions. Unless
specified otherwise please solder all components on the top of the
PCB.

Nixie Tube Clock ‘Spectrum 18’
Issue 2 (15 February 2015
www.pvelectronics.co.uk
- 9 -
4. ASSEMBLY OF THE PCB
DUE TO PRODUCT DEVELOPMENT AND IMPROVEMENTS,
YOUR PCB MAY NOT LOOK EXACTLY LIKE THE ONE
PICTURED.
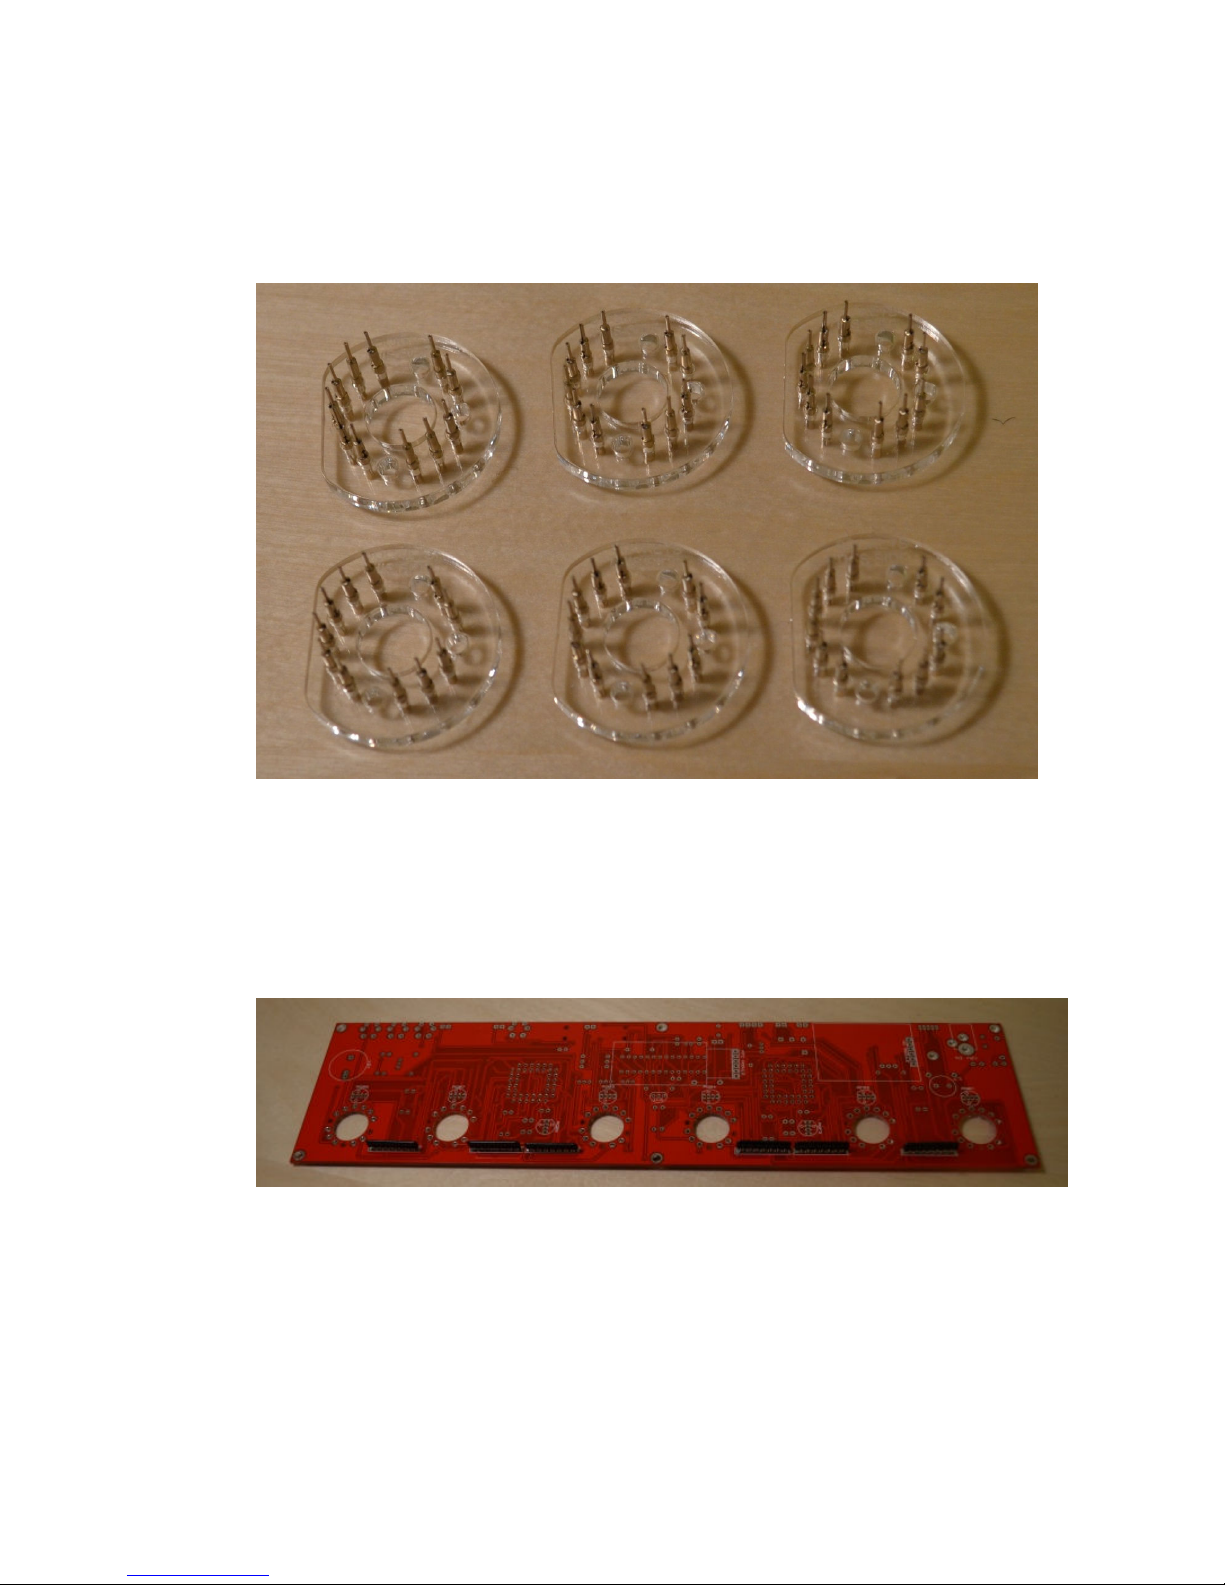
4.1 Assembly of the tube sockets
Remove the protective film from both sides of the six laser-cut
tube socket holders and identify the side that is engraved
‘SOCKETS THIS SIDE’.
For each socket holder you need to push in 11 socket receptacles.
Push them in from the ‘SOCKETS THIS SIDE’ side. Push them with
the 2 open jaws going in first. Look at the photo below.
Nixie Tube Clock ‘Spectrum 18’
Issue 2 (15 February 2015
www.pvelectronics.co.uk
- 10 -
Push all the sockets firmly into place until they stop. You will end
up with 6 socket assemblies. Put them to one side. Do not solder
them to the PCB yet.
4.2 Resistor Networks RN1 – RN6
Solder the 6 resistor networks on the bottom side of the PCB as
shown below. These parts are not polarized so the orientation
does not matter.
Table des matières
Autres manuels Nixie Clock Montre


