Newline-Interactive TC-20P Manuel utilisateur

Model: TC-20P
Manual

It is our honor that you have chosen our products.
Before using the product, please read the declaration below carefully.
Welcome!
FCC Compliance Statement (Class A):
European Community Compliance Statement (Class A):
VCCI-A
Federal Communications Commission (FCC) Statement:
This device complies with part 15 of the FCC Rules. Operation is subject to the following two
conditions:
(1) this device may not cause harmful interference, and
(2) this device must accept any interference received, including interference that may cause
undesired operation.
This is a class A product. In a domestic environment this product may cause radio interference
in which case the user may be required to take adequate measures.
When the equipment exceeds its effective usage life and is subject to
disposal, please comply with related laws and regulations to recycle
all accessories. Please do not dispose the battery and rechargeable
battery with other household waste! Please deliver the battery and
rechargeable battery to a local recycle collection station for recycle.
Let's do our share in protecting the environment.
This is a class A product.
In a domestic environment this product may cause radio interference,
in which case the user may be required to take corrective actions.
This Equipment has been tested and found to comply with the limits for a Class A digital
device, pursuant to part 15 of the FCC Rules. These limits are designed to provide reasonable
protection against harmful interference when the equipment is operated in a commercial
environment. This equipment generates, uses and can radiate radio frequency energy and,
if not installed and used in accordance with the instruction manual, may cause harmful
interference to radio communications. Operation of this equipment in a residential area is likely
to cause harmful interference in which case the user will be required to correct the interference
at his own expense.

Precautions
Understand the Visualizer
Parts Identication
Remote Control
Control Panel
LCD
Basic Preparations
Setup Visualizer
Adjusting
Adjusting Camera Arm for Different Size Image Capture
LED Arm Lamp
Insert and Take out SD Card (Not including in package)
Making Connections
System Diagram
Connect to Computer
USB Image Capture
Menu Operating Instructions
Operation the Visualizer by Tool Bar
Icon Function Instructions
Setting Visualizer
Folding the Visualizer
Trouble Shooting
Specications
01
03
03
04
05
06
07
07
08
09
10
10
11
11
12
14
15
15
15
16
17
19
20
Contents

01
Precautions
● Please prevent children from operating the device without supervision.
● Don't look directly to the lamp to avoid damage to user's eyes.
● Don’t use accessory power adaptor and power cord to other equipment, they are special for
this product.
● To prevent machine damage, avoid making camera module to hit against table surface or
other solid objects.
● Don't spill liquids on the control panel.
● Unplug the AC power cord from the wall outlet when not using it for long period.
● Don't disassemble visualizer and power adapter without proper instruction.
● Don't push the camera head to fold arms.

02
● Don't move visualizer by holding arms with one hand. Please move it by holding machine
base with both hands or holding LED arm lamp with one hand.

03
AUnderstand the Visualizer
1
1
2
2
3
3
4
4
5
5
6
6
7
7
8
8
9
9
12
12
15
15
17
17
11
11
14
14
16
16
10
10
13
13
Camera Box
Camera Arm II
Camera Arm l
Built-in MIC
Ventilation Holes
Side Connect Panel
Control Panel
Anti-theft Slot
DC 12V In
Rear Connect Panel
Stage
LCD
Power Key
Shock Absorption Strip
LED Arm Lamp
Camera Indicator
IR Receive Area
PartsIdentication
04
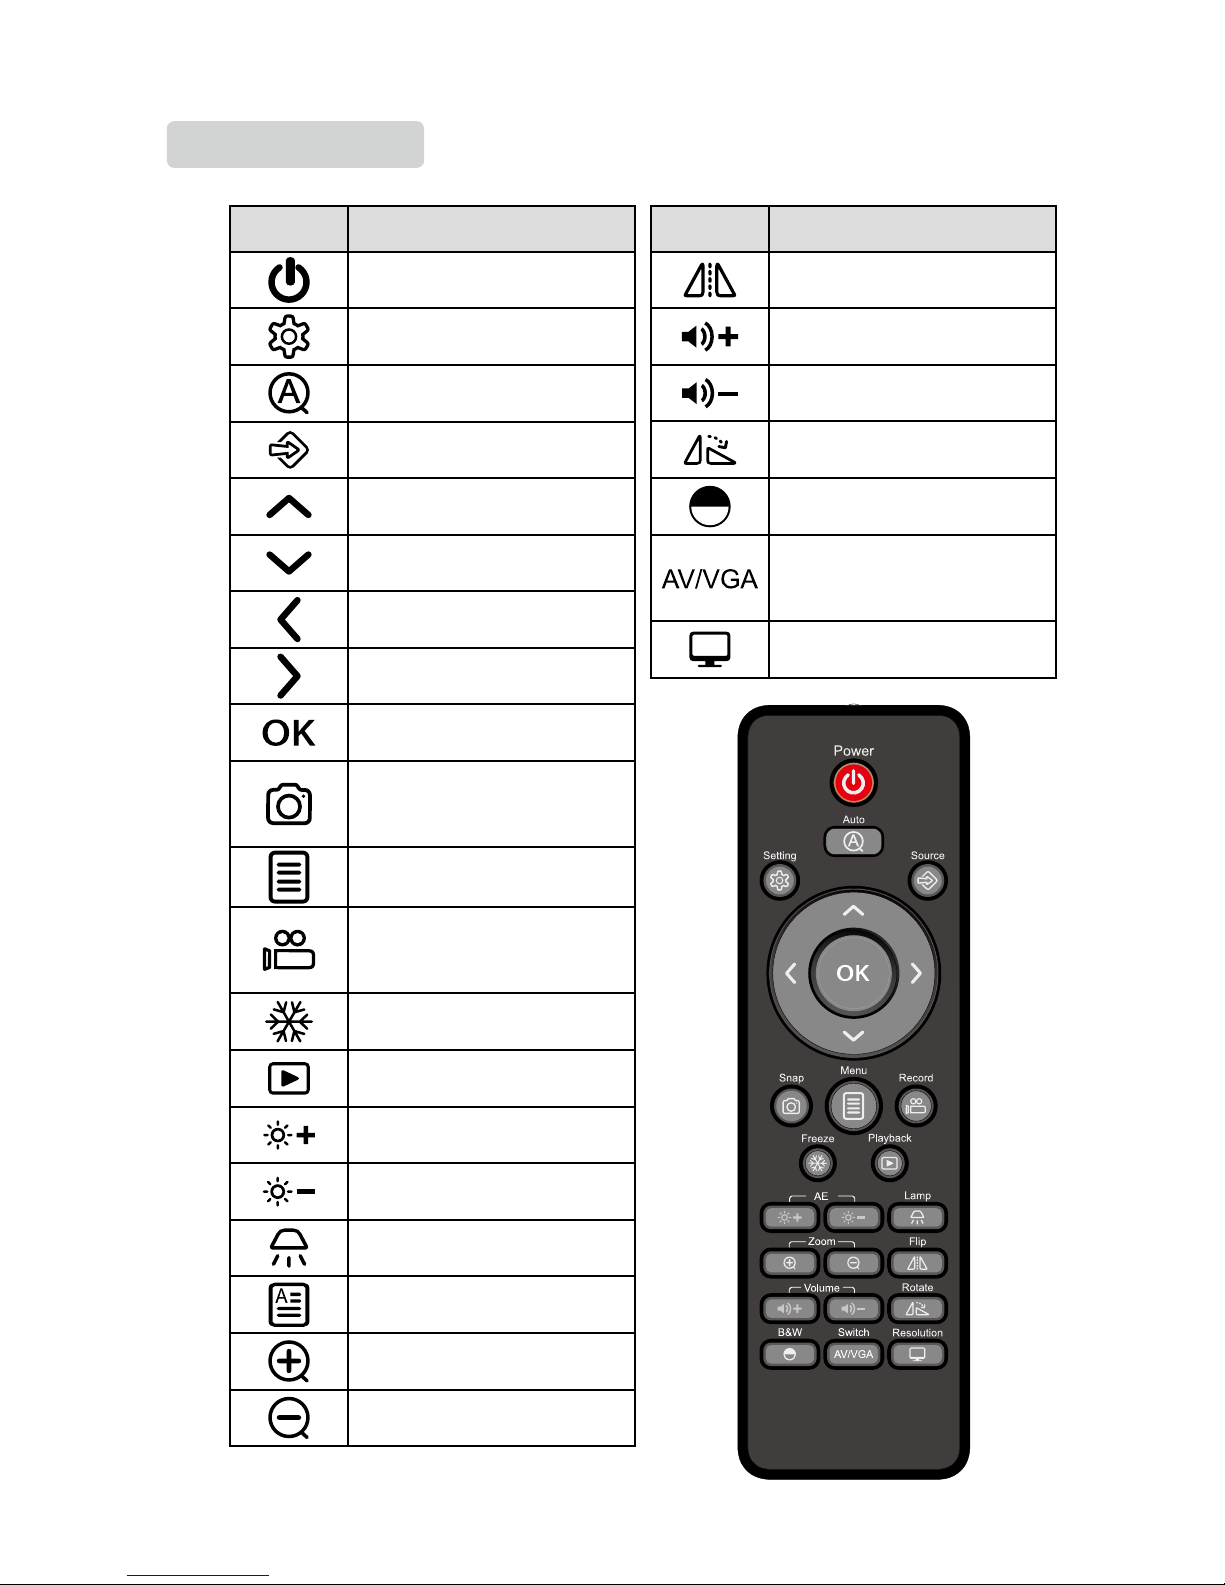
Remote Control
Button Function
Flip the current image (Press
again to normal).
Increase volume.
Decrease volume.
Rotate the image 0°, 90°, 180°,
270°.
Switch between Color mode
and Black & White mode.
Switch output port between
VIDEO OUT and HDMI/VGA
out.
Switch between XGA, SXGA,
WXGA, 720P and 1080P.
Button Function
Power on Visualizer (Press and
hold 3 seconds to turn off).
Setting the Visualizer.
To auto adjust brightness, auto
white balance and auto focus.
Select Visualizer output signal.
Move the cursor Up.
Move the cursor Down.
Move the cursor Left.
Move the cursor Right.
Conrm key.
Capture a still image and
save in ash ROM or SD Card
(Default).
To show or hide the tool bar.
Record a video clip and save in
SD Card (Press it again to stop
recording).
Freeze the image (Press again
to unfreeze).
Re-display stored images and
videos.
Increase brightness.
Decrease brightness.
Control the arm lamp on/off.
Switch between image/text
mode.
Enlarge image size.
Reduce image size.
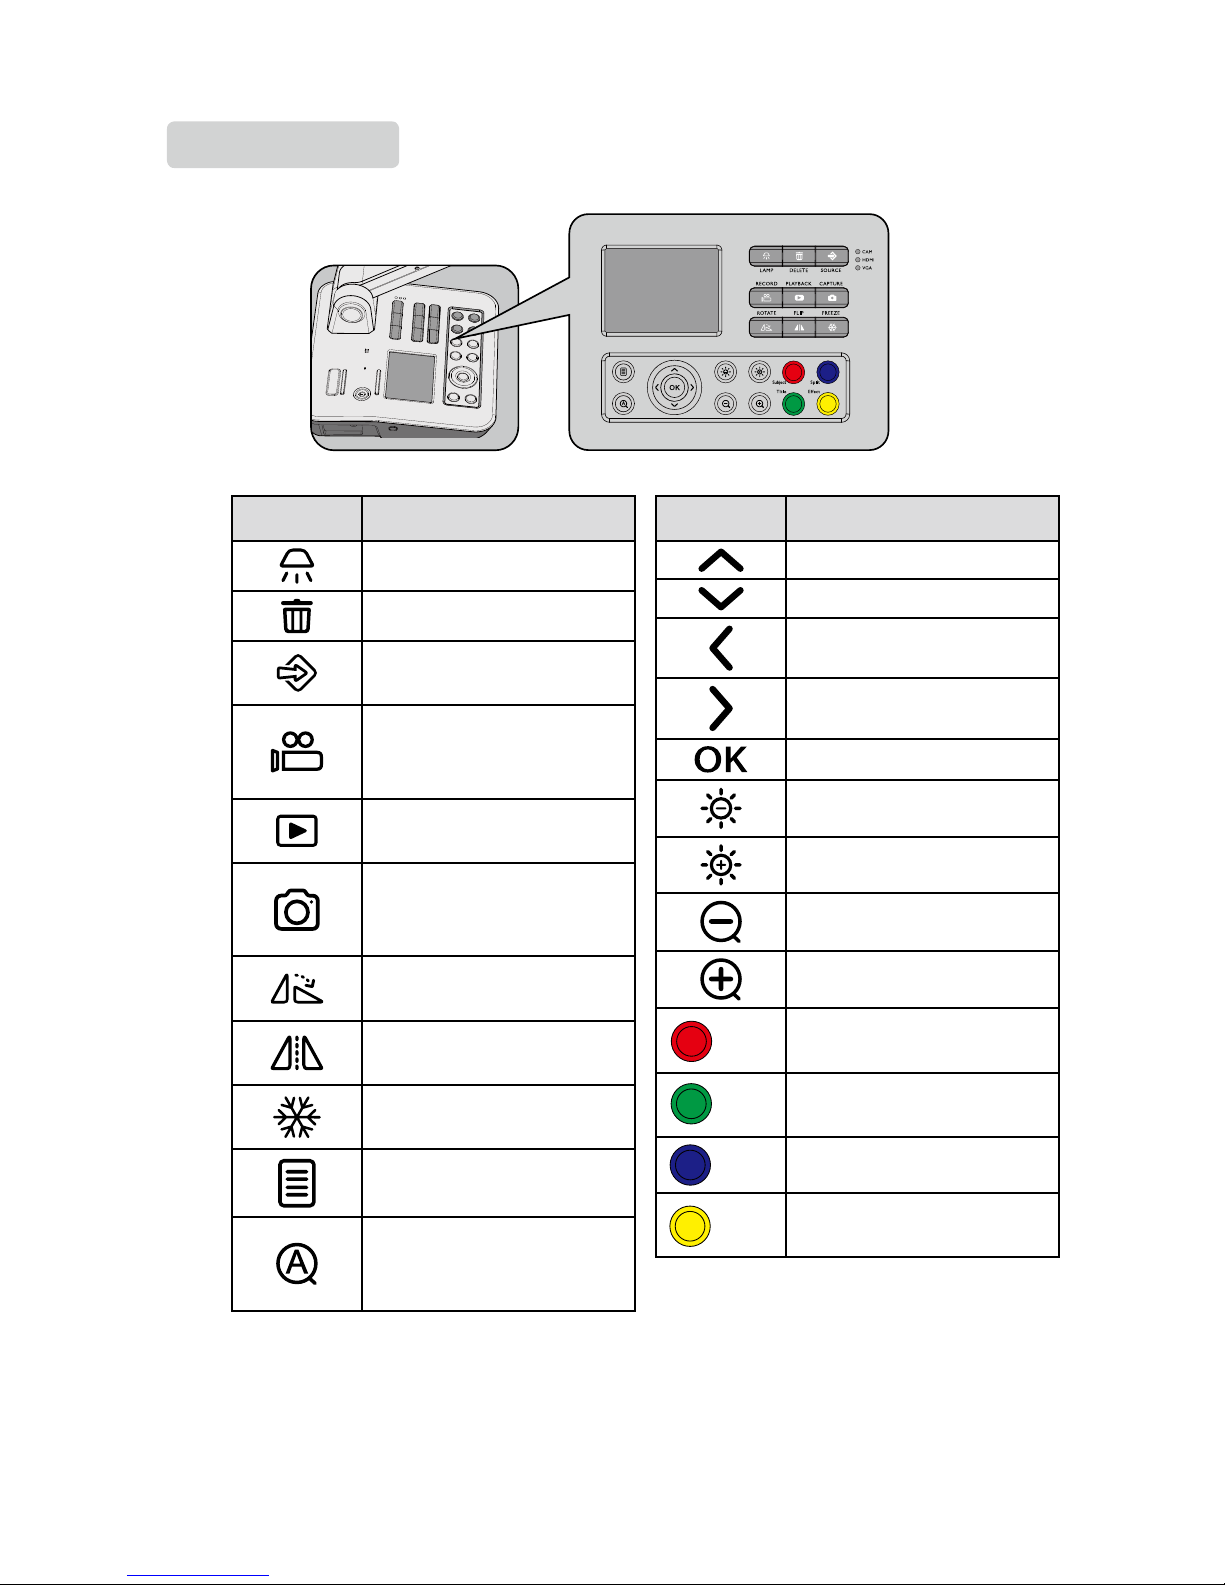
05
Button Function
Control the arm lamp on/off.
Delete key.
Select Visualizer output
signal.
Record a video clip and save
in SD Card (Press it again to
stop recording).
Re-display stored images
and videos.
Capture a still image and
save in ash ROM or SD
Card (Default).
Rotate the image 0°, 90°,
180°, 270°.
Flip the current image (Press
again to normal).
Freeze the image (Press
again to unfreeze).
To show or hide the toolbar.
To auto adjust brightness,
auto white balance and auto
focus.
Control Panel
Button Function
Move the cursor Up.
Move the cursor Down.
Move the cursor Left.
Move the cursor Right.
Conrm key.
Decrease brightness.
Increase brightness.
Reduce image size.
Enlarge image size.
(Text) Switch between image/text
mode.
(Title) Freeze the top or side 1/8 of
the screen.
(Split) Split image function.
(B&W) Switch between Color mode
and Black & White mode.

06
1. No matter what signal source is selected, this LCD can only preview
picture come from camera.
2. If AV output mode is selected, the LCD will not display any signal.
Note
This machine with a 3.5" LCD, you can preview camera signal on the screen.
LCD
LCD

07
BBasic Preparations
Setup Visualizer
Step 1: Hold the base with one hand and pull up camera arm I gently with another hand
until hearing a crack sound.
Step 2: Pull up camera arm II with hand to unfold arms to a proper position.
Step 3: Rotate camera box to the position of lens facing down.
Table des matières


