NEC MP-01 Manuel utilisateur
Media Player MP-01
NEC Display Solutions, Ltd.
Notes
The windows in the actual software may differ somewhat from those shown in this
manual.
No part of the contents of this manual may be reproduced or copied by any means
without prior written permission from NEC Display Solutions, Ltd.
Microsoft, MS, Windows(R), PowerPoint(R), Windows Media(R), Internet Explorer(R), and the
Internet Explorer(R) logo are either registered trademarks or trademarks of Microsoft Corporation
in the US and other countries.
Version 1.1
Quick Reference Guide

Introduction •••••••••••••••••••••••••••••••••••••••
Authoring Software Usage Procedure •••••••••••••••••••••••
Installing the Authoring Software ••••••••••••••••••••••••••
Running the Program (Main Window) ••••••••••••••••••••••
Configuration •••••••••••••••••••••••••••••••••••••••
Practice •••••••••••••••••••••••••••••••••••••••••••
Editing Messages ••••••••••••••••••••••••••••••••••••
Editing Programs •••••••••••••••••••••••••••••••••••••
Content Registration ••••••••••••••••••••••••••••••••••
Message Registration ••••••••••••••••••••••••••••••••••
Schedule Management •••••••••••••••••••••••••••••••••
Panel Control (Power supply settings) •••••••••••••••••••••••
Distribution ••••••••••••••••••••••••••••••••••••••••
Copying Program Data to the MP-01 Media Player’ s Memory Card •••
2
2
3
5
6
6
7
8
9
10
11
12
13
14
Table of Contents
Authoring Software - Basic Operations Manual
Installing the Viewer PPT Converte ••••••••••••••••••••••••
Using the Viewer PPT Converter ••••••••••••••••••••••••••
Introduction •••••••••••••••••••••••••••••••••••••••
Operation flowchart ••••••••••••••••••••••••••••••••••
Connecting to the LAN ••••••••••••••••••••••••••••••••
Media player network setup •••••••••••••••••••••••••••••
Registering Media Players in the Authoring Software ••••••••••••
Distribution •••••••••••••••••••••••••••••••••••••••
Screens on the Display Unit •••••••••••••••••••••••••••••
■USB Memory Procedures
■Network Procedures
■Operations Using the Supplied Software
16
16
17
17
18
20
21
23
25
•
•
•
•
•
•
•
•
•
•
•
•
•
•
•
•
•
•
•
•
•
•
•

USB Memory Procedures
USB Memory Procedures
USB Memory Procedures
1

Introduction
Introduction
• Content creation
• Scheduling/distribution Data transfer Content display
1
2
3
Programs are created with the provided Authoring software and distributed using USB memory.
This document describes the operations from creating a program with the Authoring Software through displaying that program usinga
media player.
Authoring Software Usage Procedure
Authoring Software Usage Procedure
Content preparation
Content registration
First, prepare the content to be displayed. This involves creating files using various types of
content editing software* and preparing image sources using a digital camera or a video camera.
*: Refer to the user's manual for the software itself for more information on using the individual
content editing programs.
Copy the created content files to the content folder.
Program registration Register the created content files as a program for this system.
Schedule creation
Program registration
Assign the program to a schedule to create a schedule.
Write the program data and schedule to the USB memory.
Authoring software
Authoring software
Data transmission
Insert the USB memory in the media player to transfer the program and schedule data to the
media player.
2
USB Memory Procedures
Computer
+
Authoring software Media player Display
USB memory
USB memory
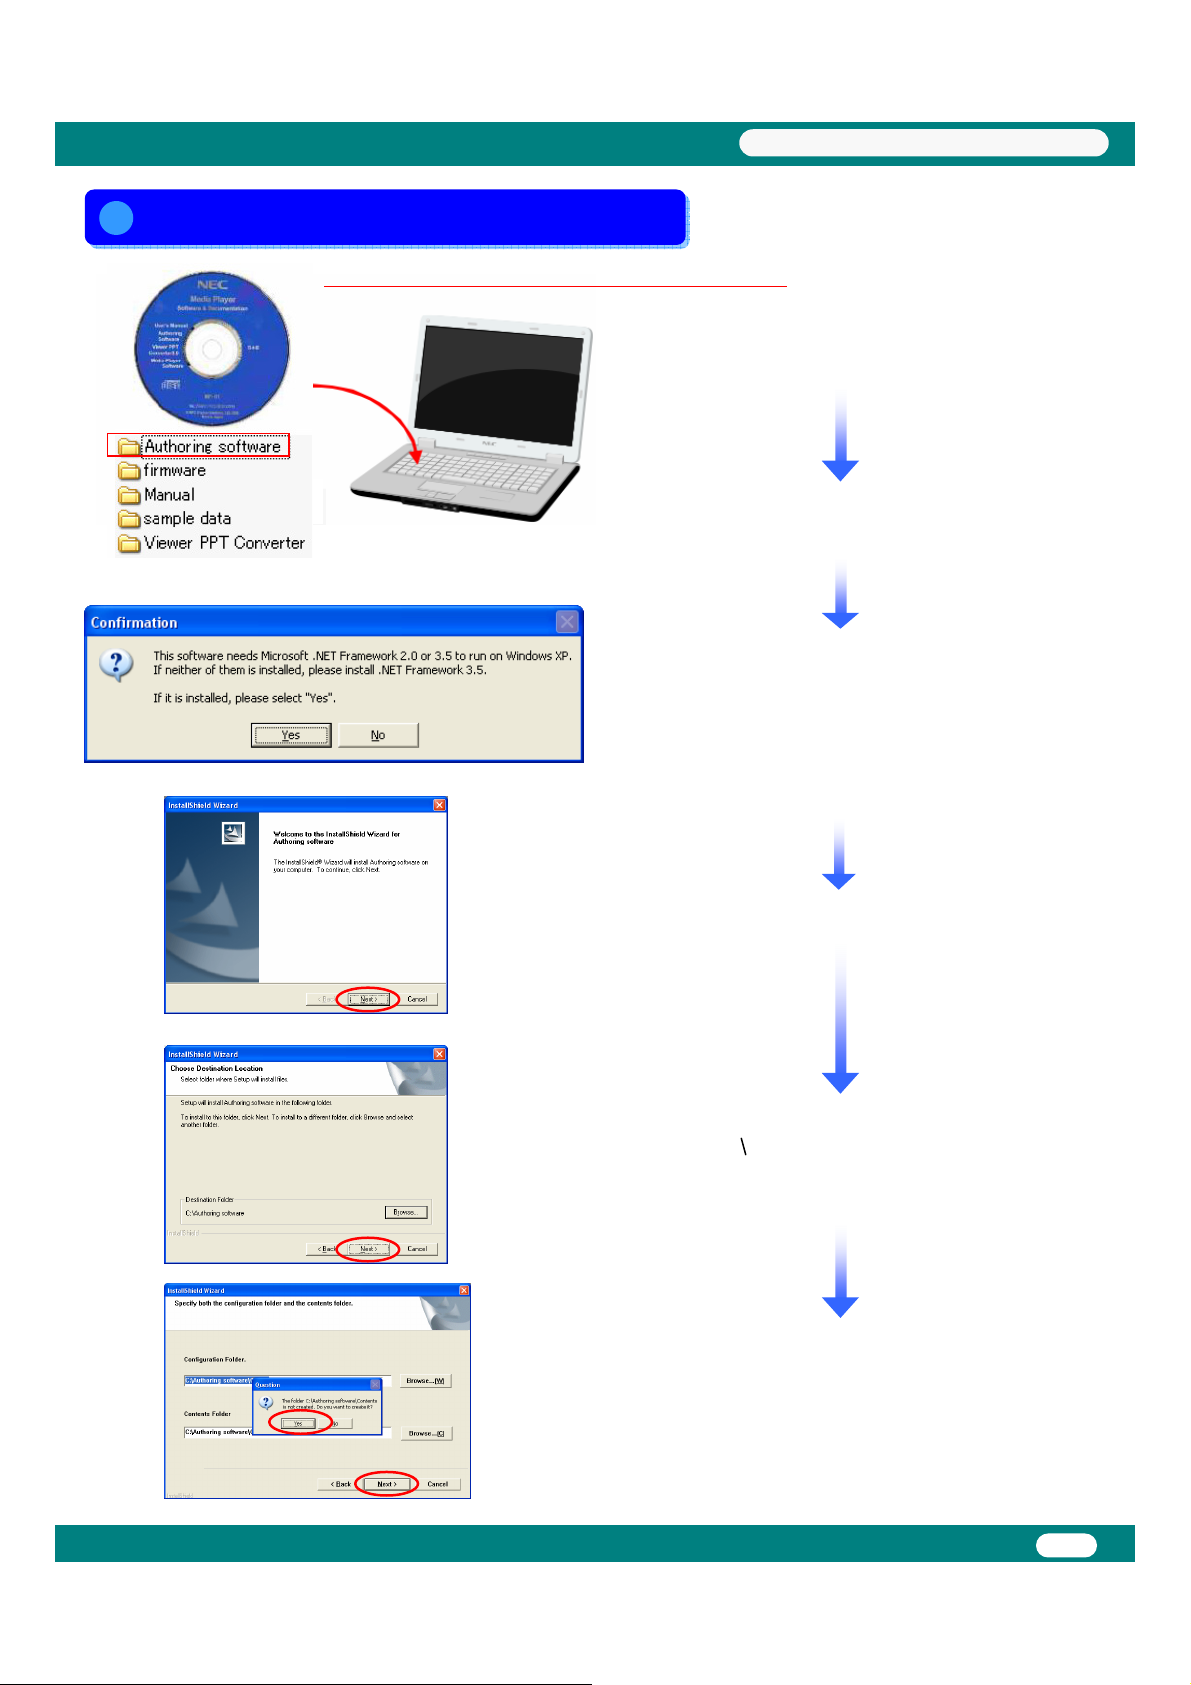
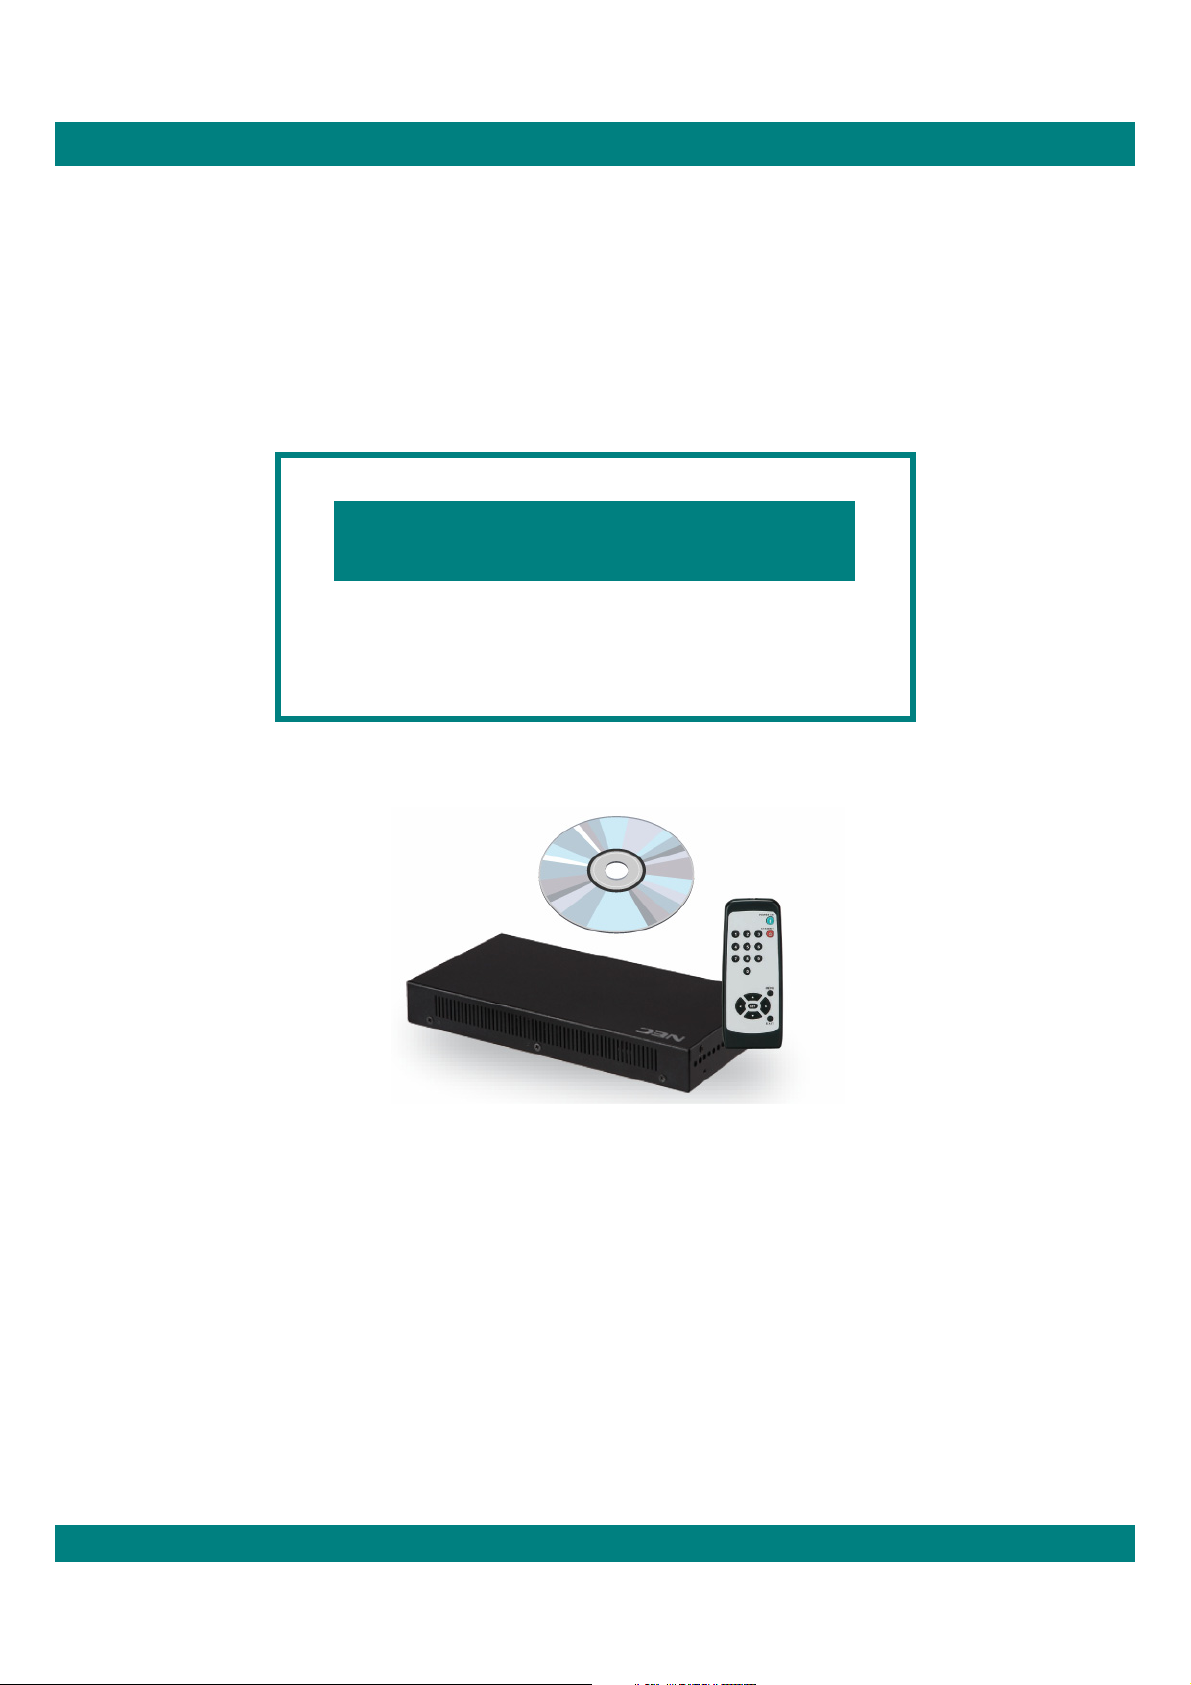
Insert the CD provided with the media player in the
personal computer onto which the software is to be installed.
Run the file “setup” in the “<Authoring Software> /
<ENG>" folder on the provided CD.
In case you use Windows XP, confirm that Microsoft .NET
Framework 2.0 or 3.5 is already installed. If either one is not
installed, select “No”, then start the installation from
Microsoft Windows Update. *Note 1)
It is already installed in Windows Vista, Windows 7.
(When it is not installed, this software finishes with error.)
Follow the directions displayed and click "Next".
Specify the folder in which the software should be installed.
*: Default: C: Authoring software
Click "Next" to use the default folder.
Follow the directions displayed and click "Yes".
*Note 1) Refer to the Authoring software operation manual for
details on installation confirmation and method.
3
USB Memory Procedures
Installing the Authoring Software
Installing the Authoring Software
Time required for installation: About 5 minutes
Included CD
4
USB Memory Procedures
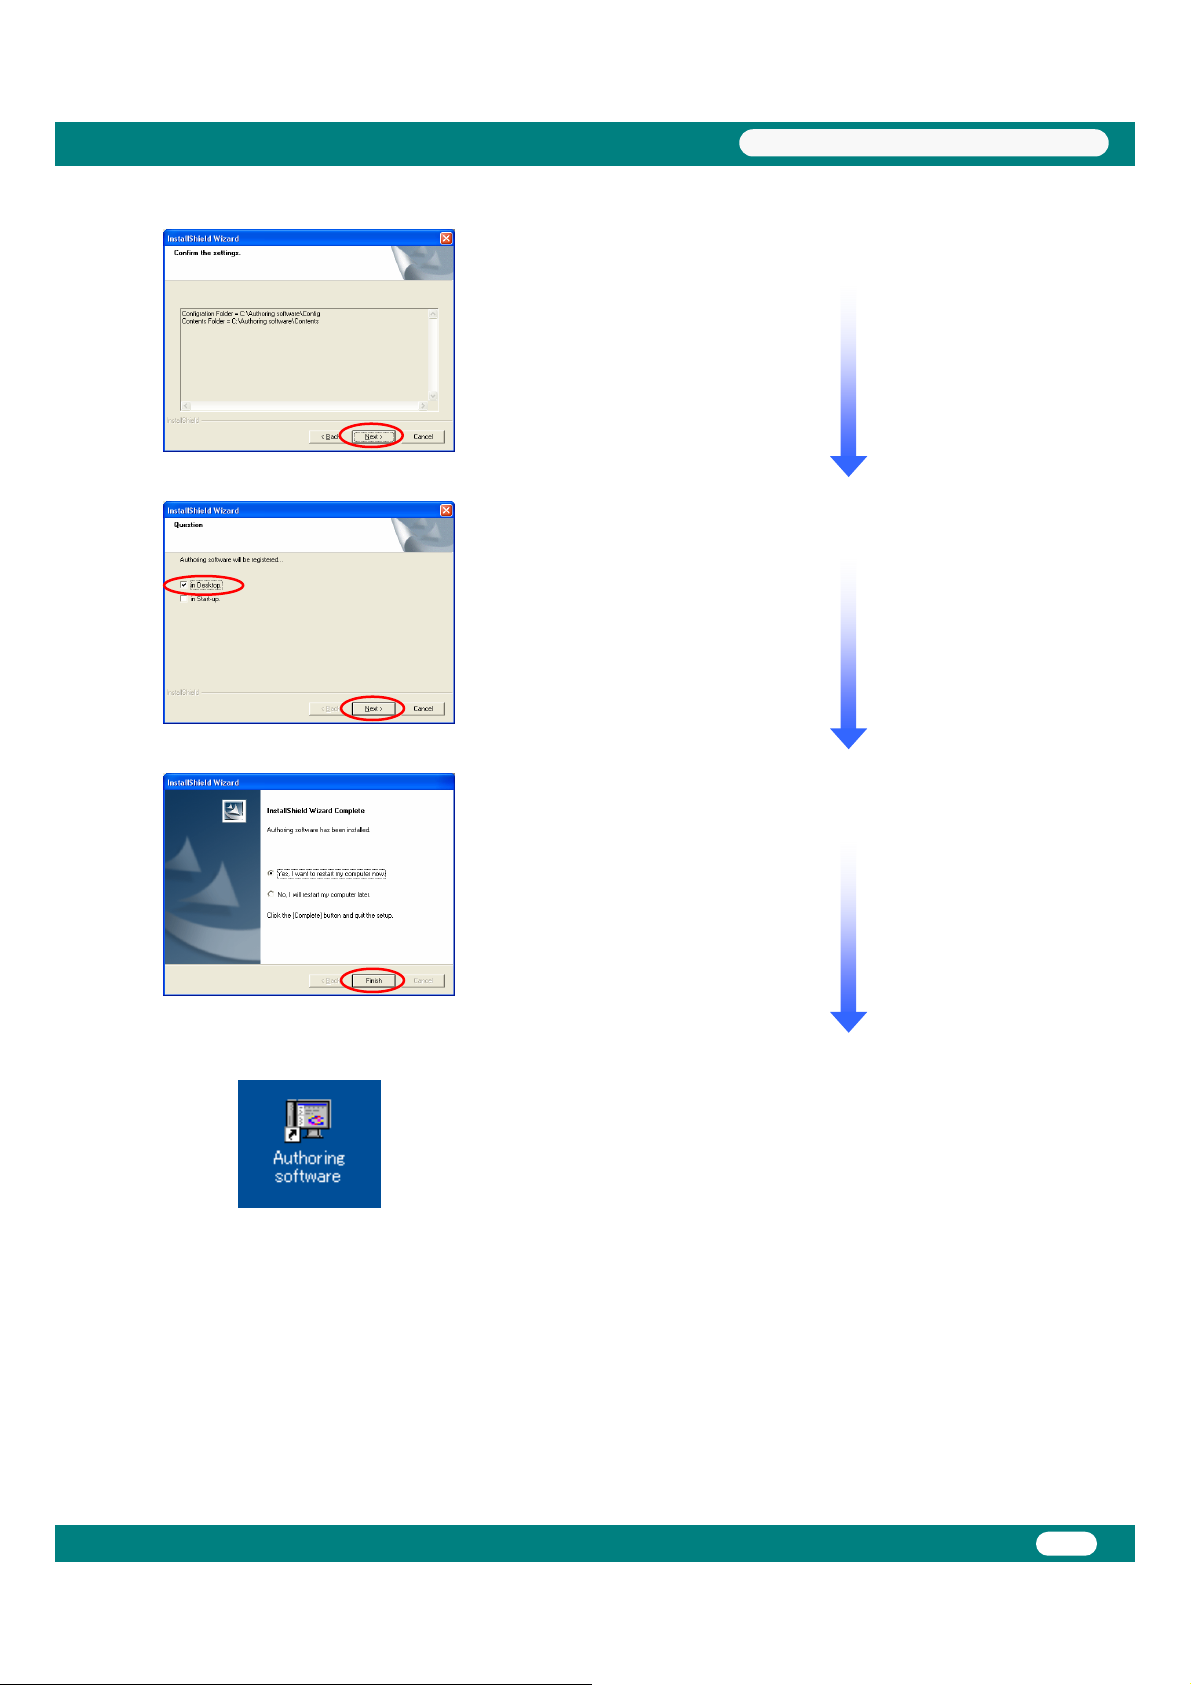
Select the "In Desktop" check box and click "Next".
This completes installation of the Authoring software.
*: Reboot the PC.
Follow the directions displayed and click "Next".
After the PC has rebooted, verify that the "Authoring
software" icon shown at the left has been created on the
desktop.

Running the Program (Main Window)
Running the Program (Main Window)
Start the program by clicking the "Authoring software" icon on the desktop.
When the "Authoring software" starts, the main window shown below will be displayed.
Displays a list of the registered programs.
Switches to the schedule sheet displayed in the list box.
Starts or stops editing of the displayed schedule.
Sets the schedule information.
These shift the schedule in month, week, or day units.
Edits the program information.
Edits the message information.
Registers a program in a schedule.
Creates and edits a layout.
Distributes (writes to USB memory) schedules and programs.
Verifies the results of distribution operations.
Selects a schedule to be used by the media player.
Configures the center system operating environment.
Terminates the center system.
(1) Program List …………………..
(2) Display Schedule ………………
(3) Start Editing ……………………
(4) Schedule management …………
(5) Schedule shifters ………………
(6) Edit Program …………………..
(7) Edit Message ………………….
(8) Schedule Setting ………………
(9) Layout settings ………………..
(10) Distribution …………………..
(11) Distribution log ………………
(12) Panel control …………………
(13) Configuration ………………...
(14) Exit …………………………..
(1)
5
USB Memory Procedures
(2)
(3) (4) (5)
(6) (7) (8) (9) (10) (11) (12) (13) (14)

Configuration
Configuration
First, configure the system's operating environment. Click "Configuration" in the [Main] window.
* Since the default settings (shown at the left) are set
up at installation, there will be no need to change these
unless the specified folder or other settings need to be
changed.
* The content data created with a content editor must
be stored in this folder in advance. You may find it
convenient to create a link to the "content" folder on
the desktop.
• Layout type
[Horizontal] Split [Top (Image) + Bottom (Message)]
• Display the program from 8:00 am until 6:00 pm every
day and turn off the power at all other times.
• On Wednesday every week, leave the power turned off all
day.
Still image
Message
Next we present the procedure for creating the following program and
copying it to the media player on the computer using the Authoring software.
* In this example, we will use the practice sample data stored on the provided "Utility CD".
* The data for the following three still images is stored in the ¥sample data directory on the "Utility CD".
* Please copy the above three images to the "Contents" folder in advance.
sample01 sample02 sample03
6
Practice
Practice
USB Memory Procedures

Editing Messages
Editing Messages
Click [Edit Message] in the main window.
The <Edit Message List> dialog box will be displayed.
Since we will create a new program, click the [+ (Add)]
button.
(1)
Dialog box
Main window
The <Edit Message Program> dialog box will be
displayed.
Change the "Message Program Title" for Message
program 01 to "Sample Message".
Since we are creating a new message program here,
click the [+ (Add)] button.
Dialog box Enter "This is a sample message".
You should also try clicking the [+ (Add)] button again to
create multiple messages.
The message display order can be changed with the up
and down arrow buttons.
Click [Details Settings].
Dialog box
The <Message Program Details> dialog box will be
displayed.
The [Text Color] and [Background Color] buttons in the
"Display Settings" dialog box allow these colors to be set to
any color.
(The message background can be made transparent by selecting slide bar
(100% : no transparent / 0% : transparent) “Opacity")
The "scrolling speed" can also be set to one of three levels.
Exit from message editing by clicking [OK] and then
clicking [OK] again.
*: The message and details settings will not be saved unless you click [OK].
Dialog box
7
USB Memory Procedures
(1)
(2)
(2)
(2)
(1)
(3)
(1)
(2)
(3)
(4)

Click [Edit Program] in the main window.
The <Program List> dialog box will be displayed.
Since we will create a new program here, click the [+ (Add)]
button.
(2)
Dialog box
Dialog box
Main window
The <Program Properties> dialog box will be displayed.
Change the "Program Title" for program 01 to be "Sample
Program".
Dialog box Change the layout from "01.[H] Full Screen (Image)" to
"03.[H] Split [Top (Image) + Bottom (Ticker)]" using the
"layout" button.
The display image (layout) will change to "Pane 1" and
"Horizontal message 1".
Dialog box
Click the object name "Pane1 (image)".
Editing Programs
Editing Programs
* Any one of 36 layouts can be selected
according to the pattern to be displayed. The
fine-grained layout properties can also be set
with the [Layout settings] function.
8
USB Memory Procedures
(1)
Autres manuels pour MP-01
2
Ce manuel convient aux modèles suivants
1
Table des matières
Autres manuels NEC Lecteur multimédia


