Naxa NMV-179 Manuel utilisateur

NMV-179
DIGITAL AUDIO AND VIDEO PLAYER
R
WITH 2.8 TOUCH SCREEN, SPEAKER & CAMERA
INSTRUCTION MANUAL

Table of Contents
Precautions
Basic Features
Basic Operation
1
3
3
4
4
4
4
4
4
5
5
5
5
6
6
7
6
7
7
8
8
9
11
12
13
12
System Configuration
Power On
Power Off
Volume Adjustment
Connection to PC and Data Exchange
Charging
Low Power
File Storage
How to use TF card
How to insert and pull out TF card
General Button /Icon Description
Main Menu Interface
Music Mode
Music Interface Description
Music Setting Interface
Lyrics Display
Video Mode
Picture mode
Radio Mode
FM Recording Interface
Ebook Mode
Camera Mode
1

14
15
16
16
16
17
17
18
17
18
18
19
19
20
20
20
20
20
20
21
21
21
21
22
22
22
22
22
22
25
26
Video Camera Setting Interface
Video Camera Interface
Camera Setting Interface
PC Camera
Explorer Mode
Application
Recorder
Calendar
Stopwatch
Calculator
Notebook
Input Method
System Setting
Player Information
Set Time
Language
Display
Calibrate
Power Off Setting
Default Settings
Upgrade
Other Setting
Video Conversion Tool
Operating Platform
What format can video files be recorded into
What format can picture files be taken into
Automatic Installation
Manual Installation
Video File Conversion
Recording Video and Taking Pictures
Notices
2

Precautions
For the correct use and good performance of the player, the user
must fully understand the manual as well as strictly follow the
instructions provided.
Avoid high temperature (above 35 C) or low temperature (
below -5 C).
Never knock the main machine violently.
Never contact with chemicals such as benzene, thinner etc.
Do not close to strong magnetic field, electric field etc.
Keep away from direct sunlight or heating appliances.
Never privately dissemble, repair or modify the player.
Using the player and the earpiece during bicycling, car and
motorcycle driving is likely to cause danger.
Never use higher volume, which may damage your hearing
ability.
Divide scraped packing, batteries, old electronic products
and dispose them properly.
Basic Features
Brand new touch screen OS for direct and convenient operation
240*320, 260,000 color high speed TFT screen
Music player: compatible with MP3 WMA, and WAV formats,
Recorder: for FM and MIC recording and compatible with MP3
and WAV formats
Picture browser: for JPEG, BMP, formats
Video player: for playing video of AVI,RMVB, 3GP format
o
o
Support Camera, Video camera or PC camera
FM Radio
E-Book browser
Compatible with TF Card
Settings: for setting and activating various features
3

USB2.0 high speed transmission
ADFU restoration and USB upgrading mode enabled
Basic Operation
System Configuration
Slide the switch to On and the player will be powered on in 3
second. The player will prompt "Welcome" and then enter the
main interface.
When the player is on, slide the switch to Off and the player
will be powered off in 3 seconds.
Under Music, FM radio or Video mode, press +, - button to
adjust volume.Press+to add volume,and press-to reduce volume.
OS: Windows XP/2K/ME/98 (driver installation needed) /Linux
9 and above /Mac OS 10 / Windows 7
CPU: Pentium-133MHz at least
Memory: 32MB at least
Hard disk free space, 100MB at least
Video card: above 640*480, enhanced color at least (16 bits)
Power On
Power Off
Volume Adjustment
Connection to PC and Data Exchange
4

Connect the player to PC with the USB cable, and the player will
enter U disk mode. Press MENU button or safely remove U
disk, and the player will be under USB charging mode. In USB
charging mode, touch the screen or press MENU to enter the
main applications interface.
Charging
This player has high capacity lithium battery. For charging,
connect the player to the USB port of the PC or to a charger.
Low Power
When battery power is low, the player will prompt and power off
and enter Standby mode automatically. Do not power on and
charge the player instead.
Charger current specification recommended: 400-500mA.
File Storage
Files of different types should be stored under different directories.
For example, music file should be stored under MUSIC dir.
Record file stored under RECORD dir. Picture files under
PICTURE dir. Video files VIDEO dir. Text files TXT dir. the
corresponding application unable to find the file If it is not saved
in this way,
How to use TF card
When this player is connected to PC, two movable disks will be
found. The first one is the internal memory, and the second one is
TF card. If no card inserted, the second disk can not be
5
6
opened. This player is compatible with maximum 8GB TF
card.
How to insert and pull out TF card
Note: please insert or pull out the card when the player is off, or
the internal files of the player will be lost or damaged.
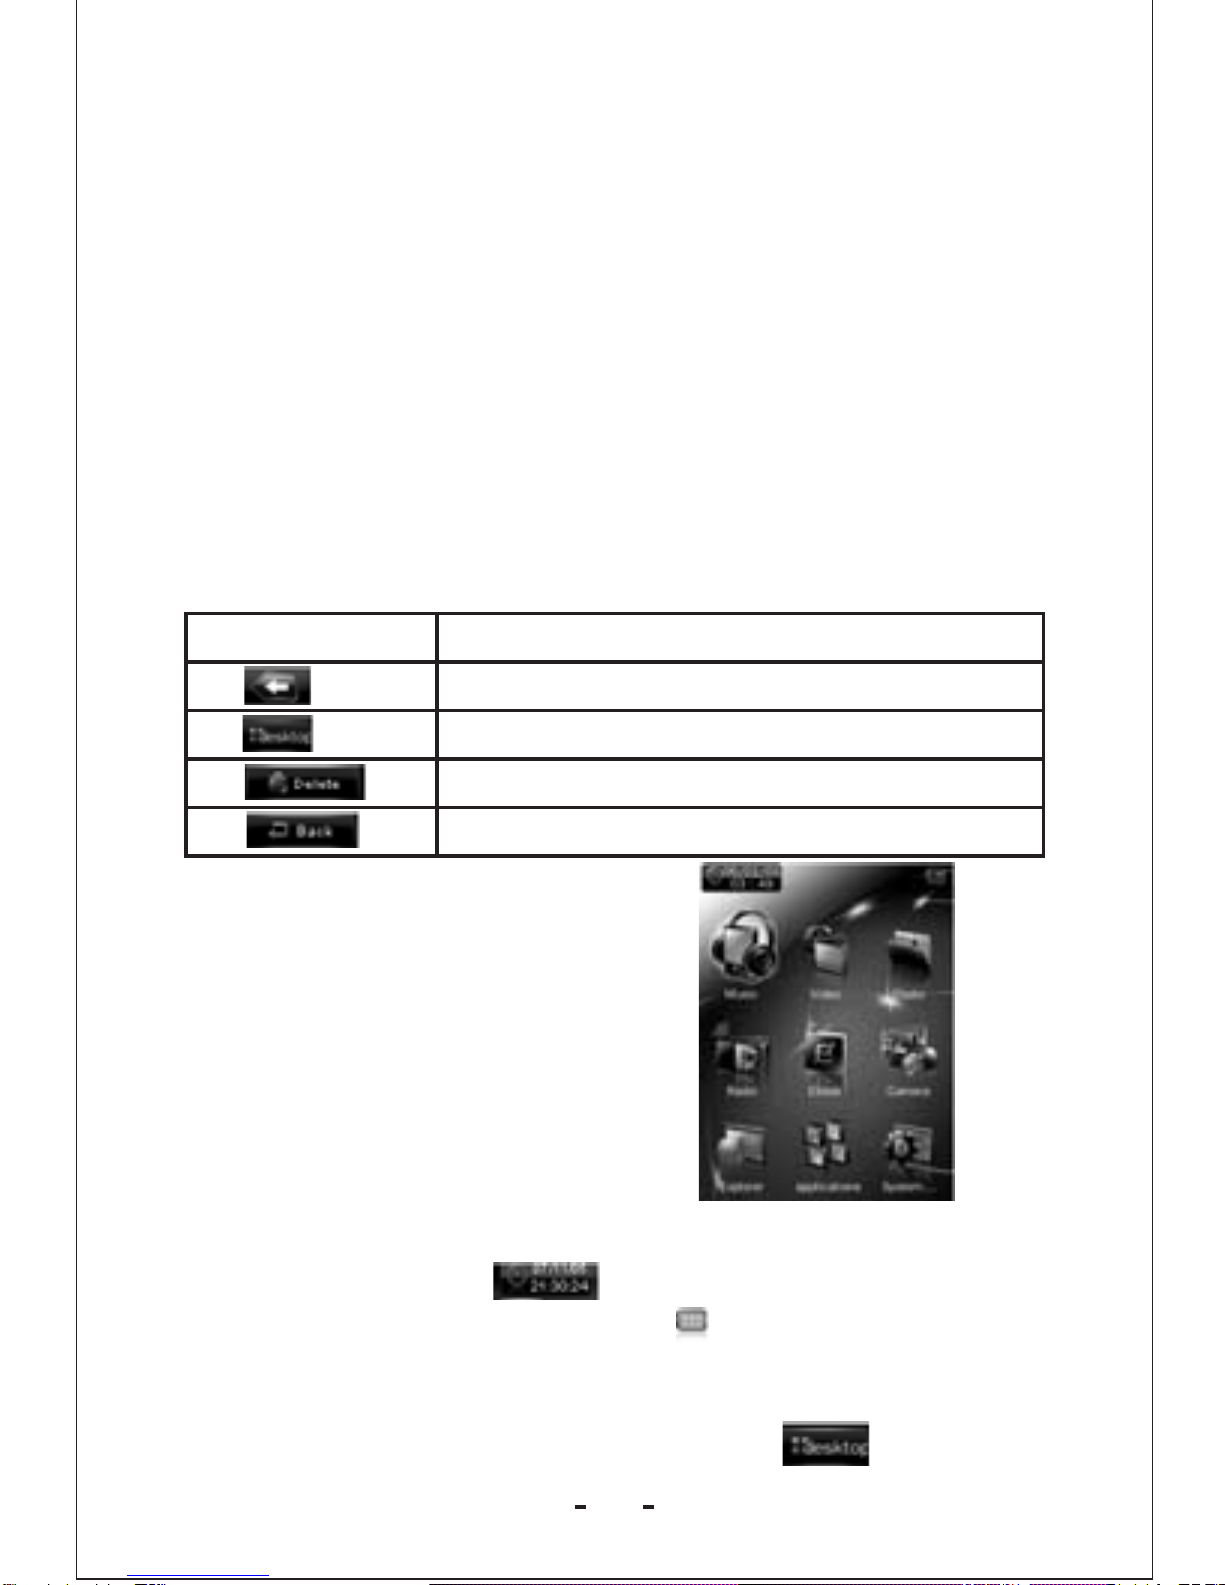
General Button /Icon Description
Button /Icon Description
Return to upper directory
Return to main menu
Delete file or folder
Return to previous operation interface
Main Menu Interface
This player provides a touch screen
OS for direct operation. The main
menu interface is shown in the
picture below:
1. The system date and time is shown on the upper left corner of
the main menu interface . The battery is shown on the
upper right corner of the main menu interface.
2. Under the main menu interface,touch an icon on the screen,and
the player will enter the selected mode.
3. After the player enters a mode, touch the icon on the
How to insert: with the front (the side with characters) of the
TF card up (towards the screen of the player), slightly
push to insert into the card holder of the player to connect.
After the card is inserted, the player can play the files in the
TF card.
How to pull out: slightly push the TF card and the TF
card will partly come out, and then pull the card out.

bottom right corner or press and hold the MENU button to return
to the main menu interface.
Music Mode
In the main interface, touch the Music icon to enter music mode.
Music Interface Description
Button /icon Description
Number of the song being played / Total songs
Playing mode
Playing sequence
Playing style
Song playing progress bar. Drag the bar to
adjust playing progress.
Volume bar. Drag the bar to adjust volume.
Touch it to switch to previous song, long
press for fast rewind
Play /pause /stop the current song. Click the
play button, and the button will be change to
pause button. After a song is finished, it will
change to stop button.
Touch it to switch to the next song, press and
long press for fast forward
Music Setting Interface
Click one of the 4 buttons at the bottom of the interface to enable
7

an appropriate function.
Icon Description
Click Browser to enter different song lists -
main directory, card directory, all songs, ID3
list, play list, and tag list.
Click Settings to choose
WOW, WOWHD,
USER Click USER to enter user
setting interface. Drag the bar or
chick the options to set the
functions. Click OK to confirm
the settings.
SRS setting:
EQ setting: click to enter User
EQ setting interface, move up
or down the bar to select sound
effect, and click OK to confirm.
Add list
Add tag
Click return to play screen.
Song information display.
The player is compatible with lyrics files of *.LRC format and
enables playing song with synchronous lyrics. The name of the
lyrics file should be the same as that of the song file. When there
are the lyrics with the same name of the song being played under
the play list directory, the lyrics of the song will be displayed on
the playing interface.
In main interface, click the video icon to enter Video mode.
Lyrics Display
Video Mode
8

Directly click the video file on the screen to start playing the
selected video.
When play a video file, the up/down buttons and the progress bar
will appear automatically by touching the screen.
Button Description
Browse: local directory, card directory, tag list
Tag: directly click the icon
and a box pops out and
prompts tag saved .
Play: click and it will change to pause button ,
and click again to continue playing.
Touch it and the Volume bar will pop out at the
bottom. Drag the bar to adjust volume.
Return to main menu
Fast rewind: long press for fast rewind. Short press
for the previous video file.
Fast forward: long press for fast forward. Short press
for the next video file.
Picture mode
1. In main interface, click the Photo icon to enter Picture mode.
9
Table des matières
Autres manuels Naxa Lecteur multimédia

Naxa
Naxa NMV-155 Manuel utilisateur

Naxa
Naxa NCD-730 Manuel utilisateur

Naxa
Naxa NMV-169 Manuel utilisateur

Naxa
Naxa NMV-179X Manuel utilisateur

Naxa
Naxa NT- 90A Manuel utilisateur

Naxa
Naxa NMV-171 Manuel utilisateur

Naxa
Naxa ND-851 Manuel utilisateur

Naxa
Naxa NMV-154 Manuel utilisateur

Naxa
Naxa NMV-170 Manuel utilisateur

Naxa
Naxa NMT-1100 Manuel utilisateur


