MotoSAT J1 Manuel d'utilisation

J1
Mobile Satellite Antenna
Controller
User and Installation Manual
Firmware Version 1.0.0
Mar 1, 2010

2
The DataStorm J1 Satellite Antenna Controller
Features
Stand Alone Satellite Antenna Controller
Front Panel Search, Stow, and Power Commands
No Software Required on PC
DVB-S2 Satellite Identification (NID)
HTML Graphical User Interface
SD Card Firmware Upgrades
SD Card Configuration Imports
Web Direct Sat Table Imports
LED Status Indicators
Simplified Multiple Sat Select Screen
Telnet Commands for Diagnostics
Import and Export Configuration Files
Import and Export Satellite Tables
Simple Electrical Connections
The DataStorm J1 Satellite Antenna Controller
is one of the most advanced Satellite Antenna Controllers available. Simple User
operation combined with many advanced configurable features will allow the
flexibility needed for almost any application anywhere.
Operate from the Front Panel or through a PC using an Internet Browser such as
Internet Explorer, Firefox, Sapphire, Chrome or many other Browsers.
No external software external is required.
A true stand alone Satellite Antenna Controller now with SD Card Interface.

3
Table of Contents
Getting Started 5
Connection and Configuration 5
Using the SD Card for Setup 5
Quick Setup 5
J1 Normal Operation 7
Front Panel Operation 7
HTML Operation 10
Find a Satellite 11
Stow Dish 14
Standard Functions 15
System Status (Main Page) 15
Modem Status 17
About 18
Configuration Functions 19
Network Settings 19
Search Settings 22
LNB Settings 33
Mount Settings 36
Advanced Functions 49
Manual Motor Control 49
Calibrate Dish 50
Import/Export Files 52
Upgrade Firmware 54
SD Card Functions 57
SD Autoload 57
SD J1 Files 57
SD LoadOnce 57
Manuals 57

4
J1 (System) Wiring 58
J1 Rear Panel 58
J1 Bottom View 59
Wiring Diagram 60
Serial Cable (Optional) 61
Power Supply 61
Specifications 62
Mechanical 62
Electrical 63
Diagnostics 64
Controller Start Up Test 64
Telnet Diagnostics 65
Telnet Screens 66
Message Codes 71
DataStorm J1 Messages Codes 71

5
Getting Started!
If this is a new system install or just upgrading to the new J1 Controller it is
important to follow the guidelines below to insure the system functions properly.
Connection and Configuration!
Nearly all technical support calls on new installations are due to bad or improper
wiring, or incorrect configurations. Please be sure to review these two items
before contacting technical support for assistance.
The J1 must be configured properly before it can be used in normal operation.
Before proceeding insure that all wiring to the J1 Controller is correct. This would
include any connections to the DataStorm Mount. See J1 System Wiring.
Using the SD Card for Setup
The J1 Satellite Antenna Controller includes a Front Panel SD Card Slot. This
feature will allow the user to upgrade firmware, import configuration files, and
import Sat Tables without being connected to a PC or Network. See SD Card
Functions for setup and use.
Quick Setup
Once the System is installed and wired the next step is to prepare the J1 Controller for the
users specific requirements.
Below is a quick list to follow to insure proper operation. Please follow the steps below
in the order as shown.
Step 1 Set up a Network Connection between the J1 and the PC
Using the SD Card, LoadOnce Folder, place a modified configuration file in the
LoadOnce folder.
Name the file “IPConfig.txt” and place the IP information needed to work in the
existing Network (Router)
LocalAddr = 192.168.1.250 /new controller IP address
SubnetMask = 255.255.255.0 /if different

6
ModemIp = 192.168.0.1 /modem IP address
GateAddr = 192.168.1.1 /router IP address
Place into J1 SD Card Slot, turn on power. When controller restarts IP Info is
changed.
See Network Settings page 19.
Step 2 Upgrade Firmware (If necessary)
Using the SD Card, LoadOnce Folder, place a new J1firmware.hex file in the
LoadOnce folder.
Place into J1 SD Card Slot, turn on power. Wait for status indicators to scroll
from left to right. When controller restarts the new firmware is updated.
See Upgrade Firmware page 54.
Step 3 Modify Configuration Functions
Open the HTML Browser and choose the Configuration Functions pages;
Search Settings (all) - Satellite System, Satellite Longitude, and RX Polarity
Search Settings (HNS) - TX Polarity, Modem IF Frequency, Symbol Rate
LNB Settings –As necessary
See Configuration Functions page 19.
Note: See Import/Export Files to save configuration page 52.
Step 4 Calibrate Dish
See Calibrate Dish page 50.
Step 5 Ready for Normal Operation (Find Satellite)
Open the HTML Browser and click on the Search command.
See Find a Satellite page 11.
Step 6 Import a current Sat Table
Once the Dish Mount is locked to the correct satellite and the Modem has come
into the network you should update the Sat Table.

7
Import Web Sat Table allows the user to directly import the latest Satellite Table
File from the MotoSAT Web Site. In Network Settings (Web Sat Table URL) is a
default web address of http://www.motosat.com/sattables/world.csv. This address
can be changed if future sites are available. For this import to work the user must
be connected to an active modem (Network) and locked onto the Satellite.
See Import/Export Files page 52.
Step 7 Save Configurations and Sat Tables
Once the J1 Controller and Dish Mount have been set up properly the Current Sat
Table and Config Files should be exported.
See Import/Export Files page 52.
After exporting these files to the PC, remove the SD Card from the J1 Card Slot
and connect the SD Card to your PC. Save the Config file and Sat Table to the J1
Files Folder on the SD Card for backup. Place SD Card back into J1 Controller.
The J1 Files Folder is used to store different Firmware versions, and different
Dish Mount configuration files samples. This is just a working folder on the SD
Card. The J1 Controller can not read or write any files to this folder.

8
J1 Normal Operation
IMPORTANT! Before the J1 is ready for normal use the system must be wired
and configured correctly. Go to Setup and Configuration for setup.
The J1 Controller can be operated through either Front Panel Controls or via
the HTML Interface built into the Controller.
Front Panel Operation
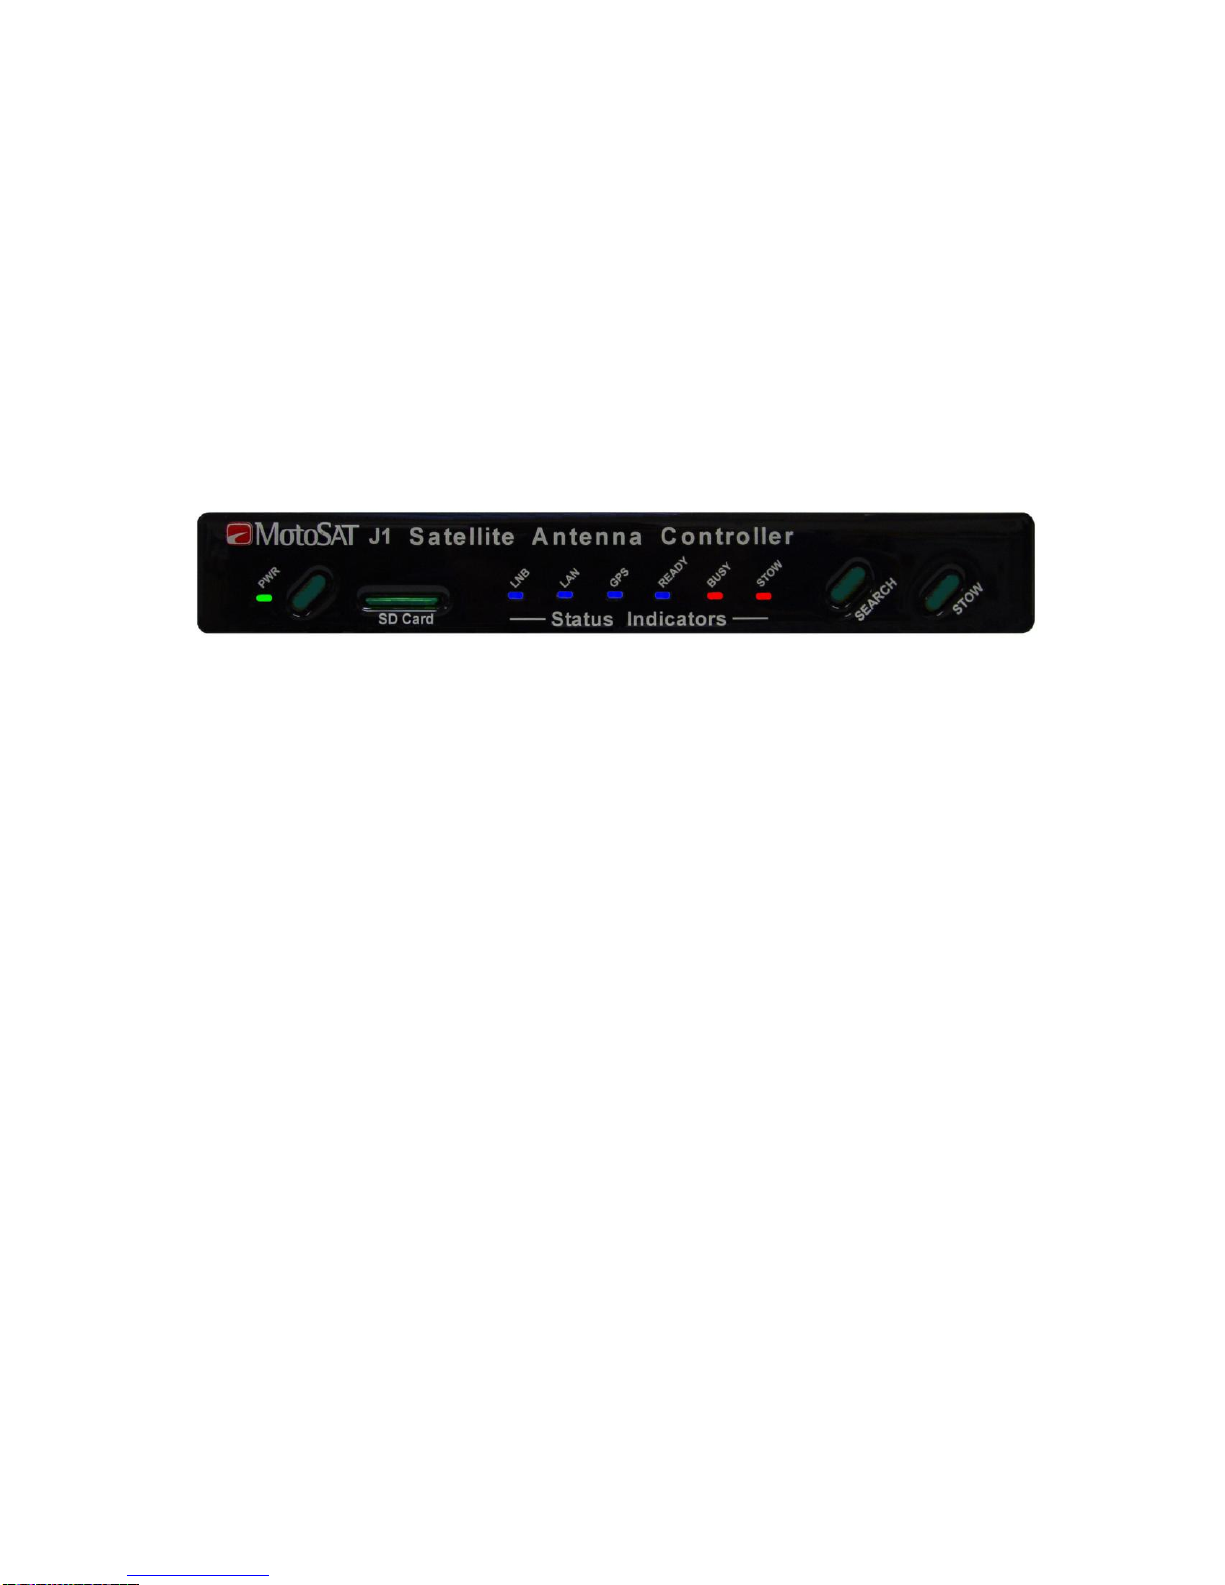
Model J1
The Front Panel has three Buttons.
The Power Button is used to turn the J1 Controller On and Off. When Powered
on the Green LED to the Left of the Power Button will illuminate. AC Power
Rocker Switch must be in On “Illuminated” position.
On Power up the controller will take about 15 seconds to initialize. The Power,
LNB, and LAN LED’s should be illuminated when controller is ready for use.
Under normal conditions the Stow LED should also be illuminated when first
powered on.
The Search Button will cause the Antenna to rise from the stowed position and
search for the Satellite 1 (Sat 1). See Building, Importing and Exporting a
Config File.
The LNB and GPS lights should be illuminated before the Antenna will start a
Search (move).
Wait for the LNB Light to illuminate before pressing the Select Button. Once
selected the BUSY and READY lights will start to flash.
The dish will begin a search if the GPS Light is on. (GPS Locked)
If the GPS Light is blinking then the Antenna will not move until the GPS Light
goes solid. A blinking GPS means that a valid GPS location has not been
determined. Typically GPS should acquire lock in less than 120 seconds.

9
The Stow Button when pressed will move the Antenna to the Travel Position.
When the Antenna is moving to the Stowed position the Busy and Stow Light will
flash. When the Antenna is stowed the Stow Light will be on Solid.
The Front Panel has seven (7) lights.
Power Light (Green) is illuminated when ever the J1 is powered on. The Main
AC power Light should also be illuminated.
LNB Light (Blue) will illuminate when a Modem is connected to the J1 and
power is applied to the Modem. If the J1 is configured to Generic Mode then the
J1 will supply LNB power.
LAN Light (Blue) is illuminated when a network connection is detected.
GPS Light (Blue) will illuminate when GPS has received a valid Latitude and
Longitude location. When GPs is not locked LED will Blink.
If there is no GPS (Sensor Board) installed on the Antenna Mount then the GPS
light will be off.
READY Light (Blue) will illuminate when the Target Satellite is locked and
peaked.
The Ready Light will flash when the Antenna is searching for a Satellite.
BUSY Light (Red) illuminates under many conditions.
On Power Up the Busy light will flash for approximately 15 seconds while the J1
Controller is initializing the system configuration.
During Search and Stow the Busy light will flash.
STOW Light (Red) is on Solid when the Antenna is Stowed (travel position).
When the Antenna is moving to the stow position the Stow Light will flash.

10
HTML (Web Browser) Operation
IMPORTANT! The LAN Light must be on before the web browser can open.
To use the HTML Interface you must access the J1 by using a standard Web
Browser such as Internet Explorer, Netscape, or Mozilla. Open the Browser as
you normally would then type into the address bar the IP Address of the J1
Controller. The default IP address of the J1 is set to 192.168.1.250. This
address can be changed in the Network Settings Screen.
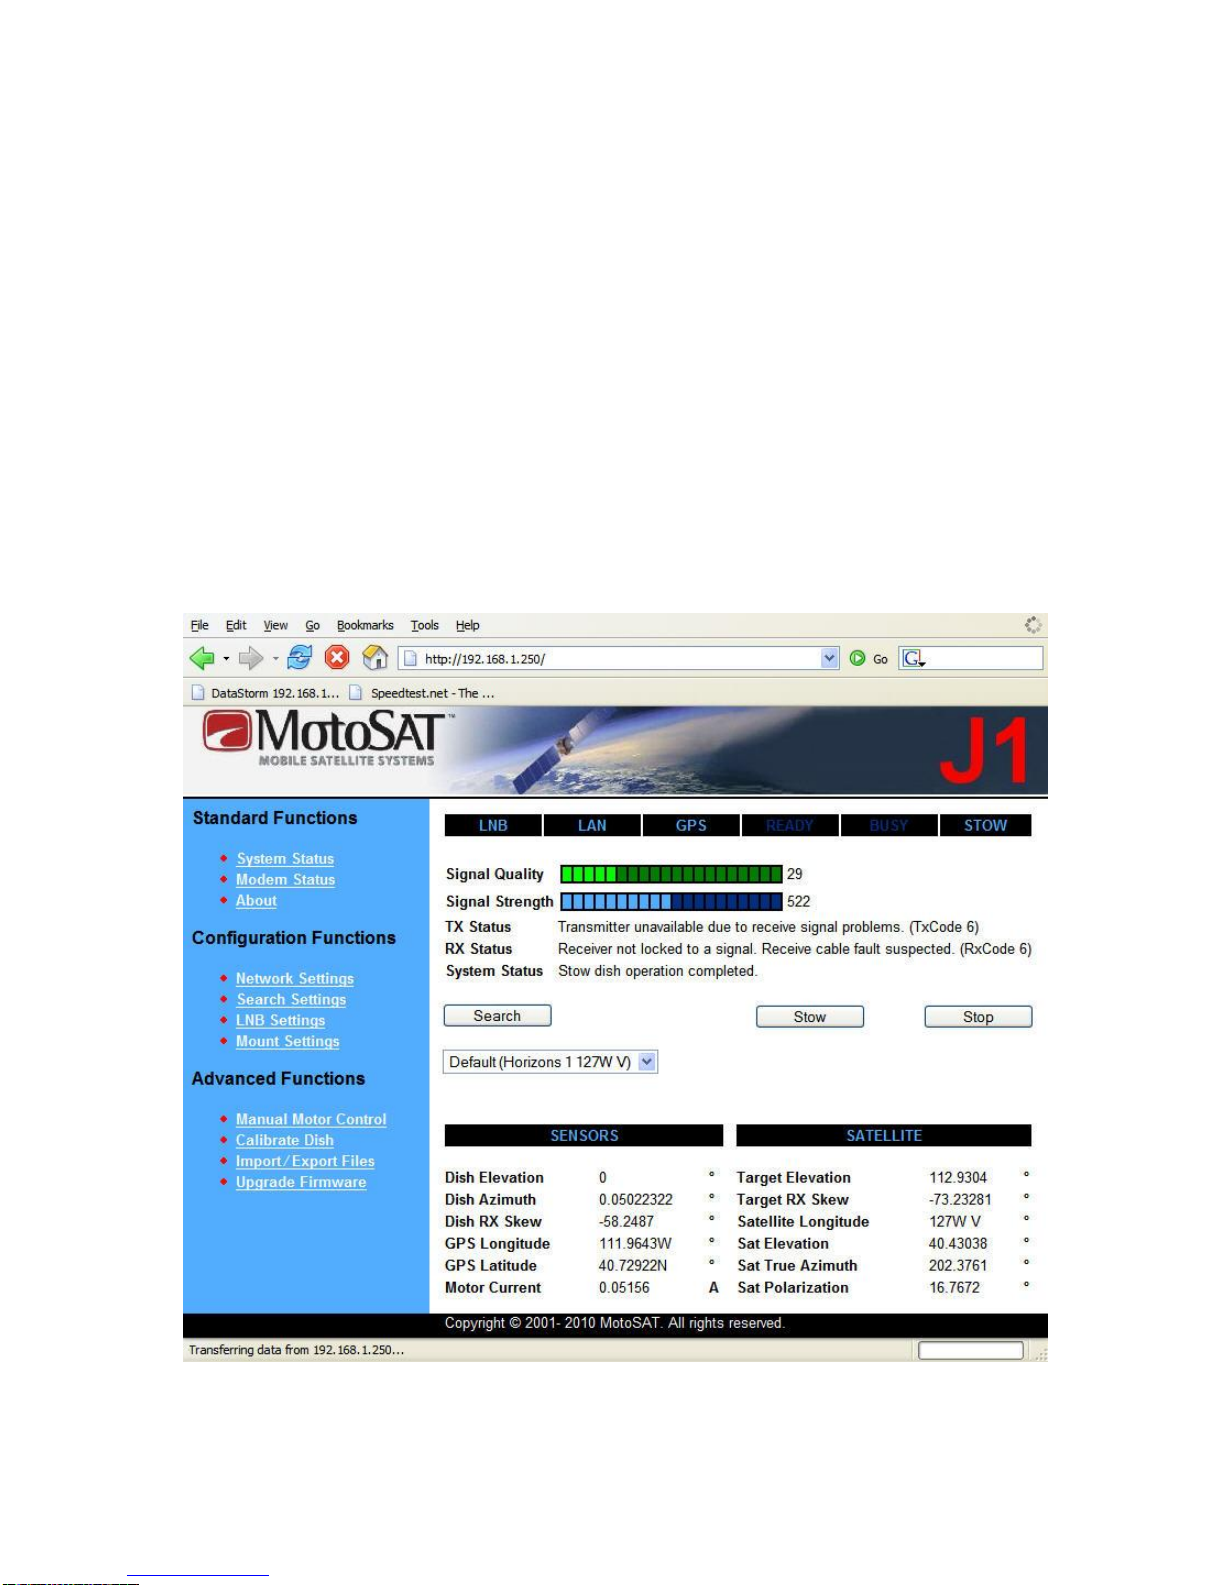
The System Status screen should open if the browser and J1 IP address are
configured correctly. See Setup and Configuration if the page below does not
open.
System Status Screen Antenna Stowed
Table des matières
Autres manuels MotoSAT Contrôleurs