Modecom MC-6100 Wi-Fi Manuel utilisateur

MODE COM PROFESSIONAL WIRELESS LINE
MODE COM PROFESSIONAL WIRELESS LINE
MC6100G WIFI
MC6100G WIFI
U
s
e
r
M
a
n
u
a
l

www.modecom.eu
2
Copyright©2006 Mode Com Ltd. Mode Com is a registered trademark of Mode Com Ltd.
Introduction
Thank you for choosing the keyboard MC-6100 Wi-Fi.
The keyboard Mode Com has been especially designed to facilitate work of
each user. Numerous oce and multimedia functions position the MC-6100
Wi-Fi among the best keyboards.
Additional buttons improve the keyboard functions and allow for more com-
fortable and more eective work.
The frequency range 2.4 GHz is used for cordless communication, so that it is
possible to use the keyboard within a greater distance than traditional cor-
dless solutions which work at 27MHz.
Besides, a mouse added to the set has perfect parameters, the set base sta-
tion is also a battery charger – all you do is leave the mouse on the pad and
its starts charging.
Choose better future - choose Mode Com
MODE COM
MODE COM
PROFESSIONAL WIRELESS LINE
PROFESSIONAL WIRELESS LINE
MC6100G WIFI
MC6100G WIFI

3
Packing content
MODE COM
PROFESSIONAL WIRELESS LINE
MC6100G WIFI
COM
Multimedia
keyboard
Mouse Charger &
receiver pedestal
Power
adapter
User manual Driver CD Two pairs of batteries
Product feature
• High-speed RF wireless technology
• Multimedia keyboard and mouse, have powerful hotkeys function
• Fast-charging docking station for mouse, with rechargeable NiMH batte-
ries for economy
• Excellent wireless ID technology adopted (256 ID available)
• Transfer the signal in 3600full angle
• Smart Power-saving technology: red LED automatically turns to electricity-
saving mode in rest condition
• 5 programmable buttons design provides powerful custom function

www.modecom.eu
4
Software installation
In order to use all of the functions of hotkeys, it is important to install the driver
software of keyboard correctly. Please make use of the disc enclosed the pro-
duct, and install it as below:
1. At rst, please uninstall the other hotkeys driver of keyboard, which you do
not use now (if you have installed before), so as to avoid conict.
2. Insert the disc in the CD-ROM. Please click „start-run”,and then choose right
disc, for example„D:\MC-6100g wi\keyboard”and„D:\MC-6100g wi\mouse”,
click„Enter”to conrm and start-up installation. Please start executable le fo-
und in the selected folders.
3. When the guide starts-up, please click „next” as illustration to nish installa-
tion in turn.
4. The software will install in „C:\Program Files\MultiKeyboard Driver” automa-
tically.
5. After installation, the PC will reset automatically. If not, please reset manually.
After that, you will see illustration in the toolbar, which shows „OFFICE multi-
media keyboard software” has been installed successfully.

5
6. You can click again to dene your individualized hotkeys as 3D illustration,
which are used to start-up application or website.
7. The software will not take up much system resource or decrease the proces-
sing speed, which needs a small part of HDD space.
Please perform similar actions for the installation of mouse software.
Battery user manual:
• Wireless mouse uses two rechargeable AAA (7#) NiMH batteries;
• Wireless keyboard uses two AA (5#) alkaline batteries;
• If you do not use the wireless mouse and keyboard, please take out the batte-
ries and keep them in cool and dry place;
• The batteries enclosed the product are expendable, as presents, the batteries
are beyond the quality warranty;
• The charger of the mouse is only suitable for the AAA (7#) rechargeable NiMH
batteries.
• Please do not charge other batteries like carbon and alkaline batteries, otherwi-
se it will cause leakage or breakage;
• If the batteries were found leakage, stain, distortion or any other abnormity,
please do not use or charge them;
• If be not used for more than one year, the NiMH batteries may be disabled, sug-
gest you discharge and recharge them sometimes.

www.modecom.eu
6
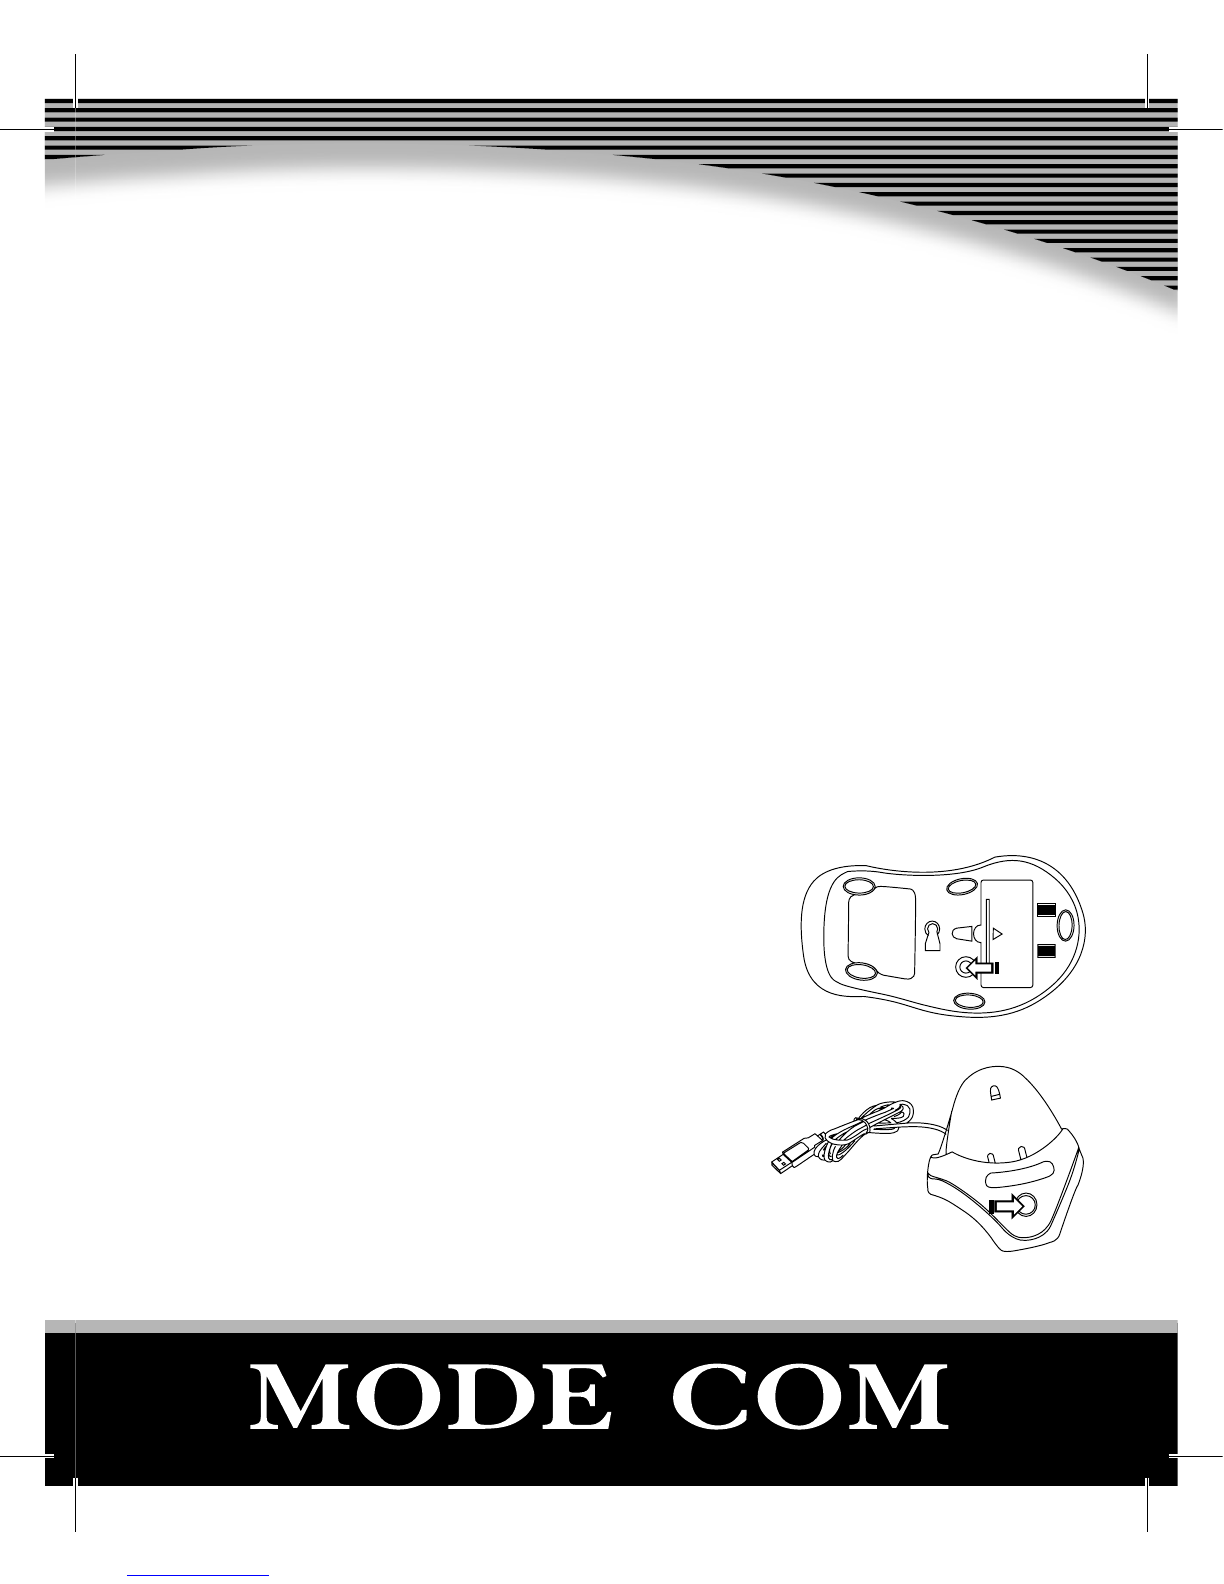
Installing batteries into mouse
1. Push the buckle on the bottom of the mouse,
with your thumb, as the arrow in the picture,
and then pull outside the mouse’s battery co-
ver to open it.
2. Insert two AAA rechargeable NiMH batteries as show inside the battery com-
partment.
3. Replace the cover carefully.
Charge explanation
1. When you use the mouse within rechargeable NiMH batteries at rst time,
please charge the batteries inside. Please check if the voltage being used is
compatible with the required voltage of the receiver. Connect the compatible
docking station and then connect the DC port to the back jack of the receiver.
(Notice: The power supply is from the USB port of the PC. On condition that
the USB port is connected with the PC well, you can charge the rechargeable
NiMH batteries on the receiver.)
C
O
N
N
E
C
T

7
2. When the recharging is beginning, green light insi-
de the lampshade will ash three times slowly, it’s
indicating the recharge is in the self-inspection sta-
tus. If the result is normal, the green light will chan-
ge into quick ash indicating the state of rechar-
ging. After nishing charging, the green light will
light on regularly. If abnormal, the green light will
not ash slowly or can not change into quick ash
after three times’ slow ash. Please check up if the
installation of batteries, the connection of charger
and placement of mouse are correct.
Installing batteries into key-
board
1. Push the buckle on the bottom of the key-
board, with your thumb, as the arrow in the
picture, and then pull outside the keyboar-
d’s battery cover to open it.
2. Insert two AA batteries as show inside the
battery compartment.
3. Replace the cover carefully.
Connect USB port to the PC
CO
CO M
COM

www.modecom.eu
8
The manual of receiver’s indicating light
1. COM: communication light/low voltage warning light.
• When receiving positive signals from the mouse or keyboard, the light will be
shinning.
• When the wireless keyboard or mouse is low voltage, there’s warning signal be-
ing sent to the receiver, the COM indicating light will keep ashing until there’s
no warning code in the signal.
2. NUM: Number lock-indicating light.
3. Caps: Capital lock-indicating light
4. Scroll: Scroll lock-indicating light.
The establishment of communication channel
between mouse /keyboard and receiver
Up to 256 dierent communication channels are available between your keybo-
ard and receiver (communication channel can also be named ID), and the same
as to the mouse and receiver. Every time of establishing the communication
channel, it will change the former communication channel. Further, the commu-
9
nication channel of the keyboard and mouse to the receiver is independent and
dierent, which means one receiver can receive signal only from one keyboard
and one mouse. Under below circumstances, you should do the „establishing
communication channel” operation:
• Your rst time uses the combo;
• Re-installation or after charging the batteries;
• Other people use the same keyboard and mouse, and their communication
channel happens to be the same as yours, which causes disturbance;
• Someone establishes communication channel operation on you combo un-
consciously, but fails.
1. Press the CONNECT button at the bottom of the mouse once (<2seconds).
2. Within 5 seconds, press the CONNECT button on the receiver. Waiting for 10
seconds, if succeed in communication, the mouse
should be used normally, at the same time the com-
munication indicator LED will light on. If the mouse
fails to work normally after 10 seconds, please repeat
the previous step again. Remarks: For the rst step, if
the pressing time is longer than 3 seconds, the mo-
use will be turned o manually; it will not change the
state of communication channel, so you do not need
to operate „The establishment of communication
channel between mouse and receiver” again.
CO
CO M
C
O
N
N
E
C
T

www.modecom.eu
10
1. Press the CONNECT button at the right side
of the keyboard once (<2seconds).
2. Within 5 seconds, press the CONNECT but-
ton on the receiver. Waiting for 10 seconds, if
succeed in communication, the keyboard sho-
uld be used normally, at the same time the
communication indicator LED will light on. If
the keyboard fails to work normally after 10 se-
conds, please repeat the previous step again.
Extra feature keys conguration
To make use of the special function keys (Media, E-mail, Homepage), you have
to install the software included in the CD as instructed in the earlier chapters.
The mentioned keyboard software allows to bind desired application to Media
and E-Mail keys, as well as to set the website which is to be opened when pres-
sing the Homepage key.
After having successfully installed the software and icon of the keyboard con-
guration program will appear in the sys tray area of the task bar.
CONNECT button
CO
COM
Table des matières
Langues :
Autres manuels Modecom Accessoires informatiques


