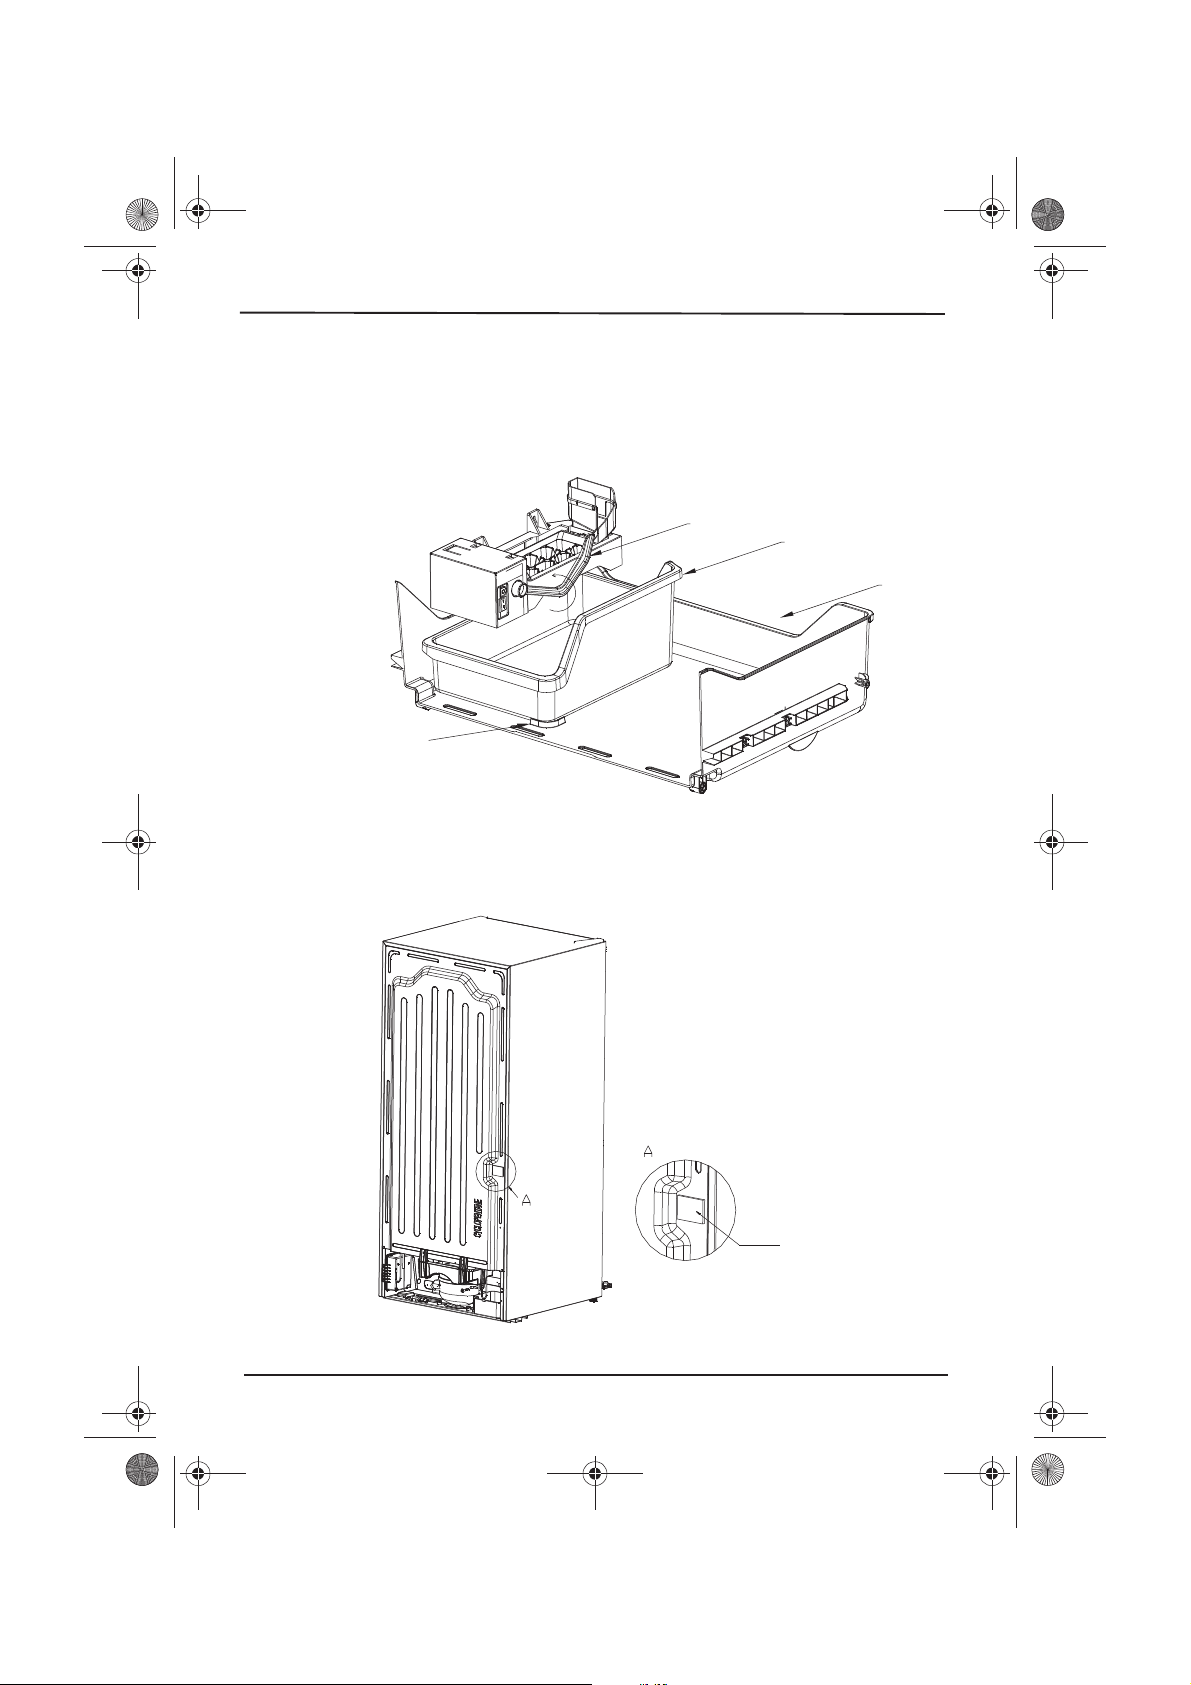
Midea IM1900MD Manuel utilisateur

Ice Maker Kit
MODEL: IM1900MD

2
Contents
Introduction . . . . . . . . . . . . . . . . . . . . . . . . . . . . . . . . . . . . . . . . . . . . . . . . . . . . . . . . . . .2
Important Safety Instructions. . . . . . . . . . . . . . . . . . . . . . . . . . . . . . . . . . . . . . . . . . .2
Features . . . . . . . . . . . . . . . . . . . . . . . . . . . . . . . . . . . . . . . . . . . . . . . . . . . . . . . . . . . . . . .4
Package contents . . . . . . . . . . . . . . . . . . . . . . . . . . . . . . . . . . . . . . . . . . . . . . . . . . .4
Installing the ice maker. . . . . . . . . . . . . . . . . . . . . . . . . . . . . . . . . . . . . . . . . . . . . . . . .5
Connecting the ice maker to the water supply . . . . . . . . . . . . . . . . . . . . . .12
Tips for using your automatic ice maker. . . . . . . . . . . . . . . . . . . . . . . . . . . . . . . .15
Troubleshooting . . . . . . . . . . . . . . . . . . . . . . . . . . . . . . . . . . . . . . . . . . . . . . . . . . . . . .16
Specifications . . . . . . . . . . . . . . . . . . . . . . . . . . . . . . . . . . . . . . . . . . . . . . . . . . . . . . . . .17
WARRANTY . . . . . . . . . . . . . . . . . . .. . . . . . . . . . . . . . . . . . . . . . . . . . . . . . . . . . . . . . . .18
Important Safety Instructions
WARNING
1Read these instructions.
2Keep these instructions.
3Heed all warnings.
CAUTION
RISK OF ELECTRIC SHOCK
DO NOT OPEN
This symbol indicates that dangerous voltage
constituting a risk of electric shock is present
within your refrigerator.
This symbol indicates that there are important
operating and maintenance instructions in the
literature accompanying your refrigerator.
Introduction
Congratulations on your purchase of a high-quality product.

3
Ice Maker
4Follow all instructions.
5Do not place fingers or hands into the automatic ice making
mechanism while the refrigerator is plugged in. Doing so my expose
you to possible injury.
6Keep your hands away from the ejector mechanism and the heating
element that releases the ice cubes, located on the bottom of the ice
maker.
7Refer all servicing to qualified service personnel. Servicing is required
when the appliance has been damaged in any way, such as the
power-supply cord or plug is damaged, liquid has been spilled or
objects have fallen into the appliance, the appliance has been exposed
to rain or moisture, does not operate normally, or has been dropped.
WARNING
Electric Shock Hazard
Failure to follow these instructions can result in electric shock, re, or
death.
1WARNING–Do not touch the interior of the freezer compartment with
wet hands. This could result in frost bite.
2WARNING–Do not use electrical appliances inside the food storage
compartment of the refrigerator, unless they are of the type
recommended by the manufacturer.
3Unplug the refrigerator before performing user maintenance on it.
4This appliance can be used by children age eight years and older and
persons with reduced physical or mental capabilities or lack of
experience and knowledge if they are given supervision or instruction
concerning the use of the appliance in a safe way and understand the
hazards involved. Children should not play with the appliance.
Cleaning and maintenance should not be performed by children
without supervision.
5If a component part is damaged, it must be replaced by the
manufacturer, its service agent, or similar qualified persons in order to
avoid a hazard.

4
Features
•Produces up to 2.6 pounds of ice a day
•Stores up to six pounds of ice
•Prevents overflow by automatically detecting when storage bin is full
Package contents
Ice maker unit Ice Container Plastic Water
Supply Tubing
Water Valve Plastic Clamp -
Qty 2
Water Inlet Tupe Sealing silicone
piece
Box cover Mounting box Connection plate
Leveling Bracket
Screw
Screws - Qty 5 Screws - Qty 2
Ice Maker

5
Ice Maker
Tools and materials needed
You’ll also need:
•A freezer shelf to hold the ice storage bin. If your model does not have
one, contact your dealer to order one.
•Access to a household cold water line with water pressure between 20
and 120 psi.
The water line kit (including copper tubing and shut o valve) are
available in a kit (#5303917950) from your local hardware or plumbing
supply store.
Installing the ice maker
Your Midea refrigerator comes set up for ice maker installation.
1Unplug the refrigerator from the wall socket.
2Start with the installation of the ice maker system in the box. Take the
upper and lower drawers of the freezer out of the refrigerator. Remove
the small screws on both sides of the guide rail of the freezer
compartment door, and then remove the whole freezer compartment
door with the guide rail support from the guide rail (selection steps for
the pull-out type door body).
Caution
Unplug the refrigerator. To eliminate the danger of electric shock
during installation, you must unplug the refrigerator.
Putty knife Needle nose pliers
or nut driver Adjustable wrench
1/4” OD copper supply
line with compression
nuts and ferrules
Knife
Phillips
screwdriver
Flat blade
screwdriver
Shut off valve
(non self piercing) Water line kit
#5303917950
Electric drill with a
1/4” drill bit

6
3
Ice Maker
Remove the main body of the ice maker, take out the connecting
plate of the water inlet sink from the accessories and insert it into
the main body water inlet sink, and x the clamps (the selection
steps for the refrigerator with the water owing from the top to the
bottom from its internal water outlet port).
Align the connection plate
to the notch to insert it into
the water inlet sink of the
ice maker and insert it
tightly.

7
Ice Maker
4Remove the terminal protection cover in the upper left corner of
the freezer compartment, take out the screw and semi-x it at the
positioning counterbore surface above the left side of the freezer
compartment, then insert the power terminal of the ice maker
main body into the socket with the upper left corner aligned, and
nally suspend the ice maker main body integrally on the
semi-xed screw.
5Correct the space horizontal position for the installation of the ice
maker main body and hold the refrigerator main body tightly in
this position to ensure its verticality. Then tighten the xing screws
of the ice maker main body.
The installation position of
the ice maker is required to
press the side edge and its
orientation is horizontal and
vertical
RESET
CLEAN
ON
OFF
Fixing screws Insert ice maker terminals
Remove the refrigerator
terminal cover

8
6
Ice Maker
After the installation of the ice maker main body, install the freezer
door guide rail back to its position and place the freezer drawers.
Then place the ice container from the accessories according to the
stopper of the freezer drawer to store the ice. The internal
installation of the ice maker box is nally completed.
7Then start the installation of the outside waterway of the ice maker
system. First, peel o the prompt label of the water hole on the
back of the box.
Limit rib
Remove the label
Ice detecting pole
Ice container
Freezer drawer

9
Ice Maker
8Then use the needle nose pliers or other tools to remove the sealed
thermal insulation foam strip in the labeled sewer tube from the
water hole.
9Take out the water tube connector, the sealing silicone piece, the
long water supply tuber and the white head screw from the
accessories. Position the silicone piece by aligning the notch to
x it on the connector, then insert one end of the water supply
tube into the quick change sealing ring at the bottom of the
connector and tighten it. Finally, insert the whole material into the
water inlet on the back of the box, and x the water tube connector
on the box with the long screw in the accessory package.
Clear foam strip
Sealing
silicone
piece
Water tube
connector
Water tube

10
10
Ice Maker
Take out two plastic clamps from the accessories to x the long
water supply tube, x the water tube clamp with screws to the
embedded positioning hole on the back of the refrigerator,
and tighten the screws.
11 Take out the water valve from the accessories, connect the box
terminal with the water valve terminal, use the plastic box and the
box cover in the accessory bag to assemble and close the terminal
connection, use screws to connect the box with the box cover and
tighten these screws (the terminal installation box and the box
cover can be optionally installed, which does not aect the ice
making function).
Install the box
cover and
tighten it with
screws
Wiring harness
plug
Water supply tube
Plastic clamp
Table des matières
Autres manuels Midea Machine à glaçons


