MBM 5009 Manuel utilisateur

Provided By
http://www.MyBinding.com
http://www.MyBindingBlog.com
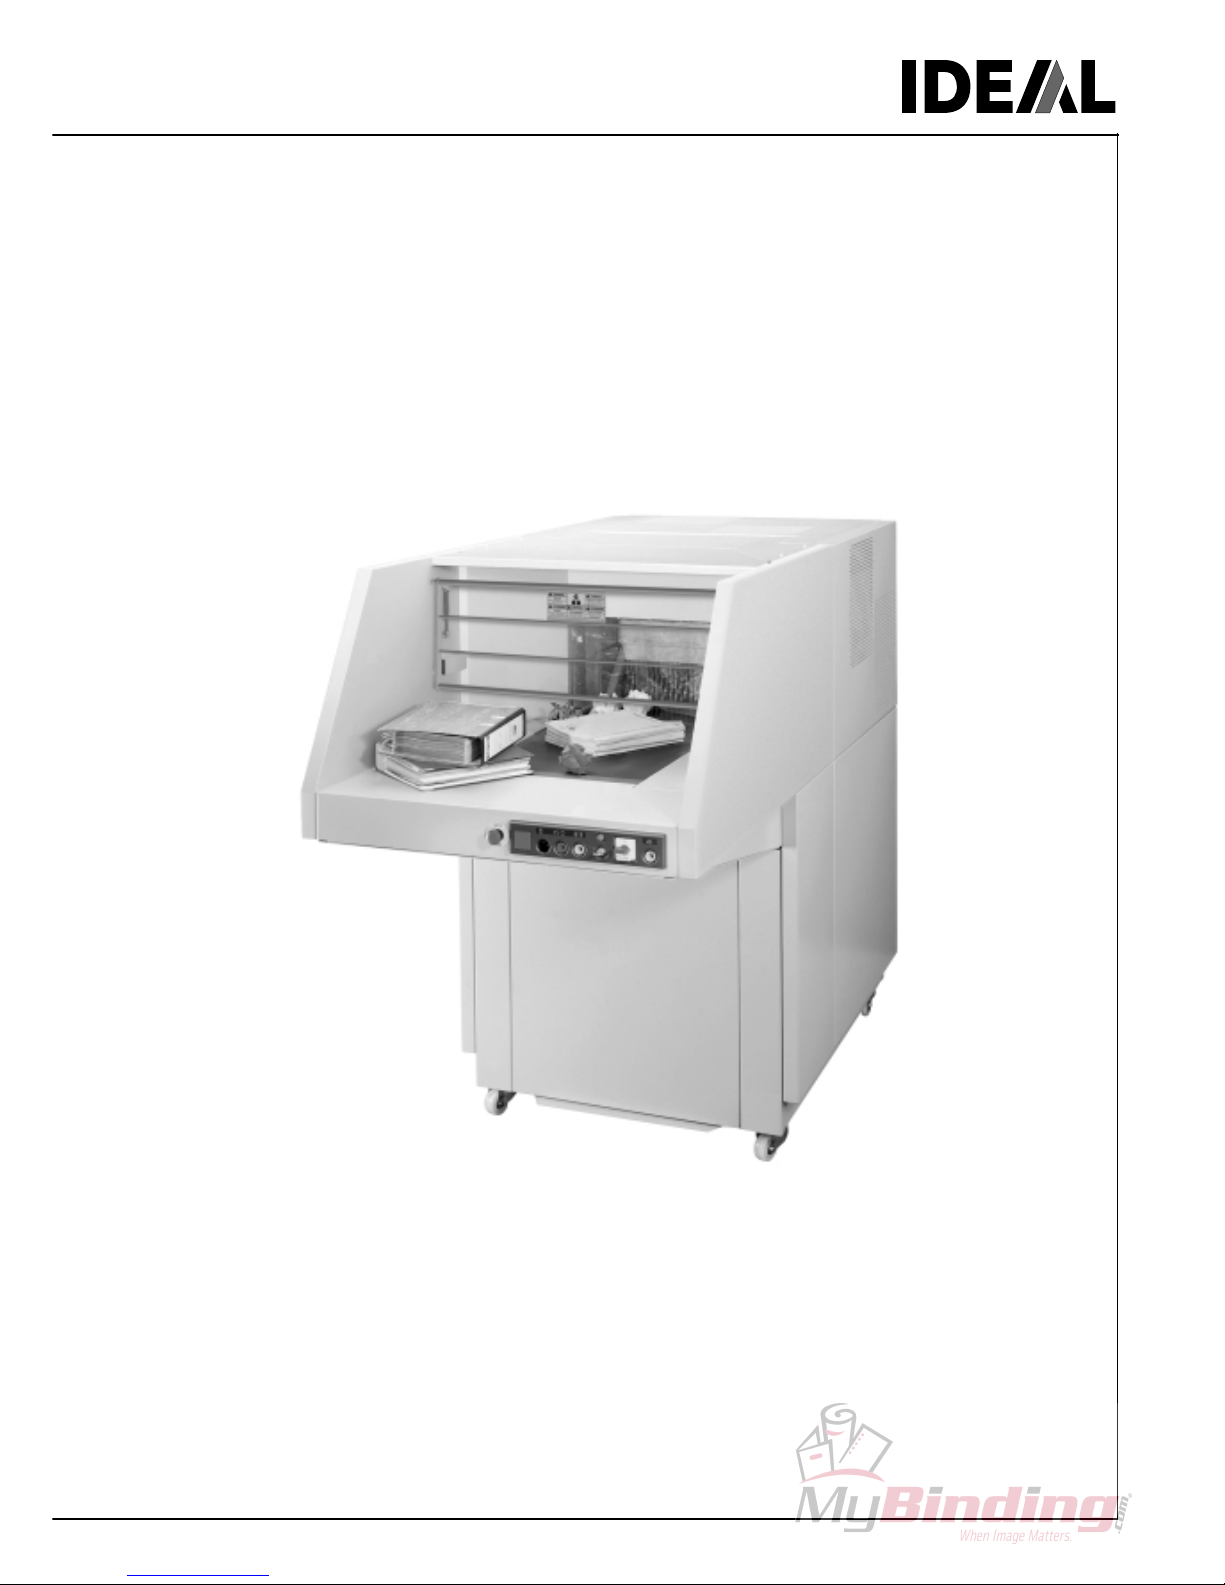
MBM Ideal 5009
Paper Shredder
Instruction Manual
Operating Instructions
Modular conveyor belt system
IDEAL 5009-1
IDEAL 5009-

IDEAL 5009-1 • IDEAL 5009-2

3
Table of contents
1. General ....................................................... 4
1.1 Safety Instructions ...................................... 4
1.2 Application ................................................... 4
2. Installation ................................................... 5
2.1 Transport ..................................................... 5
2.2 Preparing for installation ............................. 6
Waste cart ................................................... 6
Conveyor elt (Accessory) .......................... 6
2.3 Power supply ............................................... 8
2.4 Checking rotating direction ......................... 8
When the machine works in the opposite
direction....................................................... 8
3. Operation .................................................... 9
3.1 Operating elements ..................................... 9
3.2 Starting the machine ................................... 9
Stopping the machine ............................... 10
Yellow pilot light flashes ............................ 10
3.3 Stopping the machine ............................... 10
For short reaks ........................................ 10
For longer reaks ...................................... 10
3.4 Replacing the plastic ag .......................... 11
3.5 Oiling the shredding mechanism............... 11
4. Trou le shooting ....................................... 12
5. Accessories ............................................... 14
6. Technical data ........................................... 14
7. EC-declaration of conformity ..................... 15

4
IDEAL 5009-1 • IDEAL 5009-2
25
1. General
This instruction manual is meant to help you to
operate the machine easily and safely. Please read
these operating instructions efore putting the
machine into operation and o serve the safety
regulations.
1.1 Safety Instructions
Danger!
Non-compliance with the instructions may
endanger persons.
Warning!
Non-compliance with the instructions may
cause damage to the machine.
The operating instructions must al ays be
available for the operator.
1.2 Application
The machine is constructed to shred paper, flat or
crumpled, as well as card oard oxes including
staples. Data security is not guaranteed when
shredding single sheets of paper. Access to the
cutting mechanism is prevented y a grid.
Danger!
The machine may only e operated y
qualified persons.
Do not let children operate the machine.
Danger!
When the main switch is switched on do not
use steps or anything similar when operating
or repairing the machine.
Danger!
Do not shred materials which may loop, liquids
or materials which may explode, chemically
react or splinter.
Warning!
Do not feed large steel components, screws,
nails or hard materials. This will damage the
shredding mechanism.

5
780 mm
660 mm
32 “
27 “
15-01
23
12
2. Installation
The machine is mo ile on castors. The machine
must e installed on a sturdy, dry and level floor.
Danger!
- The machine must not e used outside.
- Do not use in the vicinity of flamma le liquids
or gases.
- Do not use in wet environments.
- Protect the power ca le from extreme heat,
oil, and sharp edges.
Warning!
- Do not cover the ventilation slits © see
picture left.
- Consider the floor loading.
Weight approx. 1200 kg.
2.1 Transport
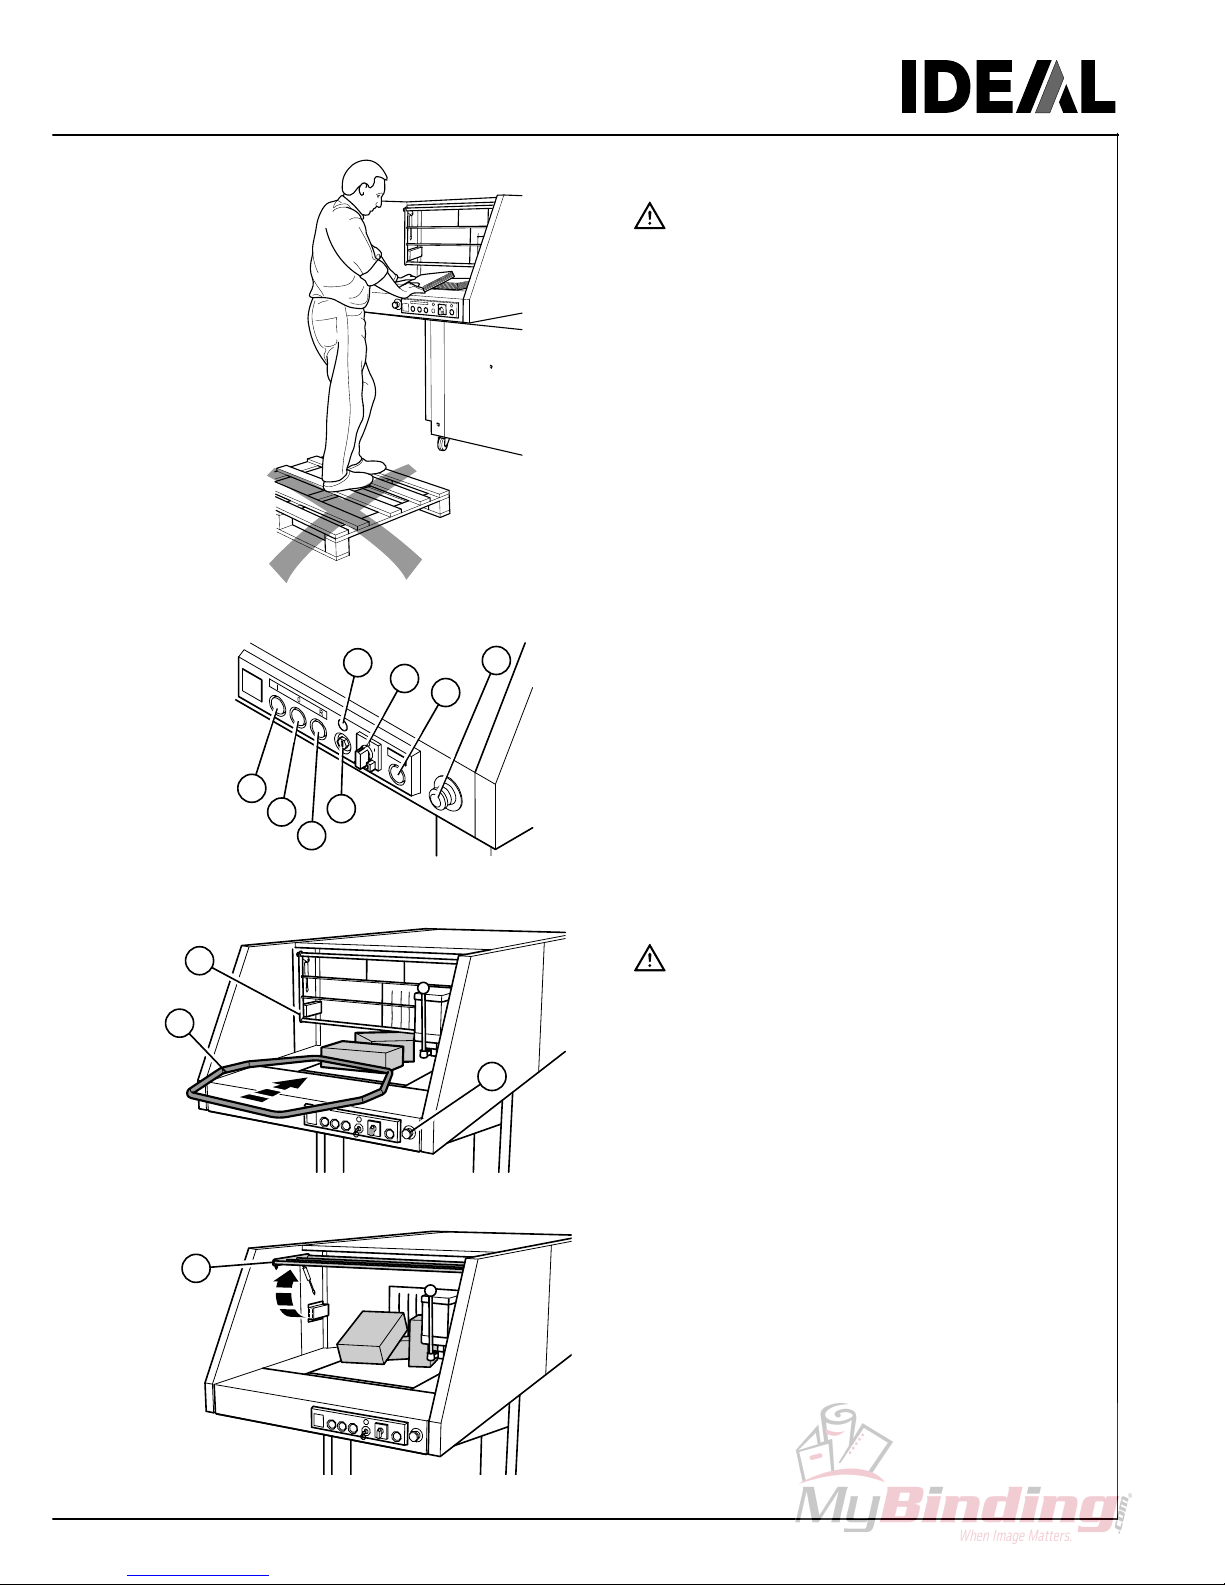
Warning!
Do not lift the machine more than necessary
© risk of tipping.
Warning!
The transport safety device (1) and (2) must
e mounted when the machine is transported
lengthwise. The machine must e transported
from the rear. It is not necessary to mount the
safety device when the machine is transported
from the side.
- Make sure the pallet-jack is centred under the
machine.
6
IDEAL 5009-1 • IDEAL 5009-2
26-01
23 01
1
23 02
2
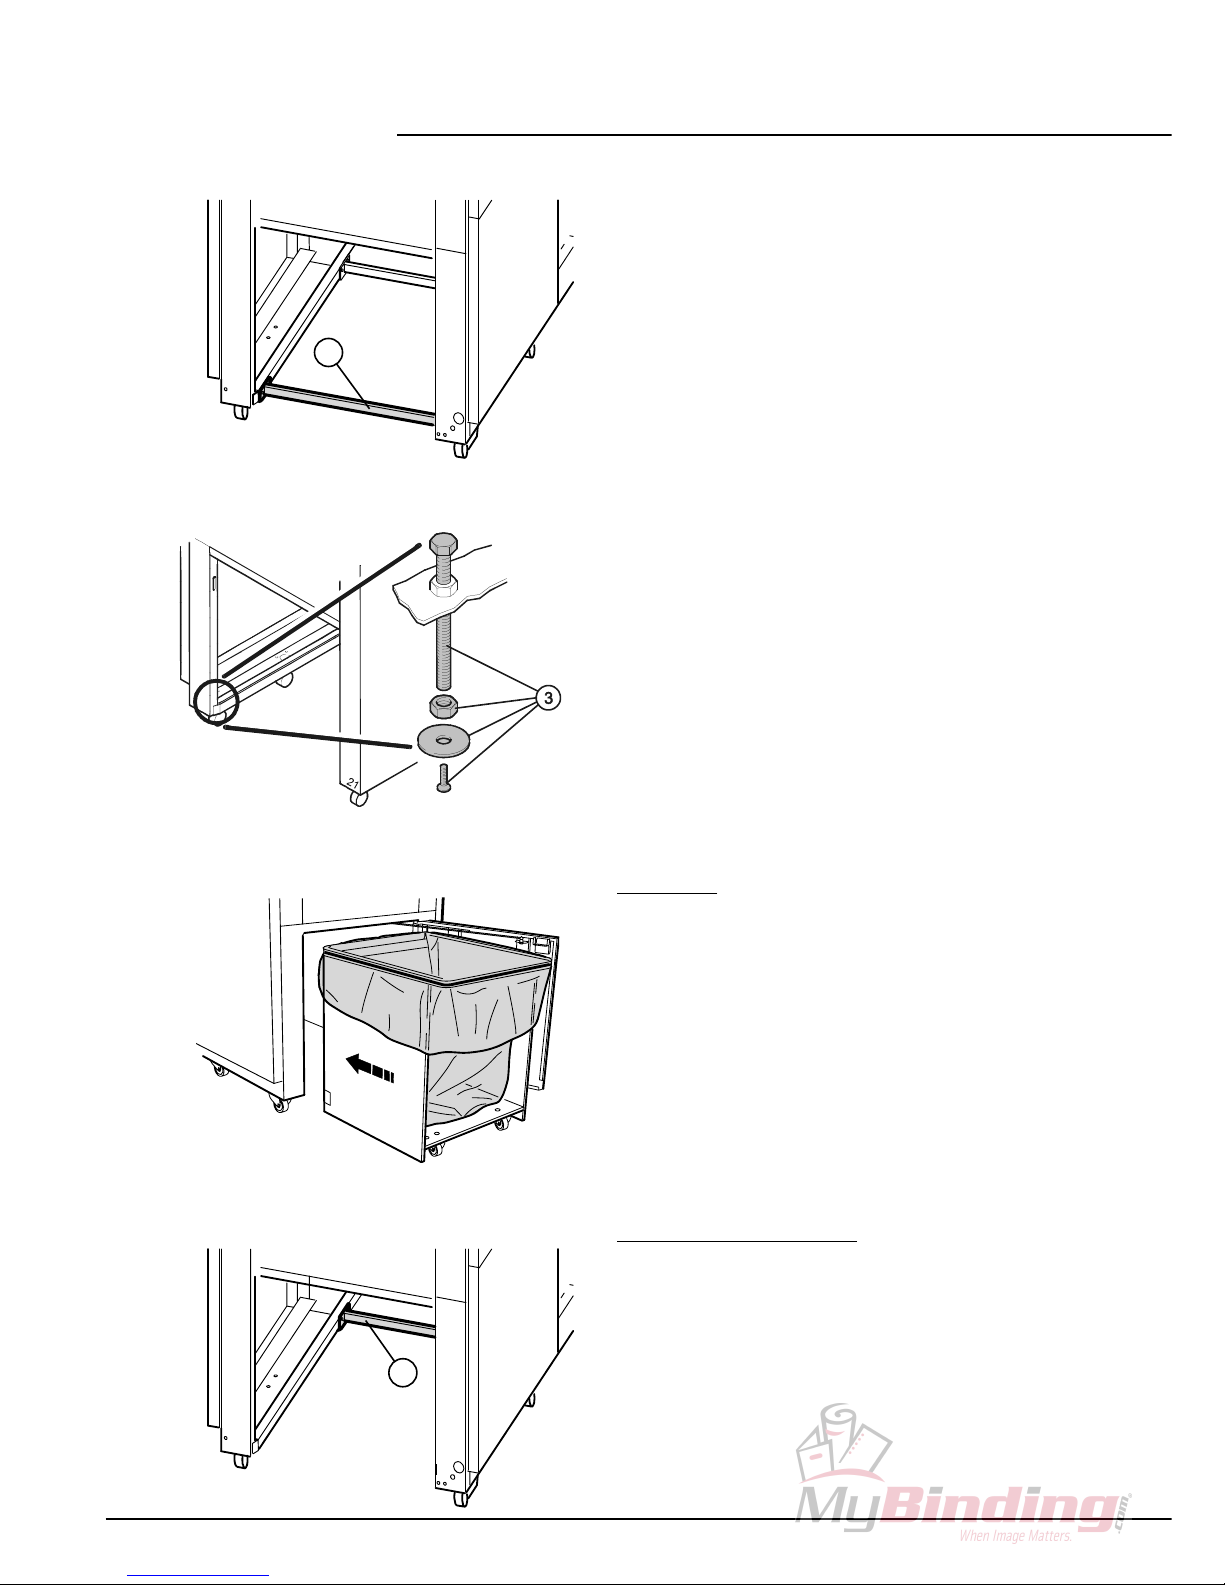
2.2 Preparing for installation
- Open the door.
- Remove the transport safety device (1) and keep
for later use.
- Mount the supporting screws (3).
- Screw down the supporting screws until the rear
castors are alanced.
Waste cart
- Put the plastic ag into the waste cart as
descri ed under “replace ag“.
- Push the cart into the machine, with the open side
facing you, until it touches the uffer.
- Close the door.
Conveyor elt (accessory)
When using a conveyor elt the following
modifications must e made on the machine:
- Remove the transport safety device (2) for the
waste cart.

7
33-01
27
31-01
30-01
4
5
- Remove the springs from the all-ends (4) on
oth sides.
- Dismount the tie- ar (5).
- Push the slide to the ack
- Push ack the conveyor elt into the machine.
- Turn oth handles to lock.

8
IDEAL 5009-1 • IDEAL 5009-2
06-01
2.3 Power supply
The rating plate is located at the rear of the
machine.
- Data stated on the rating plate
- Voltage “V“,
- Frequency “Hz“,
- Power consumption “A“ must correspond to the
values of the power supply unit.
- Earth ire must be available.
- Connect the machine to the mains.
2.4 Checking rotating direction
Operate the machine for a short time as descri ed
under 3. “Operation“.
- The material is transported to the shredding
mechanism y a feeding elt.
Feeding elt runs in the opposite direction.
The machine is wired according to the UEC rotary
field standard. When changing the rotary direction
we recommend that this is performed y an
experienced specialist. The rotary direction may
also e changed y exchanging the “L1“ and “L2“
connections in the plug.
Danger!
Incorrect exchanging of connections may
endanger the operator. If in dou t, this work
should e performed y an electrical specialist.
9
25
05-01
1234
567
8
06-04
15
11
8
32-01
15
3. Operation
Danger!
- When the main switch is switched on do not
use steps or anything similar when operating
or repairing the machine.
- The machine may only e operated y
persons who have read and understood the
operating instructions.
-Do not reach into the running shredding
mechanism! The shredding mechanism
may cause serious injury!
- The machine will only operate when the door
to the machine and the safety grid are
closed.
3.1 perating elements
(1) Start / lack utton
(2) Stop light for “door open“ and “
grid open“ / white utton
(3) Reverse switch and light showing “ ag full“
(4) Key switch
(5) Stand y / green light
(6) Main switch
(7) Temperature indicator / yellow pilot light
(8) Emergency off
3.2 Starting the machine
Danger!
Do not shred any material which may loop or
splinter. Material not caught y the shredding
mechanism must e pushed with the pusher
(11). In case of danger, press emergency off
utton (8).
- Main switch (6) to position “I“.
- Emergency utton (8) must e unlocked.
- Grid (15) must e closed.
- Turn key switch (4) to the right
© stand y (5) illuminates.
- Press and release the lack utton (1)
© conveyor elt is running.
- Distri ute the paper over the whole width of the
feeding elt.
- The grid (15) can e lifted to remove jammed
paper.
Ce manuel convient aux modèles suivants
1
Table des matières
Autres manuels MBM destructeur de papier


Manuels destructeur de papier populaires d'autres marques

Swingline
Swingline STACK-AND-SHRED200X&200XL 60X Mode d’emploi

GBC
GBC ShredMaster CC055 Manuel utilisateur

UNITED OFFICE
UNITED OFFICE UAV 190 A1 Manuel utilisateur

UNITED OFFICE
UNITED OFFICE UAV 190 A1 Manuel utilisateur

Rexel
Rexel Optimum AutoFeed+ 45X Manuel utilisateur

Martin Yale
Martin Yale 227284S1 Manuel utilisateur


