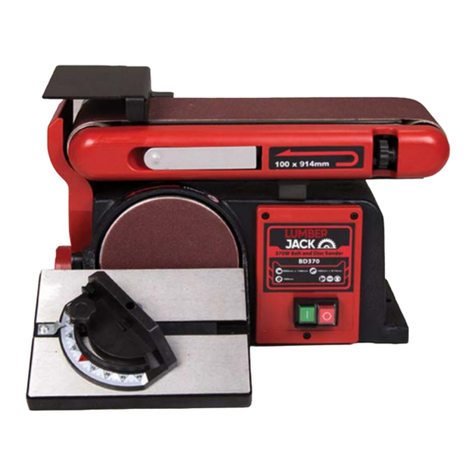
Lumberjack DS305 Manuel d'installation

DS305
305mm Disc Sander
DS305
SAFETY AND OPERATING MANUAL
O
RIGINAL INSTRUCTIONS

DS305
TABLE OF CONTENTS
Welcome to Lumberjack!
Dear Customer, Congratulations on your purchase. Before using the
product for the first time please be sure to read these instructions for use.
They provide you with all information necessary for using the product safely and to
ensure its long service life.
Closely observe all safety information in these instructions!
General Power Tool Safety Warnings………………………………….…......01
Symbols & Cable Rating Chart ……….…………………………………….………05
Machine Details and Product Features……….…………………………….….06
Assembly…………………………………………………………………………………….7-8
Operation, Maintenance and Service…………………………………….........9
Lumberjack Guarantee………….………………………………………………..11-12
Declaration of Conformity……………………………………………………………12
Parts List…………..………………………………………………………………………...13
Parts Diagram………………………………………………………………………………14

DS305
01
GENERAL POWER TOOL SAFETY WARNINGS
WARNING Read all safety warnings and
all instructions. Failure to follow the warnings
and instructions may result in electric shock, fire
and/or serious injury.
Save all warnings and instructions for
future reference. The term "power tool" in
the warnings refers to your electric (corded)
power tool or battery-operated (cordless) power
tool.
1. Work area safety
a) Keep work area clean and well lit. Cluttered
or dark areas invite accidents.
b) Do not operate power tools in explosive
atmospheres, such as in the presence of
flammable liquids, gases or dust. Power tools
create sparks which may ignite the dust or
fumes.
c) Keep children and bystanders away while
operating a power tool. Distractions can cause
you to lose control.
2. Electrical safety
a) Power tool plugs must match the outlet.
Never modify the plug in any way. Do not use
any adapter plugs with grounded power tools.
Unmodified plugs and matching outlets will
reduce risk of electric shock.
b) Avoid body contact with grounded surfaces,
such as pipes, radiators, ranges and
refrigerators. There is an increased risk of
electric shock if your body is grounded.
c) Do not expose power tools to rain or wet
conditions. Water entering a power tool will
increase the risk of electric shock.
d) Do not abuse the cord. Never use the cord for
carrying, pulling or unplugging the power tool.
Keep cord away from heat, oil, sharp edges or
moving parts. Damaged or entangled cords
increase the risk of electric shock.
e) When operating a power tool outdoors, use an
extension cord suitable for outdoor use. Use of a
cord suitable for outdoor use reduces the risk of
electric shock.
f) If operating a power tool in a damp location is
unavoidable, use a residual current device (RCD)
protected supply. Use of an RCD reduces the risk
of electric shock.
3. Personal safety
a) Stay alert, watch what you are doing and use
common sense when operating a power tool. Do
not use a power tool while you are tired or under
the influence of drugs, alcohol or medication. A
moment of inattention while operating power
tools may result in serious personal injury.
b) Use personal protective equipment. Always
wear eye protection. Protective equipment such
as dust mask, non-skid safety shoes, hard hat, or
hearing protection used for appropriate conditions
will reduce personal injuries.
c) Prevent unintentional starting. Ensure the
switch is in the off position before connecting to
power source and/or battery pack, picking up or
carrying the tool. Carrying power tools with your
finger on the switch or energising power tools that
have the switch on invites accidents.
d) Remove any adjusting key or wrench before
turning the power tool on. A wrench or a key left
attached to a rotating part of the power tool may
result in personal injury.

DS305
02
GENERAL POWER TOOL SAFETY WARNINGS
e) Do not overreach. Keep proper footing and
balance at all times. This enables better control
of the power tool in unexpected situations.
f) Dress properly. Do not wear loose clothing or
jewellery. Keep your hair, clothing and gloves
away from moving parts. Loose clothes,
jewellery or long hair can be caught in moving
parts.
g) If devices are provided for the connection of
dust extraction and collection facilities, ensure
these are connected and properly used. Use of
dust collection can reduce dust-related hazards.
4. Power tool use and care
a) Do not force the power tool. Use the correct
power tool for your application. The correct
power tool will do the job better and safer at the
rate for which it was designed.
b) Do not use the power tool if the switch does
not turn it on and off. Any power tool that
cannot be controlled with the switch is
dangerous and must be repaired.
c) Disconnect the plug from the power source
and/or the battery pack from the power tool
before making any adjustments, changing
accessories, or storing power tools. Such
preventive safety measures reduce the risk of
starting the power tool accidentally.
d) Store idle power tools out of the reach of
children and do not allow persons unfamiliar
with the power tool or these instructions to
operate the power tool. Power tools are
dangerous in the hands of untrained users.
e) Maintain power tools. Check for misalignment
or binding of moving parts, breakage of parts and
any other condition that may affect the power
tool’s operation. If damaged, have the power tool
repaired before use. Many accidents are caused
by poorly maintained power tools.
f) Keep cutting tools sharp and clean. Properly
maintained cutting tools with sharp cutting edges
are less likely to bind and are easier to control.
g) Use the power tool, accessories and tool bits
etc. in accordance with these instructions, taking
into account the working conditions and the work
to be performed. Use of the power tool for
operations different from those intended could
result in a hazardous situation.
5. Service
a) Have your power tool serviced by a qualified
repair person using only identical replacement
parts. This will ensure that the safety of the power
tool is maintained.
b) If the replacement of the supply cord is
necessary, this has to be done by the
manufacturer or its agent in order to avoid a
safety hazard.

DS305
03
GENERAL POWER TOOL SAFETY WARNINGS
6 Additional Warnings for Bench Grinder
a) Firmly bolt the grinder to a work bench or leg
stand at approximately hip height.
b) Never reach to pick up a workpiece, a piece of
scrap, or anything else that is in or near the
grinding path of the wheel.
c) Avoid awkward operations and hand
positions where a sudden slip could cause your
hand to move into the wheel. Always make sure
you have good balance.
d) Never stand or have any part of your body in
line with the path of the wheel.
e) Do not turn the motor switch on and off
rapidly. This could cause the wheel to loosen
and could create a hazard. Should this ever
occur, stand clear and allow the wheel to come
to a complete stop. Disconnect your grinder
from the power supply and securely retighten
the wheel nut.
f) Use only flanges furnished with this bench
grinder.
g) If any part of this grinder is missing or should
break, bend, or fail in any way, or should any
electrical component fail to perform properly,
shut off the power switch, remove the machine
plug from the power source and have damaged,
missing, or failed parts replaced before resuming
operation.
h) Do not overtighten the wheel nut. Excessive
tightening can cause the wheel to crack during
operation.
i)
Always use the grinder’s wheel guards and
safety shields.
j ) Inspect grinding wheel for visible defects. Check
the wheel for fissures and cracks, and test for
normal operation prior to use. Replace cracked
wheel immediately.
k) Adjust distance between wheel and work rest
to maintain 1/16 in. or less separation as the
diameter of the wheel decreases with use. The
value of separation used in the marking is to be
the separation recommended by the manufacturer
but shall not be more than 1/8 in.
l) Always ease the workpiece against the abrasive
wheel when starting to grind. A harsh impact can
break the wheel. Use light pressure when starting
to grind; too much pressure on a cold wheel can
cause the wheel to crack.
m) Never start the grinder when the wheel is in
contact with the workpiece.
n) Secure work. Always hold workpiece firmly
against the work rest.
o) Do not use the bench grinder if the flange nut
or clamp nut is missing or if the spindle shaft is
bent.
p) Frequently clean grinding dust from beneath
grinder.
q) Secure long hair so it is above shoulder level to
prevent entanglement in any rotating parts.
r) Stay alert and exercise control. Watch what
you are doing and use common sense. do not
operate tool when you are tired. do not rush.

DS305
04
GENERAL POWER TOOL SAFETY WARNINGS
s) Do nottouch the cut material until it cools or
you can be burned.
t) If the power supply cord is damaged, it must
be replaced only bythe manufacturer or by an
authorisedservice centre to avoid risk.
u)Make sure the grinder issecurely mounted as
described in the assembly instructions before
connecting the tool to apower supply.
w) Save these instructions. Refer to them
frequently and use to instruct other users. If you
loan someone this tool, loan them these
instructions also.
7. Using an Extension Cable
.
a) If an extension cable is required, use an
approved triple core extension cable suitable for
the power input of the tool.
b) Grounded tools always require a three wire
extension cable.
c) As the distance from the supply outlet
increases you must use a heavier gauge extension
cable. Using extension cables with inadequately
sized wire causes a serious drop in voltage,
resulting in loss of power and possible tool
damage.
d) The smaller the gauge number of the wire the
greater the capacity of the cord.
f) When using a cable reel, always unwind the
cable completely.

DS305
05
SYMBOLS AND POWER RATING CHART
Danger! – Read the operating
instructions to reduce the risk of
injury.
Caution! Wear safety goggles.
Caution! Wear eardefenders.
Caution! Risk of Injury! Do
not reach into the running
saw blade.
Caution! Wear a dust mask.

01010101
06
MACHINE DETAILS AND PRODUCT FEATURES
Machine Details
Specifications:
Rated Voltage: 240V~
Motor Power: 900W
No Load Speed: 1490rpm
Frequency: 50Hz
Disc Size: 305mm
Table Tilt: 0 - 45°
Table Size: 417 x 174mm
Nett Weight: 35kg
Gross Weight: 37kg
DS305
This 305 mm disc sander is ideal for
finish fitting, altering bevel angles,
sanding
convex curves - ‘to the line’, and sanding
end grain, without burning etc.
The machine is provided with a work
table which is capable of tilting to 45
degrees, and a mitre gauge, in which the
work may be held, and which
moves in a mitre gauge slot, parallel to
the disc. The mitre gauge is capable of
adjustment to 60 degrees. The table
must ALWAYS be perfectly secure before
starting work.
Considerable dust is produced when
using this machine and it is most
important that a suitable face mask is
worn at all times. We also strongly
recommend that a dust extractor is fitted
to the outlet provided, and used at all
times.
If you are not familiar with sanding
machines, it is strongly recommended
that you consult a qualified person, or
obtain relevant tutorials. Like all power
tools, this machine can be extremely
dangerous in the wrong hands or if used
incorrectly. Used correctly however, it is
a highly efficient and intensely labour
saving device.

DS305
07
ASSEMBLY INSTRUCTIONS
Your disc sander is fully assembled, except for the dust extraction and the
mitre gauge.
POSITIONING THE SANDER
Install the machine on a solid base, one that will not move easily. Ensure that
the machine is horizontal and perfectly stable.
Alternatively, the rubber feet may be removed and the machine bolted
directly to a solid workbench. This avoids the possibility of the machine moving
when in use.
BEFORE FIRST USE
Wipe the table surface with a rag moistened with white spirit to remove any
transportation lacquer.
ADJUSTING THE WORK TABLE
1. Adjust the work table to the
desired angle by slackening
the two table clamps, one
either side,
2. Move the table to the
required angle.
3. Retighten the clamps.
The clamps are spring
loaded. Turn the lever
clockwise to clamp, as far
as possible.
Then pull the lever out
against spring pressure
which allows the lever to
be turned anticlockwise
without unclamping.
Allow the lever to spring inwards again, then proceed to turn
it clockwise once more.
NOTE: Repeat the process until the table is securely clamped.....but DO NOT overtighten,
otherwise damage to the mechanism will occur.

08
ASSEMBLY INSTRUCTIONS
DS305
MITRE GAUGE
If the angle is critical, a mitre gauge
should be used between the table
and disc to ensure accuracy. For right
angles, simply slide a square on the
table, up to the disc, and adjust
accordingly. The angle should be
correct when slight pressure is placed
on the table.
For greater accuracy, the mitre gauge
is used so that the work may be held
at a required angle and moved across
the disc as shown.
Use a slight pressure ONLY... let the
disc do the work. Pressure should be
on the DOWNWARDS direction of
motion of the disc ONLY. i.e. on the
left half of the disc as shown.
NOTE: Applying the workpiece to
the right hand side of the
disc may cause kickback.
Table des matières
Autres manuels Lumberjack Sander

Lumberjack
Lumberjack XP Series Instructions de fonctionnement

Lumberjack
Lumberjack EBS100 Manuel utilisateur

Lumberjack
Lumberjack EBS76 Manuel d'installation

Lumberjack
Lumberjack EBS100VS Manuel d'installation

Lumberjack
Lumberjack OSS500 Manuel d'installation

Lumberjack
Lumberjack BD370 Manuel d'installation

Lumberjack
Lumberjack BD370 Manuel utilisateur

Lumberjack
Lumberjack DS460VS Manuel d'installation

Lumberjack
Lumberjack BD370 Manuel d'installation

Lumberjack
Lumberjack PS240 Manuel d'installation