Lok8u nu.m8 Manuel utilisateur

1
User Guide
Introduction
Thank you for purchasing nu•m8; the world‟s first location device specifically designed to be worn
by children.
It is my hope that nu•m8 will make parents feel more comfortable in allowing their children to play
un-supervised, so that “kids can be kids” and enjoy the benefits of being free to interact with their
peers through unstructured play.
I know, like you, that the social environment in which our children are growing up can, at times, be
perilous and therefore we all want to make sure our children are safe and free from harm.
nu•m8 does not make the environment safer but will allow you to know where your children are,
control the areas in which they play and be the first to know if they are at risk.
Please read this simple user guide carefully to get the best out of your nu•m8 and remember it is
an aid to parental care and control; it must not be regarded as a substitute.
As a parent myself, it was the urge to keep my children safe, whilst letting them enjoy the freedom
of childhood that I enjoyed that spurred the development of nu•m8.
I know that it will live up to your expectations but if there are any suggestions that you think would
be sensible to incorporate I will give them my full attention. I can be contacted at
stevenksalmon@lok8u.com.
S.K.Salmon
Chief Executive

2
Contents
Getting started .....................................................................................................................3
Start-up................................................................................................................................6
Time.....................................................................................................................................8
Using the Customer Portal...................................................................................................9
Where are you request ......................................................................................................12
Maximise map....................................................................................................................17
Set, apply and edit a „Safe Zone‟ .......................................................................................19
Removing nu•m8 without triggering an alert ......................................................................29
Live Track ..........................................................................................................................32
Alerts..................................................................................................................................34
Home Zone ........................................................................................................................37
My details...........................................................................................................................38
Calendar ............................................................................................................................39
Waterproof .........................................................................................................................40
Certification........................................................................................................................41
Product Information ...........................................................................................................43
APPENDIX ONE (i)............................................................................................................45
APPENDIX TWO (ii) ..........................................................................................................46

3
Getting started
Remove nu•m8 from its packaging and place it on charge using the supplied desk top charger for a
full 8 hours before use. The red LED will illuminate whilst nu•m8 is charging. This will be replaced
by the green LED illuminating when nu•m8 is fully charged. The green LED light may illuminate
faster than quoted above but we still advise that you charge it the full 8 hours to ensure that the
battery is fully topped up.
Whilst there may be some residual charge from manufacture it is not
safe to use nu-m8 until it is fully charged, as described above.
Please go to www.lok8u.com/uk/portal and click “register me” to
register your nu•m8 and enable the incorporated sim card to be
activated.
Doing this will allow nu•m8 to broadcast its location to the Lok8u
pinpoint server infrastructure whilst in use.
You will receive an email confirming that the sim card has been activated, together with the phone
number of your nu•m8, within a maximum of 24 hours from registration. It will then be ready for
use.
Log-in page
Registration

4
To complete the registration process you will need:-
the serial number of your nu•m8, (found on the base of the packaging)
gift certificate number (if applicable)
a valid debit or credit card registered at your address
the telephone number of the mobile phone, and email address that you want to receive
alerts to as primary contact
A digital photograph of your child, or other image, if you want to upload it to your part of the
customer portal, maximum size 200kb
Select the required subscription tariff (to select the subscription that is most appropriate for
your planned use of Nu•m8. Please refer to http://www.lok8u.com/uk/order-now for the
available options.)
It can take up to 24 hours to activate the sim. Once this has been completed you will
receive an email confirming that the sim card has been activated together with the phone
number of your nu-m8.
Once you have received this email you can then activate nu•m8.
To do this you MUST switch it on by inserting the strap in to the housing whilst the watch is
off the wrist and click the re-set switch with the tool provided in the charger base. (The re-
set switch is found on the back plate next to the gold charging pins).
nu•m8 will then go through its activation process and log on to the mobile phone network.
(Please note that it may be necessary to take nu-m8 outside to enable this process to
complete)
When this has happened the time will display on the screen. “See Start” up (page 4)
IT IS CRITICAL THAT IN ORDER TO COMPLETE THE ACTIVATION PROCESS THE
FOLLOWING 2 STEPS ARE FOLLOWED.
Go to the Portal and click the “Switch Off” button to turn nu•m8 off. When this
action has completed the “Off” button on the Portal will be filled and the display on
nu•m8 will be blank.
Device details

5
Now disconnect the strap from the housing using the tool provided.
nu•m8 is now ready for normal use.
You can now adjust the strap to fit your child‟s wrist. Use the release tool located in the
back of the charger base to un-do and re-do the locking screw in the strap. It is important
that the strap is tight enough so that it cannot be slipped over the hand, but not so tight that
it is uncomfortable.
The strap is adjusted as follows:-
Your nu•m8 is now ready to be used. Simply place it around your Childs wrist and lock the
open end of the strap in to the body of the nu•m8.

6
Start-up
PLEASE NOTE
We recommend that you ensure that the time has displayed on nu-m8 before you let your
child out to play. This is a visible indication that nu-m8 is connected. If you have poor
network coverage at home this process may not complete.
However, nu-m8 will connect as coverage improves, which may be as close as the end of
the street, so when you are comfortable that nu-m8 completes its log on within close
proximity of home it will not be necessary for the time to display before you let your child
out to play.
nu-m8 defaults to GMT. When you turn nu-m8 on it may show a discrepancy of one hour. To adjust
the time see “Time” Page 5.
Place nu•m8 around your child‟s wrist and push the strap to lock it in place. nu•m8 will go through
an automatic start-up process to check the status of the core functions of the product (GPS, GSM,
battery, valid subscription) and update any status changes that you have recently made on the
portal, such as alert information, Safe Zone etc. This is shown by a message “Loading Zone 1” and
a black bar moving around the four sides of the LCD display.
When this process is completed the time will appear as a digital clock display.
To adjust the clock settings see “Time” (page 5)
If the clock does not appear nu•m8 is not connected to the
network. The most common reason for this is poor mobile
phone coverage. If you take your child outside this will
help it to acquire the necessary signal strength. Once
coverage is established nu-m8 will hold the signal even in
areas where it couldn‟t get signal at boot-up.
If you have taken nu•m8 off your child during the
start up sequence the watch will think it is in
'Bracelet Compromise' and go in to “Live Track”.
You will be notified by a bracelet compromise
SMS and the portal will show a strap alert. It will
be necessary to turn nu•m8 'Off' using 'Switch
Off' from the portal or texting 'Off' from the
approved mobile phone and wait for the screen to go blank on nu-m8 You should then
initiate the start up process again.
If you have taken nu•m8 off during the start up process and don‟t get a bracelet
compromise alert then re-insert the strap in to the housing and gently press the re-set
button on the back plate.
nu•m8 will then go through the start up process again.

7
When the clock appears on the screen nu•m8 has logged on to the mobile phone network
and you must now go to the Portal and send nu•m8 the 'Switch Off' command.
When this has been processed and the Portal has updated showing nu•m8 is off ('Off'
checked in the right hand status panel) release the strap from the housing, using the tool
supplied, and nu•m8 is ready to be placed on your child and the start up sequence re-
commenced.
Subscriptions: If nu•m8 is out of subscription it will not operate and should be removed from your

8
Time
The time can only be adjusted from the mobile phone set to receive alerts.
This will be the primary contact details given at registration. (To change the alerts please see the
“Alerts” section below.)
Clock display
The nu•m8 display can be adjusted to show:-
Analogue watch or
12 hour digital or
24 hour digital.
To set analogue watch - text “clock”
To set 12 hour digital - text “12”
To set 24 hour digital - text “24”.
Setting the time
To correct the time text “time+(hour)”, or “time-(hour)”to NU•M8
e.g. if the actual time is 9.00am and nu•m8 shows 8.00 am text “time+1” to nu•m8.

9
Using the Customer Portal- www.lok8u.com/uk/portal
To use the customer portal please log in using the user name and password that were chosen at
registration
The first screen that appears is shown below. Simply click the red cross and the next screen will
appear. (If you do not want this pop up screen to appear again tick the box at the bottom before
navigating away from the pop up box).

10
You are now ready to interact with nu•m8 using the functionality that is described in the
following sections of this manual.
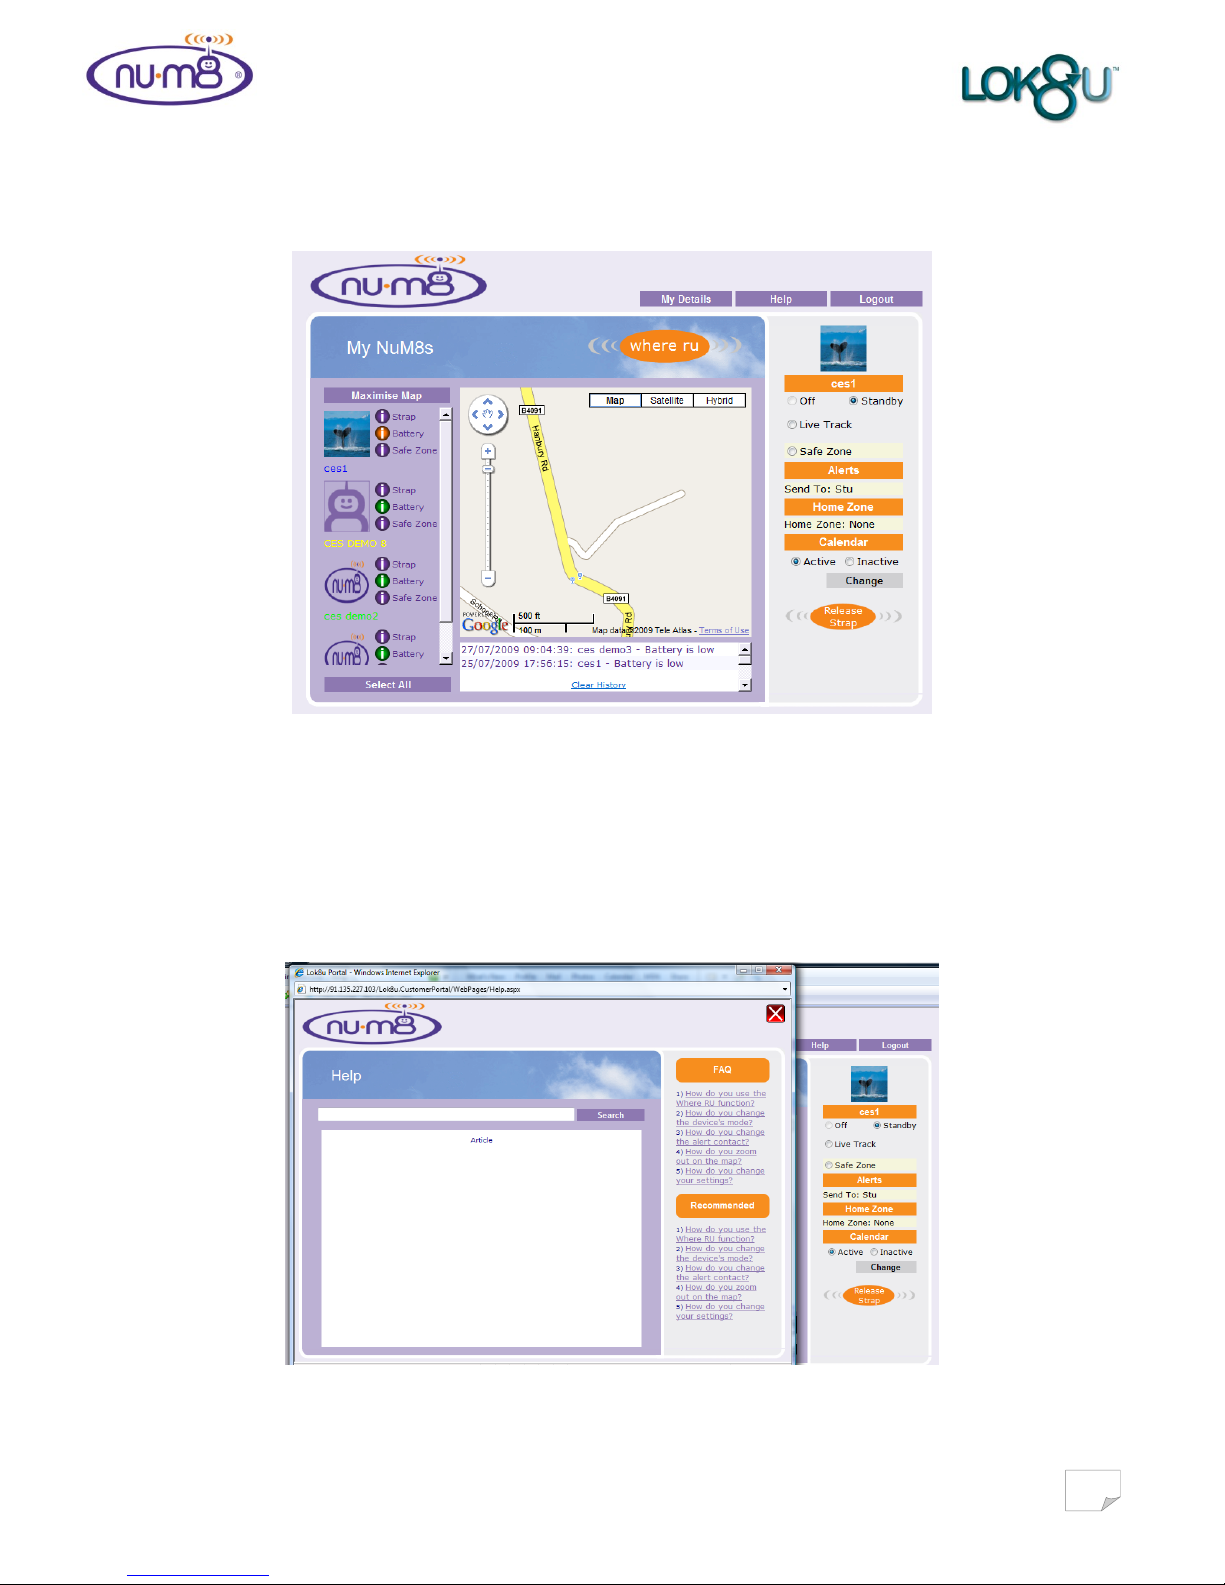
If at any time you need assistance just click the “Help”button and the following screen will
appear. Simply select the article that deals with your query or just type your query in to the
search box.
Table des matières
Autres manuels Lok8u GPS