LINKED LY14 Manuel utilisateur
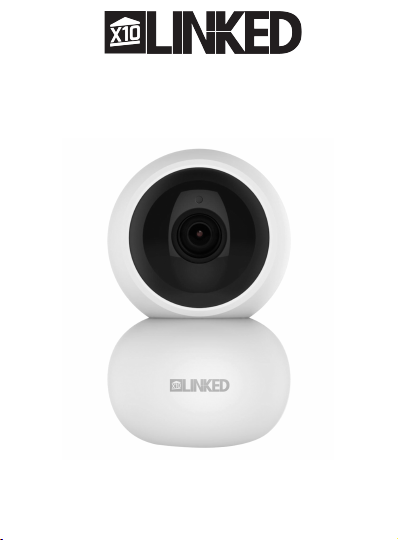
Pan and Tilt
LY14 User Manual
Before using this product, please read the guide carefully to avoid
any damages to the product, do not misconfiguration or misuse.
Pan and Tilt
LY14 User Manual
Beforeusing this product, please read the guide carefully to avoid
any damages to the product, do not misconfiguration or misuse.
1. Product Description
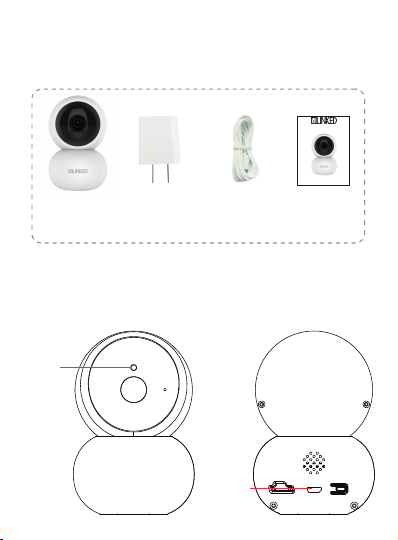
1.1Packing list
Camera User manualUSB cable
*Pictures are only for reference.
1.2 Product outlook
Adapter
IR cut
USB port
-2-
2. Installation
2.1 App installation
For iPhone users:
Open the App Store and search for “X10 Linked”
Download and install the Linked app onto your iPhone.
For Android phone users:
Open the Google Play Store and search for “X10 Linked”
Download and install the Linked app onto your Android
phone.
2.2 Device Hardware installation
Connect the power supply to the camera device, then wait
for the indicator light to flash.
X10 Linked
For AndroidFor iOS
-3-
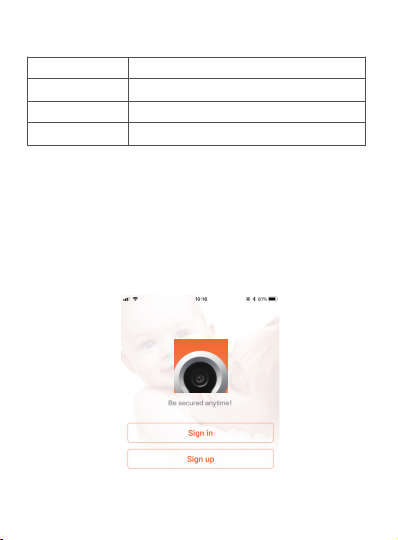
1. After opening the app for the first time, register your
account by clicking ‘sign up’ and enter the email address.
a. Click "Send code", your email will receive a verification
code, enter the code within 30 minutes.
b. Input the password twice, click "Register immediately".
c. Your login information will be saved the next time you
open the app; however, it is recommended that you write
your login information down.
Different LED colors correspond to different
camera status:
Blue
Slow blue flash
Fast blue flash
Solid blue
System start up
Syncing mode
Connecting to Wi-Fi
Camera working properly
2.3 User Account Registration
-4-

Click Add Camera button, click on ‘connecting my camera’
Step 1: Check to see if the front LED light is flashing: After
powering on the camera, the LED light should be flashing
blue, click on ‘Next’ and proceed to Step 2.
Step 2: Connect to your wifi network(802.11 b/g/n 2.4GHz):
a. Find your wireless network in the first field. You can
select ‘Other’ if you do not see your wireless network.
b. Enter your Wi-Fi password. If your wireless network does
not have a password, click on the ‘No Wi-Fi password’ box.
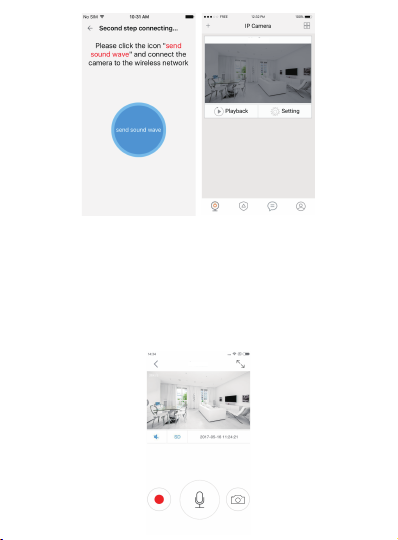
Then click ‘Next’, select your timezone.
c. Follow the instructions on the screen and move your phone
speaker close to the camera’s microphone. Before doing so,
make sure you are in a quiet environment without any noise
interference and make sure your phone is not on silent. Then
click ‘send sound wave’.
d. You will hear a scrambled sound being played from your
phone. Keep your phone still and wait for the duration of the
transmission, before you move your phone away. Afterwards,
the voice prompt will indicate that the binding was successful
and the app will redirect to the camera view interface
automatically.
e. If you do not hear the voice prompt say, ‘binding
successful’, you can try again by clicking the ‘Send sound
wave’ or click on the hyperlink and follow the instructions.
2.4 Camera Device and Phone Synchronization
-5-
3. App functions
3.1 Live video
After syncing successfully, click the IP Camera interface to view
live video. Smooth, SD and HD video definition are available.
X10 Linked
3.2 Video Recording
3.2.1 Users can record video on live video interface , by pressing
the red video recording icon on the left, refer to photo below.
The recorded video will be stored in the album on the
homepage of app.
X10 Linked
-6-
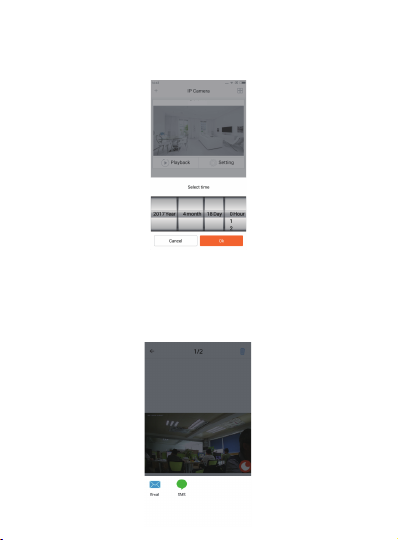
3.2.2 Playback: Click “Playback” icon and choose the time to
replay the video recorded in the MicroSD card.
Select the date and time you wish to playback. You can fast
forward/backward by swiping on the time bar. Tap on the
camera icon to take a screen shot while replaying the video.
Refer to photo below.
3.3 SNAPSHOT SHARING
Our camera provides a function that shares any snapshot
photos to Email/SMS, etc. To access snapshots, please follow
same directions as accessing your video recording explained
under playback feature, choose the photo you want to share
and the platform you want to share it from as indicated in Figure 1.
X10 Linked
Figure 1
-7-
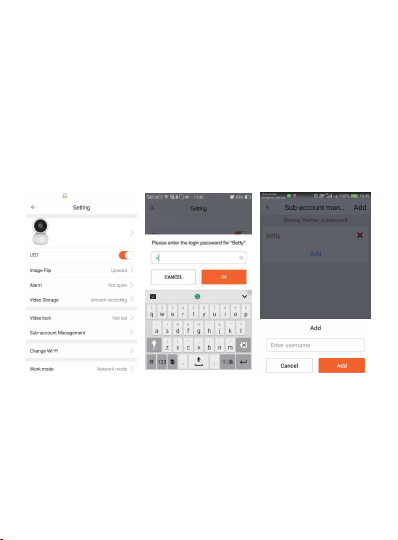
3.4 SUB-ACCOUNT MANAGEMENT
Sub-Accounts gives you the option to allow for multiple users live
access to the same camera. Each camera can support up to 15 live
viewer accounts (including the Administrator account). The
administrator can add and delete sub-accounts by using
Sub-Account Management function. Refer Figures 2, 3 & 4
below.
New sub-accounts can be setup by clicking on the “Add” button.
Note: Please follow the same procedure under user account
registration in page 2 to register and verify the email address
you are willing to add as a sub-account prior to adding it as new
sub-account.
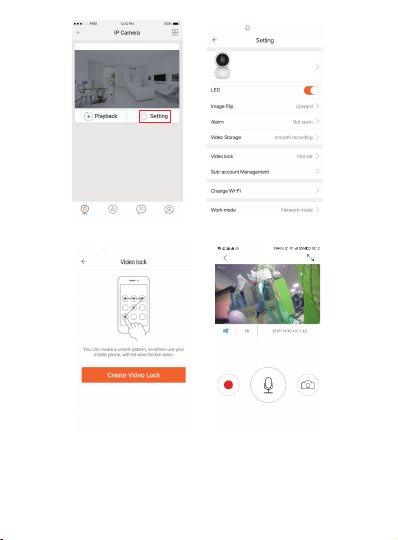
3.5 VIEWING LOCK
This function allows the user to watch live video and replay
videos only after a password has been setup.
1) To set up, click on the ‘Setting’ button in the IP camera
page as indicated in Figure 5 & 6 below.
2) In the Setting screen, tap on the ‘Video Lock’ button
[defaulted to ‘Not Set’] as indicated in Figure 7 below.
3) Then enter a password that you can remember.
Figure 2 Figure 3 Figure 4
X10 Linked
-8-
X10 Linked
Figure 5 Figure 6
Figure 7 Figure 8
X10 Linked
3.6 TWO WAY AUDIO
When you are viewing camera, you can press the “Microphone
Icon” as indicated in Figure 8 above and talk or if the volume on
the phone is up the voice from the camera could be heard in
the phone.
X10 Linked
-9-
3.7 INFRARED NIGHT VISION
Infrared night vision is controlled by camera system automatically.
When the area around the camera becomes too dark, the
infrared night vision will activate automatically. Likewise, when
the area around the camera is bright enough, the night vision
will deactivate automatically.
3.8 INFRARED ALARM
The camera uses infrared sensors when someone/something
appears within its detection area. The alarm on camera will
ring for 5 seconds, and at the same time, the phone will also ring
and receive an alarm notification. Set the alert notification
message to access the live video feed.
You can adjust the timing of the alarm and enable/disable the
alarm sound under the camera setting.
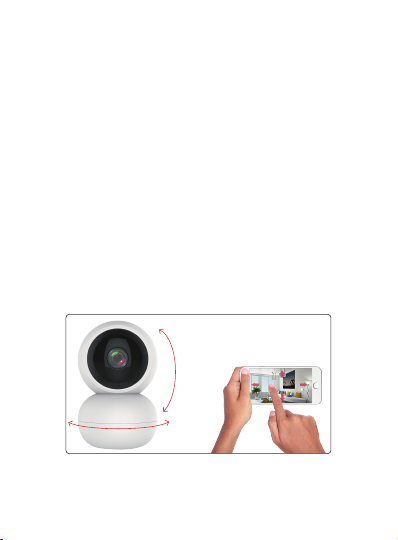
3.9 REMOTE CONTROL YOUR LY14 BY APP
Enter the live video interface of the Linked Camera APP, using
your finger to slide the screen up/down/left/right to control the
camera to rotate vertically/horizontally.
Vertical: 90°
Horizontal: 355°
-10-
Table des matières
Autres manuels LINKED Caméra de sécurité


