4
Specifications
Technical
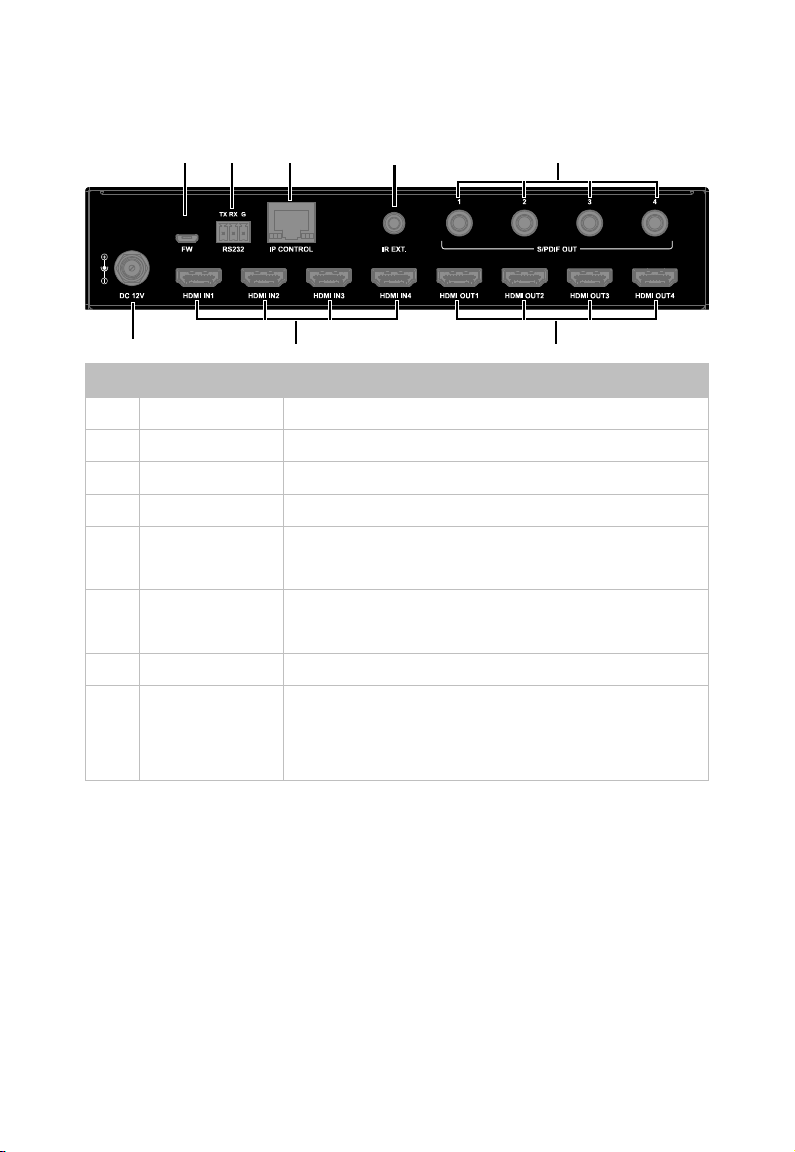
Input/Output Port
4 x HDMI IN, 4 x HDMI OUT, 1 x RS-232,
1 x IP Control (RJ45), 4 x SPDIF OUT (Digital),
1 x FW (Micro USB), 1 x DC 12V IN
Input/Output Signal
Type
HDMI with 4K@60Hz 4:4:4, HDR 10, HLG & Dolby Vision,
HDCP 2.2
Note: Dolby vision is not supported in downscaler mode.
Input/Output
Resolution Supported
VESA:
800x6008, 1024x7688, 1280x7688, 1280x8008, 1280x9608,
1280x10248,1360x7688, 1366x7688, 1440x9008,
1600x9008, 1600x12008, 1680x10508,1920x12008
SMPTE:
720x576P6, 1280x720P6,7,8, 1920x1080P2,5,6,7,8,
3840x21602,3,5,6,8, 4096x21602,3,5,6,8
2 = at 24 Hz, 3 = at 25 Hz, 5 = at 30 Hz, 6 = at 50 Hz, 7 =
at 59.94 Hz, 8 = 60 Hz
Audio Format
HDMI IN/OUT: Fully supports audio formats in HDMI 2.0
specification, including PCM 2.0/5.1/7.1, Dolby TrueHD,
Dolby Atmos, DTSHD Master Audio and DTS:X
S/PDIF OUT: Supports PCM 2.0/5.1, Dolby digital and
Maximum Data Rate 18Gbps
Front Panel Buttons, RS232, IR, LAN (Telnet &Web UI)
Operating Temperature 0°C to 45°C (32°F to 113°F)
-20°C to 70°C (-4°F to 158°F)
Humidity 10% to 90%, non-condensing
ESD Protection
Human-body Model:
±8kV (Air-gap discharge)/
Power Supply DC 12V
Power Consumption
10.8W
Device Dimension
(W x H x D)
215mm x 42mm x 120.2mm/8.46” x 1.65” x
4.73” (Without mounting brackets)”