
Lenoxx GLA45 Manuel utilisateur

LICENSED MERCEDES RIDE-ON CAR
Model: GLA45
Batch: PR3831
Please read and retain these instructions for future reference.

The illustrations used in this manual are to illustrate the operation method and product structure of
the product. Where there is a small difference between the physical item and the illustrations,
please take the physical as the standard.
SAFETY INFORMATION AND WARNINGS:
1. Children using this product must always be under the supervision of an adult.
2. The ride-on is not to be used by persons with reduced physical, sensory or mental capabilities, or
lack of experience and knowledge, unless they have been given supervision or instruction.
3. In the interests of safety, DO NOT use this product on public roads, near motor vehicles, uneven
ground, swimming pools or where there is water. Do not let children ride in the street, anywhere
dangerous including slopes with more than 10 degrees, next to bodies of water and away from
other obstacles. Use during day light hours or in an illuminated area is advised to avoid accidents
in the dark.
4. Do not drive on long or wet grass, mud, soft ground, gravel or sand.
5. Do not drive near anything flammable or explosive. Keep any hazardous chemicals out if the
drivers reach.
6. Do not immerse the ride-on or charger in water.
7. Suitable for children aged 3+ years old. It is recommended that children always wear shoes and
other protective clothing and equipment (e.g.: helmet, gloves, kneepads etc.) during use.
8. This ride-on must only be used by a single child, maximum load is 30 kg. This is advisable to
avoid damage to the motor, gears and to prohibit overloading.
9. When the ride-on is running, do not place anything on the moving parts such as the motor, gear
box, wheels or steering wheel.
10. Please keep the product and all parts away from children before full assembly has been
completed by a responsible adult.
11. These instructions contain important information, please retain them after product assembly.
12. Assembly of the ride-on must be completed by an adult.
13. To avoid suffocation or choking, keep all bags and small parts away from babies and children.
14. Never push or pull the ride-on backward when it is running.
15. Do not charge the ride-on with a broken or damaged charger. Please call 1300 666 848 to order
a replacement charger.
16. Any repairs to the ride-on must be carried out by an authorised or qualified service
centre/repairer.

CONNECTING THE BATTERY:
●The battery will need to be connected as a step in the assembly process, before charging and
before use of the ride-on.
● Remove the black plastic protective cover.
●Connect the red wire from the ride-on body onto the red terminal of the battery. Also ensure the
black wire is connected onto the black terminal of the battery.
Note: Pay attention to the positive and negative positions on the battery to prevent a short circuit.
BATTERY CAUTIONS:
If the ride-on will not be used for a long period of time (3 months or longer), it is advised that you
fully charge the battery and disconnect it from the connections.
A long period of non-use will damage the battery. It is advised that the battery should be charged
once a month, even if the ride-on is not being used.
A new battery must be fully charged before its first use.
Please take care with the battery as it contains acid electrolyte. Handling of the battery by adults
only.
If the battery has leaked, do not touch the acid. Place the battery into a polybag and dispose of it.
If the electrolyte splashes on your skin or into your eyes, immediately wash with water for at least
15 minutes and consult your doctor.
Do not contact the batteries two terminals with any other metal objects.
It will cause short circuiting, damage or fire.
Do not plug the charger into any non‐working or faulty wall socket. This could cause short circuiting
or fire.
CAUTIONS FOR CHARGING:
The ride-on is equipped with a charge protection function. Ensure that the power switch on the
ride-on is in the OFF position before charging.
When charging the ride-on, all the functions of the ride-on are not operational.
1. The charging time is 8 –12 hours. Avoid intermittent charging as that can affect the battery life.
2. When charging, connect the chargers pin to the charging socket of the ride-on and plug the
charger into a 240v power point.
3. During the charging process, the heating of the charger or battery is normal (below 60 degrees
Celsius).
4. A new battery must be fully charged before its first use.
5. Ensure the charger is removed from the charging socket before the ride-on is used.

PARTS DIAGRAM:
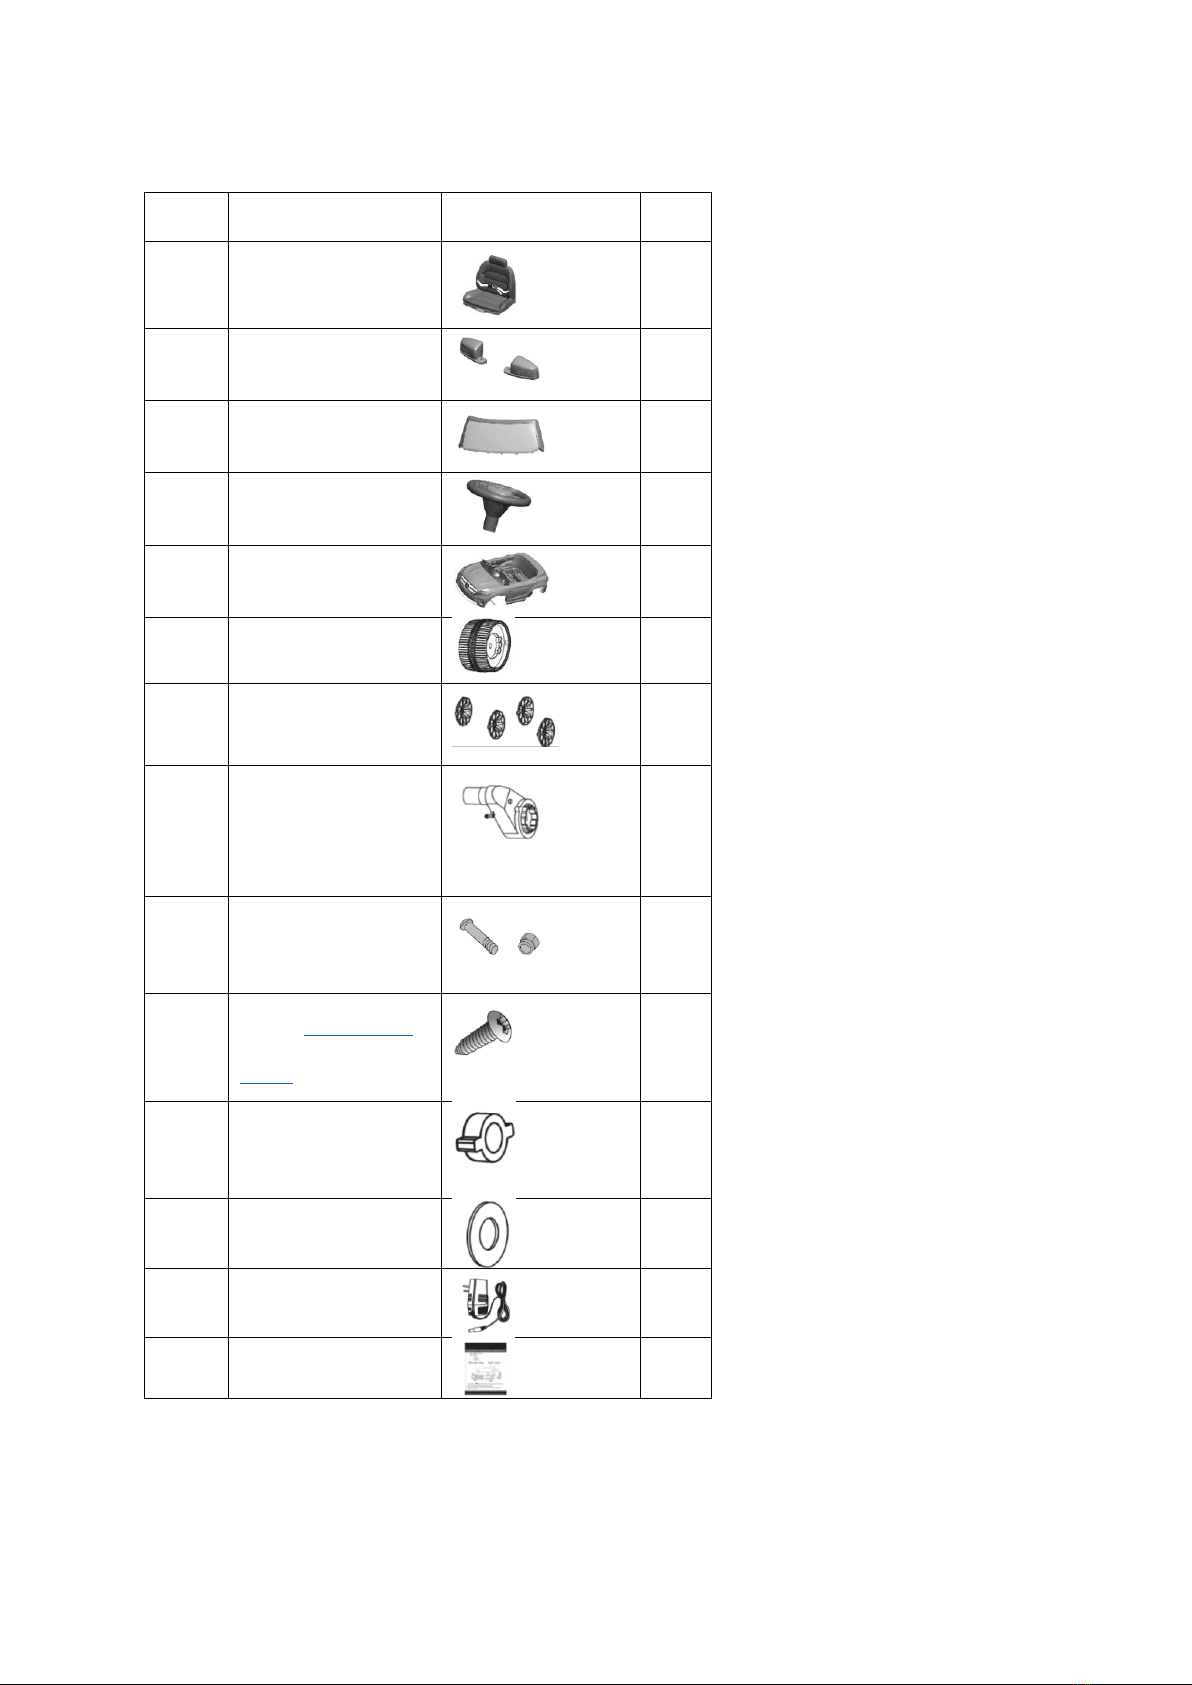

ASSEMBLY STEPS:
1. RIDE‐ON BODY
2. MOTOR/MOTORS
3. AXEL SLEEVE
4. WHEEL
5. GASKET
6. NUT
7. WHEEL COVER
8. MIRROR
9. SEAT
10. WINDSHIELD
11. M10 NUT. M5*35 ROUND SCREW
12. STEERING WHEEL

Warning:
Assembly of the ride-on must be completed by an adult.
To avoid suffocation or choking, keep all bags and small parts away from babies and children.
1 x screwdriver is required for assembly. Screwdriver is not included.
2 x socket wrench are included.
Driving wheel installation:
●Turn the ride‐on upside down as shown in the image above.
●Put an axle sleeve and a gasket into the wheel.
●Push the wheel to the back axle and make the wheel connect well with the motor.
●Put an axle sleeve and a gasket to the other side of the wheel
●Tighten the wheel with a M10 nut.
● Insert the wheel cover.
●The other wheel is to be installed in the same way.
Front wheel installation:
● Turn the ride‐on upside down as shown in the image above.
●First put an axle sleeve and a gasket into the wheel.

●Push the wheel to the front axle.
●Put an axle sleeve and a gasket, then tighten them with a nut.
● Insert the wheel cover.
●The other wheel is to be installed in the same way.
Steering wheel installation:
●Connect the terminal of the steering wheel to terminal of the instrument panel,
put some of the wire back inside instrument panel if it is too long.
●Ensure the two holes of the steering wheel connect with the holes in the instrument panel,
and then tighten the M5 nut well with M5*35 round nut.
Mirror installation:
● Ensure the slots in
the mirror are in line
with the slots in ride‐
on body and press the
mirrors into the gaps.

Windshield installation:
●Look at the slots and
press the windshield
into the slots
accordingly.
Seat installation:
● Put the seat onto the ride‐on body according to the above
picture, ensuring the seat marrys up wo the slots on the
ride‐on’s body. Attach the seat with using Ø4*20 self‐
tapping screws.
Reminder:
Ensure the battery is connected before screwing
the seat into position.
●The battery will need to be connected as a step
in the assembly process, before charging and
before use of the ride-on.
● Remove the black plastic protective cover.
●Connect the red wire from the ride-on body
onto the red terminal of the battery. Also ensure
the black wire is connected onto the black terminal of the battery.
Note: Pay attention to the positive and negative positions on the battery to prevent a short circuit.

Dashboard:
1. Player: with USB, MP3, TF card Jack, power quantity display.
2. Light switch: Turn on or off the light.
3. Power button: press to turn the power on or off.
4. Forward/backward switch:
Operate it together with the accelerator to make the ride‐on to go forward or backward.
Towing handle:
When the ride‐on’s battery is flat, you can pull it home, by using the handle under the ride‐on.
Door locking:
For a child to exit the ride‐on, release the door button. Use the same button to lock the door when a
child is inside the ride‐on.
Table des matières
Autres manuels Lenoxx Jouet


