Lascar EL-SMS-2G-TP Manuel utilisateur
EL-SMS-2G-TP / TP+ / PROBE-G USER MANUAL
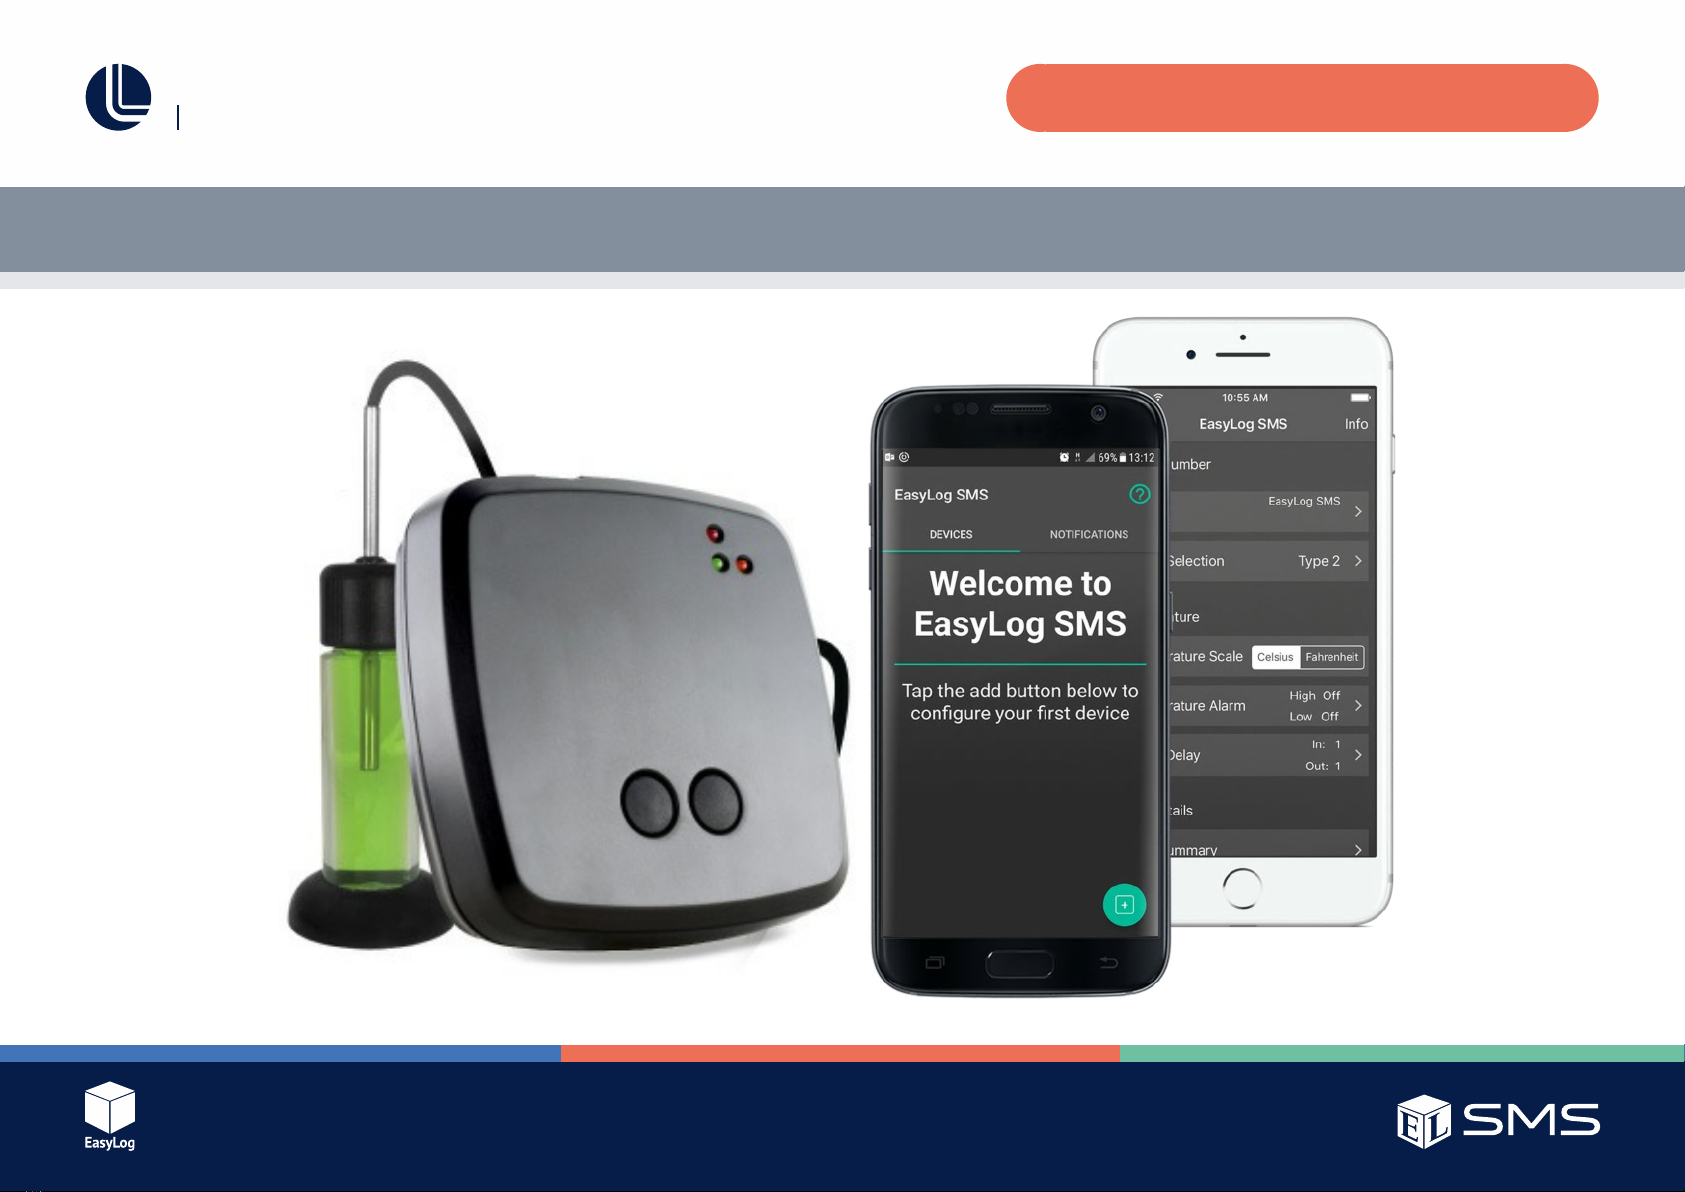
Temperature Monitor with SMS Alerts

Issue 1
Page 2 of 24
EL-SMS-2G-TP / TP+ / PROBE-G USER MANUAL
Quick Start Guide
1. Check that there is adequate mobile signal strength from the appropriate
provider at the location where you intend to use the unit.
2. Download and install the “EasyLog SMS” App from Google Play store or
the App Store.
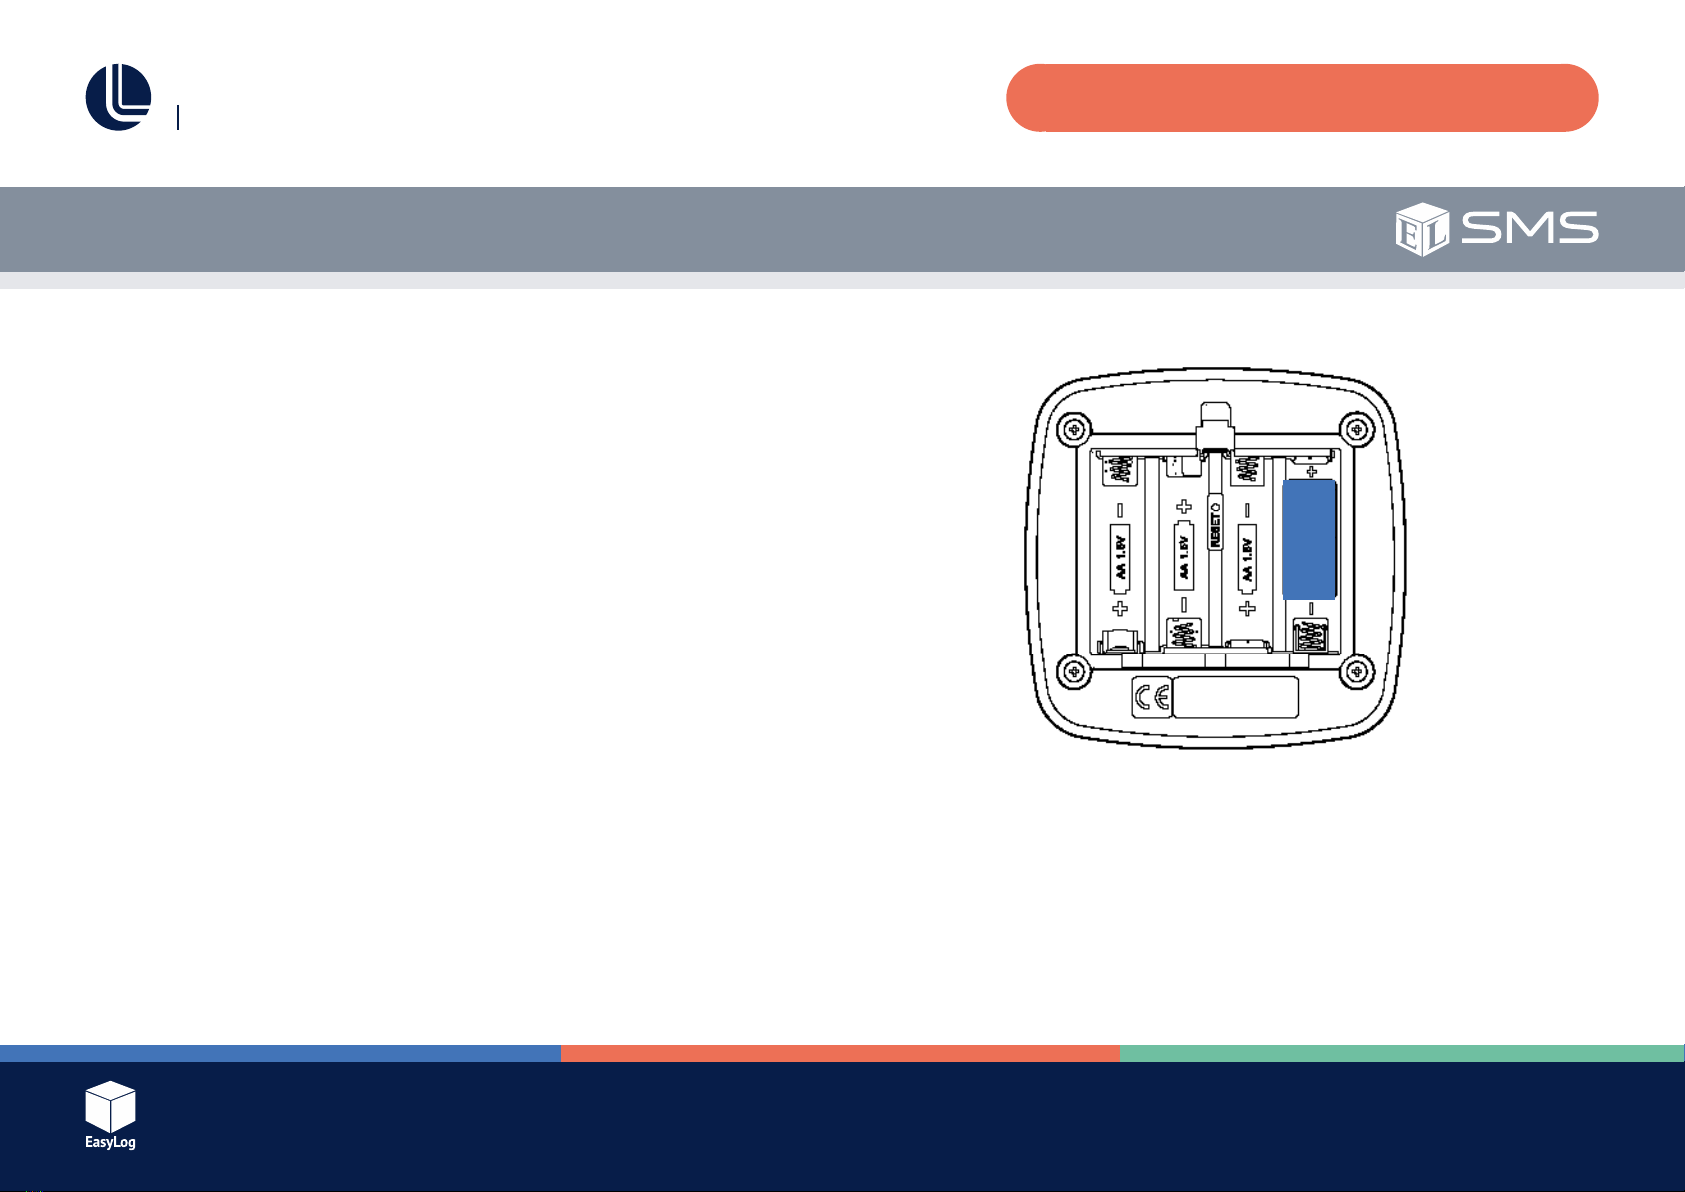
3. CarefullyremovethebatteryplateandfityourSIMcardintothe
microSIM holder.
4. Insert 4 x AA alkaline batteries into the unit and replace the battery plate.
5. Connect your probe in the external temperature probe port.
6. Open the App on your smartphone or tablet and and add a new device.
Use the mobile number that was supplied with your SIM card.
7. If using Android, select the device just added and press the “Setup” button.
8. Configuretheparameterstosuityourintendedapplication,thenpress
the “Start” button (Android) or “Send SMS Message” button (iOS) and
follow the onscreen instructions, which will prepare the unit to receive the
configurationSMSandsendthemessage.
9. Oncetheconfigurationhasbeencompleted,youwillreceivea
“Setup complete” message and the unit will begin monitoring.
@@@ [insert line diagram]
1
2
3
4
5
6
7
8
9
1Status bu�on
2Stop bu�on
3Status LEDs
4Netlight
5External temperature probe port
6Sounder
7Ba�ery Bay
8Reset switch
9SIM card holder

Issue 1
Page 3 of 24
EL-SMS-2G-TP / TP+ / PROBE-G USER MANUAL
EL-SMS App User Guide - Android Page No.
Features 4
Compatibility/Limitations 4
App Use 4
EL-SMS App User Guide - iOS
Features 7
Compatibility/Limitations 7
App Use 7
EL-SMS-2G-TP - User Guide
Introduction 9
Basic Operation 9
SIM Card 9
Thermistor Probe 10
Temperature Monitoring Interval 10
Multiple SMS Destinations 10
Alarm Delay Operation 10
Alarm Delay Example 10
Operating Modes 11
Standby Mode 11
Setup Mode 11
ConfiguringtheUnit 11
Run Mode 13
Stop Monitoring 13
SMS Retry Process 13
Security 14
Table of Contents
Hardware Operation 15
Power Up LED Sequence 15
LED Flash Sequences 15
Netlight LED Operation 15
Sounder 15
Battery 16
Aerial and Signal Strength 16
Real Time Clock 17
Time Zone 17
Message Groups 17
NotificationTypes 18
“Setup Complete” Message 18
“No SMS Rxd” Message 18
“Temperature Alarm” Message 19
“Summary” Message 19
“Low Battery” Message 19
Probe Errors 20
SIM Card Missing/Error Detection 21
Disclaimers 21
SMS Limit 21
SMS Delivery 21
Warnings 21
Troubleshooting 22
Other Information 23
BasicSpecifications 23
Glossary of Terms 24
Issue 1
Page 4 of 24
EL-SMS-2G-TP / TP+ / PROBE-G USER MANUAL
EL-SMS App User Guide -Android
Features
●Simple management of your EL-SMS devices.
Compatibility/Limitations
●Compatible with Android versions 2.3.3+ (API 10).
●Android device must have mobile network service and the ability to send/
receive text messages.
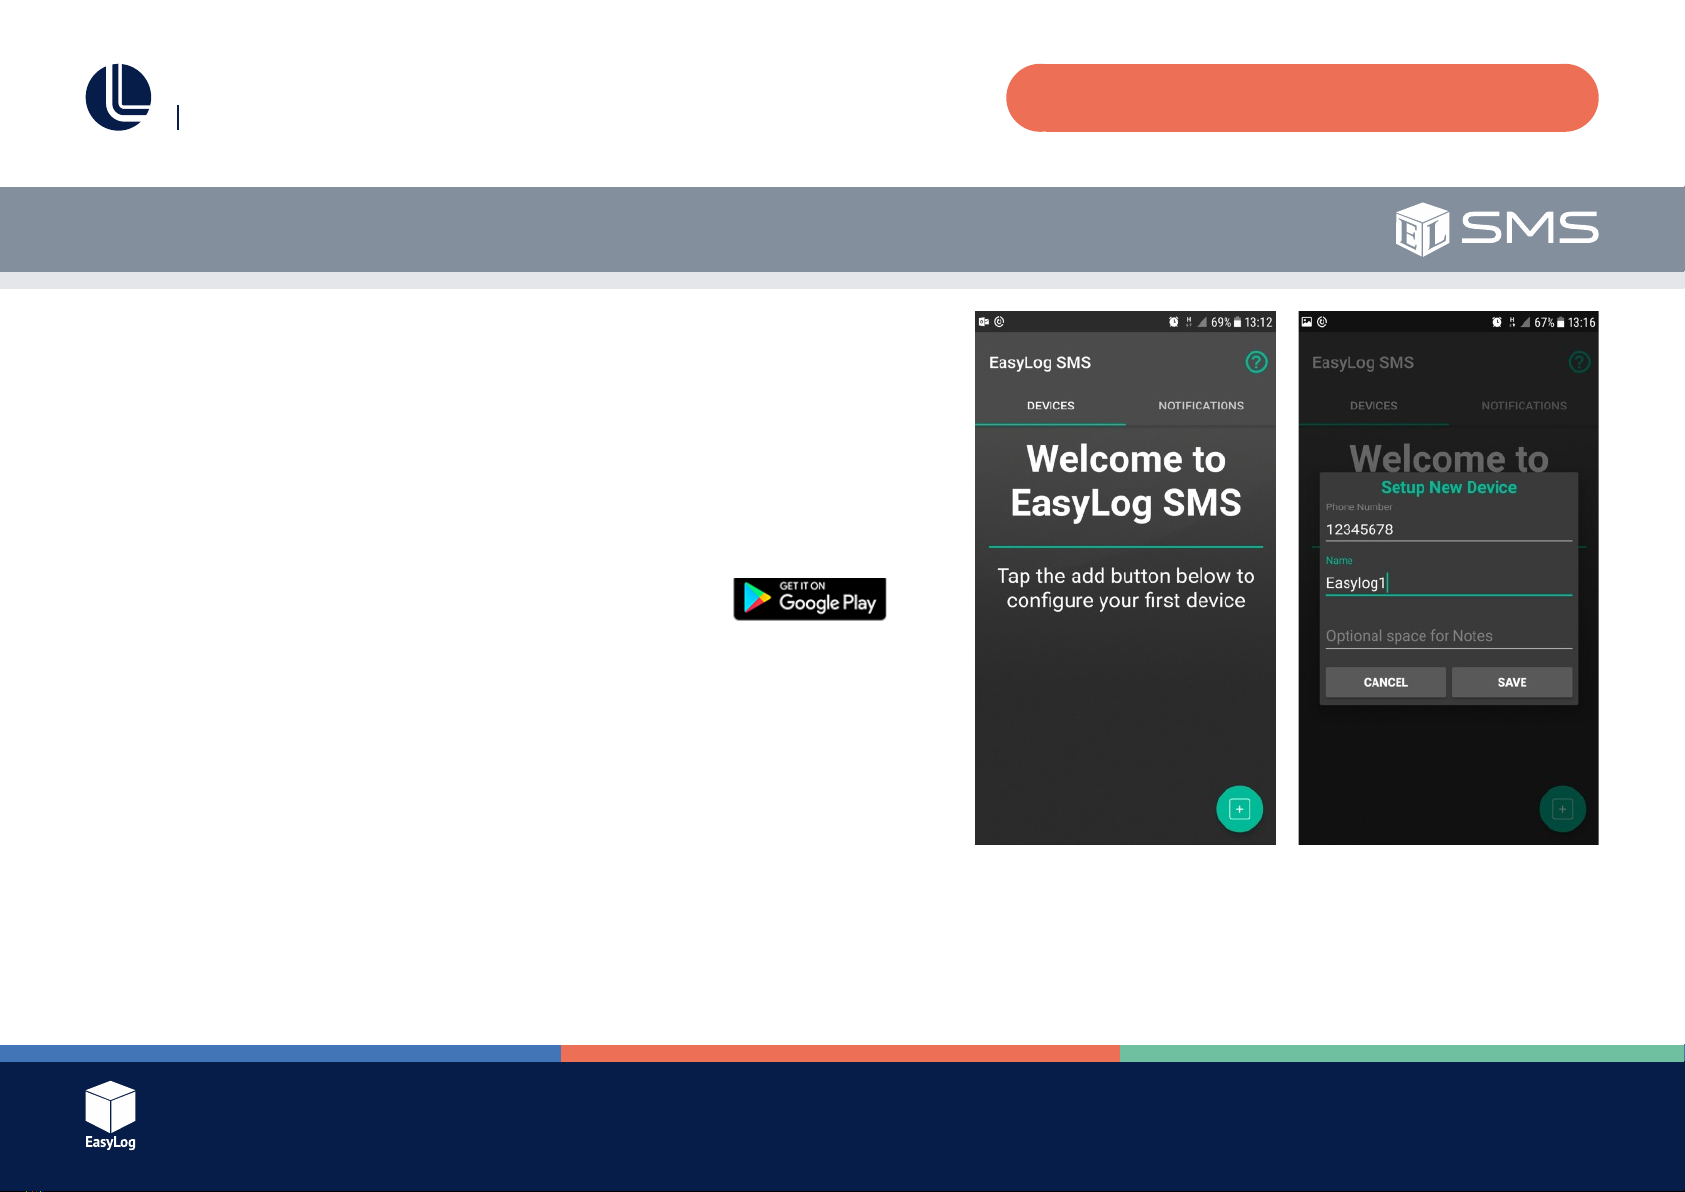
App Use (App images are subject to change)
1. Download and install the Android App from Google Play.
2. Open the App (see Fig. 1).
3. Add the EL-SMS device to your list by clicking the “Add logger button” at
the lower right of the screen.
4. Input the ELSMS device mobile number. Optionally add a device name
and notes regarding the device’s location, use etc. then press “Save”
(see Fig. 2).
The device number can consist of the following characters: “+0123456789” and
must be 7 digits or more.
The device name can consist of the following characters shown between the double
quote marks below:
“abcdefghijklmnopqrstuvwxyz ABCDEFGHIJKLMNOPQRSTUVWXYZ0123456789”
The name can be up to a maximum of 16 characters. If left empty the default name
“EasyLog SMS” will be used.
Fig. 1 Fig. 2
Issue 1
Page 5 of 24
EL-SMS-2G-TP / TP+ / PROBE-G USER MANUAL
App Use (Continued)
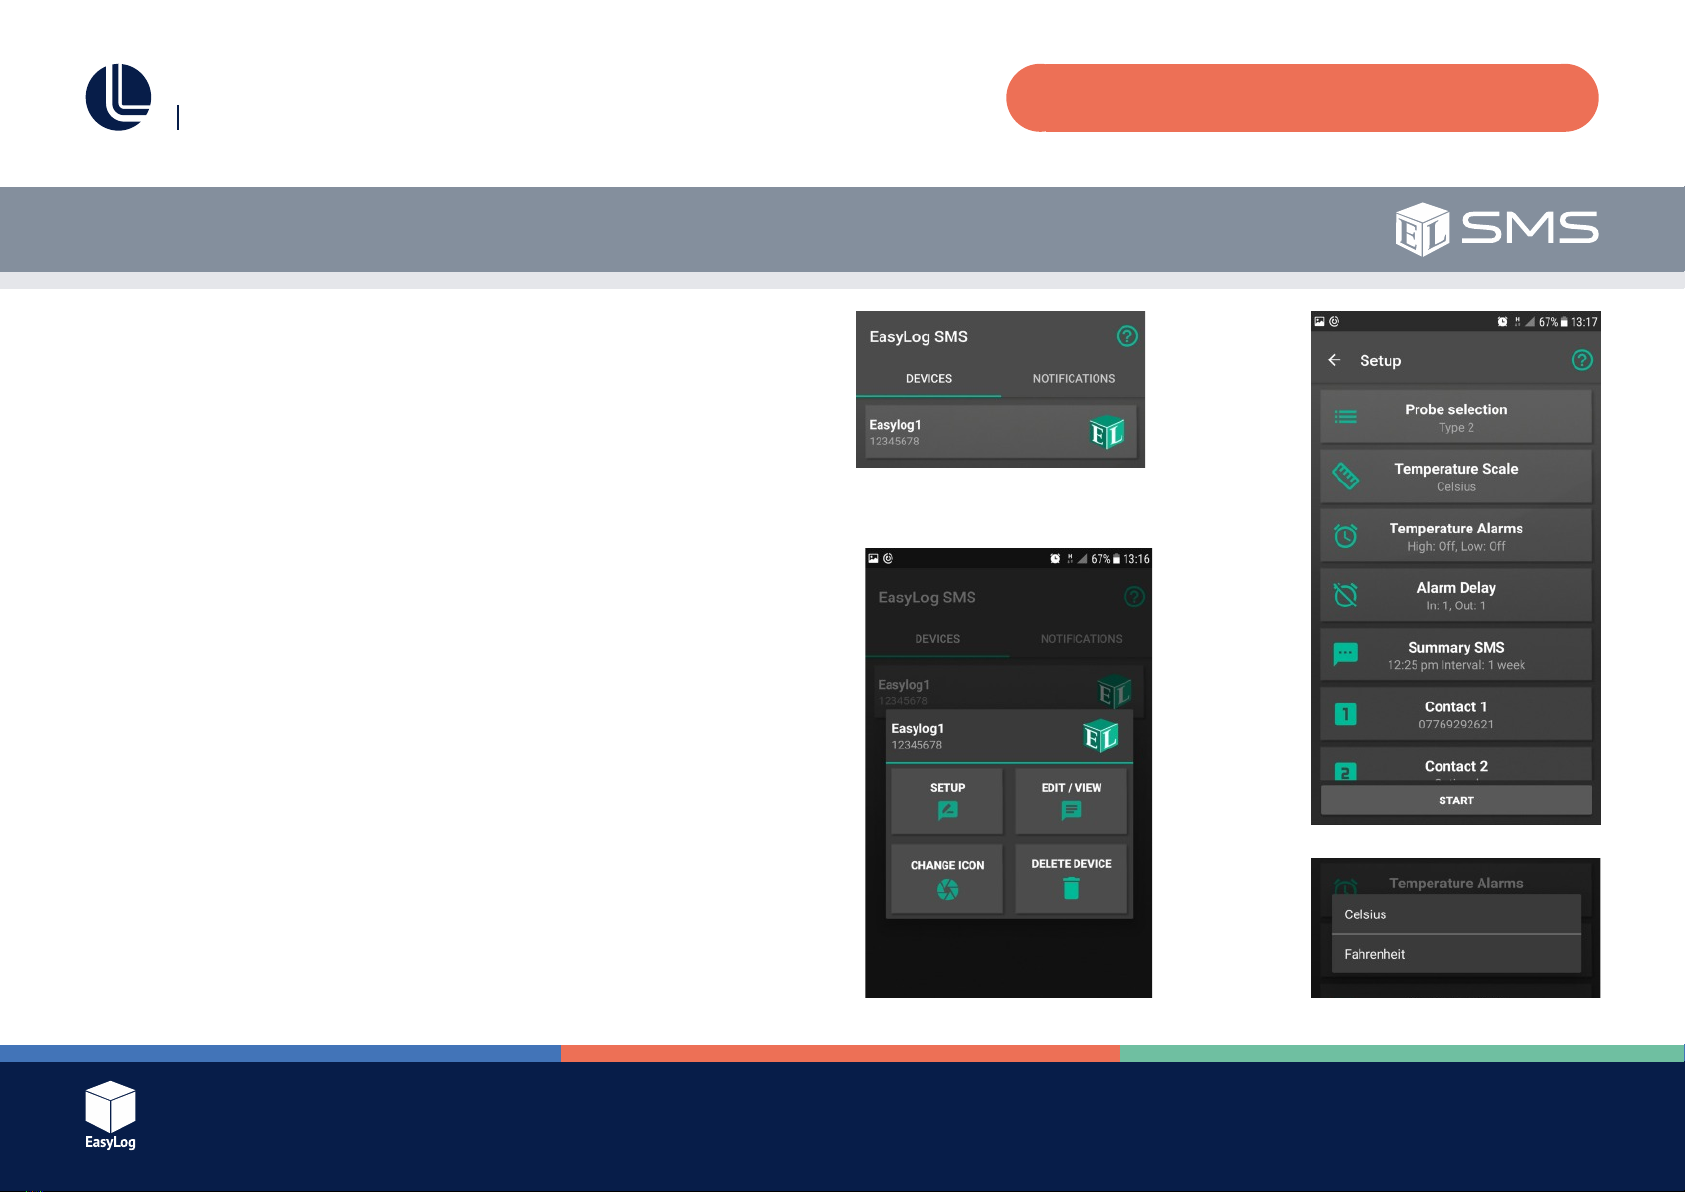
The EL-SMS device is now in your device list. (See Fig. 3).
5. Toconfigurethedevice,tapthedevicenameinthelisttobringupthe
options menu (See Fig. 4).
a. SETUP – Allows you to enter the Full Setup menu, see section 6 below.
b. EDIT/VIEW – Edit or view the basic details of the device.
c. CHANGE ICON – Allows you to change the icon for the device to a photo
or reset it back to the default.
d. DELETE DEVICE – Removes the device from the App.
6. Full Setup
Tap the setting you wish to change (See Fig. 5).
a. Probe selection - Allows you to select the correct probe type for your
device. Select Type 2 for the standard probe (-TP model) or Type A for the
high accuracy probe (-TP+ and -PROBE-G models).
b. Temperature Scale – Choose between Celsius and Fahrenheit
temperature measurements (See Fig. 6).
c. Temperature Alarms – Set the high and low alarm thresholds you require
(See Fig. 7).
Fig. 3
Fig. 4
Fig. 5
Fig. 6
EL-SMS App User Guide -Android
Issue 1
Page 6 of 24
EL-SMS-2G-TP / TP+ / PROBE-G USER MANUAL
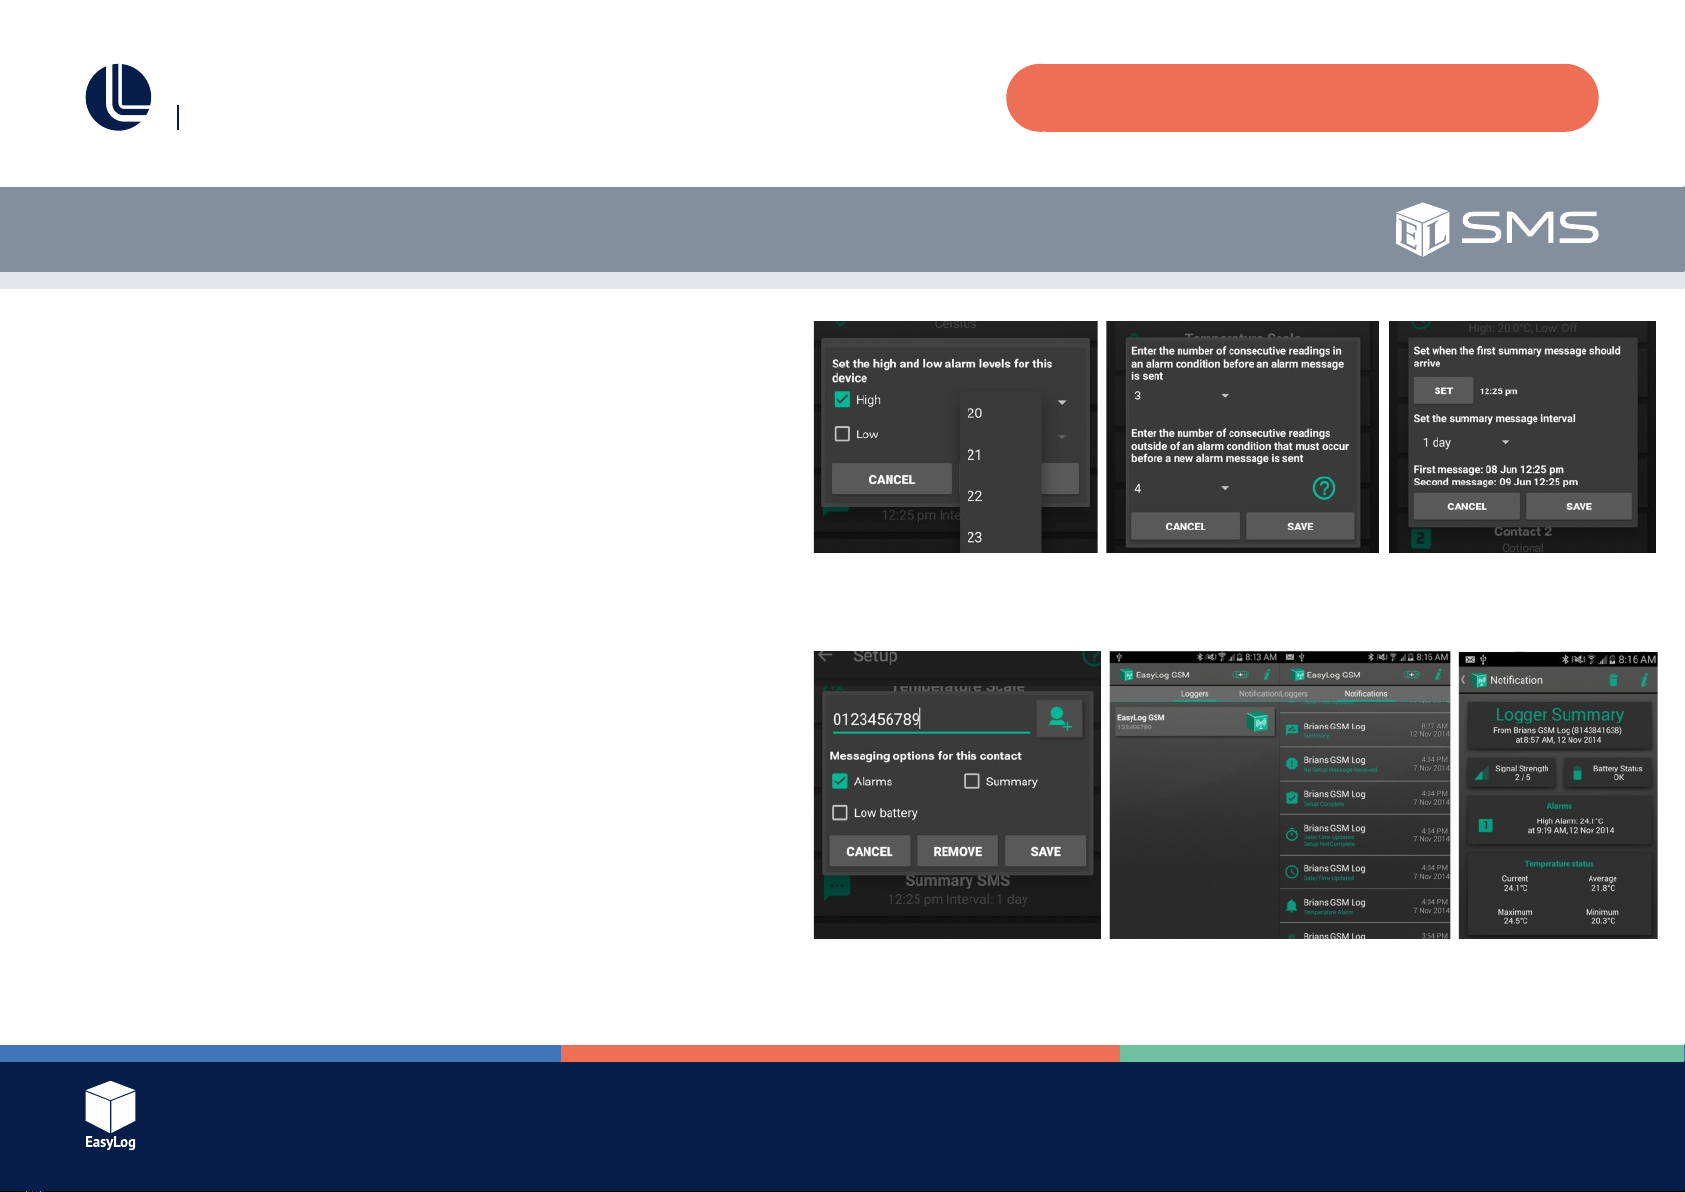
App Use (Continued)
d. AlarmDelay–Configurehowmanyreadingsmustoccurinanalarm
conditionbeforeyouarenotifiedandhowmanyreadingsafterthe
temperature normalises before a new alarm condition will be sent to you.
(See Fig. 8).
e. Summary Interval – The interval at which the ELSMS device will send
you information regarding its status. (See Fig. 9).
f. Input up to three contact numbers that this ELSMS device should notify,
and select which messages they will receive (See Fig. 10).
g. Pressthestartbuttontosendtheconfigurationmessagetothe
EL-SMS device.
7. Viewingnotifications–Fromthehomepageswipeleftortap
“Notifications”toviewthenotificationlist(SeeFigs.11and12).
This list contains the messages you have received from EL-SMS devices in your
list.Tapanotificationtoviewthemessagedetails.Messagescanbedeleted
bypressingthetrashcanbuttononthenotification,orbylongpressingonthe
notificationinthenotificationlist.
Fig. 7
Fig. 10
EL-SMS App User Guide -Android
Fig. 8 Fig. 9
Fig. 11 Fig. 12
Issue 1
Page 7 of 24
EL-SMS-2G-TP / TP+ / PROBE-G USER MANUAL
EL-SMS App User Guide -iPhone and iPad
Features
●Simple management of your EL-SMS devices.
Compatibility/Limitations
●Compatible with iOS versions 9.2 and above.
●Apple device must have mobile network service and the ability to send/
receive text messages.
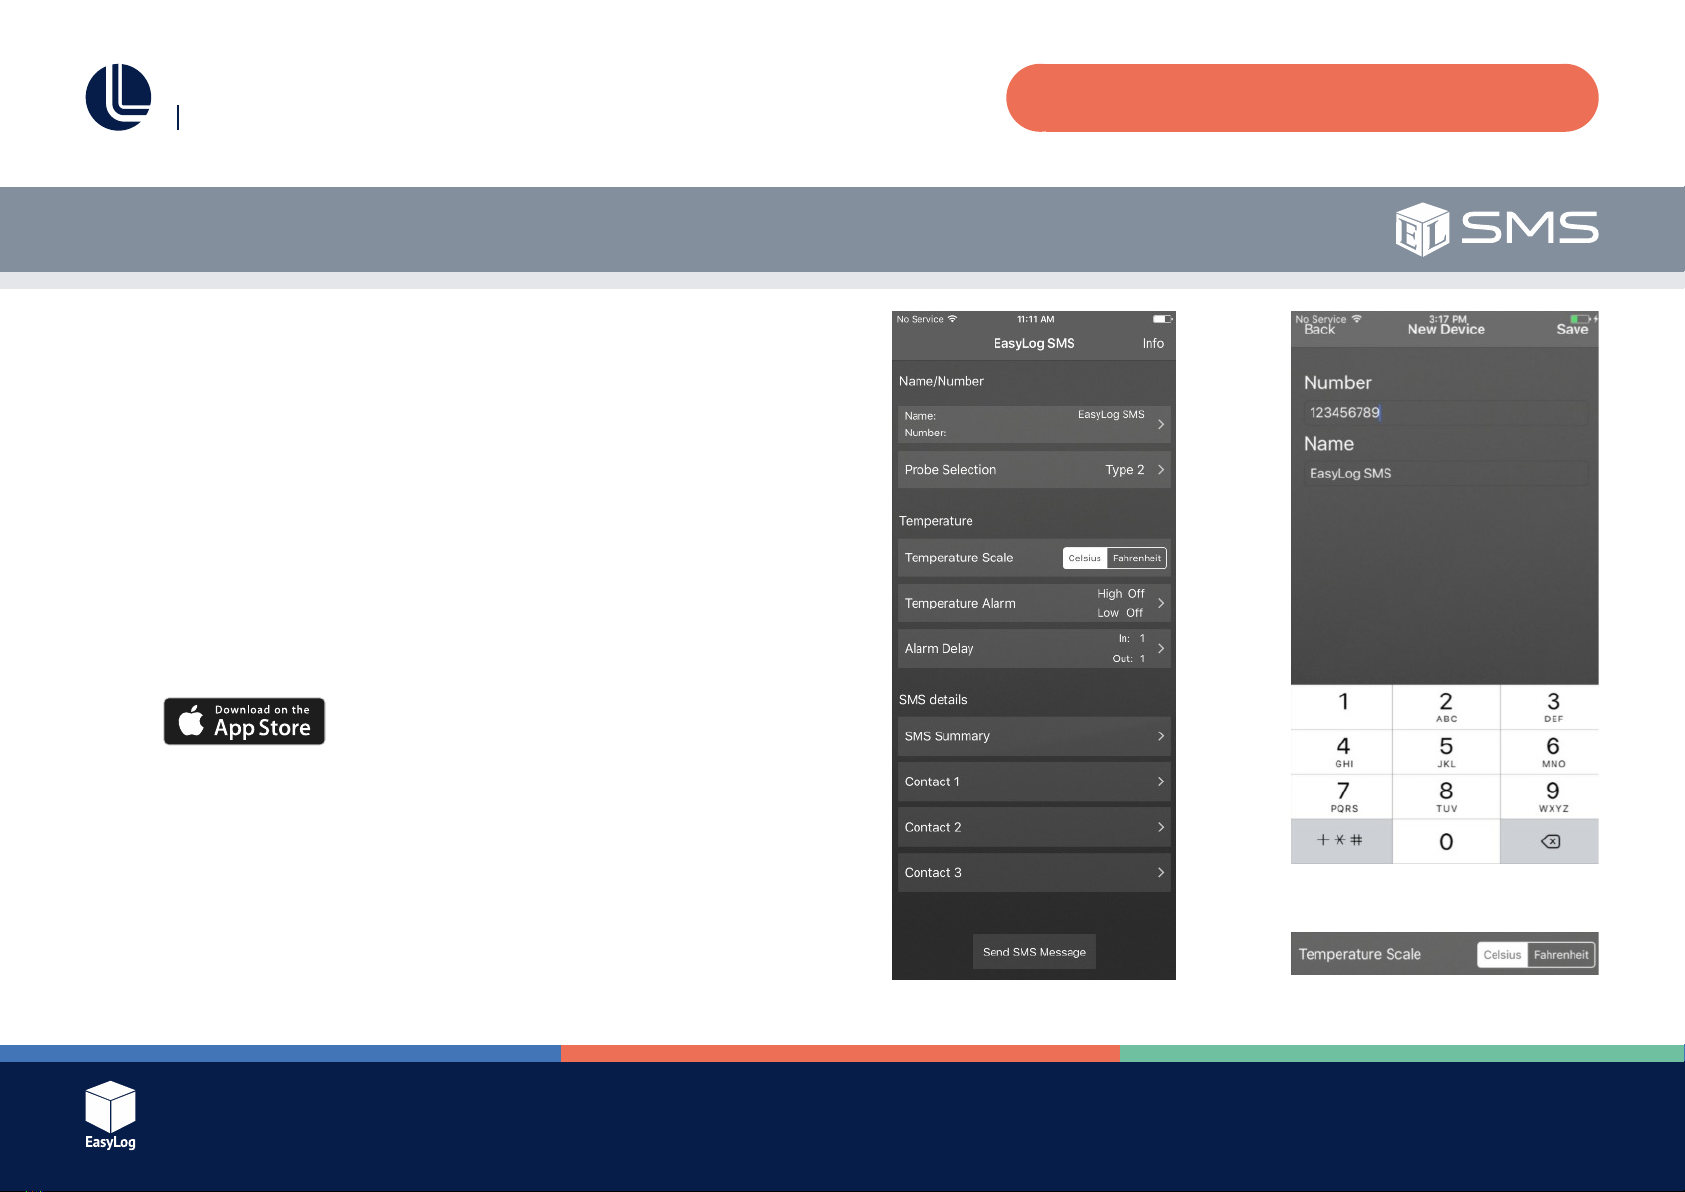
App Use (App images are subject to change)
1. Download and install the App from the App Store/iTunes.
2. OpentheApp(seeFig.1).FullSetup–Configurethedevicebytapping
the options in the list.
3. Select and enter the EL-SMS device mobile number. Optionally add
a device name then press “Save” (see Fig. 2).
4. Probe Selection Select the appropriate probe type. Select Type 2 for
the standard probe (-TP model) or Type A for the high accuracy
probe (-TP+ and -PROBE-G models).
5. Temperature Scale – Choose between Celsius and Fahrenheit temperature
measurements (See Fig. 3). Fig. 1
Fig. 2
Fig. 3
Issue 1
Page 8 of 24
EL-SMS-2G-TP / TP+ / PROBE-G USER MANUAL
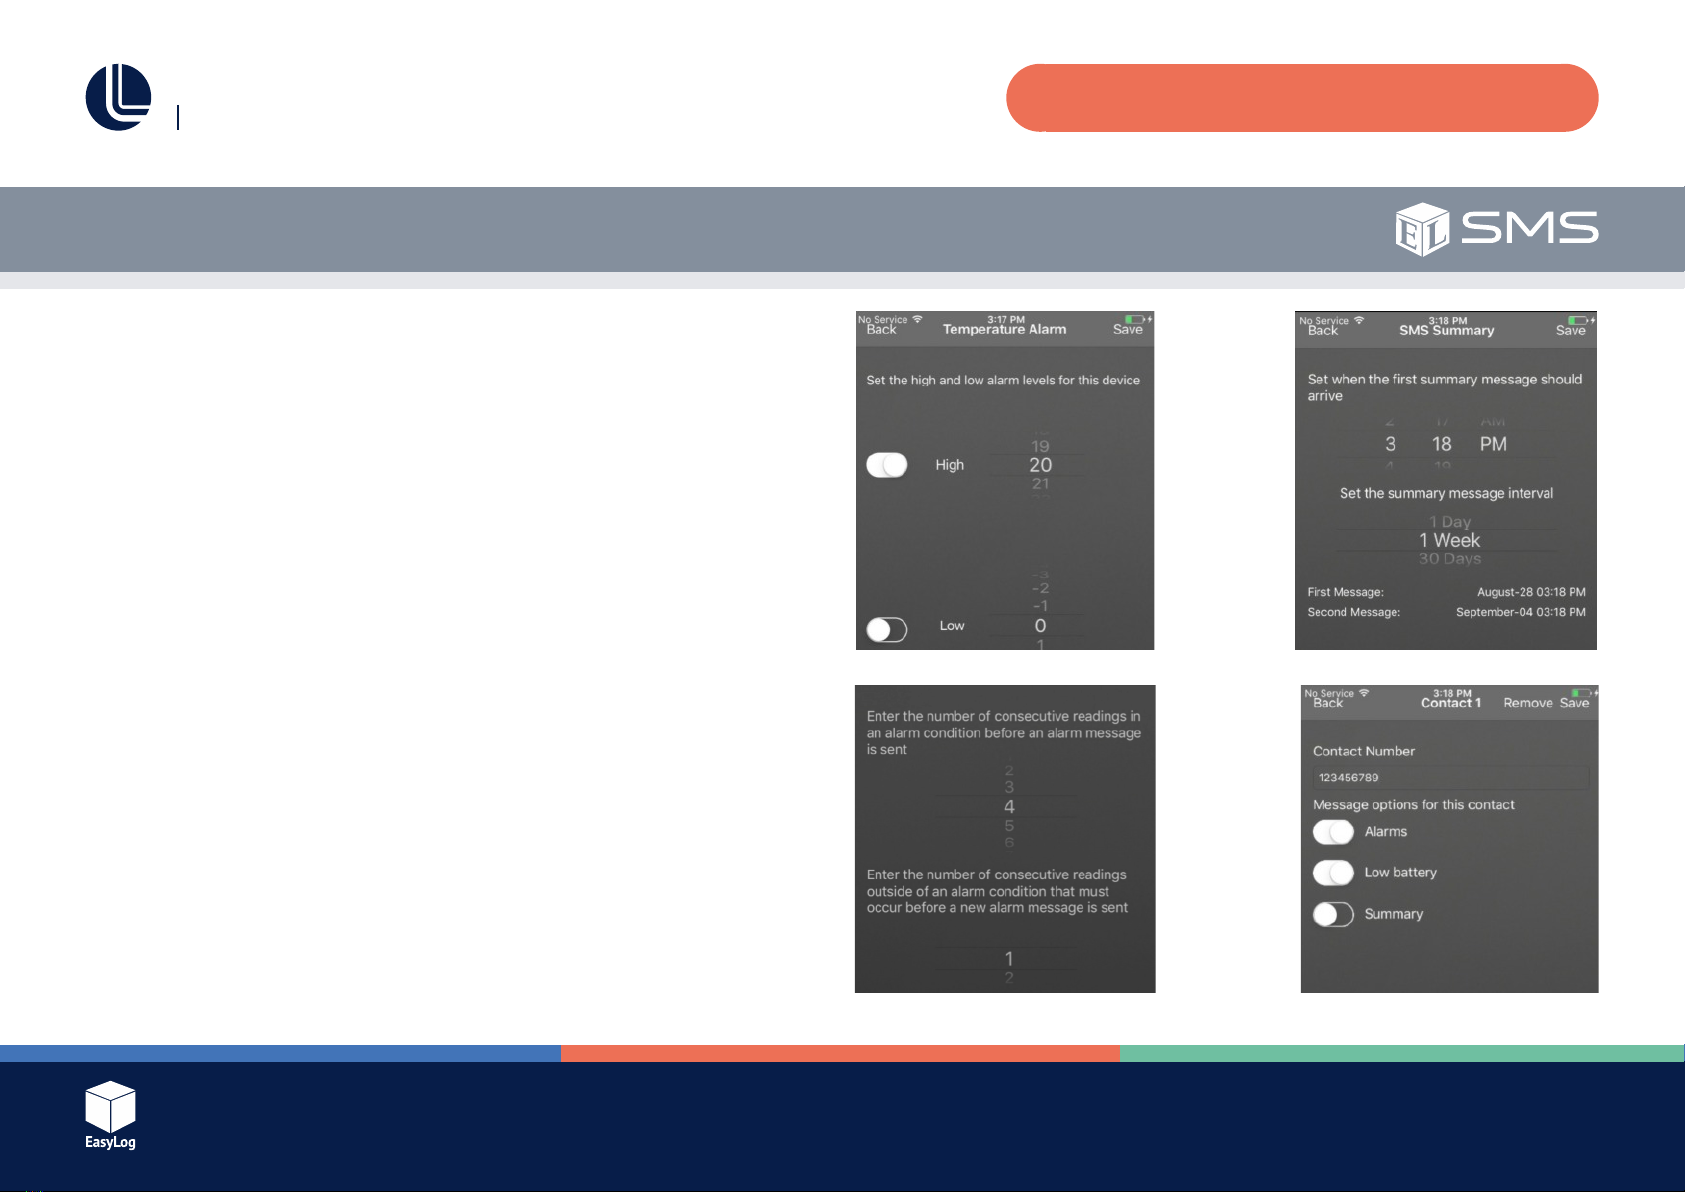
6. Temperature Alarms Set the high and low alarm thresholds (See Fig. 4).
7. AlarmDelay–Configurehowmanyreadingsmustoccurinanalarmcondition
beforeyouarenotifiedandhowmanyreadingsafterthetemperaturenormalises
before a new alarm condition will be sent to you (See Fig. 5).
8. Summary Interval – The interval at which the ELSMS device will send you
information regarding its status. (See Fig. 6).
9. Contact Information – Input up to three contact numbers that this ELSMS device
should notify and select which messages they will receive (See Fig. 7).
10.Pressthe“SendSMSMessage”buttontosendtheconfigurationmessageto
the ELSMS device (See Fig. 1).
EL-SMS App User Guide -iPhone and iPad
Fig. 4
Fig. 5
Fig. 6
Fig. 7
Issue 1
Page 9 of 24
EL-SMS-2G-TP / TP+ / PROBE-G USER MANUAL
Introduction
The EL-SMS-2G range is a family of battery powered temperature alerts that will
sendSMS(ShortMessageService)notificationmessagestodesignatedmobile
phone numbers whenever the temperature monitored exceeds a programmed
upper or lower temperature limit.
Thetemperaturelimitsalongwithotherconfigurableparametersaresenttothe
unitviaaconfigurationSMSwhichiscreatedusingthe“ELSMS”App.
OnceconfiguredtheELSMSunitscansendperiodicsummarymessages
toconfirmthattheyarerunningnormally.Summarymessagescontainthe
minimum, maximum and average temperature since the previous summary
message, along with a history of the three most recent temperature limit breaches
that the unit has detected.
These products use the GSM (Global System for Mobile Communications) network
todelivertheSMSnotificationmessagesandmustbefittedwithamicroSIMcard
to allow them to connect to a GSM network and register. These units use a built-in
aerial to allow communication with the GSM network.
Notificationmessagescanbesenttouptothreeprogrammedmobilephone
numbers.Eachnumbercanbeindividuallyconfiguredtoreceivespecificalerts,i.e.
Alarm, Low Battery or Summary messages.
Basic Operation
SIM Card
User Guide
The units require a micro SIM card to operate. It is important that no PIN code is
enabled as this will prevent operation. If necessary, a normal mobile phone can be
used to disable the SIM PIN code lock. Be aware that the product will erase any
existing SMS messages that are already stored on the SIM card.
TheSIMcardmustbefittedtooperatenormally.
All 2G micro SIM cards should work as long as the PIN code function is disabled.
Visit http://maps.mobileworldlive.com to check for GSM coverage in your
geographic location.

Issue 1
Page 10 of 24
EL-SMS-2G-TP / TP+ / PROBE-G USER MANUAL
Thermistor Probe
These units are supplied with a thermistor probe to sense temperature. The
EL-SMS-2G-TP is supplied by default with a Type 2 (Standard) thermistor probe.
The ELSMS2GTP+ is supplied by default with a Type A (High Accuracy) probe
and the EL-SMS-2G-PROBE-G with a Type A probe inserted into a glycol bottle.
The thermistor probes connect to the unit via the 3.5mm jack socket.
Thethermistorprobetypecanbeselectedwhentheunitisconfiguredusing
the App.
Temperature Monitoring Interval
These units will take a temperature reading every minute. For this reason it may
take up to one minute before the unit responds to a change in temperature.
Multiple SMS Destinations
Theunitscansendnotificationstoamaximumofthreemobilephonenumbers.
It should be noted that operating any unit with more than one destination mobile
phonenumberwillsignificantlyreducetheexpectedbatterylifeandmayincur
additional costs as more messages are sent.
When multiple destination numbers are used these units will attempt to send
notificationmessagestoeachphonenumber.Iftheunitisabletosuccessfully
transfer the SMS to the mobile network for at least one of the destination numbers
then it will assume that the delivery of the message was successful. Be aware
however that actual delivery of the message is reliant on the mobile network and
mobile operator’s services operating normally.
User Guide
Alarm Delay Operation
These units allow a separate pre and post alarm delay to be applied to any set
temperature alarms. This is useful to prevent sending excessive text messages if
themeasuredtemperatureisfluctuatingaroundeitherthehighorlowalarmlevels.
When a knockin delay is used, these units will wait until that number of consecutive
temperature readings have all been in an alarm condition before sending a
temperature alert message. If a knockout delay is used, they will stay in an alarm
stateuntilthespecifiednumberofconsecutivereadingsarealloutsideofanalarm
condition. When the knockout delay has completed, they will once again respond
to new alarm conditions when they occur.
If the alarm delay feature is not required then the delay values should be set to one.
Alarm Delay Example
Considerthefollowingsetupconfiguration:
Low temperature alarm set at 12°C using an “In delay” of 15 and an “Out delay”
of 30.
With these settings the temperature must drop below 12°C and stay below for
15 minutes before an alarm condition will be registered. During this 15 minute
period if any temperature reading is above 12°C then the delay is reset. This means
that the temperature must then remain below 12°C for a further 15 minutes before
the alarm is registered.
Once the alarm has been registered (after 15 consecutive minutes below 12°C) a
lowtemperatureSMSnotificationwillbesent.
Ce manuel convient aux modèles suivants
2
Table des matières
Autres manuels Lascar Moniteur


