itcreations itbike Manuel utilisateur

User Manual
Version: 7
Date: April 2010
By:

www.itbikes.com
2
Table of Contents
Page no.
Dear itBike user… 3
Unpacking itBike 4
itBike Assembly 6
Secure the Insert Module 7
Handle Bar Assembly 9
Seating System Assembly 10
Product Update: Seat Knob 11
Attaching the itBike Pedals 12
Final Check 13
itBiking 14
Preventative Maintenance 16
Questions and Answers 17
Storage and Transport 20
Safety Related Questions 22
Technology & Construction 23
Troubleshooting
itBike does not turn left or right 25
itBike Pedals are stuck & will not turn 26
Steering Column Replacement Steps 27
Adjusting at the Steering Cord Clip 30
Gear Box Removal & Installation ( Fiberglass model) 33
itBike Hull Repair Instructions ( Fiberglass model) 38

www.itbikes.com
3
Dear itBiker:
Congratulations on your purchase of the itBike and thank you for joining the
growing family of itBikers around the world.
We hope you have many years of itBiking satisfaction. This manual provides
you the information you will need to get started with itBike and it also provides
information regarding preventative maintenance, service, safety and other
considerations.
Please contact us if you have any suggestions, complaints or you want to share
thoughts with us.
The itBike Team

www.itbikes.com
4
Unpacking itBike
Your itBike is shipped in 2 cartons.
HULL 1 INSERT MODULE
Open the Hull carton
Please keep this box as you will need it in the unlikely event that you have to do
a major repair of the itBike hull or if you want to ship it somewhere.
*Slide the itBike hull onto a non-abrasive surface.

www.itbikes.com
5
Inside the 2nd carton you will find the Hull the Insert Module (which is composed
of the itBike subsystem and the keel module), the Steering Column, the Seat and
the Pedals.
Take out the Insert Module and the other parts out of the 2nd carton.
Insert Module Pedals & Covers, Handle Bar,
Seating System
In summary, your itBike shipment should include:
•1 hull
•1 Insert Module
•1 package of pedals with 2 pedals inside.
•1 package of Soft-Feel pedal covers (2 covers)
•1 Handle Bar
•1 Seating system (Seat and Backrest)
(The pedals are the only components of the itBike that require any tools for
assembly. You will need only a 6mm Allen key)

www.itbikes.com
6
itBike Assembly
Place the itBike Hull on the itStand shown below (you can order the itStand from
your itBike dealer or on line at www.itBikes.com ).
If you do not have the itStand, place the itBike hull in a position at least 16
inches above and parallel to the ground and make sure there is clearance between
the hole in the middle of the itBike hull and the ground below.
This is where the Insert Module will be placed.
itBike Stand Place the Hull on the Stand
Before sliding the Insert Module into the itBike Hull, you have to:
1) Unscrew the Keel-lock from the Hull.

www.itbikes.com
7
2) Make sure that the itBike propeller at the base of the Insert Module is
aligned in such a way that it will not interfere with the itBike hull. Place the
Insert Module into the itBike hull and make sure that the handles are facing
the forward (pointy) part of the itBike hull. We haven’t tried the itBike the
other way around and we’re not sure it is a good deal!!
The Insert Module should effortlessly slide into the itBike hull. See Photos.
WRONG Alignment CORRECT Alignment Insert the Module
Important notes:
1) When removing the Insert Module from the Hull, make sure the
propeller and keel are again correctly aligned to avoid breaking the
parts while lifting out the module.
2) Lubricate the chain and the back ends of the steering wire with any
machine oil.
Secure the Insert Module with the Keel Lock.

www.itbikes.com
8
To secure the Insert Module into the itBike Hull, you re-install the Keel-Lock
that you took off before sliding the Insert into the Hull.
1 2
3 4
5
Do not over tighten.That is all there is to it.

www.itbikes.com
9
Handle Bar Assembly
Place the handle bar into the sockets of the lower steering column located at the
front part of the itBike. There will be 2 bicycle clamps and these can be tightened
to lock the Handlebars into the Insert Module.
The handlebars can be raised and lowered in order to accommodate different
preferences. Should the Handlebars not slide smoothly up and down, simply wipe
the lower ½ of the handle bars with a cloth dipped in a little motor oil.
Insert the handlebars and slide them up and down a few times
45
Position the Clamps as follows:
Wrong Correct
www.itbikes.com
10
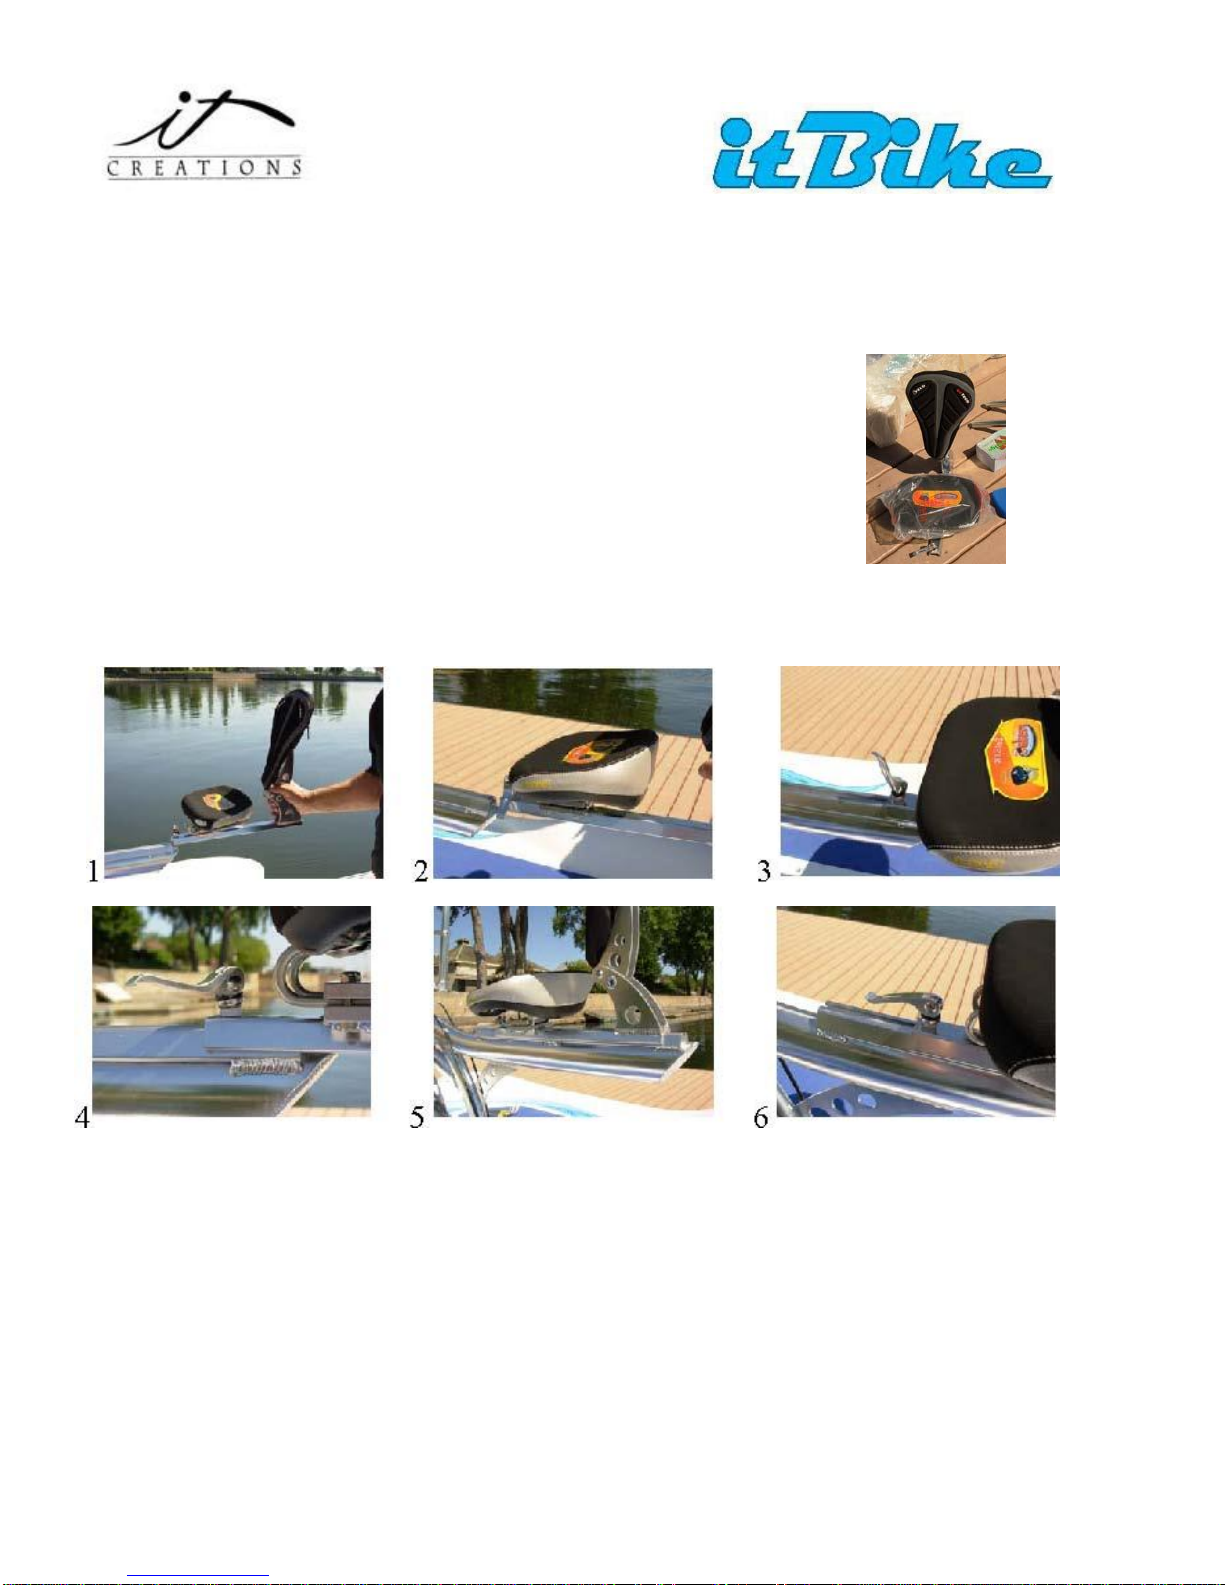
Seating System Assembly
The seating system is very comfortable for both the bum
and the back. It will provide hours of comfortable riding.
The itBike seating system slides onto the back of the itBike bicycle frame
and moves forwards and backwards in order to accommodate users of different
heights. The adjusting mechanism is a Knob. The itBike seat can’t be lowered.
There is no need to as the seat can be moved forward and backwards. Another
reason is that itCreations chose an optimum center of gravity for the itBike and
by keeping the itBike user at the chosen height above the water, we have
provided for ideal stability and comfort.
Table des matières


