7 Apriva BT200-T Smart Card Reader User’s Guide
If the BT200-T LED is not showing after pressing the Power button,
then the reader needs to be charged for 30 or more minutes. After 30
minutes, the user must check the status of the indicators by inserting
a smart card.
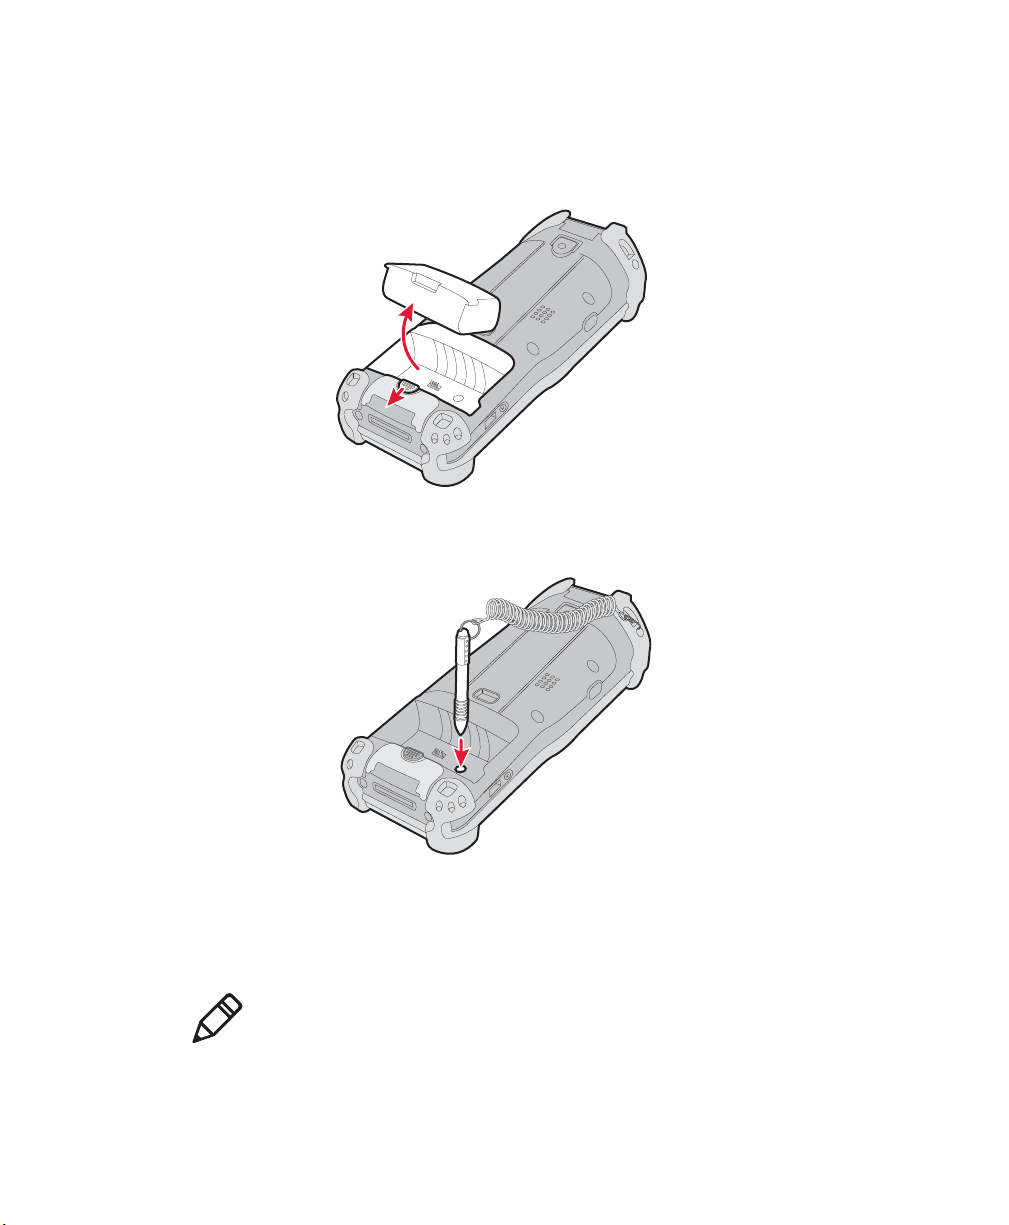
Checking and Charging the Battery
The BT200-T takes approximately 3 hours to charge its internal
battery. You can use the wall charger or a USB cable to charge the
BT200-T.
Use this section to learn how to check the status of the battery and
charge the BT200-T.
To check the status of the battery
•Press the Power button and observe the status LEDs. For more
information on the status LEDs, see “Understanding the Power
Button and LEDs” on page 6.
To charge the battery using the wall charger
1Attach the BT200-T to the wall charger.
2Insert the wall charger into an electrical outlet.
3Use the status LEDs to tell you when charging is complete.
Common access
card has been
inserted for more
than four
seconds.
Flashing green
or red every one
second.
Connection between the CK61G and
the Apriva BT200-T has been
established, and the unit is ready for
operation.
The USB cable is
connected.
Solid green Apriva BT200-T is being charged, and
the Apriva BT200-T cannot be used.
Note: The Apriva BT200-T can be used
when you are charging with a wall
charger, but not when a USB
connection is the power source.
Smart card/
charge cable is
removed.
Green and red
flash once
When the Power button is pressed, this
provides a visual clue that the Apriva
BT200-T has been powered off.
Understanding the Status LEDs (continued)
Action LED Status Description