B.
SUBWOOFER
8
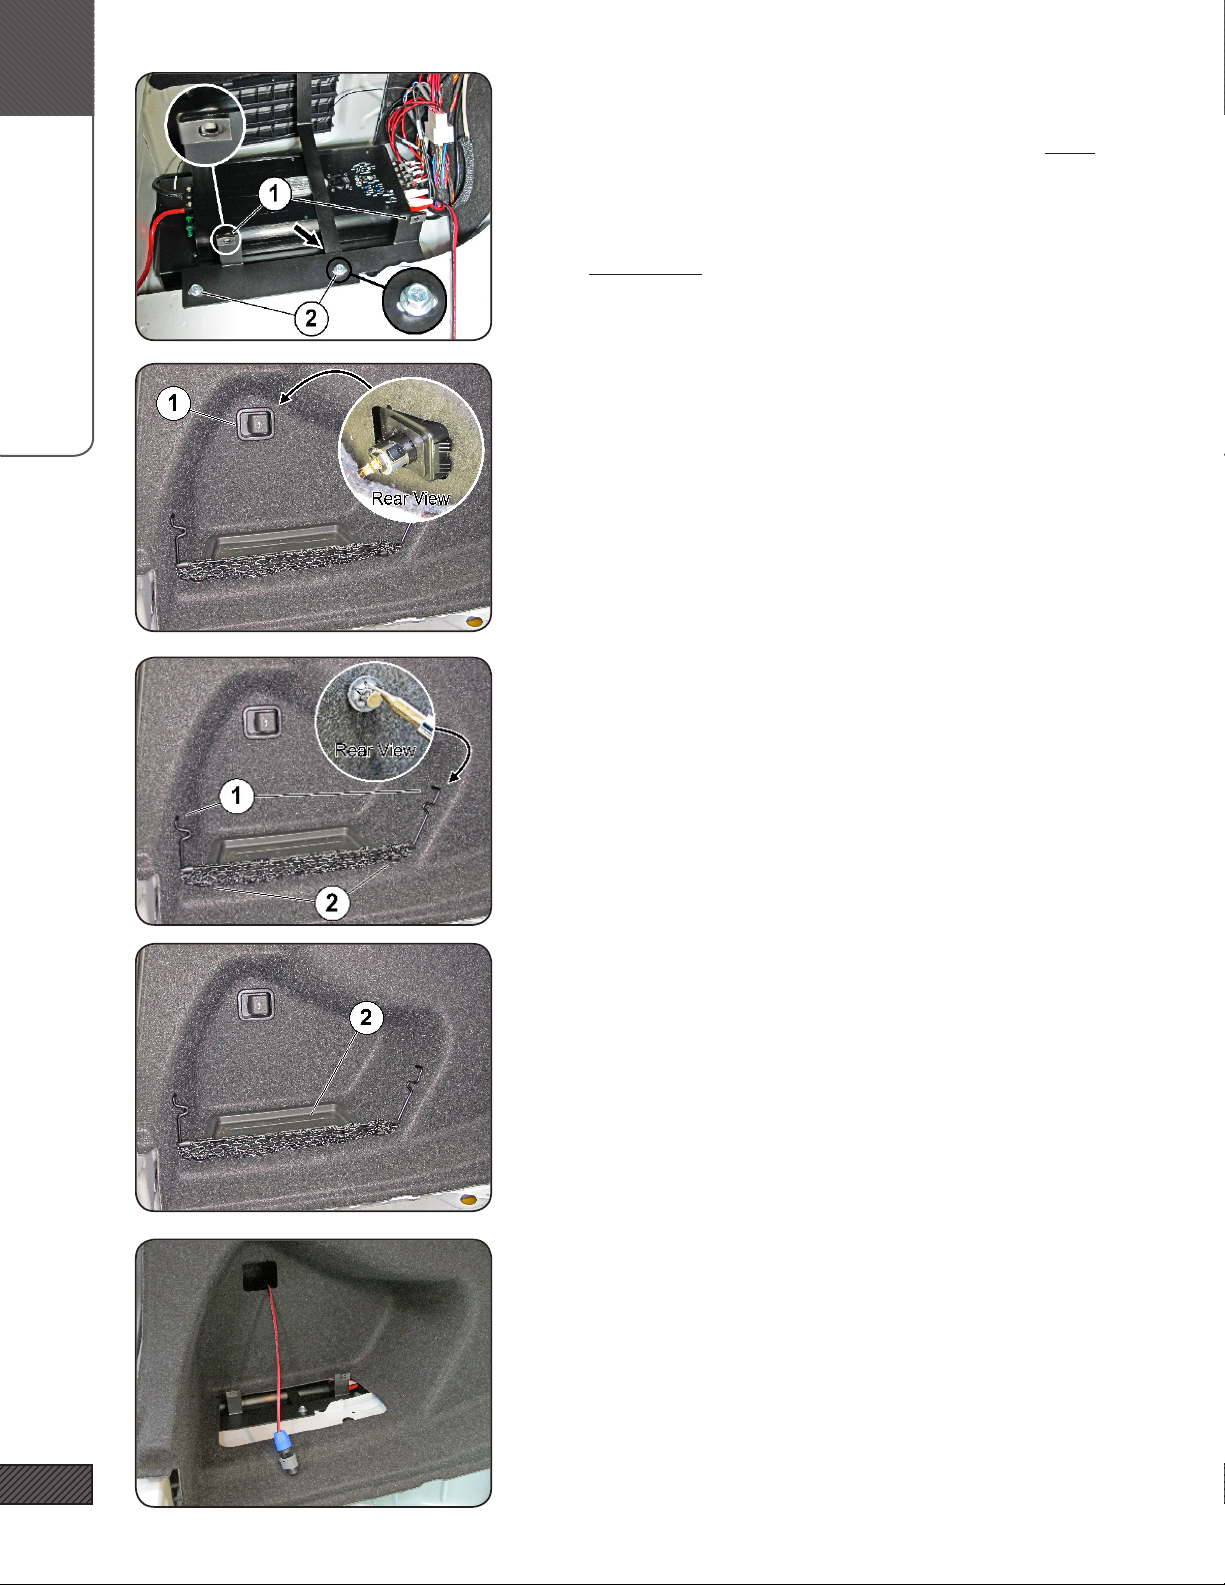
16. LOOSEN WIRE BUNDLE
Loosen/free the 12V power outlet wire bundle by sliding the plas-
tic retaining clip off the mounting stud.
17. SUBWOOFER INSTALLATION
Locate the IASW10T4 Subwoofer, Subwoofer Enclosure, Subwoofer
Hardware Kit, and Speaker Grille.
18. MOUNT THE SUBWOOFER IN THE ENCLOSURE
Connect the Subwoofer Internal Wiring Harness [F30.WH.SUB-INT]
to the Neutrik terminal in the enclosure. Note polarity markings
on the Neutrik terminal! Connect the other end to the subwoofer.
Mount the subwoofer to the enclosure using the eight #10-24 x
1” Button Head Cap Screws and tighten with a 1/8” Allen wrench.
Insert the speaker grille over and around the subwoofer gasket.
19. SUBWOOFER WIRING (NEUTRIK PLUG)
Select the 3ft long Subwoofer Wiring Pigtail from the Subwoofer
Hardware Kit. Connect the Neutrik Speak-on Plug to one end of the
subwoofer wire. Slide the blue chuck (1) over the wire, followed
by the strain-relief bushing (2). Make the positive & negative con-
nections to the plug as shown, tighten the terminals with a small
Phillips screwdriver. Slide the bushing (2) forward and tighten the
chuck (3) onto the plug (3).
20. SUBWOOFER SUPPORT BRACKET
Make sure the sound liner (1) is in place. Install the Subwoof-
er Support Bracket [F30.SUB.HNG.BRKT] (2). The upper end (3)
mounts on the same course-threaded stud as the lower end of the
OEM Amp Relo Bracket. The bracket has three holes for t adjust-
ment, start with the center hole. Fasten with the Flange Nut from
the Hardware Kit. The lower end of the Subwoofer Support Bracket
will be secured underneath the hole shown at (4) in the next step.
NOTE: image shows Soundstage amplier, not included.