
Intact BTJ41 Manuel utilisateur

- GB-V1.1 -
BTJ41 BATTERY TESTER
BTJ42 BATTERY/CHARGING/STARTING SYSTEM ANALYZER
TEST PROCEDURES / OPERATING INSTRUCTIONS
IMPORTANT:
1.
For testing 12 volt, 2AH~200AH batteries (BTJ41/BTJ42),
and for testing 12 volt charging systems (BTJ42).
2.
Suggested operation range 32℉(0℃) to 122℉(50℃) in
ambient temperature.

- GB-V1.2 -
WARNING:
1.
Working in the vicinity of a lead acid battery is dangerous.
Batteries generate explosive gases during normal battery
operation. For this reason, it is of utmost importance, if
you have any doubt, that each time before using your
tester, you read these instructions very carefully.
2.
To reduce risk of battery explosion, follow these
instructions and those published by the battery
manufacturer and manufacturer of any equipment you
intend to use in the vicinity of the battery. Observe
cautionary markings on these items.
3.
Do not expose the tester to rain or snow.
PERSONAL SAFETY PRECAUTIONS:
1.
Someone should be within range of your voice or close
enough to come to your aid when you work near a lead
acid battery.
2.
Have plenty of fresh water and soap nearby in case
battery acid contacts skin, clothing or eyes.
3.
Wear safety glasses and protective clothing.
4.
If battery acid contacts skin or clothing, wash
immediately with soap and water. If acid enters eye,
immediately flood eye with running cold water for at least
ten minutes and get medical attention immediately.
5.
NEVER smoke or allow a spark or flame in vicinity of
battery or engine.
6.
Be extra cautious to reduce risk of dropping a metal tool
onto the battery. It could spark or short-circuit the battery
or other electrical parts and could cause an explosion.
7.
Remove personal metal items such as rings, bracelets,
necklaces and watches when working with a lead acid
battery. It can produce a short circuit current high enough
to weld a ring or the like to metal causing a severe burn.

- GB-V1.3 -
PREPARING TO TEST:
1.
Be sure area around battery is well ventilated while
battery is being tested.
2.
Clean battery terminals. Be careful to keep corrosion
from coming in contact with eyes.
3.
Inspect the battery for cracked or broken case or cover. If
battery is damaged, do not use tester.
4.
If the battery is not sealed maintenance free, add distilled
water in each cell until battery acid reaches level
specified by the manufacturer. This helps purge
excessive gas from cells. Do not overfill.
5.
If necessary to remove battery from vehicle to test,
always remove ground terminal from battery first. Make
sure all accessories in the vehicle are off to ensure you
do not cause any arcing.
OPERATION & USE :
BATTERY TEST - BTJ41/BTJ42
1.
Before you test a battery in a vehicle, turn off the ignition,
all accessories and loads. Close all the vehicle doors
and the trunk lid.
2.
Make sure you have put a 9V battery into the battery
chamber. If the 9V battery runs out of power, screen will
show “REPLACE INTERNAL BATTERY”. Replace a 9V
battery before starting the test.
Note: Nothing will show on the display until the tester is
connected to a vehicle battery.
3.
Make sure the battery terminals are clean. Wire brush
them if necessary. Clamp the black load lead to the
negative terminal of the vehicle battery. Clamp the red
load lead to the positive terminal of the vehicle battery.
Please clamp on the lead part of the terminal only.

- GB-V1.4 -
Clamping on the iron part of the terminal will lead to
wrong test results.
4.
You will view the following screens:
*BTJ41/BTJ42
BATTERY TESTER BATTERY VOLTS ▲\▼↵
××.×× V
* Press ▲\▼to
select language.
▲\▼
* Press “Enter” to
battery test.
LANGUAGE ▲\▼↵
SELECT
* Press ▲\▼back to
battery test.
Enter
* Press “Enter” to set
language.
LANGUAGE ▲\▼↵
ENGLISH
* Press ▲\▼to
select language
Enter
( English, French,
German, Spanish,
Italian, Portuguese,
Japanese.)
* Press “Enter” to
confirm choice &
go back to battery
test.
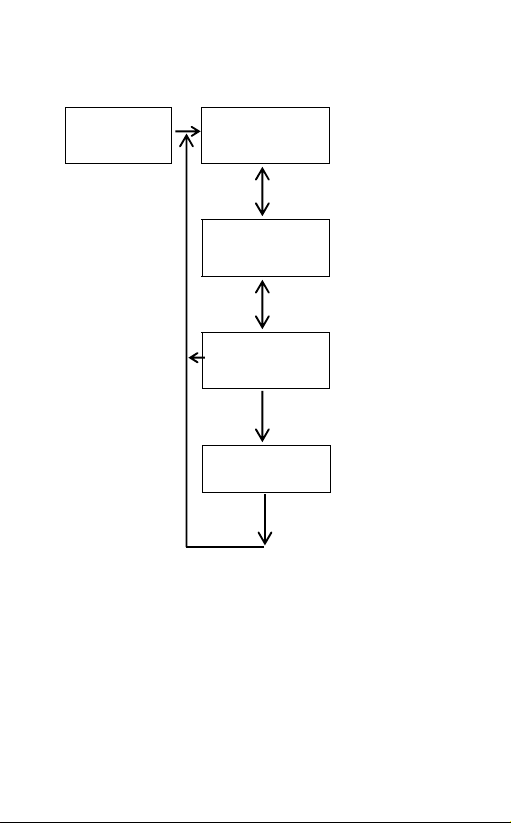
- GB-V1.5 -
*BTJ42
SYSTEM ANALYZER
BATTERY TEST▲\▼↵
××.×× V
* Press ▲\▼to
select language or
system test.
▲\▼
* Press “Enter” to do
battery test.
SYSTEM TEST▲\▼↵
××.×× V
* Press ▲\▼to
select battery test
or language
▲\▼
* Press “Enter” to do
system test.
LANGUAGE ▲\▼↵
SELECT
* Press ▲\▼to
select battery test
or system test.
Enter
* Press “Enter” to
set language.
LANGUAGE ▲\▼↵
ENGLISH
* Press ▲\▼to
select language.
Enter
( English, French,
German, Spanish,
Italian, Portuguese,
Japanese.)
* Press “Enter” to
confirm choice &
go back to battery
test.

- GB-V1.6 -
SET CAPACITY ▲\▼↵
××××AH
GOOD & PASS
××.××V ×××× SAE
GOOD & RECHARGE
××.××V ×××× SAE
TESTING
BATTERY TYPE ▲\▼↵
VRLA/GEL/AGM/SLA
IS BATTERY ▲\▼↵
CHARGED? YES
5.
Press the ▲\▼key to select battery test. Press
«ENTER» button. Example :
6.
Press the ▲\▼key to select
the battery type:
VRLA/GEL/AGM/SLA or
STANDARD SLI.
Press «ENTER» to confirm choice.
7.
Press the ▲\▼key to input
the battery capacity of AH:
2~200.
•Press «ENTER» to begin the test.
8.
Test the battery for few
seconds.
9.
Press the ▲\▼key to select
battery fully charged or not if
tester asks. Press «ENTER»
to confirm choice.
10.
When the test is completed, the display shows the
actual volts , the actual CCA and %. {Press the ▲\▼
key to select: SOH (STATE OF HEALTH) or SOC
(STATE OF CHARGE)}.
One of six results will be displayed:
GOOD & PASS :
The battery is good & capable
of holding a charge.
GOOD & RECHARGE :
The battery is good but needs
to be recharged.

- GB-V1.7 -
BAD & REPLACE
××.××V ×××× SAE
RECHARGE & RETEST
××.××V ×××× SAE
BAD CELL & REPLACE
××.××V ×××× SAE
LOAD ERROR
RECHARGE & RETEST :
Battery is discharged, the
battery condition cannot be
determined until it is fully charged. Recharge & retest
the battery.
BAD & REPLACE :
The battery will not hold a
charge. It should be replaced
immediately.
BAD CELL & REPLACE :
The battery has at least one
cell with short circuit. It should
be replaced immediately.
LOAD ERROR :
The tested battery is bigger
than 200AH. Or the clamps
are not connected properly. Please fully charge the
battery and retest after excluding both previous reasons.
If reading is the same, the battery should be replaced
immediately.
※
The operator is asked if any accessories are left on
as a possible cause. If accessories are left on, the
operator is instructed to charge and retest the battery. If
accessories are not left on, the operator is instructed to
replace the batter because the charging system is
working and a good battery should have accepted a
charge.
11.
Press «ENTER» return to step 5 or remove the test
clamps from the battery posts after completion of testing
batteries to end test.

- GB-V1.8 -
CRANKING VOLTS
××.××V LOW
SYSTEM TEST - BTJ42 Example :
1.
Press «ENTER» button, you
will view the following screen:
2.
Turn off all vehicle accessory
loads such as light, air
conditioning, radio, etc. before
start the engine.
3.
When the engine is started, one of the three results will
be displayed along with the actual reading measured.
CRANKING VOLTS NORMAL
The system is showing normal
draw. Press «ENTER» to
perform the charging system test.
CRANKING VOLTS LOW
The cranking voltage is below
normal limits, troubleshoot the
starter with manufacturers recommended procedure.
CRANKING VOLTS NO
DETECTED
The cranking voltage is not
detected.
4.
If the cranking voltage is
normal, press «ENTER» to
begin charging system test.
5.
Press the «ENTER» key, you
will view the following screen.
Please turn off ALL LOADS.
6.
Press the «ENTER» key, one of the three results will be
displayed along with the actual reading measured.
SYSTEM TEST
××.××V
TURN OFF LOADS
START ENGINE
CRANKING VOLTS
××.××V NORMAL
PRESS ENTER FOR
CHARGING TEST
MAKE SURE ALL
LOADS ARE OFF
CRANKING VOLTS
NO DETECTED

- GB-V1.9 -
LOW CHARGING VOLTS WHEN TEST AT IDLE
The alternator is not providing
sufficient current to the battery.
Check the belts to ensure the
alternator is rotating with engine running. If the belts are
slipping or broken, replace the belts and retest. Check
the connections from the alternator to the battery. If the
connection is loose or heavily corroded, clean or
replace the cable and retest. If the belts and
connections are in good condition, replace the
alternator.
CHARGING SYSTEM NORMAL WHEN TEST AT IDLE
The system is showing normal
output from the alternator. No
problem is detected.
HIGH CHARGING VOLTS WHEN TEST AT IDLE
The voltage output from the
alternator to the battery
exceeds the normal limits of a
functioning regulator. Check to ensure there is no loose
connection and the ground connection is normal. If
there is no connection issue, replace the regulator.
Since most alternators have the regulator built-in, this
will require you to replace the alternator. The normal
high limit of a typical automotive regulator is 14.7 volts
+/- 0.05. Check manufacturer specifications for the
correct limit, as it will vary by vehicle type and
manufacturer.
7.
Following the charging system
at idle, press «ENTER» for the
charging system with
accessory loads. Turn on the blower to high (heat),
highbeam headlights, and rear defogger. Do not use
cyclical loads such as air conditioning or windshield
wipers.
ALT. IDLE VOLTS
××.××V LOW
ALT. IDLE VOLTS
××.××V NORMAL
ALT. IDLE VOLTS
××.××V HIGH
TURN ON LOADS
AND PRESS ENTER

- GB-V1.10 -
RIPPLE DETECTED
××.××V NORMAL
NO RIPPLE DETECT
8.
When testing older model
diesel engines, the users need
to run up the engine to 2500
rpm for 15 seconds. You will view the screen as follows:
9.
Press «ENTER» to look for the amount of ripple from the
charging system to the battery. One of two testing
results will be displayed along with the actual testing
measured.
RIPPLE DETECTED NORMAL
Diodes function well in the
alternator / stator.
Or
EXCESS RIPPLE DETECTED
One or more diodes in the
alternator are not functioning
or there is stator damage.
Check to ensure the alternator mounting is sturdy and
that the belts are in good shape and functioning properly.
If the mounting and belts are good, replace the
alternator.
10.
Press the «ENTER» key to continue the charging
system with accessory loads. One of the three results
will be displayed along with the actual testing measured.
RUN ENGINE UP TO
2500 RPM 15 SEC.
RIPPLE DETECTED
××.××V HIGH
Ce manuel convient aux modèles suivants
1
Table des matières
Autres manuels Intact Équipement de test


Manuels Équipement de test populaires d'autres marques

SMART
SMART KANAAD SBT XTREME 3G Series Manuel utilisateur

Agilent Technologies
Agilent Technologies BERT Serial Manuel utilisateur

Agilent Technologies
Agilent Technologies N3280A Manuel utilisateur

Vernier
Vernier Go Direct Voltage Manuel utilisateur

Lifeloc
Lifeloc R.A.D.A.R. Manuel utilisateur

Fluke
Fluke T5-600 Instructions d'utilisation et d'installation


