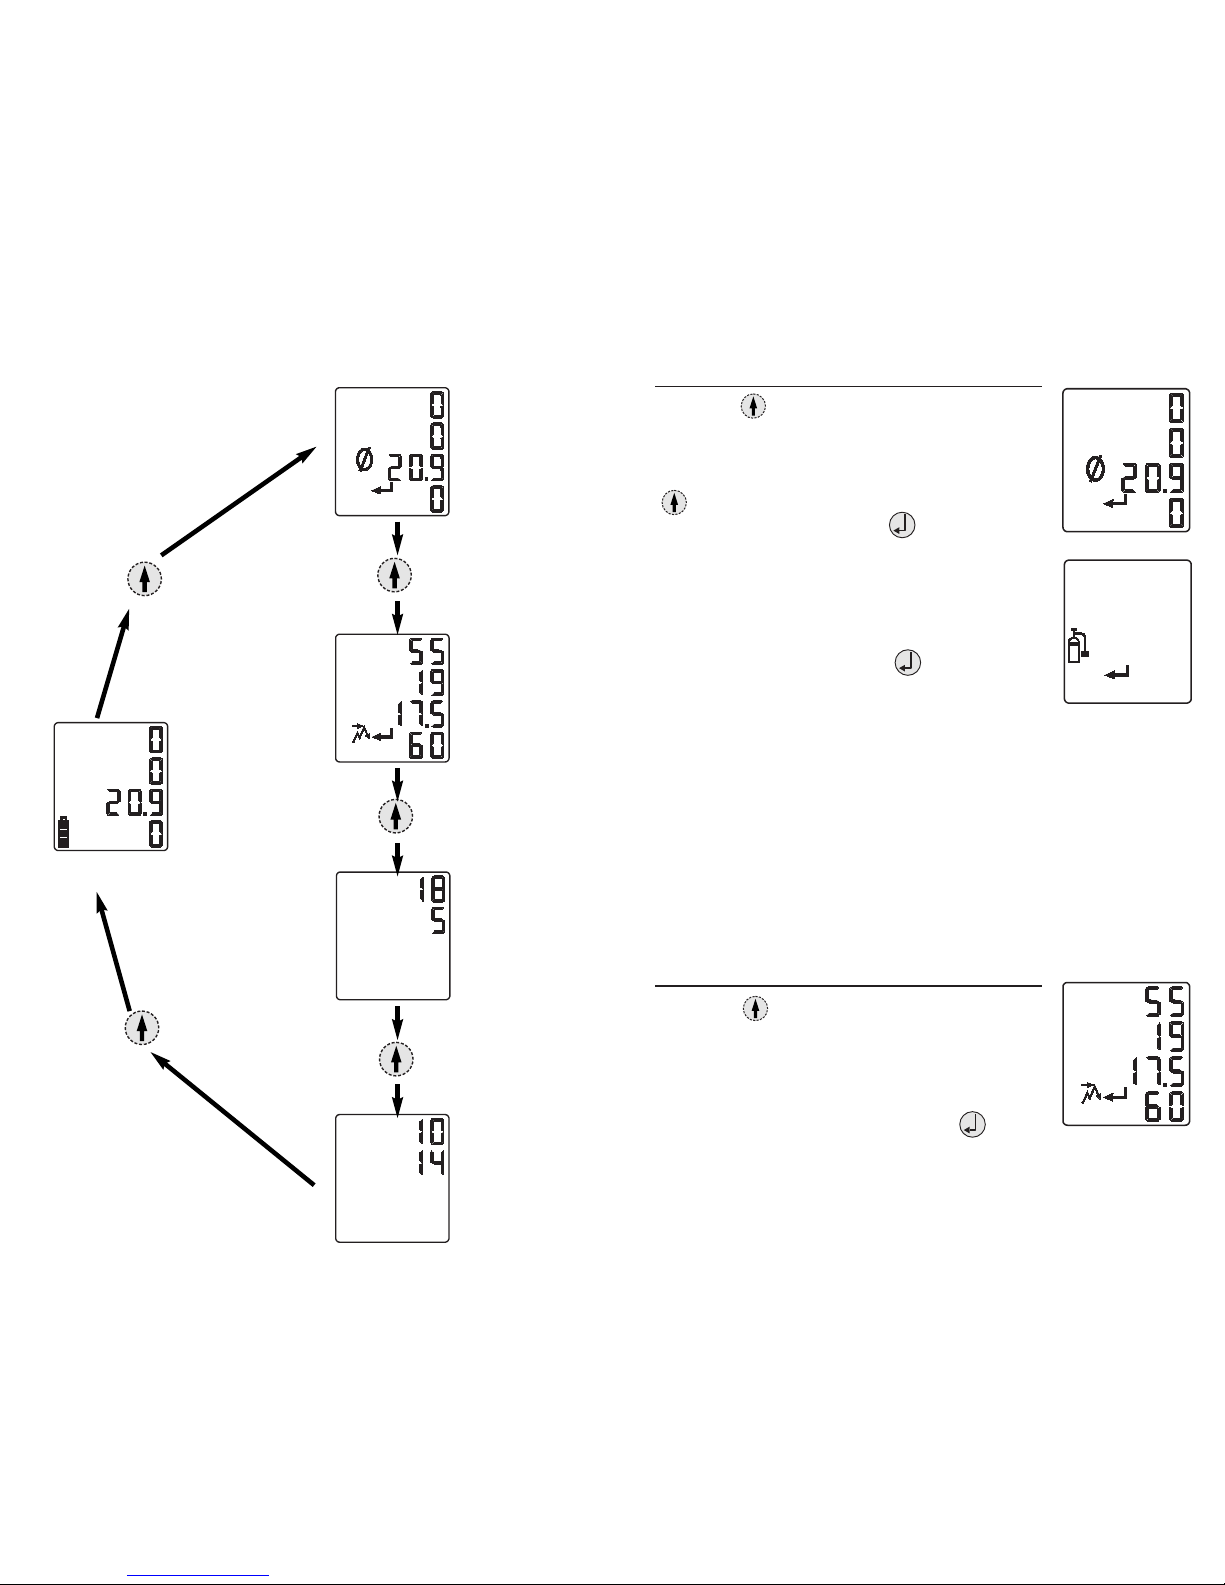
STEL ALARM SET POINTS
The fourth of the configuration screens is the STEL alarm
values. The display will show the "STEL", "Buzzer",
"Low", "Enter", and "Up/Down/Enter" icons along with
the two STEL alarm set points. If no changes are needed,
press the arrow key to move to the next screen. If
changes are desired, press the key. The first STEL
alarm value will be flashing. To adjust this value, use the
and arrow keys. Once the desired value is met,
press the key to select the next STEL alarm value.
Continue this process until both STEL alarm set points
have been set. When both values are set, the display will
again show the "STEL", "Buzzer", "Low", "Enter", and
"Up/Down/Enter" icons along with the two STEL alarm
set points. Pressing the key will re-enter the mode
and let you set the STEL alarm levels again; pressing the
arrow key will move you to the Clock Setting
screen. Pressing the key at any time will take you
back to initial STEL Alarm screen, and no changes will be
saved. Pressing the key a second time will take you
to the normal Gas Readings screen.
CLOCK SETTING
Setting the clock is the next configuration screen. The
display will show the "Clock", "Enter", and
"Up/Down/Enter" icons along with two rows of digits. If
no changes are needed, press the arrow key to move
to the next screen. If changes are desired, press the
key. The first value that will be flashing is the hours
setting of your clock. To adjust this value, use the
and arrow keys. Once the desired value is met, press
the key to select the minutes value. Continue this
process until both hours and minutes have been set. When
both values are set, the display will again show the
"Clock", "Enter", and "Up/Down/Enter" icons along with
the two rows of digits. Pressing the key will re-enter 13
12
Continue this process until all four high alarm set points
have been set. Once all four values are set, the display will
again show the "Buzzer", "High", "Enter", and
"Up/Down/Enter" icons along with the four high alarm set
points. Pressing the key will re-enter the mode and
let you set the high alarm levels again; pressing the
arrow key will move you to the TWA Alarm Set Points
screen. Pressing the key at any time will take you
back to initial High Alarm screen, and no changes will be
saved. Pressing the key a second time will take you
to the normal Gas Readings screen. The high alarm is a
non-latching alarm.
TWA ALARM SET POINTS
This is the third of the configuration screens. The display
will show the "TWA", "Buzzer", "Low", "Enter", and
"Up/Down/Enter" icons along with the two TWA alarm set
points. If no changes are needed, press the arrow key
to move to the next screen. If changes are desired, press
the key. The first TWA alarm value will be flashing.
To adjust this value, use the and arrow keys.
Once the desired value is met, press the key to select
the next TWA alarm value. Continue this process until
both TWA alarm set points have been set. When both
values are set, the display will again show the "TWA",
"Buzzer", "Low", "Enter", and "Up/Down/Enter" icons
along with the two TWA alarm set points. Pressing the
key will re-enter the mode and let you set the TWA alarm
levels again; pressing the arrow key will move you to
the STEL Alarm Set Points screen. Pressing the key
at any time will take you back to the initial TWA Alarm
screen, and no changes will be saved. Pressing the
key a second time will take you to the normal Gas
Readings screen.