inDESIGN MP30D Manuel utilisateur

MP30D: INSTALLATION & OPERATION MANUAL
PAGE 2
The inDESIGN MP30D – 30 watt, all-in-one mixer amplier is
designed for small to medium installations where multiple
playback sources are required. The in-built FM tuner, DAB+ tuner,
USB and MP3 player allow easy playback of your favourite radio
station, or music stored on a USB drive.
The MP30D delivers 30 watts via 8Ω or constant voltage 100V
and 70V speaker outputs and features 2 Microphone/Line
inputs with individual gain control for external audio sources
and microphones. A ‘pre-amp out/power amp in’ link allows
for the mixer audio signal to be sent to an external equaliser
or a booster amplier.
INTRODUCTION
INTRODUCTION 2
IMPORTANT SAFETY
INSTRUCTIONS 3
INSTALLATION 5
FRONT PANEL 6
REAR PANEL 7
BLOCK DIAGRAM: 8
SPECIFICATIONS 9
WARRANTY INFO 10
CONTENTS
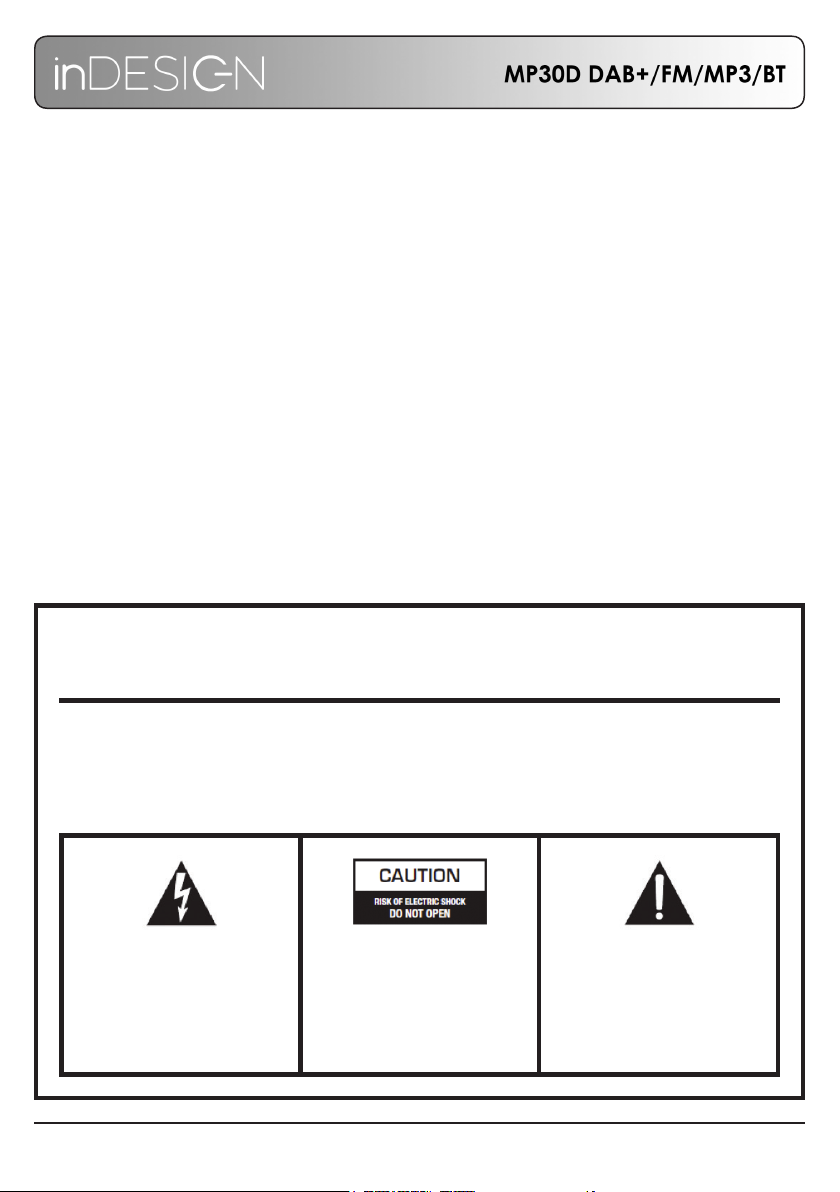
Electrical and Safety Warnings
THESE SERVICE INSTRUCTIONS ARE FOR USE BY QUALIFIED SERVICE PERSONNEL ONLY.
TO REDUCE THE RISK OF ELECTRIC SHOCK DO NOT PERFORM ANY SERVICING
OTHER THAN THAT CONTAINED IN THE OPERATING INSTRUCTIONS
UNLESS YOU ARE QUALIFIED TO DO SO.
CAUTION
The lightening ash with arrowhead
symbol, with an equilateral triangle,
is intended to alert the user to the
presence of un-insulated
“dangerous voltage” within the products
enclosure that may be of sufcient
magnitude to constitute a risk of electric
shock to persons.
WARNING: TO REDUCE THE RISK OF ELECTRIC
SHOCK, DO NOT REMOVE COVER (OR BACK).
NO USER SERVICEABLE PARTS INSIDE. REFER
SERVICING TO QUALIFIED SERVICE PERSONNEL.
WARNING: TO REDUCE THE RISK OF FIRE OR
ELECTRICAL SHOCK, DO NOT EXPOSE THIS
APPLIANCE TO RAIN OR MOISTURE.
The exclamation point within an
equilateral triangle is intended to
alert the user to the presence of
important operating and maintenance
(servicing) instructions in the literature
accompanying the appliance.

MP30D: INSTALLATION & OPERATION MANUAL PAGE 3
IMPORTANT SAFETY INSTRUCTIONS
1. Read these instructions.
2. Keep these instructions.
3. Heed all warnings.
4. Follow all instructions.
5. To prevent injury please refer to these instructions for electrical and safety information before installing
or operating the apparatus.
6. No naked ame sources such as lighted candles should be placed on the apparatus.
7. Operation of this apparatus is recommended for moderate climates only.
8. This apparatus must not be exposed to dripping or splashing liquid.
No object lled with liquid, such as a vase, should be placed on the apparatus.
9. Clean only with a dry cloth.
10. Do not block any of the ventilation openings. Install in accordance with the manufacturer’s instructions.
11. Do not install near any heat sources such as radiators, heaters, stoves, or other apparatuses
(including ampliers) that produce heat.
12. Unplug this apparatus during lightening storms or when not in use for long periods of time.
13. Protective Earthing Terminal:
The apparatus should be connected to a mains socket outlet with a protective earthing connection.
14. The mains plug/appliance coupler is used as a disconnect device, the disconnect device shall remain
readily operable.
15. When not in use and during transportation, please take care of the power cord set, for example, tie up
the power cord set with a cable tie/something similar. It should be kept away from sharp edges and
the like that can cause abrasion of the power cord set. When put into use again, check that the power
cord set is not damaged. If any damage is found, have the unit checked by a qualied service person
to replace the power cord set specied by the manufacturer.
16. The terminals marked with symbol of “ “ may be of sufcient magnitude to constitute a risk of
electric shock. The external wiring connected to the terminals requires installation by a qualied service
person or the use of ready-made leads or cords.
17. Only use attachments/accessories specied by the manufacturer.
18. Check speaker line load prior to connecting to amplier using an impedance meter.
19. Refer all servicing to qualied service personnel. Servicing is required if the apparatus has been
damaged in any way, such as power-supply cord or plug breakage, damage due to liquid or objects
falling onto the apparatus, exposure to rain or moisture, or if the apparatus does not operate normally,
or has been dropped.
20. Correct Disposal of this Product:
This marking indicates that this product should not be disposed of with other household wastes. To
prevent possible harm to the environment or human health from uncontrolled waste disposal, recycle
it responsibly to promote the sustainable reuse of material resources. To return your used device, please
use the return and collection systems or contact the retailer where the product was purchased. They
can take this product for environmental-safe recycling.
WARNING: There are no user serviceable parts inside. Refer all servicing to qualied service personnel.

MP30D: INSTALLATION & OPERATION MANUAL
PAGE 4
>10cm >4in
>10cm >10cm
>4in >4in
>10cm
>4in
You must allow a minimum 10 cm or 4 inches of unobstructed clearance around the unit.
Do not place the unit on a bed, sofa, rug, or similar surface that could block the ventilation openings. If the
unit is placed in a bookcase or cabinet, there must be ventilation of the cabinet to allow proper cooling.

MP30D: INSTALLATION & OPERATION MANUAL PAGE 5
To calculate the ampliers capability:
If your chosen amplier has a maximum output of 30 Watts at 100V,
the minimum impedance connected should be at least 333 Ohm (100V x 100V/333 Ohm = 30W).
When measuring a constant voltage speaker load, use a professional impedance meter, not a multimeter.
INSTALLATION
How to Calculate the correct load for a 100V Amplier:
When installing a 100V loudspeaker system, it is rather simple to calculate the number of loudspeakers that
can be connected to a particular 100V amplier.
Each 100V loudspeaker has a 100V transformer that will have different power tappings, for example 1.5, 3
and 6W. The sum of all taps should never exceed the ampliers power rating.
MP30D
AMPLIFIER POWER > LOUDSPEAKER LOAD POWER
27W 1.5 1.5 3 3 6 12= + + + + +
MP30D: INSTALLATION & OPERATION MANUAL
PAGE 6
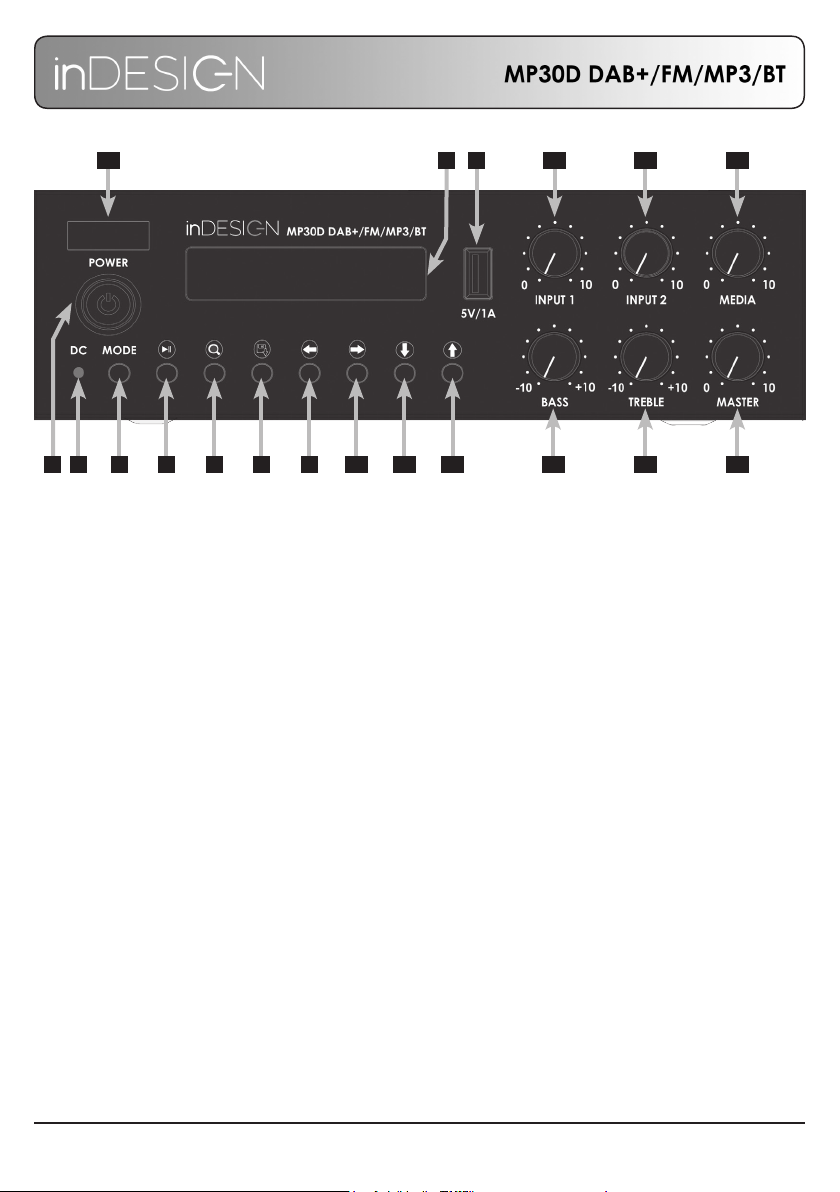
FRONT PANEL
1. Power On / Off button.
2. DC 24V power indication LED.
Red indicates 24V DC power available.
Orange indicates 24V DC power active.
3. Display screen.
4. USB input for MP3 playback.
5V, 0.5A.
5. Mode select button.
Switch between DAB+, FM, MP3 and BT
media options.
6. BT mode: Play / Pause, hold to Pair.
USB mode: Play / Pause.
7. DAB+: Scan for available stations.
FM: Auto-scan and store 10 radio stations.
8. DAB+ / FM: Hold to store station to
pre-set slot. While storing, press again to
cycle through available pre-set slots, the
station will then store on selected pre-set
slot automatically.
Single press to recall station pre-set.
Press again to cycle through available
stored station.
9. BT / USB: Previous track.
DAB+: Menu return.
FM: Scan to previous station.
10. BT / USB: Next track
DAB+: Menu enter.
FM: Scan to next station.
11. DAB+: Menu up.
FM: Manually change frequency.
Down 100kHz step.
12. DAB+: Menu down.
FM: Manually change frequency.
Up 100kHz step.
13. Volume adjustment for mic / line input 1.
14. Volume adjustment for mic / line input 2.
15. Volume adjustment for media source.
16. Bass level adjustment for output.
17. Treble level adjustment for output.
18. Output volume adjustment.
19. BT antenna behind window.
21 5 6 7 8 9 10 11 12 16 17 18
1514134
319

MP30D: INSTALLATION & OPERATION MANUAL PAGE 7
REAR PANEL
20. Antenna socket for DAB+ and FM radio.
21. Loudspeaker outputs.
When connecting low impedance speakers, use COM and 8Ω connections.
For 70V or 100V speakers, use COM and the respective 70V or 100V connections.
Do not use both 8Ω and 70V/100V outputs at the same time.
22. Pre-Master Auxiliary Output for external devices.
23. Mains Socket.
*Note: Only use a fuse equal to the specied rating.
24. DC 24V input socket.
25. Input 1. Balanced XLR for mic level and dual RCA for line level inputs.
26. Input 2. Balanced XLR for mic level and dual RCA for line level inputs.
27. Phantom Power switch. 24V DC mic input 1.
28. Voice Priority. Threshold level adjustment for input 1 voice priority.
20
21 22 23242526 27 28

MP30D: INSTALLATION & OPERATION MANUAL
PAGE 8
DAB+
Use the ‘Mode’ button to select DAB+. Ensure the provided antenna is securely connected and uncoiled.
For rst time use, use the button to perform an initial scan.
Once the scan is nished, use the and buttons to scroll through the list of available stations.
Pressing the button will select the current station.
To open the DAB+ menu press the button.
The DAB+ menu provides access to the Station List, Full Scan and the MP30D Main Menu.
Use the button to select any of these options, or the button to return to the currently
playing station.
*Please note, the Main Menu can only be accessed while in DAB+ mode.
For ease of use, up to 10 stations can be stored as presets.
To store a station to a preset slot, rst select a station from the station list.
With the desired station playing, press and hold the button. When the ‘Preset Save’ prompt appears,
press the again to cycle through the 10 preset slots. The station will be automatically saved to the
shown preset slot 3 seconds after last button press.
To recall preset stations, press the button. With the ‘Preset’ prompt showing, pressing the button
will cycle through the 10 presets to recall. The selected station will be automatically recalled 3 seconds after
last button press.
FM RADIO
Use the ‘Mode’ button to select FM Radio. Ensure the provided antenna is securely connected
and uncoiled.
For rst time use, use the button to perform a quick scan. This will automatically store the rst
10 available stations.
Using the and buttons will scan to the previous or next available station respectively, or use
the and buttons to move down or up the available spectrum in 100kHz steps.
Preset stations can also be added or modied manually. To do so, rst move to the desired station, then
press and hold the button. When the ‘Preset Save’ prompt appears, press the again to cycle
through the 10 preset slots. The station will be automatically saved to the shown preset slot 3 seconds
after last button press.
To recall preset stations, press the button. With the ‘Preset’ prompt showing, pressing the button
will cycle through the 10 presets to recall. The selected station will be automatically recalled 3 seconds
after last button press.

MP30D: INSTALLATION & OPERATION MANUAL PAGE 9
BLUETOOTH
Use the ‘Mode’ button to select Bluetooth.
Press and hold the button to enter pairing mode. With a compatible Bluetooth device paired,
pressing the button will play or pause the audio. Pressing the button will begin the track again
or skip to the previous track and pressing the button will skip to the next track.
USB
Use the ‘Mode’ button to select USB.
Insert a USB drive into the port on the front of the unit. The unit will automatically locate compatible audio
les on the USB drive and begin playback.
Use the button will play or pause the audio. Pressing the and buttons will skip to the previous
or next track respectively.
Pressing the button will rotate between Loop All, Loop One and Random playback modes.

MP30D: INSTALLATION & OPERATION MANUAL PAGE 10
BLOCK DIAGRAM
Phantom power PRE OUT
Radio
Bluetooth
Mp3
Player
DSP
Channel Level
2 Band EQ
Master Level
Power AMP
Media Player
VOX
Com
8 ohm
70V
100V
AC IN
SMPS
AC 110-240V 50/60Hz
24V DC IN
24V to AMP
24V Phantom power
Input 1
Input 2
VOX
Media
MP30D Block Diagram
Table des matières


