HAYA HYP008F Manuel utilisateur

1
LED SPOT LIGHT 4 in 1)
USER MANUAL

2
CONTENTS
1.BEFORE YOU BEGIN.......................................................3
What is included...............................................................3
Unpacking Instructions......................................................3
AC POWER......................................................3
Safety Instructions............................................................4
2.INTRODUCTION............................................................5
Specifications..................................................................5
Features.............................................................................5
Product overview...............................................................6
Dimensions.............................................................................6
3.SETUP................................................................................7
Installation Requirement......................................................7
Connection of DMX Signal Wire.............................................8
3-PIN TO 5-PIN CONVERSION CHART............................8
4.OPERATIG INSTRUCTIONS...............................................9
Control Panel Functions.......................................................9
Menu Map............................................................................10
Operating instructions............................................................11
DMX512 Controller Mode......................................................12
DMX512 Channel Values......................................................12
ID Address Instructions.....................................................16
Master/Slave Control Mode................................................17
5. APPENDIX................................................18
Service Maintenance Guide................................................18
Blow-out Diagram................................................20
3
1.BEFORE YOU BEGIN
What is included
Ø1 x Fixture
Ø1 x Powercable with plug
Ø1 x UserManua
Unpacking Instructions
Immediately upon receiving a fixture, carefully unpack the carton; check the
contents to ensure that all parts are present, and have been received in good
condition. Notify the shipper immediately and retain packing material for
inspection if any parts appear damaged from shipping or the carton itself shows
signs of mishandling. Save the carton and all packing materials. In the event that
a fixture must be returned to the factory, it is important that thefixture be returned
in the originalfactory box andpacking.
AC POWER
This fixture hasan auto-switching switch-modepower supply thatcan
accommodate a widerange of inputvoltages. The only thing necessaryto do
before powering onthe unit isto make surethe line voltageyou are applyingis
within the rangeof accepted voltages.This fixture will accommodate between
100V and 240VAC 50-60Hz.
Help preserve theenvironment! Ensure thatthis product is
recycled at theend of itslife. Your supplier cangive details
of local arrangementsfor the disposalof products.
4
Safety Instructions
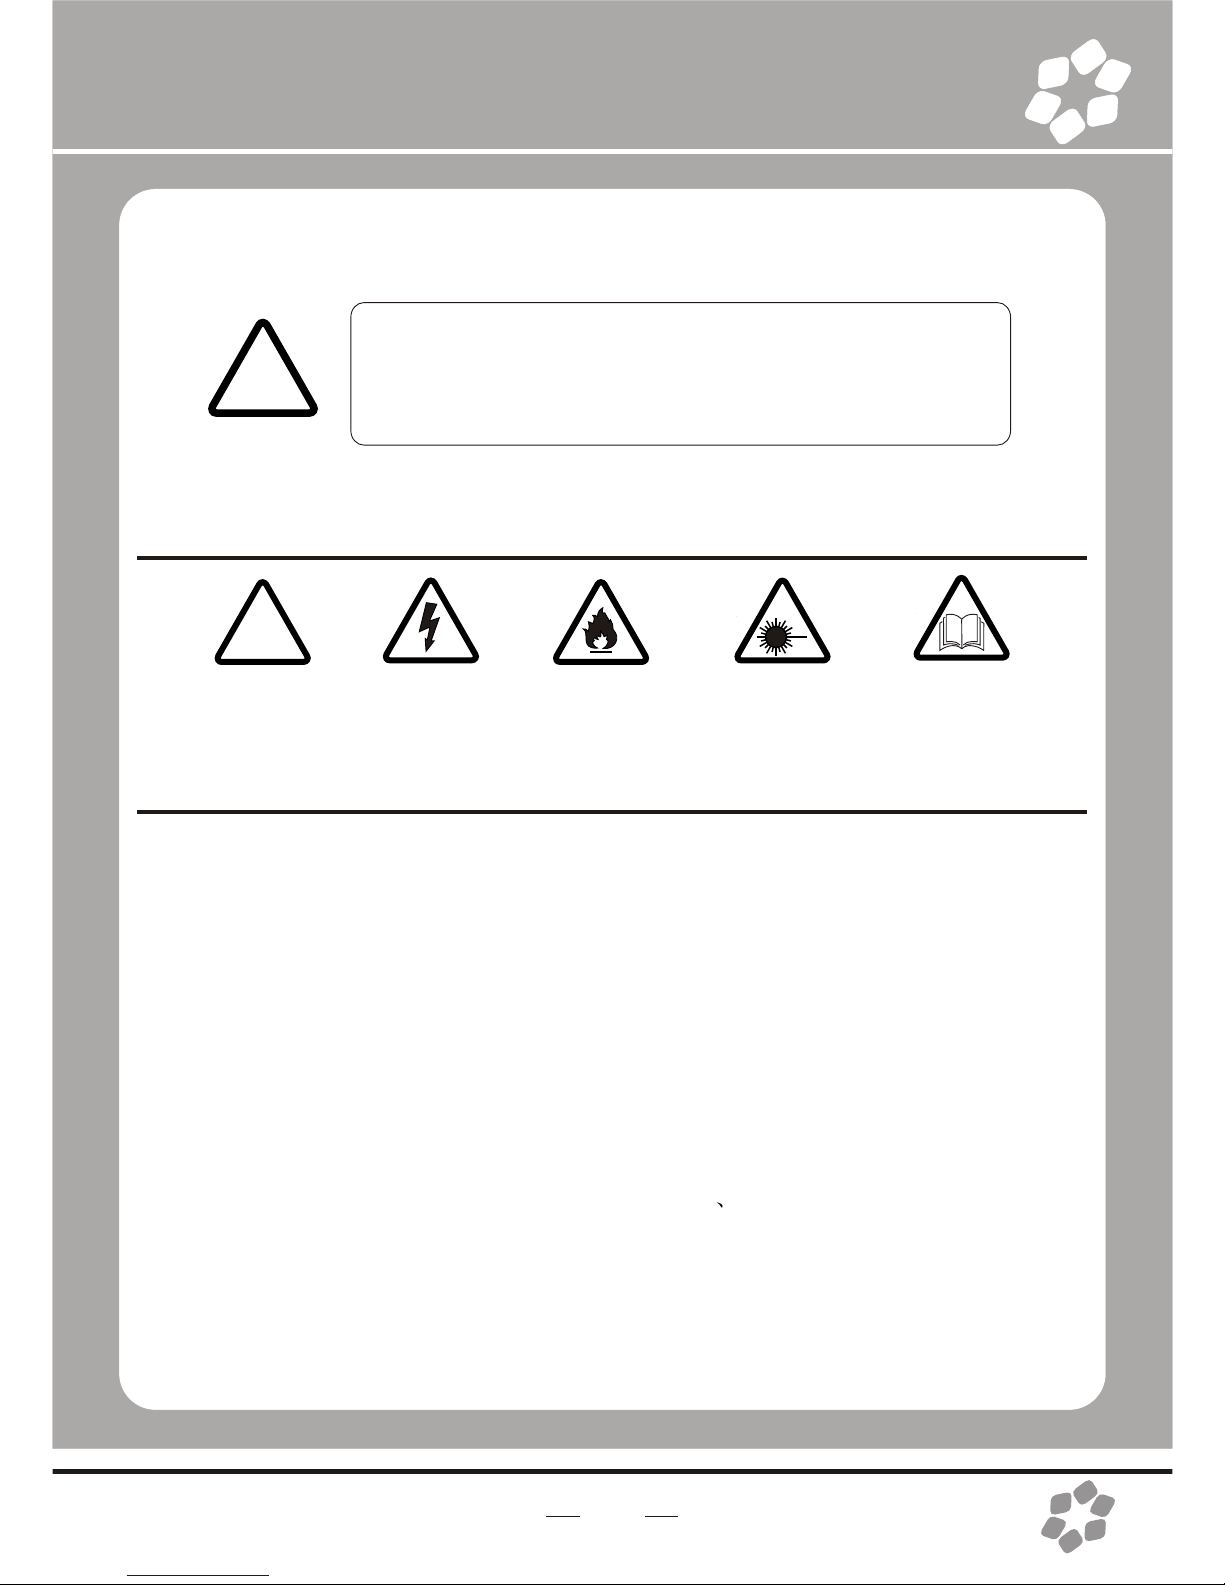
!
WARNING!
Please read theseinstructions carefully, which includes
important information aboutthe installation, usageand
maintenance of thisproduct..
The following symbols are used to identify important safety information on the
product and inthis manual:
!!
DANGER!
Safety hazard.
Risk of severe
injury or death
DANGER!
Hazardous
Voltage. Riskof
lethal or severe
electric shock.
WARNING!
Fire hazard
WARNING!
LED light
emission. Risk
of eye injury.
WARNING!
Refer to user
=This light belongsto grade Iprotection device, thereforethe light mustconnect
to the earthexcellently. And thepower connection mustbe operated bythe
professional technician.
=Make sure thatthe working voltagewill not higheror lower thanthe rated value.
=Make sure thatthe cable didn'tbe damage orlacerated by sharp.
=The light mustbe power off when it'sstanding idle orbefore clearing.
=The cable mustwith plug, andyou must pullout the cableby handle theplug.
=Please be carefulwhen installing thelighting. Never touchthe bared cable,or
it will causethe deadly electricshock.
=Please use thesuitable and safecable to connectthe light.
=Please never remodelthe light randomly, we willnot take theguarantee for the
faulty and damagewhich caused bydismantle repair or remodelof the
nonprofessional person.
=Maximum ambient temperature40°C. Do notoperate fixture attemperatures
higher than this.
=Never connect thedevice to adimmer pack.
5
2.INTRODUCTION
Specifications
lVoltage Rating: AC100V 240V 50-60Hz
lPower Rating: 60W
lLED Quantity: 7pcs 4 in1LEDs(RGBW)
lLED: 500mA
lBeam Angle: 20°/30°/40°(option)
lIngress Protection: IP65/IP20
lProduct Size: 190X148X238mm
lPackage Size:230X200X295 mm
lN/W:2.5Kgs
Features
lRGBW color mixing with or without DMX controller
l5 distinct dimming curves
lUser defined program/ inner optional program
lLED display with password protection
lTransfer custom programs between fixtures
lOperating Modes: DMX512Connection with IDAddress/Master &Slave...
lDMX Channels: STAG/col.d
11 channels(STAG): Dimmer+RGBW+ Macro +strobe +AUTO + auto speed
+ dimming speed+ID
5 channels(col.d):Dimmer+RGBW

6
Product Overview
Dimensions
Control board
DMX IN DMX OUT
Hanging
bracket/ floor
stand
Bracket
adjustment
knob
POWER OUT
POWER IN

7
3.SETUP
Installation Requirement
lThis product can be used in a variety of situations, can hang and put on
the ground.
lIf hanging the fixture for over head use,then please followthe below steps.
lPlease choose thesuitable location toput or hangthe light wheninstalling it.
Youmust use the exclusive clamp hanger and screw when hanging it, and
make sure the weight of the light is within limits of the hanger.
lPlease make sure without any flammable objects within 0.5m when
installing the light.
lThe installation should be operated by professional person; any irregular
installation will cause the body injury or equipment damage.
lBlock access belowthe work areaand use suitable and stable platform
when installing or servicing fixture.
Hanging Clamp
Note: sold
separately
Safety Cable
Note: the cablemust be
secured through the heat
sink ventilation
passageway.
8
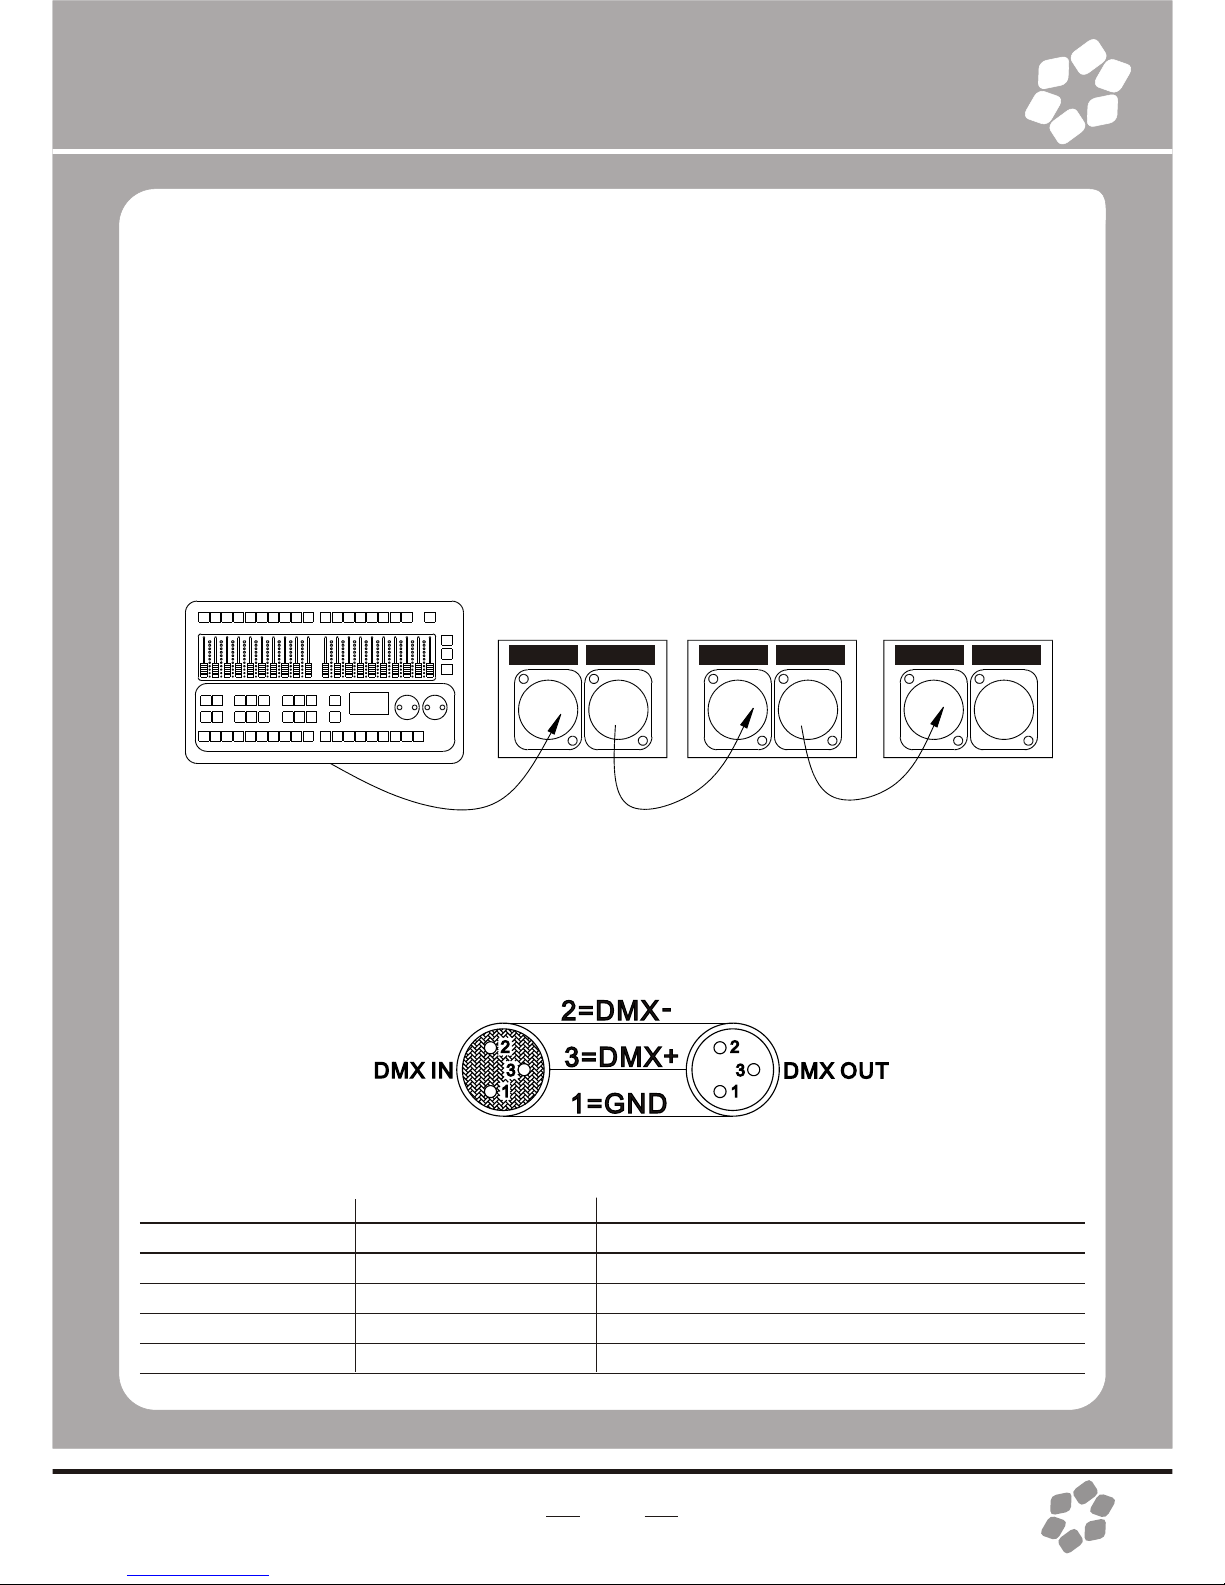
Connection of DMX Signal Wire
1Please use the fixture controller wire specially when use the DMX512
Controller. Connectthe (male) 3pin connector side of the DMX cable to
the output (female) 3 pinconnector of the first fixture.
2Connect the endof the cable coming fromthe first fixture which willhave
a (male) 3pin connector tothe input connectorof the next fixture
consisting of a (female) 3 pin connector. Then, proceed to connect from
the output asstated above tothe input of the following fixture and so on.
3This product can be connected numerous lamps in series without the
need for the signal amplifier; the signal will not be weakened.
DMX IN DMXOUT DMX IN DMXOUT DMX IN DMXOUT
3-PIN TO 5-PIN CONVERSION CHART
Note! If you use a controller with a 5 pin DMX output connector, you will
need to usea 5 pinto 3 pin adapter.
Conductor
Ground/Shield
Data ( -) signal
Data ( +) signal
Do not use
Do not use
3 Pin Female(output)
Pin 1
Pin2
Pin 3
5 Pin Male(Input)
Pin 1
Pin2
Pin 3
Do not use
Do not use
3 PIN TO 5 PIN CONVERSION CHART
9
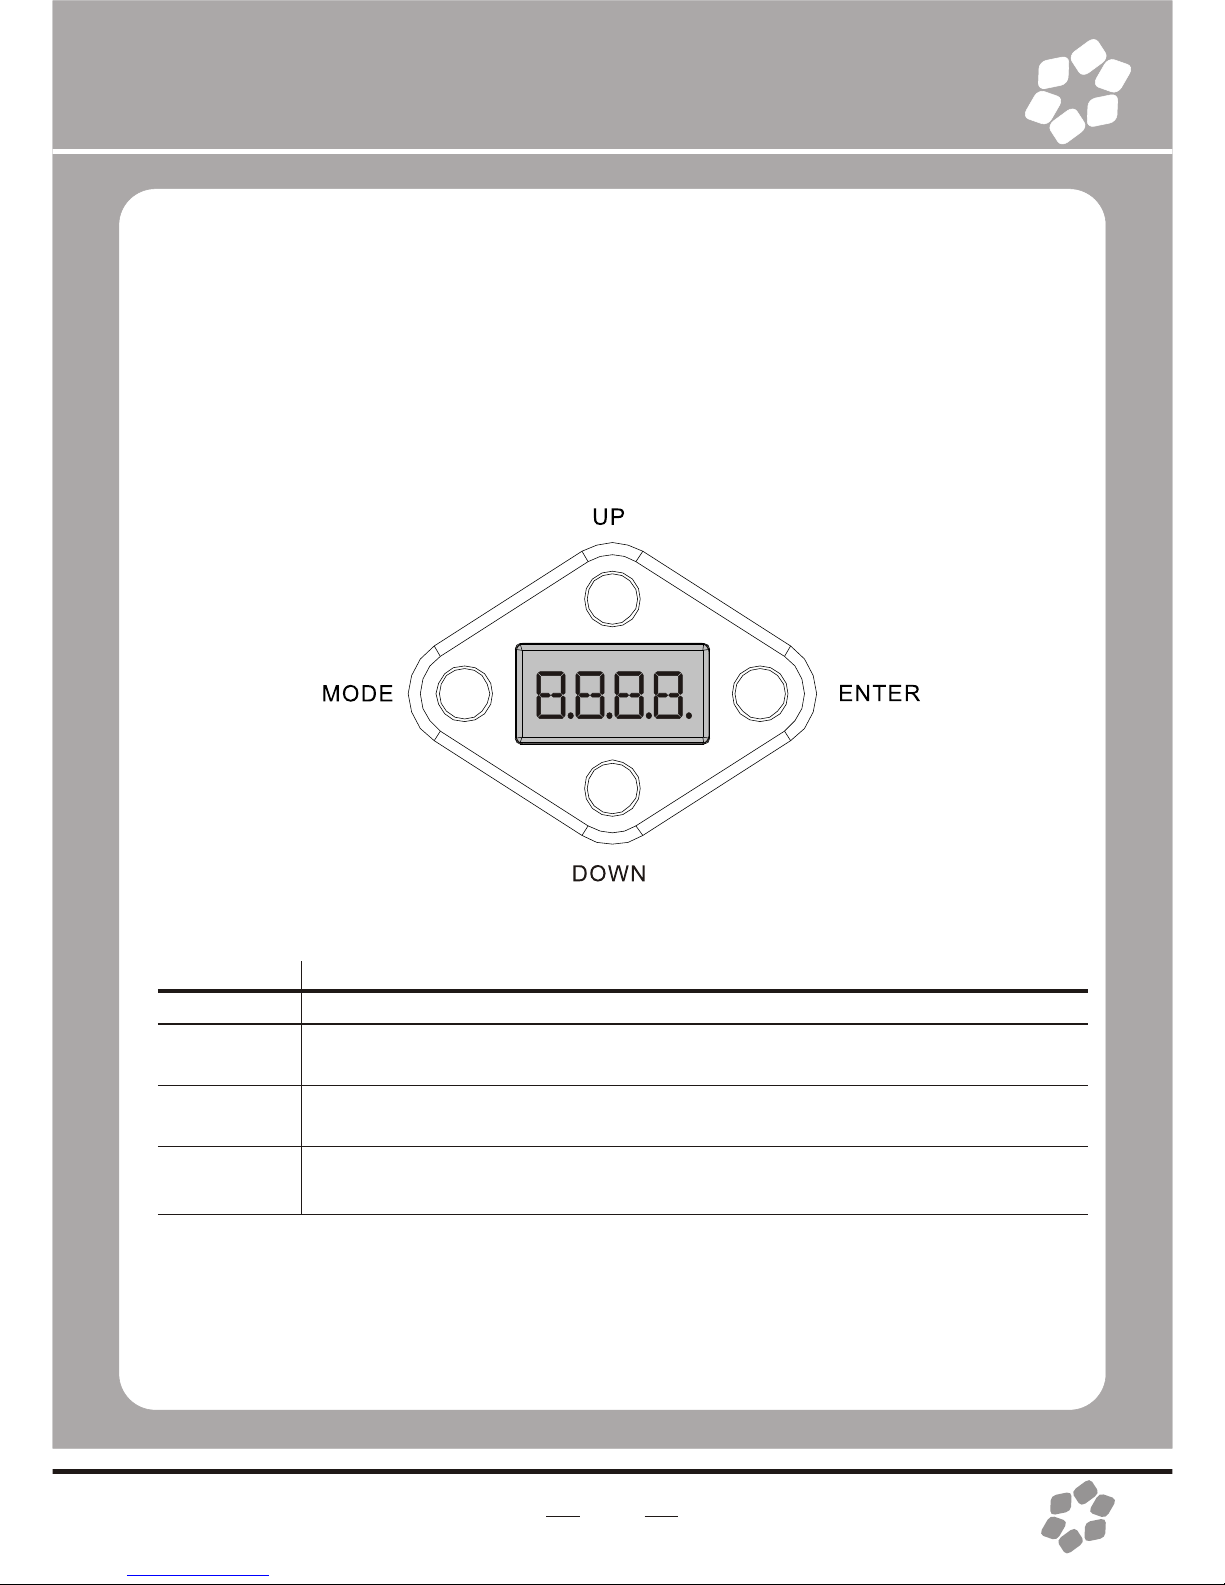
BUTTON
MODE
ENTER
UP
DOWN
FUNCTION
Exits from thecurrent menu or function
Enables the currently displayed menu or sets the currently selected
value in tothe selected function
Navigates upwards through the menu list and increases the numeric
value when ina function
Navigates downwards through the menu list and decreases the numeric
value when ina function
4.OPERATING INSTRUCTIONS
Control Panel Functions
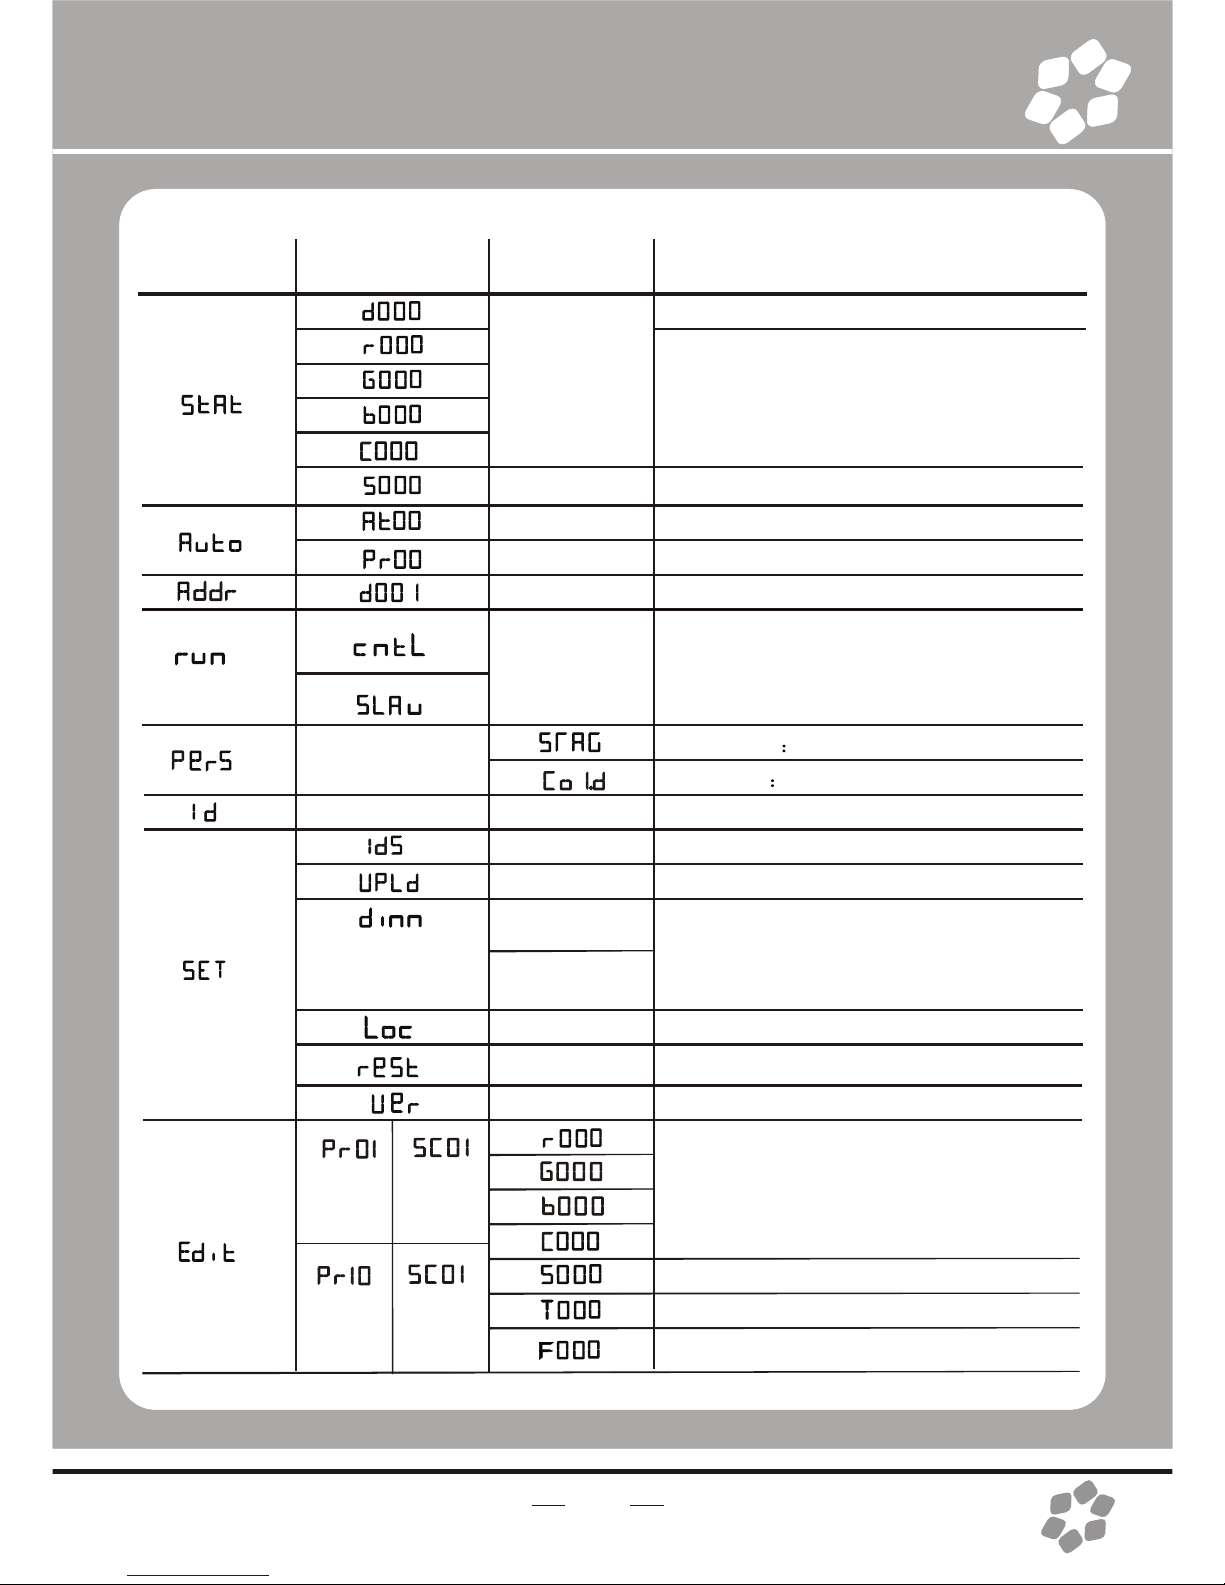
MAIN
FUNCTION
SUB-
FUNCTION SELECTION
000~255
(0 ~ 100%)
00~20
01~10
01~10
001~512
ON~OFF
Password
OFF
DIM1/2/3/4
ON~OFF
Password
V1.38
01~66
01~09
custom
custom
01~30
scene
01~90
scene
INSTRUCTION
Dimmer
User can combineRED, GREEN,BLUE
and WHITE togenerate a customcolor
Select strobe frequency
10 auto programsavailable
chose program from10 “EDIT”programs
Set DMX startaddressSets the
operating mode forthe fixture:to
receive signal froma DMX controller
(cntl) .receive signalor Download
programs from Masterfixture. (Slave)
11 channels D+RGBW +S…
5 channels D + RGBW
Assign ID addressfor fixtures
Enable or disableID
Upload programs(Password required)
"Off" meansselect linear dimming,or
choose dimmer 1-4to control thedimming
speed, dimming 1of the fastestdimming
curves, 4 forthe most slowlydimming curve
Enables or Disablespassword lockout
Reset factory defaults
Version number
User can combineRED, GREEN,BLUE
and WHITE togenerate a custom
color(0~255)
(0~20Hz)Select strobe frequency
(0~255) step time
transition time oflast step tocurrent step
10
Table des matières
Manuels Équipement d'éclairage populaires d'autres marques


Qazqa
Qazqa Suplux SL 3 Black 103062 Manuel utilisateur

Commercial Electric
Commercial Electric 54568141 Manuel utilisateur

CREE LIGHTING
CREE LIGHTING 304 Series Manuel utilisateur

Goobay
Goobay 49867 Manuel utilisateur

ECOMAN ITALIA
ECOMAN ITALIA LED T8 Manuel utilisateur

Alkalite
Alkalite Krypton KT-81 Manuel utilisateur


