Grandstream Networks IPVT10 Manuel utilisateur

Grandstream Networks, Inc.
126 Brookline Ave, 3rd Floor
Boston, MA 02215. USA
Tel : +1 (617) 566 - 9300
Fax: +1 (617) 249 - 1987
www.grandstream.com
For Warranty and RMA information, please visit www.grandstream.com
IPVT10
Video Conferencing Server
Quick Installation Guide

Content
English..............................................................................1
简体中文.........................................................................11
Español............................................................................21
Français...........................................................................31
Русскй.............................................................................41
Português.........................................................................51
ةيبرعلا ...............................................................................
61

~ 1 ~ ~ 2 ~
PRECAUTIONS:
The IPVT10 is not pre-congured to support or carry
emergency calls to any type of hospital, law en-
forcement agency, medical care unit (“Emergency
Service(s)”) or any other kind of Emergency Service.
You must make additional arrangements to access
Emergency Services. It is your responsibility to
purchase SIP-compliant Internet telephone service,
properly congure the IPVT10 to use that service, and
periodically test your conguration to conrm that it
works as you expect. If you do not do so, it is your re-
sponsibility to purchase traditional wireless or landline
telephone services to access Emergency Services.
GRANDSTREAM DOES NOT PROVIDE CON-
NECTIONS TO EMERGENCY SERVICES VIA THE
IPVT10. NEITHER GRANDSTREAM NOR ITS
OFFICERS, EMPLOYEES OR AFFILIATES MAY
BE HELD LIABLE FOR ANY CLAIM, DAMAGE, OR
LOSS. YOU HEREBY WAIVE ANY AND ALL SUCH
CLAIMS OR CAUSES OF ACTION ARISING FROM
OR RELATING TO YOUR INABILITY TO USE THE
IPVT10 TO CONTACT EMERGENCY SERVICES,
AND YOUR FAILURE TO MAKE ADDITIONAL
ARRANGEMENTS TO ACCESS EMERGENCY
SERVICES IN ACCORDANCE WITH THE IMMEDI-
ATELY PRECEDING PARAGRAPH.
EN
• Please keep the equipment dry and avoid violent collisions between
the equipment and other objects during storage, transportation, and
usage.
• Please do not disassemble the equipment. Please contact with
Grandstream support or designated distributor when users encounter
problems.
• Any individual or enterprise may not change the structure, safety
or performance design of the equipment without Grandstream
authorization.
• When using this equipment, users should follow the relevant laws and
regulations, and respect the legal rights of others.
• Before plugging or unplugging the cables of the equipment, users
should stop using the equipment and disconnect the power supply.
• Do not interrupt the power supply during system startup or rmware
upgrade. This may damage the equipment rmware, and cause the
equipment failure.
• Please place the equipment in a ventilated, direct light-free environ-
ment. The operating environment temperature of this equipment is
0°C to 45°C.
• Do not block the openings of the device with any object and leave
more than 10cm of heat dissipation space around the equipment.
• Do not place the equipment at the environment with the following
humidity: 10% - 90% RH (non-condensing).

~ 3 ~ ~ 4 ~
OVERVIEW:
Product Features:
IPVT10 is an enterprise full-HD conference system that integrates multiple
service units such as MCU, media service, WebRTC service, and conference
management. IPVT10 includes a full set of conferencing system solutions
in one single device. The product is mainly used in small and medium
enterprise for internal conferences and communications (internal communi-
cations between headquarters and branch ofces), government-to-business
communications, remote training/education, and etc.
• Support two-way audio/video real-time conference in 1080P / 30fps /
H.264 for maximum 120 attendees.
• Support two-way audio real-time conference for maximum 200
attendees.
• Support one-way video (receiving video) and two-way audio real-time
conference in 1080P/30fps/H.264/VP8 for maximum 200 attendees.
• Support up to 10 conferences at the same time.
• Support up to 49 sharing cameras at the same time during the
conference.
• Support GVC3200/3202, GVC3210, WebRTC client (Firefox, Chrome,
Edge, Opera, Safari, etc.), IE11, IOS/Android mobile applications and
other SIP Phones
• Packets loss resistance rate during the conference is as high as 30%.
• Conference Control features: Presentation, Video Layouts, Conference
Control, Chat, Q&A, Recording, and etc.
• Multiple Meeting Modes: Schedule Meetings, Instant Meetings, and
Personal Meetings.
• Multiple Meeting Types: Video Conference, Webinar, and Recurring
Meetings.
• Complete conference management platform and functional post-meet-
ing statistics.
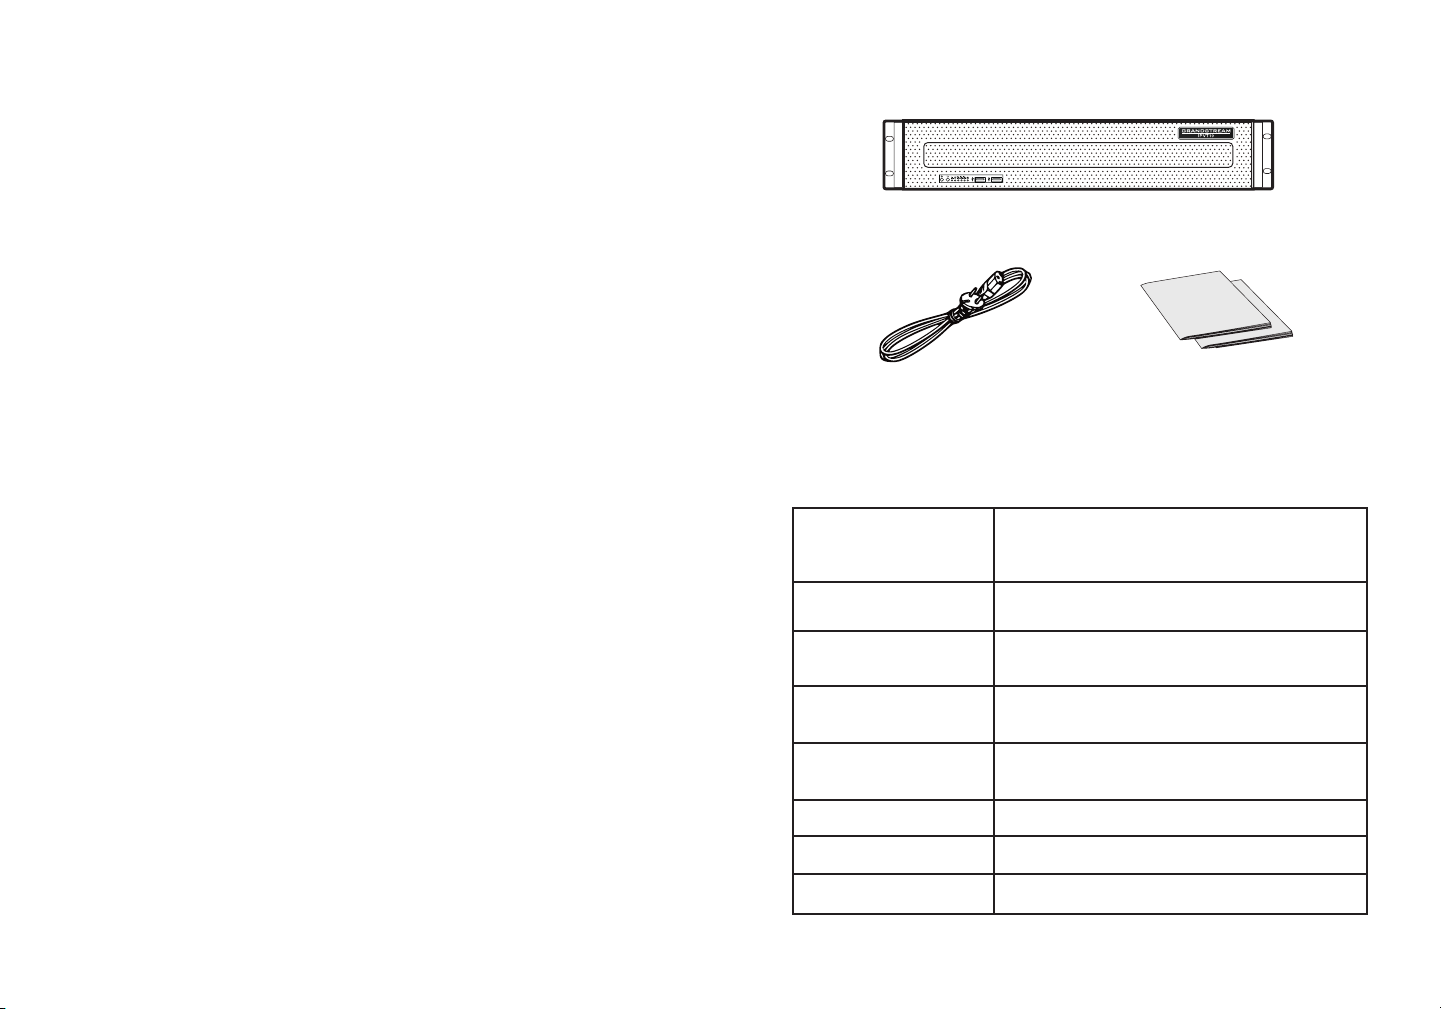
PACKAGE CONTENTS:
1x IPVT10 Equipment
2x Power Supply Cable 1x Quick Installation Guide
1x GPL Statement
Power Supply
- Redundant Power.
- 550W.
- Only AC power supply supported.
Applicable Cabinet 2U Rackmount Design, and it supports 19”
cabinets and rails.
Equipment Size Bare Equipment size: Height 88mm * Width
430mm * Depth 650mm.
USB Interfaces - 3x USB 3.0 (2 rear, 1 via header)
- 3x USB 2.0 (2 rear, 1 via header)
LAN Interfaces - 2x RJ45 Gigabit Ethernet LAN Ports.
- 1x RJ45 Dedicated IPMI LAN Port.
Display Interfaces 1x VGA Port.
Operating Temperature 0°C - 45°C
Relative Humidity 10% - 90% (Non-condensing)
HARDWARE SPECIFICATIONS:

~ 5 ~ ~ 6 ~
EQUIPMENT SETUP:
NO. Name NO. Name NO. Name
1Equipment
Switch 4Hard Disk Indicator 7Failure Indicator
2Reboot Switch 5Network Connection
Indicator 8USB 2.0 Interface
3Power Indicator 6Ethernet Interface
Indicators 9USB 3.0 Interface
ROHS
550W
550W
FRONT PANEL
BACK PANEL
1 52 3 46 7 8 9
1 2 53 46 7 8
MOUNTING IPVT10 TO CABINET:
Users can install the IPVT10 in a 19-inch cabinet that conforms to the IEC
(International Electro-Technical Commission) 60297 standard.
• The IPVT10 server is heavy and we suggest to carry it by two people at
least.
• The cabinet has been installed and we suggest a space of at least “2U”
(1U=44.45mm) needs to be reserved.
• Users can select the regular rail for installation, or optional installation
(Rails and Rail Holders are not included within the package contents).
Users need to follow the steps below to mount IPVT10 to Cabinet:
1. Remove the rail holder and the rails by loosening the 4 screws rst, and
then removing the front and back rail holders.
2. Install the inner rail to the server case. Pull the inner rail out of the rail until
it cannot be pulled.
3. Fix the inner rail with 2 screws to the server case. Fit the smooth surface
of the inner rail to the side of the server case, and match the screw holes
on the inner rail with the screw holes on the server case. Hold the inner rail
tightly against the server case and tighten with the screws.
4. Repeat steps 1 to 3 to install the other inner rail on the other side of the
server case.
5. Install the rail holder to the cabinet. Make sure the installation position of
the front rail holder on the cabinet, align the two xing holes between the
rail holder and the cabinet corner, tighten the screws. Then, according to
the depth of the cabinet (the depth of the cabinet is 650mm), adjust the
back rail holder properly, and align the two xing holes between the back
rail holder and the cabinet corner at the back of the cabinet, tighten the
screws. (Note: Please make sure that the front and back rail holders are
horizontal.)
6. Repeat the above steps to install the other front and back rail holders to
the cabinet. (Note: Please make sure that the left and right side rails are
horizontal)
7. Lift the server up and close to the cabinet so that the back of the server
faces the front of the cabinet. Insert the inner rails on the two sides of the
server into the front and back rail holders on the cabinet, align the xing
holes and tighten the screws.
8. When the installation is completed, push the server into the cabinet.
NO. Name NO. Name
1Power Supply interfaces 5USB 3.0 Interfaces
2IPMI Interface 6Ethernet Interface 1
3COM Interface 7Ethernet Interface 2
4USB 2.0 Interfaces 8VGA Input interface

~ 7 ~ ~ 8 ~
CONNECTING THE IPVT10 SERVER:
1. Connect Network cables: In order to ensure using IPVT10 properly,
users need to connect the server to a Gigabit Switch. Connect the RJ45
Ethernet Cable with Ethernet interface 1 and connect the other end to
Gigabit Switch. Do the same for Ethernet interface 2.
Notes:
• Please do not use 100M or 10M switches.
• If only one network is used, only one network interface needs to be
connected with the switch (Internal Network - Setup Ethernet Interface
1, External Network - Setup Ethernet Interface 2).
2. Connect Power Supply: Connect the standard power supply cable with
the equipment and plug it into the AC Power supply.
Notes:
• Please use a standard power outlet.
• Please make sure that the output voltage is within the range of the
power module (90~264VAC, 8.5~2.7A, 50/60Hz). If it is not within the
working range, correct it and do not power on the equipment.
POWERING ON THE IPVT10 SERVER:
When the equipment is properly installed, users can power on the equipment
by proceeding as follows:
Check before Power on:
Before powering on the equipment, users need to ensure that the equipment
meets the following conditions:
• If the equipment is installed in a cabinet, please ensure that the screws
are xed, and the equipment has enough space for heat dissipation.
• The connections of the cables on the equipment are normal.
• The input power and current are within the working range of the equipment.
• The distance between the power cable and the Ethernet cable outside the
cabinet must be greater than 30 mm.
Power on Equipment:
Once the previous conditions are checked, the users can power up the
IPVT10 Server. In order to make the equipment run properly, users need to
press the equipment switch in the front panel of the server to power on the
equipment. The indicator will turn to solid green.
Note: When IPVT10 Server is on, pressing the equipment switch for 5
seconds will shut down the server.
Check after Power on:
After the equipment is turned on, please check the following indicators to
make sure the equipment is working properly.
NO. Name Description
1Power
Indicator
• When the equipment is on and connected to the
power supply: the light is solid green.
• When the equipment is off and the power
supply is not connected with the equipment: the
light is off
2Hard Disk
Indicator
• When the hard disk is writing/reading: the light
is solid blue.
• When the hard disk is faulted or work off: the
light is off.
3
Network
Connection
Indicators
• When the network connection is normal: the
light is ashing yellow.
• When the network connection is abnormal or the
network is not connected with the equipment:
the light is off.
4Failure
Indicator
• Normal condition: the light is always off.
• When the equipment is faulted: the light is
ashing red.
1 2 34

~ 9 ~ ~ 10 ~
CONFIGURING THE IPVT10 SERVER:
1. Please make sure that the IP address of the PC is under the same
network segment as the server’s. If not, users need to go to “Network”
conguration page of the PC to setup the network segment as the same
as IPVT10 server’s.
2. Enter the IP address (http://192.168.88.88) of the equipment in the
browser of the PC, and press “Enter” to access the conguration page,
as the screenshot shows below:
3. Input login user name and password (The default user name is “admin”,
and the default password is “change_me”).
4. (Optional) Users could select the language on the list at the bottom of the
conguration page.
5. Click to login to the conguration page.
If there is an IP conict, users can connect the PC directly to the server via an
Ethernet cable for conguration purpose. Follow the steps below:
1. Unplug the Ethernet cable from the Ethernet Port 1 on the IPVT10
equipment.
2. Then, connect the Ethernet Port 1 and a PC with an Ethernet cable.
3. Enter the IP address (http://192.168.88.88) of the equipment in the
browser of the PC, and press “Enter” to access the conguration page.
4. Input login user name and password (The default user name is “admin”,
and the default password is “change_me”).
5. (Optional) Users could select the language on the list at the bottom of the
conguration page.
6. Click to login to the conguration page.
Notes:
• After the congurations are complete, users must unplug the Ethernet
cable from Ethernet Port 1, and reconnect the server to the Gigabit
Ethernet switch to ensure that the two Ethernet ports of the equipment
are connected to the Gigabit Ethernet switch.
• For more information, users could go to Grandstream ofcial website
www.grandstream.com/support and download the User Manuals of
IPVT10.
ROHS
550W
550W

~ 11 ~ ~ 12 ~
IPVT10不预设对医院,执法机构,医疗中心(急救服
务)以及各种紧急服务的紧急通话服务。用户必须自行
设定紧急通话功能。用户必须自行购买SIP兼容的网络
电话服务,正确的设定IPVT10使用该服务,并定期测
试您的配置以确保IPVT10如预期工作,否则请购买传
统无线或有线电话服务来拨打紧急通话。
Grandstream Networks 公司的IPVT10不支持紧急通
话服务。Grandstream Networks公司、其管理者和
员工以及其相关机构对此所造成的任何索赔、损失或
者损害都不负有任何法律追究责任。在此,您将无权
对任何以及所有由于无法通过IPVT10拨打紧急电话以
及没有遵照前段文字描述而造成紧急通话失败的事件
提出诉讼 。
ZH
注意事项:
• 在存储、运输和使用设备的过程中,请保持设备干燥,并避免设备
与其他物体发生激烈碰撞。
• 请勿自行拆卸设备。当用户遇到问题时,请联系Grandstream的技
术支持或者指定的经销商。
• 未经授权,任何单位和个人不得对设备进行结构、安全和性能设计
等方面的改动。
• 使用本设备时应遵循相关的法律法规,尊重他人的合法权利。
• 插拔设备线缆前,请先停止使用设备并断开电源。
• 系统启动或固件升级期间不要中断电源。这可能会损坏设备固件,
并导致设备故障。
• 请将设备放置在通风、避光的环境中。本设备的运行环境温度为
0°C~45°C。
• 请勿用任何物体堵塞设备的开孔,且在设备四周留出10cm以上的散
热空间 。
• 请勿将设备暴露在环境湿度如下范围以外:10-90%RH(无冷凝)
。
~ 13 ~ ~ 14 ~
产品概览:
产品特点:
IPVT10是企业入驻式全高清会议系统,集成了MCU、媒体服
务、WebRTC服务、会议管理等多种服务单元。IPVT10是单台服务即可
实现一整套会议系统的解决方案。 产品主要应用于中小企业内部远程会
议(总部和分支机构的频繁内部沟通需求)、政企沟通、远程培训和教
育等。
• 最大支持120方1080P 30fps H264 实时双向音视频接入。
• 最大支持200路实时双向语音接入。
• 最大支持200路1080P 30fps H264/VP8单向视频接收和实时双向语
音接入。
• 最大支持10个会议同时进行。
• 单个会议最大支持49个摄像头同时进行显示。
• 支持 GVC3200/3202,GVC3210,WebRTC客户端 (Firefox,Chrome,
Edge,Opera,Safari等),IE11, IOS/Android移动应用程序,以及其他
SIP电话。
• 音视频抗丢包率高达 30%。
• 会议功能包括:演示,视频布局,会控,聊天,问答,录制等。
• 多种会议召集方式:预约会议,一键起会,固定会议室。
• 多种会议类型:视频会议,大型研讨会,循环会议。
• 完整的会议管理平台和丰富的会后统计。
设备包装清单:
1x IPVT10设备
2x 电源线 1x 快速安装手册
1x GPL许可证
电源
- 冗余电源。
- 550W。
- 仅支持交流(AC)供电。
适用机柜 2U机架式设计,支持19寸机柜和导轨。
设备尺寸 裸机尺寸:高 88mm*宽430mm * 深650mm
USB接口 - 3x USB 3.0 (2 后置, 1 前置)
- 3x USB 2.0 (2 后置, 1 前置)
LAN 接口 - 2x RJ45千兆以太网LAN端口.
- 1x RJ45专用IPMI LAN端口
显示接口 1 x VGA端口
工作温度 0°C - 45°C
相对湿度 10%~ 90% (非冷凝)
物理特性:

~ 15 ~ ~ 16 ~
安装IPVT10到机柜:
用户可以将IPVT10安装到符合IEC(International-Electrotechnical-
Commission) 60297标准的19寸机柜中。
• IPVT10服务器较重,我们建议至少两位工作人员搬抬设备。
• 已安装机柜,我们建议至少预留“2U”(1U=44.45mm)的空间。
• 用户可以选择通用导轨来安装,或者可选安装(导轨和固定架不包含在
产品包装中)。
用户需要按以下步骤安装IPVT10到机柜上:
1. 首先拆卸固定架和导轨,即先松卸4个螺钉,然后将前、后固定架拆
下。
2. 然后将内轨安装到服务器机箱上。首先将内轨从导轨中拉出,直到无
法拉动为止。
3. 用2个螺钉将内轨固定在机箱上。将内轨的平滑面对应机箱的侧面,
并将内轨上的螺钉孔与机箱上的螺钉孔相匹配。将内轨紧贴在机箱
上,然后用螺钉拧紧。
4. 重复步骤1~3,将另一个内轨安装在机箱的另一侧对应位置。
5. 将导轨的固定架安装到机柜上。在机柜上确定好前固定架的安装位
置,对准导轨固定架与机柜角柜上的2个固定孔,拧紧螺钉。然后根
据机柜的深度(设备机箱的深度650mm),适当调整后固定架,并
将后固定架对准机柜后面的角柜上的两个固定孔,拧紧螺钉。(注
意:请务必确保前、后固定支架处于同一水平。)
6. 重复上述操作,将另一个导轨的前后固定架安装到机柜。(注意:请
务必确保左、右两侧的轨道处于同一水平)
7. 抬起服务器,将其接近机柜,使服务器后部面对机柜的前部。将服务
器上两侧的内轨卡进机柜上的前后固定架上,分别对准固定孔并拧紧
螺钉。
8. 安装完成后,将服务器推入机柜中。
设备外观:
号码 名字 号码 名字 号码 名字
1设备开关 4硬盘指示灯 7故障信号灯
2重启开关 5网络连接指示灯 8USB 2.0接口
3电源指示灯 6以太网接口指
示灯 9USB 3.0接口
ROHS
550W
550W
主机正面
主机背面
1 52 3 46 7 8 9
1 2 53 46 7 8
号码 名字 号码 名字
1电源接口 5USB 3.0接口
2IPMI接口 6以太网接口1
3COM接口 7以太网接口2
4USB 2.0接口 8VGA输入接口
Autres manuels pour IPVT10
3
Table des matières
Langues :
Autres manuels Grandstream Networks Serveur

Grandstream Networks
Grandstream Networks GXV 3501 Manuel utilisateur

Grandstream Networks
Grandstream Networks GXV 3501 Manuel utilisateur

Grandstream Networks
Grandstream Networks GXW-410x Manuel utilisateur

Grandstream Networks
Grandstream Networks GXV3504 Manuel utilisateur

Grandstream Networks
Grandstream Networks GXV 3501 Manuel utilisateur

Grandstream Networks
Grandstream Networks IPVT10 Manuel utilisateur


