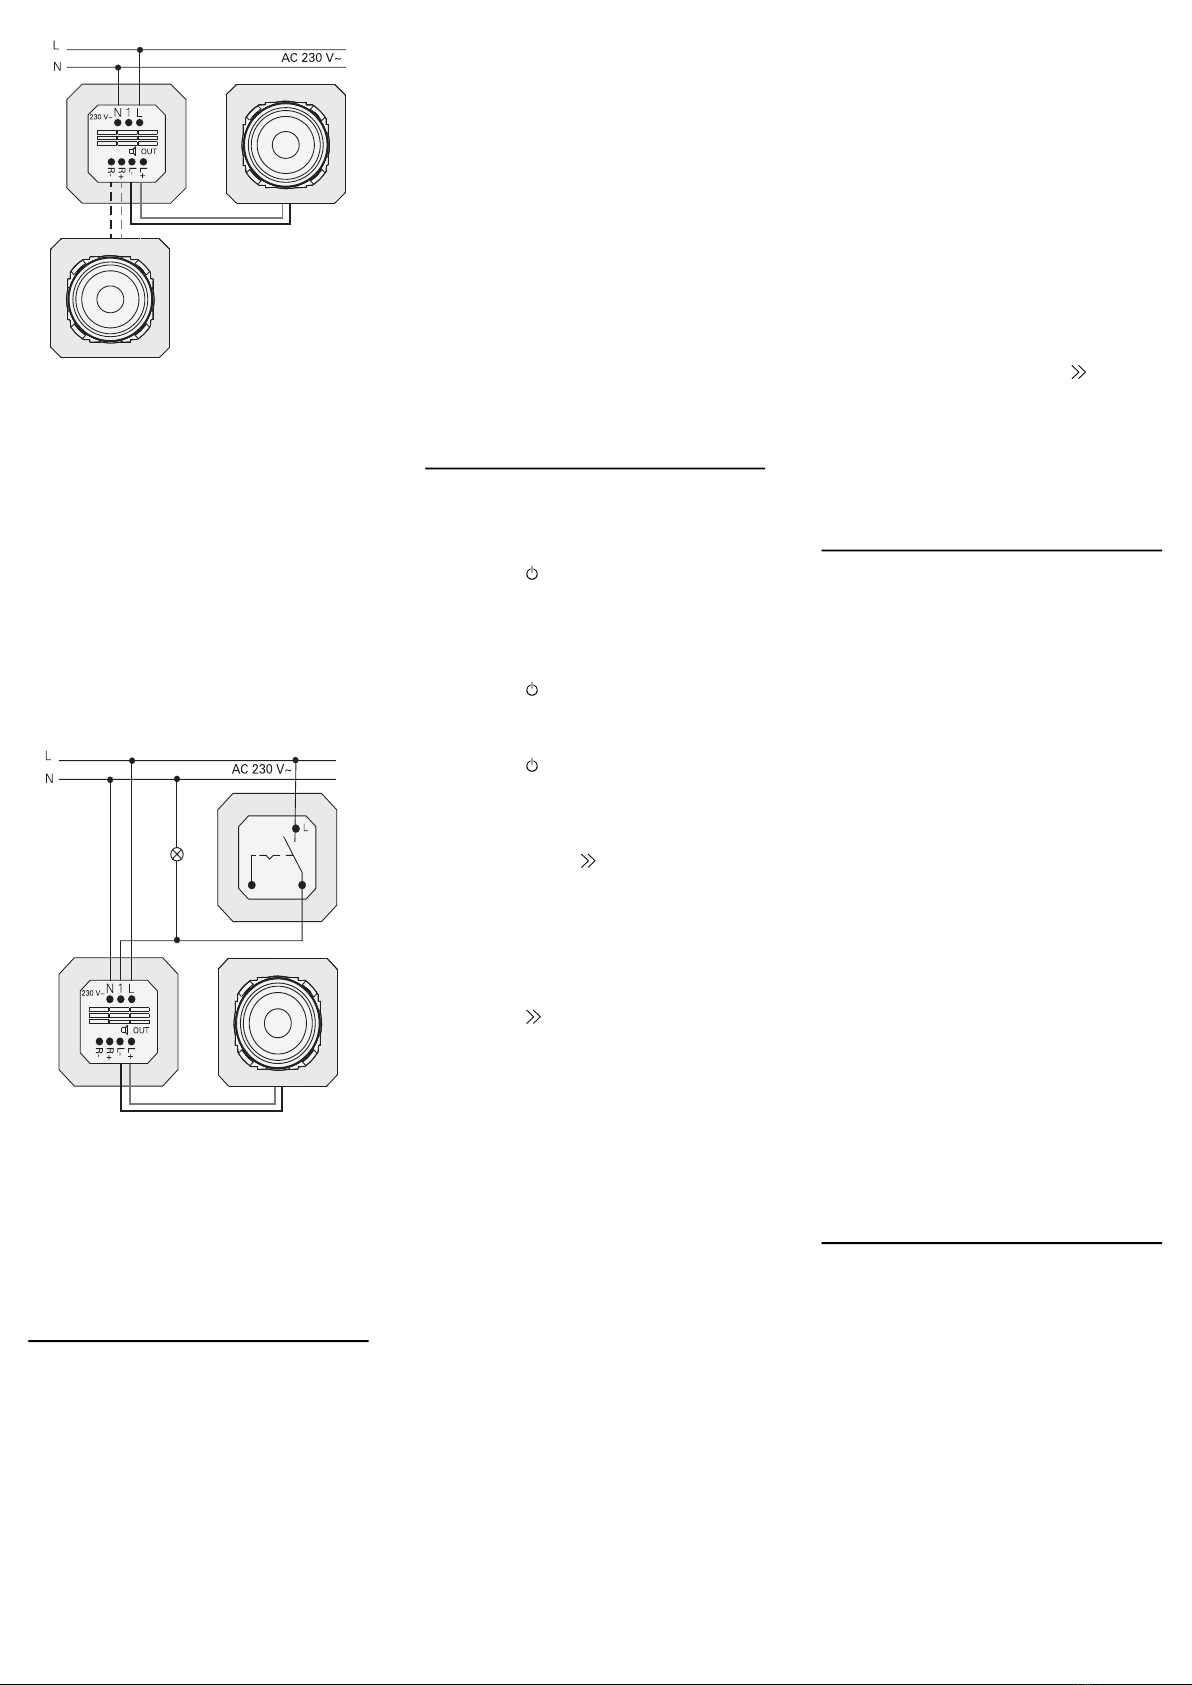
Connecting the supply voltage
3. Connect the supply voltage (230 V) to
the L/N terminals of the IP flush-moun-
ted radio insert.
Connecting auxiliary unit (optional)
The auxiliary unit can be used to switch the
flush-mounted radio simultaneously with
the lighting, for example.
After switching on, the radio may take up to
5-10 seconds to load.
4. Connect the switched phase of a switch
to the auxiliary input (1) of the IP flush-
mounted radio:
Use the same phase for the auxiliary
input and the power supply of the IP
flush-mounted radio.
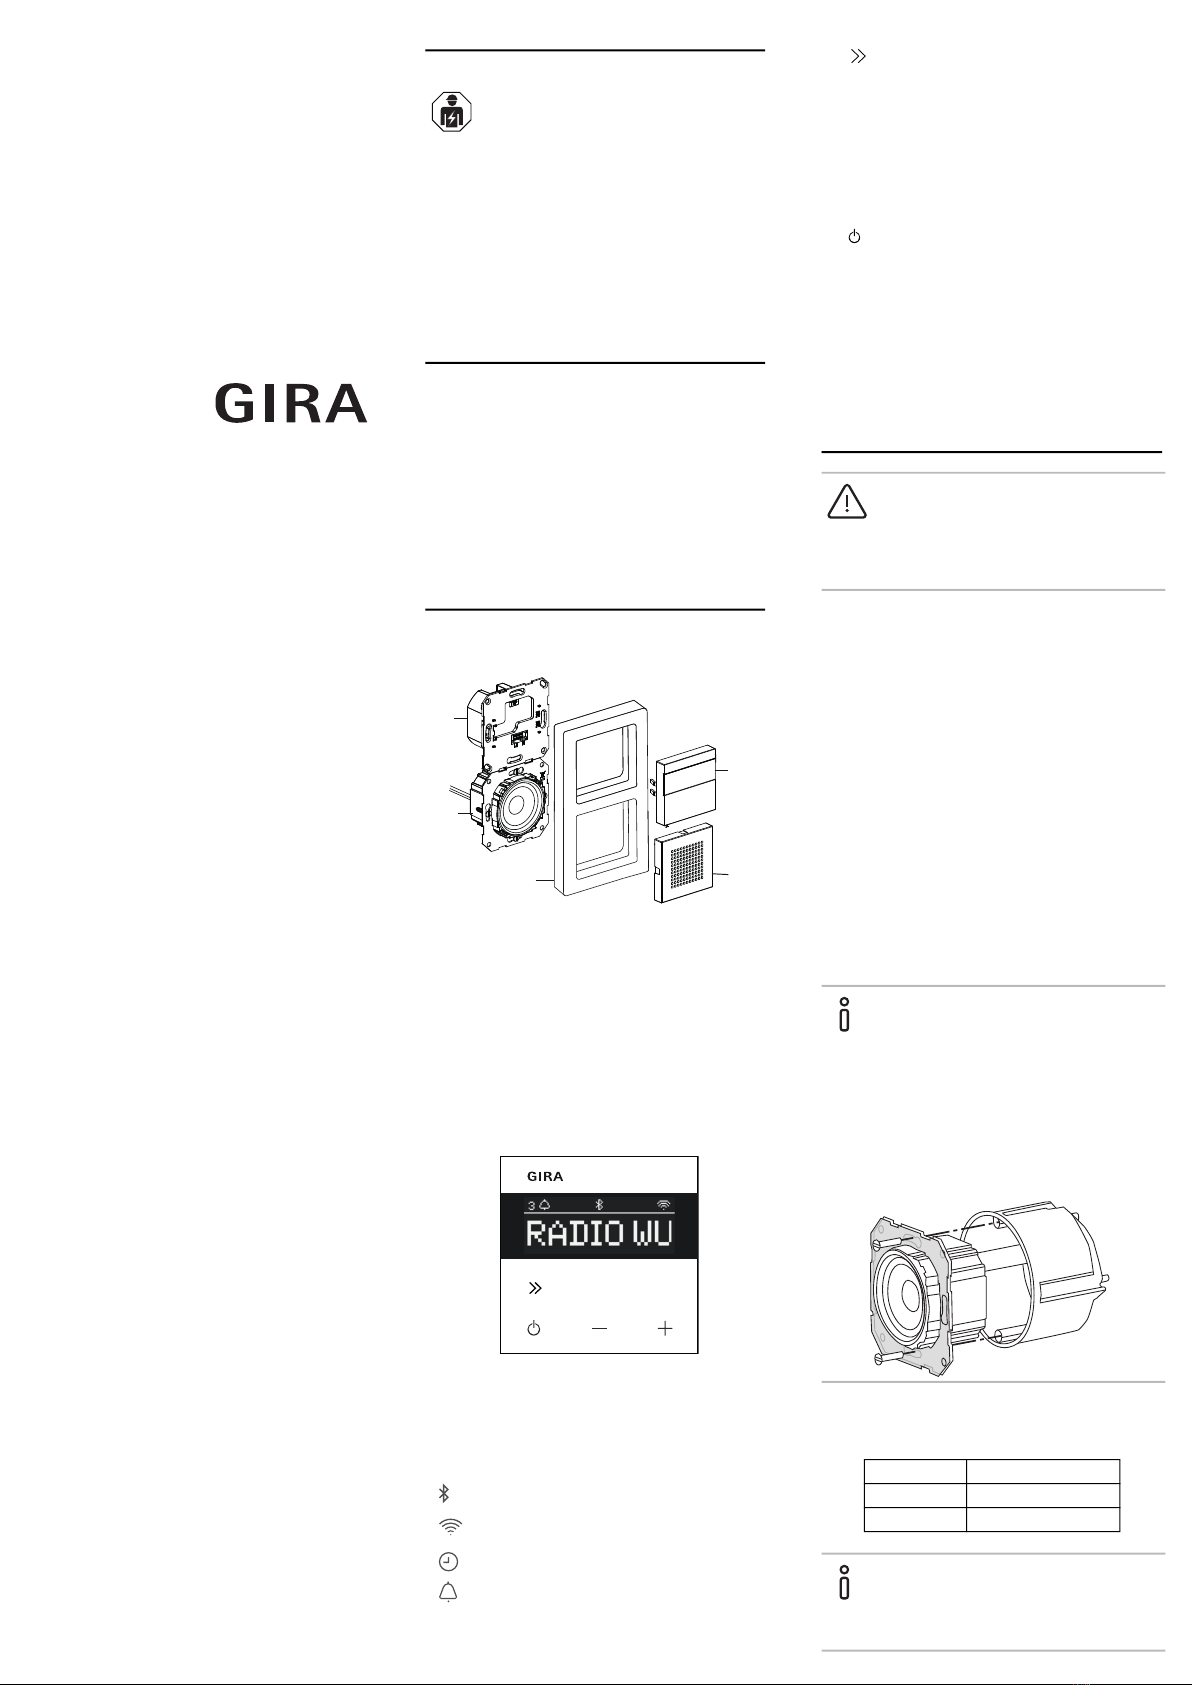
Installing inserts and cover frames
5. Insert the IP flush-mounted radio insert
into the flush-mounted device box.
6. Remove the protective cover plate from
the speaker insert.
7. Position the cover frame and attach the
speaker cover and operating top unit.
Start-up
After starting the IP flush-mounted radio for
the first time or after a factory reset, the
start-up wizard will guide you through
selecting the countries and speakers.
Afterwards, you can choose to set it up with
the app or without the app (using WPS). It is
only possible to set it up as a Sonos
operating device via the app.
Setup with the app
Requirement: You must have the Gira
System 3000 app installed on a mobile end
device with a Bluetooth interface and
Android or iOS operating system.
1. Press button 2 on the IP flush-mounted
radio.
FSetup type “with the app” is selected.
2. Start the Gira System 3000 app and fol-
low the instructions.
3. At the end of the setup process, you can
choose between WLAN Radio and
Sonos Control. This selection is also
available via the device parameters in
the System 3000 App.
Setup without the app (using WPS)
1. Press button 1 on the IP flush-mounted
radio.
FSetup type “WPS” is selected.
2. Activate the WPS function on the router.
FThis establishes a WLAN connection.
FDuring start-up, the IP flush-mounted
radio saves the first 20 stations it finds.
Operation on the device
Only a light touch of the buttons is required
for operation.
Switch on
1. Press the button.
FWhen the device is switched on, the sta-
tion or track last listened to will be
played at the volume last set.
Switch off
1. Press the button.
FThe radio is switched off.
Activate sleep mode
1. Press the button for > 1 second.
FAfter 30 min, the IP flush-mounted radio
will switch off automatically.
Select the next station or track:
1. Briefly press the button repeatedly
until the desired station or track is
playing.
FEach time you press the button, the next
station or track in your favourites will be
played.
Select the previous station or track:
1. Press the button for > 1 second
repeatedly until the desired station is
playing.
FThe previous station or track from your
favourites will be played.
Changing the volume
1. Press the + or - buttons briefly to
change the volume in increments.
or
Press and hold the + or - buttons to
change the volume quickly.
FThe volume is increased or decreased.
Play favourite
1. Press button 1 or 2 or, for favourite 3,
press buttons 1 and 2 briefly at the same
time.
FThe selected favourite is played.
Save favourite
1. Press button 1 or 2 or, for favourite 3,
press buttons 1 and 2 for > 1 second at
the same time.
FOnce the favourite is saved, the memory
number is shown on the display.
Pairing the IP flush-mounted radio with
the Gira System 3000 app
Requirement: The IP flush-mounted radio
must be switched off.
1. Hold down the + button for 4 seconds.
FThe Bluetooth icon on the display will
flash, indicating that it is searching for a
connection.
2. Start the Gira System 3000 app and
search for the device.
FFollowing successful connection, the
Bluetooth symbol will light up for as long
as the Gira System 3000 app is connec-
ted to the IP flush-mounted radio.
Resetting the IP flush-mounted radio to
factory settings
1. Press and hold button 2 and at the
same time.
FAfter 4 seconds, a countdown will
appear on the display of the IP flush-
mounted radio. At the end of the count-
down, the device will be reset to factory
settings.
Technical data
Conformity
Gira Giersiepen GmbH & Co. KG hereby
declares that the wireless system type, item
no.
2320 .. conforms to Directive 2014/53/EU.
The complete item number can be found on
the device. The complete text of the EU
declaration of conformity is available at the
following web address:
www.gira.de/konformitaet
Rated voltage AC 230 V
Mains frequency 50 Hz
Input current 75 mA
Standby power ≤ 2 W
Audio output 1.5 W (8 Ω)
3.0 W (4 Ω)
Speaker impedance
4 to 16 Ω
Speaker cable Max. 20 m
Bluetooth
Wireless fre-
quency
2.402 to 2.480 GHz
Transmission
power
Max. 2.5 mW / 4 dBm
Class 2
Transmission
range
Typically 10 m
WLAN (IEEE 802.11b/g/n)
Wireless fre-
quency
2.400 ... 2.483 GHz
Transmission
power
Max. 100 mW /
20 dBm
Connection
terminals
Mains:
Speaker:
1.5 mm² to 2.5 mm²
0.5 mm² to 1.5 mm²
Installation depth 32 mm
Ambient
temperature
-5 to +45 °C
Storage/transport
temperature
-20 to +70 °C