Genius MP3-DJ VIVID Manuel utilisateur

1
INDEX
Care and Maintenance………………………….2
Introduction……………………………………….3
Knowing your MP3 player……………………….4
Software Installation……………………………..6
Downloading music to your MP3 player……….8
MP3 player function-key Instructions…………..10
Overall View of OLED display…………………..13
Menu Settings…………………………………….14
Listening to FM Radio……………………………19
Specifications……………………………………..21

2
Care and Maintenance
Do not set the volume level too high or distortion may occur. Avoid using the equipment continuously
for a long period of time to minimize impairment to your hearing.
Extreme temperatures may have a temporary effect on the operation of your MP3 player. This is
normal and does not indicate a fault.
Do not modify or disassemble the equipment. There are no user serviceable parts.
Vibration during walking or exercising will not affect the MP3 player. However, dropping the player or
dropping a heavy object on the player may result in distorted sound.
Avoid contact with liquids. If the equipment becomes wet, remove the power immediately and contact
your retailer.
Do not leave the equipment in direct sunlight or in a humid, dusty or hot area.
Keep metallic and magnetic items that may accidentally touch the terminals away from the equipment.
When connecting the player to an external source, read the operating instructions of the equipment for
the correct connection and safety precautions. Ensure the player is compatible with the product it is
being connected to.
When disposing of any packing materials or old equipment check with your local authorities for
information on recycling.
Safety Notice :
1. Do not open or repair this device.
2. Keep this device away from liquids, such as water
3. Never throw the batteries onto an open fire. The batteries may explode.
4. Do not attempt to recharge alkaline batteries. There is danger of them exploding.
5. Keep the batteries out of the reach of small children.

3
Introduction
Genius MP3 PLAYER
Thank you for purchasing the Genius MP3 player. You do not need to carry a cassette tape or CD anymore.
With this MP3 Player, enjoying CD-quality music becomes a breeze. You can store dozens of MP3 files in
the built-in flash memory. Also, you can listen to the radio or even record your favorite radio program,
interview, conversation or lecture.
Package contents
Stereo Earphone
USB Cable
Software Installation CD
AAA Alkaline battery
Quick guide
Velvet
System Requirements
Pentium 200 MHz
40MB hard disk space
USB 1.1 Port or above
CD-ROM Drive 4x speed or above
Microsoft Windows 98 (2nd Edition) / Me / 2000 / XP
Mac 9.2.2 or above
Insert battery
Use an alkaline battery with your player
AAA Alkaline battery

4
1
2
7 8
5
4
3
6
9
10
11
12
Knowing your MP3 player

5
1. Power On / Play / Pause
Press the button to power on the player
Playback or pause the music or voice file
2. Stop / Power Off
Press and hold to power off the player
3/4. Forward / Backward
Press to skip to next track
Press and hold to fast forward within the current track
Press to skip to previous track
Press and hold to fast reverse within the current track
5. MENU
Press and hold to enter menu or sub-menus to configure different settings of the player
Press to confirm the selected menu option
Press and hold to exit menu and return to playback mode
Press to Repeat between Section A and B during music mode
6. MIC
Built-in microphone for voice recording
7/8. Volume up / Volume down
Press to increase the volume level
Press to decrease the volume level
Press these two keys at the same time to start voice/FM recording
9. USB Port
You can upload / download files via this port with the USB cable connected to
your computer.
10. Earphone Jack
Plug the earphone into the jack and listen to your player.
11. Battery Door
12. HOLD(Key lock)

6
Software Installation
Attention
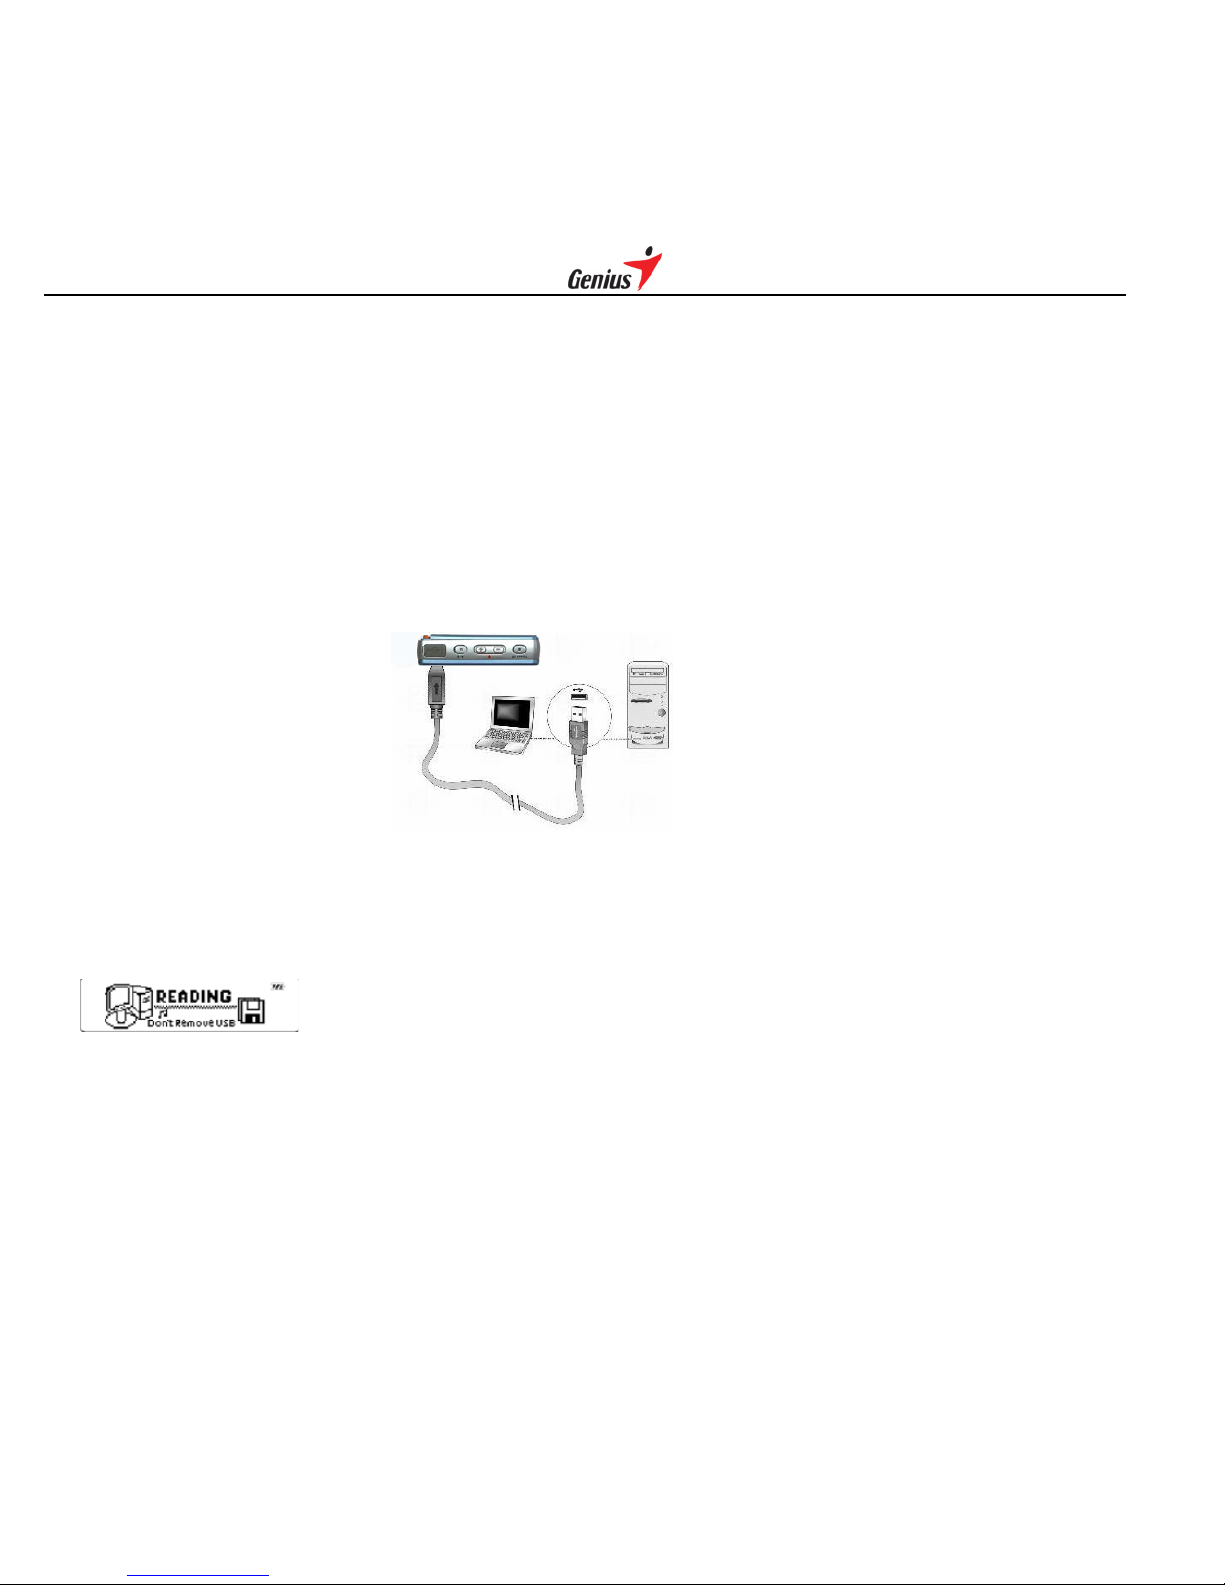
1. If you are using Windows ME / XP / 2000 or Mac 9.2.2 or above, it is not necessary to install any driver.
Simply connect the player to your PC, the player will be detected and the generic driver will be installed. The
built-in flash memory will be shown under "My Computer" as a Removable Disk Drive. After it is finished, you
can upload, download and manage the files in the player.
However, you still need to install the driver from software installation CD if you want to upgrade the firmware
or completely format the flash memory of the player.
2.If you are using Windows 98 (2nd Edition), you are required to install the driver from the software
installation CD. Otherwise you are not able to operate the player, because Windows 98 does not integrate
with any generic driver to support USB mass storage device. Therefore, users are required to run the
installation CD to provide driver for Windows 98 to complete with the installation for the player.
Windows98 (2nd Edition)
Step 1.
Insert the software installation CD into the CD-ROM drive. If the setup program does not run automatically,
do steps 2 to 3. Otherwise, skip to step 4.
Step 2.
Click Start -> Run.
Step 3.
In the Run dialog, type D:\ShowMenu.exe (where D:\ is your CD-ROM drive) and click OK. The driver
installation wizard will guide through the driver installation.
Step 4.
At the Genius Driver screen, click the "INSTALL" icon once.
Step 5.
The driver installation wizard starts. Follow the instructions given by the wizard to complete the installation,
i.e. press "Next" and "Yes" to proceed to the next step while the installation is in-progress.
Step 6.
Restart your computer once for the new hardware installation to take effect.
Step 7.
After your computer has restarted, connect your player to the computer, new hardware will be found.
When you install the driver, please do not install by manual or will get missing the route. The CD will
guide you to complete the whole install process.

7
Windows Me / 2000 / XP
The installation CD is not required when installing your player under these operating systems. However, for
those who are using Windows 2000 are recommended to update their OS with Service Pack 4.
Connecting to PC
Enjoy the Ultimate Quality of Sound by
(1) Position your computer so that you can access the USB ports more easily. Then power on your
computer.
(2) Plug the flat USB connector of the USB extension cable to your computer.
(3) Plug the mini connector of the USB extension cable to the player.
(4) The player will power on automatically.
(5) "Ready" appears on the OLED of the player, indicates the connection with the computer has established
successfully.
When your MP3 PLAYER is connected to your computer, it starts working as a removable hard disk
(external drive) on your computer. You can transfer, copy, paste, and delete the data (audio files, voice
recording files, etc.) which are stored on your player into your computer very conveniently. It can also be
used for storage of non-music files.
Attention :
The removable drive can be found under "My Computer" or "Windows Explorer". Also, open the "Device
Manager" of your Windows and you will see the player is recognized as "KYE Genius USB Device", which
becomes one of the disk drives in your computer observe the diagrams for illustration).

8
Download music to your MP3 player
The player can be used as a mobile data storage device. No special software is required to upload,
download and manage the music and data files. All you need to use the copy, paste, delete and other
commands of your operating system and it is very easy and efficient by just clicking on the mouse.
To download music to the player, connect the player to the PC first .
Step 1.
Select the track you want to download to the player by clicking on the file icon
Step 2.
Right-click on the files, a menu appears. Click Copy
Step 3.
Under My Computer or Windows Explorer, double-click Removable Disk to open the drive.
The Removable Disk window appears
Step 4.
Right-click on the Removable Disk window and click Paste in the menu
Step 5.
Start copying the files. The OLED of the player displays
Attention: You can move the whole folder into the player. The MP3 player has a “Navigator” function that
can let you to choose your favorite singer or album on the MP3 player.

9
When USB connection between the player and your PC is currently busy transferring data. Please do not
disconnect your player until you see "Ready" appears on the OLED again, or else it may cause severe
damage to the player, and the data being transferred will be lost too. For users of Windows Me / 2000 / XP,
please follow the instructions below disconnecting the player from your computer.
- Double-click on the "Safely Remove Hardware" icon (green arrow) on the taskbar of your Windows
- Click Stop in the "Remove Hardware Device" dialog window.
- You will be asked about which device to stop. Click OK to continue.
- The "Safely to Remove Hardware" window appears to confirm that it is safe to remove the player. Click OK
to continue.
- Now you can disconnect the player from the computer.

10
MP3 player Function & keys Instructions
Icon Function
Play/Pause/Power on
Next track
Previous track
Power off/Stop
+ Volume up
- Volume down
M Menu
Play/Pause
Press shortly
- Power on the player
- Start / Resume playback, when the player is in status of pause or stop
- Pause playback, when the player is in status of play
Stops/Power off
Press shortly
- Stop playback, when the player is in status of play or pause
Press and hold
- Power off the player
Forward /Backward
Forward
Press shortly
- Skip to next track during playback of music or voice file
- Search forward for next track when the player is in status of stop
- Move forward to next available options within MENU or sub-menu
Autres manuels pour MP3-DJ VIVID
1
Table des matières
Autres manuels Genius Lecteur MP3
Manuels Lecteur MP3 populaires d'autres marques

Blaupunkt
Blaupunkt Compact Drive MP3 Manuel utilisateur

Memorex
Memorex MMP9008 - 8GB USB 2.0 Manuel utilisateur

Meizu Electronic Technology
Meizu Electronic Technology E5 Manuel utilisateur

Naxa
Naxa NMV-173NX Manuel utilisateur

Philips
Philips PSA250 Manuel utilisateur

Zipy
Zipy go! Waving Manuel utilisateur


