
Genesys cx33 Manuel utilisateur

1
CX33
EN - USER MANUAL
DE –BEDIENUNGSANLEITUNG
PL - INSTRUKCJA OBSŁUGI
CZ - NÁVOD K POUŽITÍ
SK - NÁVOD NA POUŽITIE
RO –MANUAL DE UTILIZARE

2
GENESIS CX33 –USER MANUAL - EN
I. KEYBOARD
INSTALLATION
1. Connect keyboard to the USB port, for first time usage wait around 15 seconds
until drivers will be installed.
2. Keyboard is ready for use.
II. MOUSE
INSTALLATION
1. Connect mouse to the USB port, for first time usage wait around 15 seconds
until drivers will be installed.
2. To set the programmable buttons and DPI settings you need to download and
install the latest software version from our website www.genesis-zone.com,
3. Open the installation folder, double click the icon setup.exe.
4. Follow the instruction to install the program.
5. When the installation has been completed successfully the icon at taskbar will
be displayed.
6. Double click the icon to pop up setting interface.
BASIC SETTINGS
Basic settings tab allows you to assign individual functions to each button.
1. Each button can be set individually by click on list of programmable buttons,
after this action the pop-up window will show available functions which can be
selected by left click.
2. Select required function and click “Apply” to save the settings.

3
Single Key
This function allows you to
assign any button from the
keyboard. Click on “Single
key”, when the pop-up
window will come out press
any button on keyboard which
you want to assign e.g. “Ctrl”,
then click “OK” to finish and
close the window. Click
“Apply” to save settings.

4
Fire Key
This function allows you to assign any button from your keyboard/mouse as a “Fire
key”.
1. To set “Fire key” click on the list of programmable buttons and then select “Fire
key”.
2. When pop-up window will come out select required button which you want to
assign e.g. “A”. In the pop-up window you can also set the speed and number of
how many times you want to use fire key by single button press.
3. Click “OK” to finish and close the window, then click “Apply” to save the
settings.
Combo Key
This function allows you to assign combination of buttons from your keyboard or
mouse. Click on “Combo Key”, when the pop-up window will come out select
required combination of buttons which you want to assign e.g. “Ctrl+A+Alt”, then
click “OK” to finish and close the window. Click “Apply” to save settings.

5
DPI settings
Gaming software allows you to predefine up to four DPI
profiles, which can be switched “on the fly” using the DPI
button. Each profile can be set individually in “Basic
Settings” tab. In these settings you can also set backlight
color, backlight mode and resolution 250 –4000 DPI. Click
“Apply” to save the settings.
Report Rate
To set report rate (polling rate) select “Basic Settings” tab and choose one of 4 options
(125Hz, 250Hz, 500 Hz, 1000 Hz), then click “Apply” to save the settings.

6
ADVANCED SETTINGS
Macro and profile editor
Adding a macro
To add a macro click “Advanced Settings” and enter name of macro in box “Macro
name”, e.g. “1”. Click “New” and then “Start recording”. Use the keyboard to enter a
combination of buttons which you want to assign into this macro, e.g. “Shift+A+B”,
click “Stop recording” to finish recording. Enter a number in box “Loop times” to set
how many times macro should be used after single button press. Click “Confirm” to
finish and close the window.
Select macro
To select macro click “Basic settings”
tab and then click on box “Macro Key”.
In pop-up window select the name of
previously recorded macro. Select one of
three options on the right and then click
“OK” to finish and close the window.
Then Click “Apply” to save the settings.
7
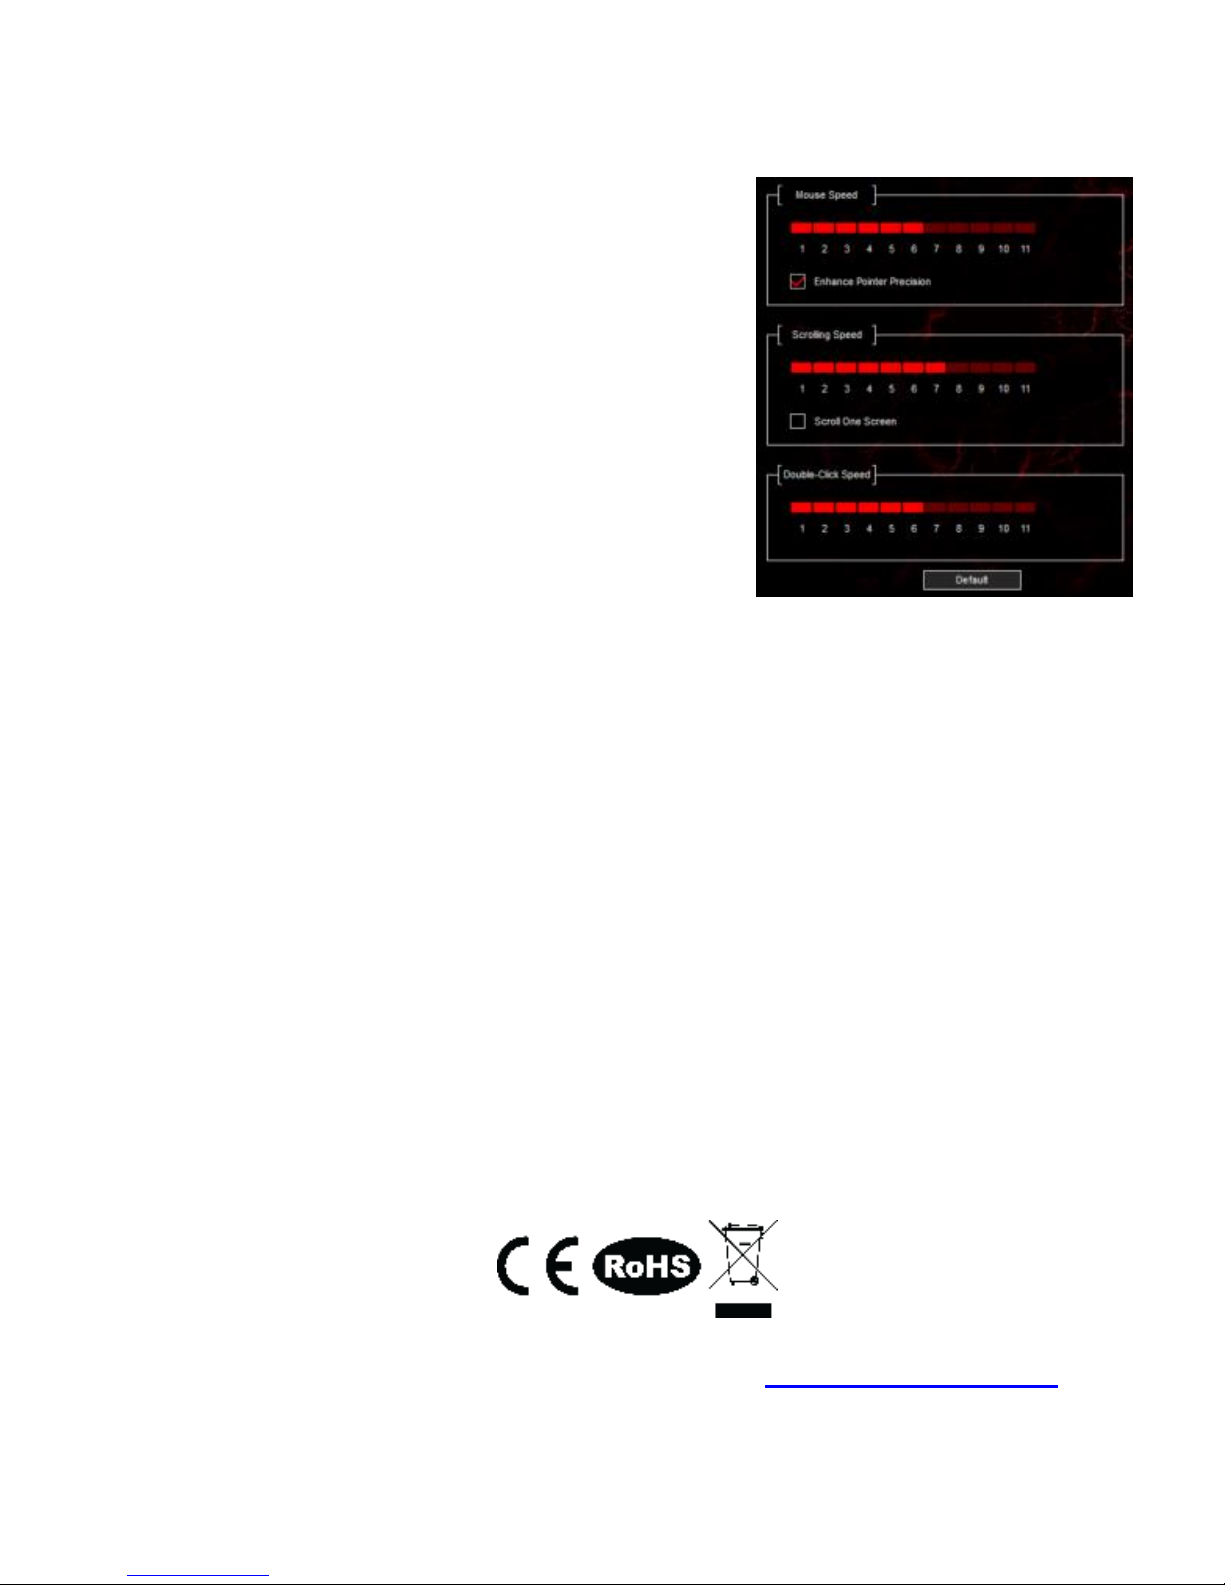
System settings
In this settings you can adjust mouse moving
speed, scrolling speed and double click speed. To
set these functions go to “Advanced settings” and
select required speed for each function. Then
Click “Apply” to save the settings.
GENERAL INFORMATION
Non-authorized repairs or taking the device to pieces make the warranty void and
may cause the product damage.
Do not use the product in low and high temperatures and in the dusty atmosphere.
Safe product, conforming to the EU requirements.
This product is made in accordance with RoHS European standard. The standard
was issued in order to decrease the amount of the electronic and electrical waste
emitted into the atmosphere.
The WEEE symbol (the crossed-out wheeled bin) indicates that this product in not
home waste. You protect the environment when you recycle hazardous waste
appropriately. In order to get detailed information about recycling this product
please contact your retailer or a local authority.
Visit our web site to get more information: www.genesis-zone.com

8
GENESIS CX33 –BEDIENUNGSANLEITUNG - DE
I. TASTATUR
INSTALLATIONSVORGANG
1. Die Tastatur an einen USB-Port anschließen. Beim ersten Anschluss circa 15
Sekunden abwarten, bis die Treiber vollständig installiert sind.
2. Tastatur ist betriebsbereit.
II. MOUSE
INSTALLATIONSVORGANG
1. Die Mouse an einen USB-Port anschließen. Beim ersten Anschluss circa 15
Sekunden abwarten, bis die Treiber vollständig installiert sind.
2. Für die programmierbaren Tasten und der DPI-Einstellungen müssen Sie
herunterladen und installieren die neuste Software-Version von unserer
Internetseite: www.genesis-zone.com.
3. Den Installationsordner öffnen und die Datei setup.exe doppelt anklicken.
4. Folgen Sie den Anweisungen, um die Software zu installieren.
5. Nach einer erfolgreichen Installation erscheint ein Symbol auf der Taskleiste.
6. Das Symbol doppelt anklicken, um das Einstellungsfenster zu öffnen.
GRUNDEINSTELLUNGEN
Mithilfe des Grundeinstellungsreiters kann der User jeder Maustaste eine bestimmte
Funktion zugeordnen.
1. Jede Taste kann individuell eingestellt werden. Zuerst das entsprechende
Tastensymbol in der Liste der programmierbaren Tasten anklicken. Ein Fenster
mit verfügbaren Optionen wird angezeigt, die mit linker Maustaste angewählt
werden können.
2. Die gewünschte Funktion anwählen und mit der Schaltfläche "Übernehmen"
bestätigen; die Einstellungen werden gespeichert.

9
Single Key
Mit dieser Funktion kann eine
beliebige Tastaturtaste zugeordnet
werden. Die Schaltfläche "Single
Key" zuerst anklicken: Ein
Dialogfenster erscheint, dann die
gewählte Taste, die man zuordnen
möchte auf der Tastatur betätigen.
Anschließend die Schaltfläche
"OK" anklicken, um abzuschließen.
Die Schaltfläche "Übernehmen"
betätigen, um die Einstellungen zu
speichern.

10
Fire Key
Mit dieser Funktion kann eine beliebige Taste an der Tastatur/ Maus als die
„Feuertaste” definiert werden.
1. Für die Zuordnung der "Feuertaste" zuerst die Liste der programmierbaren
Tasten öffnen und dann die "Fire key" wählen. In dem Fenster eine beliebige
Tastatur-/ Maustaste anwählen, der die Feuerfunktion zugeordnet werden soll,
z.B. "A". In dem angezeigten Fenster können auch die Geschwindigkeit und die
Anzahl der Schüsse nach einmaliger Betätigung der Feuertaste eingestellt
werden.
2. Die Schaltfläche "OK" anklicken, um abzuschließen und anschließend
"Übernehmen" betätigen, um die Einstellungen zu speichern.
Combo Key
Mit dieser Funktion können Kombinationen von Tastaturtasten zugeordnet werden.
Die Schaltfläche "Combo Key" betätigen. Wenn das Fenster erscheint, die
Kombination von Tasten, die gewünscht ist, wie z.B. "Strg+A+Alt" auswählen,
eintragen und anschließend auf "OK" klicken, um abzuschließen. Die Schaltfläche
"Übernehmen" anklicken, um die Einstellungen zu speichern.
Ce manuel convient aux modèles suivants
1
Table des matières
Langues :
Autres manuels Genesys Accessoires informatiques


