QRG-S1080-1000
Revision B
August 22, 2013 Company Proprietary Information Page i of ii
Table of Contents
1.0 CONFIGURE THE CAMERA FOR THE LENS TYPE...................................................................................................1
2.0 INSTALL THE CAMERA FOR THE FIRST TIME .......................................................................................................1
2.1 Camera Connected Directly to a Personal Computer......................................................................1
2.2 Standalone POE Switch Installation.................................................................................................5
2.3 UPNP- and DHCP-Enabled Network Installation.............................................................................6
2.4 Use DCHP to Obtain an IP Address Automatically..........................................................................7
3.0 WEB BROWSER GUI SCREEN...........................................................................................................................8
3.1 Select Stream(s) to View..................................................................................................................8
3.2 Icons.................................................................................................................................................8
4.0 ADD/EDIT USERS SCREEN................................................................................................................................9
5.0 VIDEO SETTINGS............................................................................................................................................10
5.1 Advanced Video Settings ...............................................................................................................12
5.2 Face Detection - Region of Interest................................................................................................12
6.0 ADVANCED FEATURES SCREEN ......................................................................................................................13
7.0 CAMERA........................................................................................................................................................14
7.1 Camera –Advanced Settings.........................................................................................................15
7.2 Camera –Pan/Tilt...........................................................................................................................15
7.3 Alignment Controls .........................................................................................................................16
8.0 AUDIO ...........................................................................................................................................................16
9.0 DATE/TIME ....................................................................................................................................................17
10.0 NETWORK AND PORT SCREEN........................................................................................................................18
11.0 ALARM ..........................................................................................................................................................19
12.0 STORAGE ......................................................................................................................................................21
12.1 Create a Recording Schedule ........................................................................................................21
12.2 Upload Files at the Storage Screen ...............................................................................................22
12.3 Upload Files At the Alarm Screen ..................................................................................................22
List of Figures
Figure 1 Back of Camera Showing DIP #1 in Position 2 ........................................................................................1
Figure 2 Camera Connected Directly to PC...........................................................................................................2
Figure 3 OnVIF Main Screen and Log In................................................................................................................2
Figure 4 Wrench Icon and Application Settings Screen........................................................................................3
Figure 5 Internet Explorer Screen.........................................................................................................................3
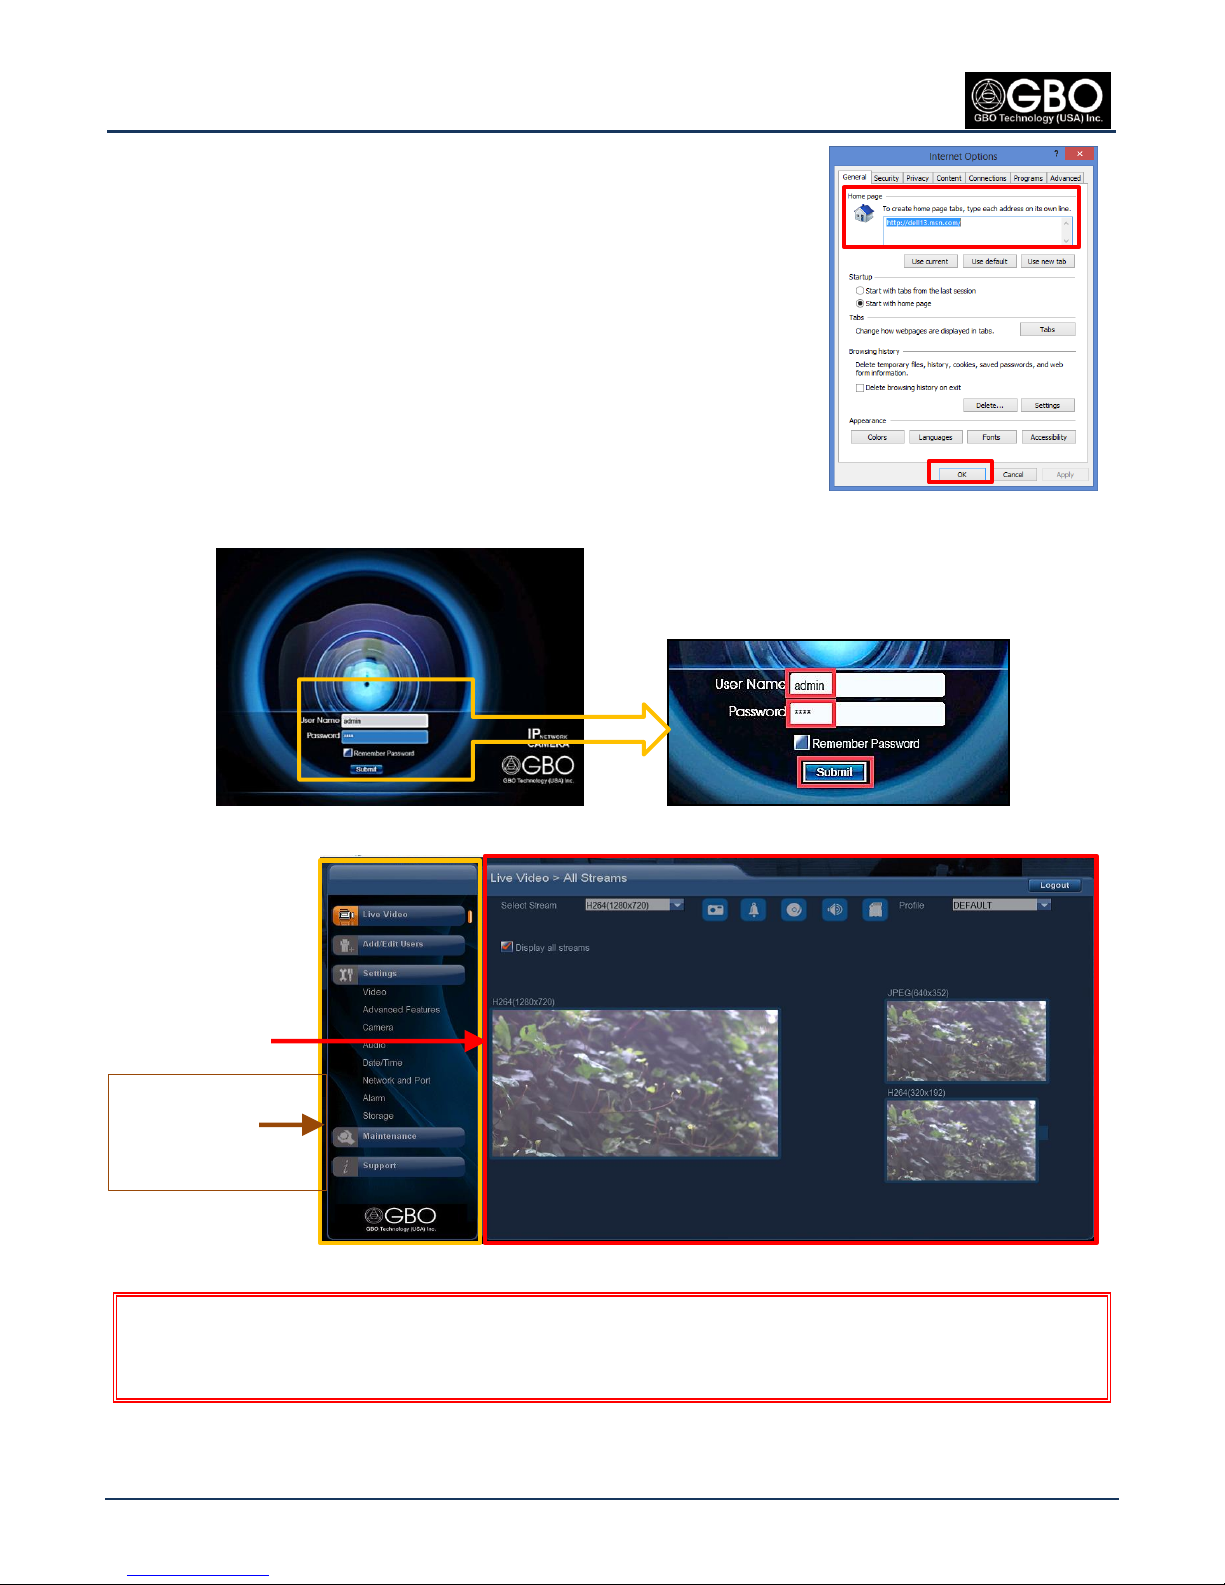
Figure 6 Internet Options......................................................................................................................................4
Figure 7 GBOT IP Network Camera Log In Screen ................................................................................................4
Figure 8 Web Browser GUI Screen (Live Video Screen)........................................................................................4
Figure 9 Set Browser Window Size .......................................................................................................................5
Figure 10 PC to Standalone POE Switch to Camera................................................................................................5
Figure 11 Back of Camera and POE Switch .............................................................................................................5
Figure 12 PC to POE Switch to Cameras .................................................................................................................6
Figure 13 UPnP Icon for GBOT IP Network Camera................................................................................................6
Figure 14 Ethernet Icon ..........................................................................................................................................7
Figure 15 Live Video Screen....................................................................................................................................8
Figure 16 Live Video Screen Icons...........................................................................................................................8
Figure 17 Add/Edit Users Screen ............................................................................................................................9
Figure 18 Video Screen .........................................................................................................................................10
Figure 19 Advanced Video and Region of Interest Screens..................................................................................12
Figure 20 Advanced Features Screen....................................................................................................................13