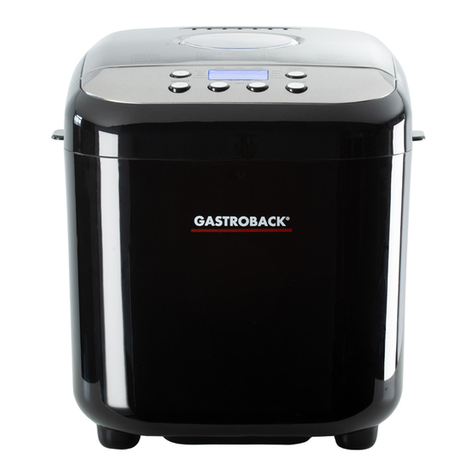
Gastroback Design Automatic Bread Maker Advanced Manuel utilisateur

Read all provided instructions before first usage!
Model and attachments are subject to change!
For domestic use only!
Art.-No.62823 »Design Bread Maker Advanced«
OPERATING INSTRUCTIONS
DESIGN AUTOMATIC BREAD
MAKER ADVANCED

Carefully read all provided instructions before you start running the
appliance. Pay regard to the warnings mentioned in these instruc-
tions.
TABLE OF CONTENTS
Knowing Your »Design Bread Maker Advanced« ............................................4
Important Safeguards ...................................................................................6
General Safety Instructions ......................................................................6
Important Safeguards for Electrical Appliances ..........................................9
High Temperatures—Risks of Burns.........................................................10
Moving Parts—Risks of Injuries...............................................................11
Non-Stick Coating ................................................................................12
Care and Cleaning ....................................................................................12
Technical Specifications..............................................................................17
Properties of Your New Bread Maker...........................................................17
Environment.........................................................................................17
Functions of the Buttons .........................................................................18
Programs of the Bread Maker ................................................................19
Program Phases....................................................................................22
Keep Warm Function............................................................................22
Memory Function..................................................................................22
Programming Your Own Settings............................................................23
Using the Timer ....................................................................................24
Locking the Control Panel ......................................................................25
Tips for Best Results ....................................................................................26
Before First Use..........................................................................................29
Operation .................................................................................................30
Preparations ........................................................................................31
Starting the Baking Program ..................................................................32
Special Introduction about Quick Bread ..................................................34
Applying Some Additional Baking Time ..................................................34
Making Jam ..............................................................................................35
Using the Ice Bucket ...................................................................................36
Making Ice Cream................................................................................37
Making Yoghurt.........................................................................................39
Solving Problems .......................................................................................40
Storage.....................................................................................................44
Notes for Disposal .....................................................................................44
Information and Service..............................................................................45
Warranty..................................................................................................45
Recipes.....................................................................................................46

3
DEAR CUSTOMER!
Your new Gastroback »Design Bread Maker Advanced« will provide a series of
delightful, freshly baked fragrant breads and cakes. To replenish your well-set break-
fast table even jam and yoghurt can be made quite easily. As a special highlight,
using the designated ice bucket (not included, seperately available as accessory)
the appliance can prepare even ice cream. Try some new recipes to your individual
taste. For this, use the various pre-set programs or even set-up your own program.
The »Design Bread Maker Advanced« will make your ideas come true without effort.
These instructions for use will inform you on the various functions and features, which
make it easy to take pleasure in your new Bread Maker.
We hope that you will enjoy your new Bread Maker.
Your Gastroback GmbH
IMPORTANT NOTE - PLEASE READ CAREFULLY -
BEFORE YOU USE THE DEVICE!
DO NOT CLEAN THE BREAD PAN IN THE DISHWASHER!

4
KNOWING YOUR »DESIGN BREAD MAKER ADVANCED«
1
2
3
4
5
6
7
8
9
10
ACCESSORIES
11 12
13
11. Measuring cup
12. Measuring spoon—wells for 5 ml (1
Teaspoon) and 15 ml (1 Tablespoon)
13. Hook for removing the kneading paddle
1. Lid – including handle, viewing window, ventilati-
on slits, and ingredients box; with a list of the
available programs printed on top
2. Viewing Window
3. Ingredients Box – will release the ingredients
automatically during the pre-programmed baking
programs 1-9.
4. Non-Stick Coated Kneading Paddle
Drive Shaft – put on the kneading paddle here
5. Operating elements
6. Non-Stick Coated Bread Pan – with handle
for easy installation and removal
7. Stainless Steel Housing
8. Heating Compartment
Coupling of the kneading works – for operation,
the bread pan must be locked here tightly
Heating Element (not visualized)
9. Non-slip Rubber Feet– for a stable stand on
smooth surfaces
10. Power Cord

5
LCD screen showing the following
information:
(a) Selected range of loaf weight: large (up to 1000
g, 2 lb), medium (approx. 750 g, 1.5 lb), or small
(up to 500 g, 1.0 lb)
(b) Remaining time until completion in minutes
(c) Icon of the selected bread crust colour: light, medi-
um, dark
(d) Selected program number
(e) Hourglass icon, if a delay time has been set
(f-l) Icon and number of the currently running program
phase (stir/knead, rest/rise/ferment, heat, bake,
keep warm, completion).
(m) Key icon, if the control panel is in locked mode.
Buttons – only slightly touch with your
finger. A beep sounds on every input.
• MENU—to select the desired baking program.
• WEIGHT—to set the desired loaf weight.
• BURNING COLOR—to set the desired browning.
• +TIME and -TIME—for setting a time delay, or set-
ting the processing time.
• BAKE—a short-cut to the Bake program (16).
• MIX—a short-cut to the Mix program (12).
• START/STOP—starts, pauses, or cancels operati-
on.
• SETTING – provides a short-cut to the Homemade
program (17) and switches through the various
program phases.
OPERATING ELEMENTS
a
b
c
d
e
g
m
l
k
h
i
f
f
j

6
IMPORTANT SAFEGUARDS
Carefully read all instructions before operating this appliance and save for further
reference. Do not attempt to use this appliance for any other than the intended use,
described in these instructions. Any other use, especially misuse, can cause severe
injuries or damage by electric shock, moving parts, heat, coldness, or fire.
These instructions are an essential part of the appliance. Do not pass the appliance
without this booklet to third parties.
Any operation, repair and technical maintenance of the appliance or any part of it
other than described in these instructions may only be performed at an authorised
service centre. Please contact your vendor.
GENERAL SAFETY INSTRUCTIONS
• This device may be used by children aged 8 and over and by people
with reduced physical, sensory or mental abilities or a lack of expe-
rience and/or knowledge if they are supervised or have received
instruction on how to use the device safely and have understood the
dangers resulting from failure to comply with the relevant safety pre-
cautions. Children must not play with the device. Cleaning and user
maintenance may not be performed by children, unless they are older
than 8 years of age and are supervised.
• Children younger than 8 years of age and animals must be kept away
from the device and the mains cable.
• The appliance is not intended to be operated by means of an external
timer or separate remote-control system.
• This appliance is for household use only and NOT intended for use in
moving vehicles. Do not operate or store the appliance in humid or
wet areas or outdoors. Any use of accessories, attachments or spare
parts that are not recommended by the manufacturer or damaged in
any way may result in injuries to persons and/or damage.
• Check the entire appliance and its parts regularly for proper ope-
ration—especially the power cord (e.g. check for distortion, disco-
louration, cracks, corroded pins of the power plug). Do not operate
the appliance, when the appliance or any part of it is likely to be
damaged, to avoid risk of fire, electric shock or any other injuries to
persons and/or damage. The appliance or its parts are likely to be
damaged, if the appliance has been subject to inadmissible strain

7
(e.g. overheating, mechanical or electric shock), or if there are any
cracks, excessively frayed or melted parts, or distortions (e.g. lid is
broken or cracked), or if there is any kind of malfunction (e.g. motor
gets stuck, liquid or dough running out, overheating, smoke coming
out). If one of these cases occurs during operation, immediately
unplug the appliance. Get in contact with an authorized service cen-
tre for examination and/or repair.
• Operate the appliance on a well accessible, stable, level, dry, and
suitable large table or counter that is resistant against water, fat,
and heat. The appliance will vibrate vigorously during motor opera-
tion and, despite the non-slip feet, could move around on the table
or counter. Thus it is crucial, to ensure a really stable stand on a
level surface. The appliance may not wobble, tilt or slip on the table
or counter. Additionally, keep an appropriate distance (at least 30
cm at each sides) to the edges of the working space and any other
objects. During operation leave at least 1 m of free space above the
appliance to avoid damage due to heat and condensate and for
unhindered access. Do not operate the appliance under over hanging
boards or drop lights.
• Always keep the appliance and the table or counter clean and dry,
and wipe off spilled liquids immediately. The rubber feet could lea-
ve stubborn stains on some surfaces. Thus, it is good advice to place
the appliance on a heat-resistant mat or plate. However, do not
place any clothes or tissue or other foreign objects under or on the
appliance during operation, to avoid risk of fire, electric shock and
overheating. Do not place the appliance or any hot parts of it (e.g.
bread pan) over a power cord or on any surfaces sensitive to heat,
fat, or moisture, or near the edge of the table or counter, or on wet
or inclined surfaces.
• This appliance is NOT intended for use by persons (including child-
ren) with reduced physical, sensory or mental capabilities, or lack
of experience and knowledge, unless they have been given supervi-
sion or instruction concerning the use of the appliance by a person
responsible for their safety. Children must always be supervised to
ensure that they do not play with the appliance or any part of it or
the packaging. Always keep the appliance where it is dry, frost-free,

8
and clean, and where young children cannot reach it. Do not leave
the appliance or any part of it unattended, when in reach of young
children.
• Do not place the appliance or any part of it in a range, or on or near
hot surfaces (e.g. burner, heater or oven). Do not use the appliance
or any parts of the appliance with any other device or for any other
purpose (e.g. drying of foodstuffs or other materials). Exclusively use
the appliance for processing food that is fit for consumption. Do not
dry or store any food or foreign objects within the appliance. Before
operation, always ensure that the appliance is assembled and con-
nected completely and correctly according to the instructions in this
booklet. Do not handle the appliance or any part of it with violence.
The ventilation slits in the housing must always be unobstructed.
• The ice bucket, gear box, and stirring paddle may never be heated or
touch hot surfaces (e.g. oven, burner, range) to avoid risk of burst,
melting and distortion. Do not use the ice bucket, gear box, and stir-
ring paddle with any program of the appliance other than the Ice
Cream program! Do not bring the ice bucket in contact with hot sur-
faces or hot liquids. The coolant within the ice bucket would expand
forcefully when heated, thus bursting the ice bucket and causing risk
of severe injuries and damage. After cooling the ice bucket in the
freezer, always protect your hands with gloves before touching the
ice bucket. NEVER touch the ice bucket with wet skin, when it has
been cooled in the freezer. Otherwise, your skin would immediately
freeze solid to the ice bucket, causing severe frost-bites and injuries.
• Do not hold your hands or any foreign objects (e.g. clothes, cooking
utensils) in the heating compartment or bread pan, with the appliance
connected to the power supply. Do not use any hard, sharp or edged
objects (e.g. knives, forks, metal scraper) with the appliance or any
part of it.
• Do not fill in more dough than 1000g in total. Otherwise ingredients
or dough may run out of the bread pan and reach the hot heating ele-
ments, causing overheating, fire and/or electric shock. Ensure that the
exterior of the bread pan is completely clean and dry before placing
it in the heating compartment. Always wipe off spilled liquids imme-
diately. If liquids have run out or are spilled on the housing, immedi-
ately unplug the appliance and clean the appliance (see: “Care and

9
Cleaning”).
• Always unplug the appliance, and wait until the motor comes to a
standstill, before assembling or disassembling any parts (e.g. bread
pan). Additionally leave the appliance cool down, before moving, or
cleaning the appliance. Always unplug the appliance, when not in
use. Always hold the housing at both sides near the bottom for moving
the appliance. Do not hold the appliance at the lid, lid handle, bread
pan handle, or power cord for moving the appliance. Do not place
any hard and/or heavy foreign objects on or in the appliance or any
part of it.
• Do not use any corrosive chemicals, abrasive cleaners, or cleaning
pads (e.g. bleach, oven cleaner, metal scouring pads) for cleaning to
avoid damage to the surfaces.
• Do not place the appliance, or any part of it, or power cord in an
automatic dishwasher.
• Do not leave any food dry on the appliance. Always clean the appli-
ance after each use to prevent accumulation of baked-on foods (see
“Care and Cleaning”). Always keep the appliance and its parts,
where it is clean.
IMPORTANT SAFEGUARDS FOR ELECTRICAL APPLIANCES
The appliance is heated electrically. Place the appliance near a suitable
wall power socket to connect the appliance directly to a protected mains
power supply with protective conductor (earth/ground) connected proper-
ly. Ensure that the voltage rating of your mains power supply corresponds
to the voltage requirements of the appliance (220 -240 V, 50/60 Hz,
AC, rated for at least 10 A) to avoid interference with other appliances.
The installation of a residual current operated circuit breaker (r.c.c.b.)
with a maximum rated residual operating current of 30 mA in the supp-
lying electrical circuit is strongly recommended. If in doubt, contact your
electrician for further information.
In various foreign countries, the specifications for power supplies are sub-
ject to incompatible norms. Therefore it is possible that power supplies in
foreign countries do not meet the requirements for safe operation of the
appliance. Thus, before operating the appliance abroad, ensure that safe

10
operation is possible.
• Do not use any desk top multi socket outlet, external timer, extension
cord, or remote control systems.
• Always handle power cords with care. The pins of the power plug
must be smooth and clean. Always completely unwind the power cord
before use. Do not place the appliance on a power cord. Power cords
may never be knotted, twisted, pulled, strained or squeezed. Do not
let the plug or power cord hang over the edge of the table or counter.
The power cord may not touch hot surfaces or sharp edges. Ensure
that no one will pull the appliance by the power cord. Take care not
to entangle in the power cord. Always grasp the plug to disconnect
the power cord. Do not touch the appliance or power plug with wet
hands when the appliance is connected to the power supply.
• DO NOT drip or spill any liquids on or in the housing, or oven com-
partment, or power cord. Always ensure that the exterior of the bread
pan is clean and dry before placing the bread pan in the heating
compartment. Otherwise liquid could run into the housing or on the
heating element, causing risk of electric shock or fire. Do not immerse
the appliance or power cord in water or other liquids. Do not pour or
spill any liquids on/in the housing or power cord. Do not place the
appliance on wet surfaces. When liquids overflowed or are spilled on
the housing, heating element, or power cord, immediately unplug the
appliance. Thereafter, clean the appliance and, leaving the lid open,
let it dry for at least 1 day. See: “Care and Cleaning”. Do not clean
the appliance in an automatic dishwasher.
HIGH TEMPERATURES – RISK OF BURNS
• The »Design Bread Maker Advanced« is designed for baking bread
and cakes and making jam in a household environment. For this pur-
pose, the appliance is heated electrically. Thus, improper handling
could cause severe injuries and damage. Please keep this in mind to
avoid scalds and damage.
• Except for the containing food, the lid, bread pan, and exterior of the
appliance can get very hot during operation and thereafter. Additio-
Ce manuel convient aux modèles suivants
1
Table des matières
Autres manuels Gastroback machine à pain