FTS 610
January 3, 1996
5
7. Remove and save the separator (thin cardboard or foam) that is between the two batteries. Slide the second battery
towards the back of the UPS until the positive (red) cable is about two inches away from the cabinet.
8. Using the needlenose pliers, disconnect the positive (red) cable and the jumper cable from the battery (see Figure
3 on page 4 for cable location).
Read the caution below; then, lift out the batteries.
CAUTION: Make sure that the terminals do not touch the cabinet or any metal part. Assume that the
batteries are fully charged, and use the same precautions you would use when handling
new batteries.
Batteries contain lead. Dispose of old batteries properly. Do not dispose of batteries in a
fire; the battery may explode. Do not open or mutilate batteries. Released electrolyte is
harmful to the skin and eyes. It may be toxic.
Section 3: Replacing the Batteries in the Fortress
1. Check to see if your Fortress has “battery bumpers” installed on the cabinet where the batteries sit. If there are no
cabinet battery bumpers, go to step 2.
If your UPS has cabinet bumpers installed, check to see if the new batteries have bumpers installed on the top.
Remove the bumpers from the batteries since the batteries will not fit in the cabinet if there are bumpers in both
places.
2. Route the positive (red) and negative (black) battery cables from the printed circuit board through the grommet and
into the bottom of the cabinet.
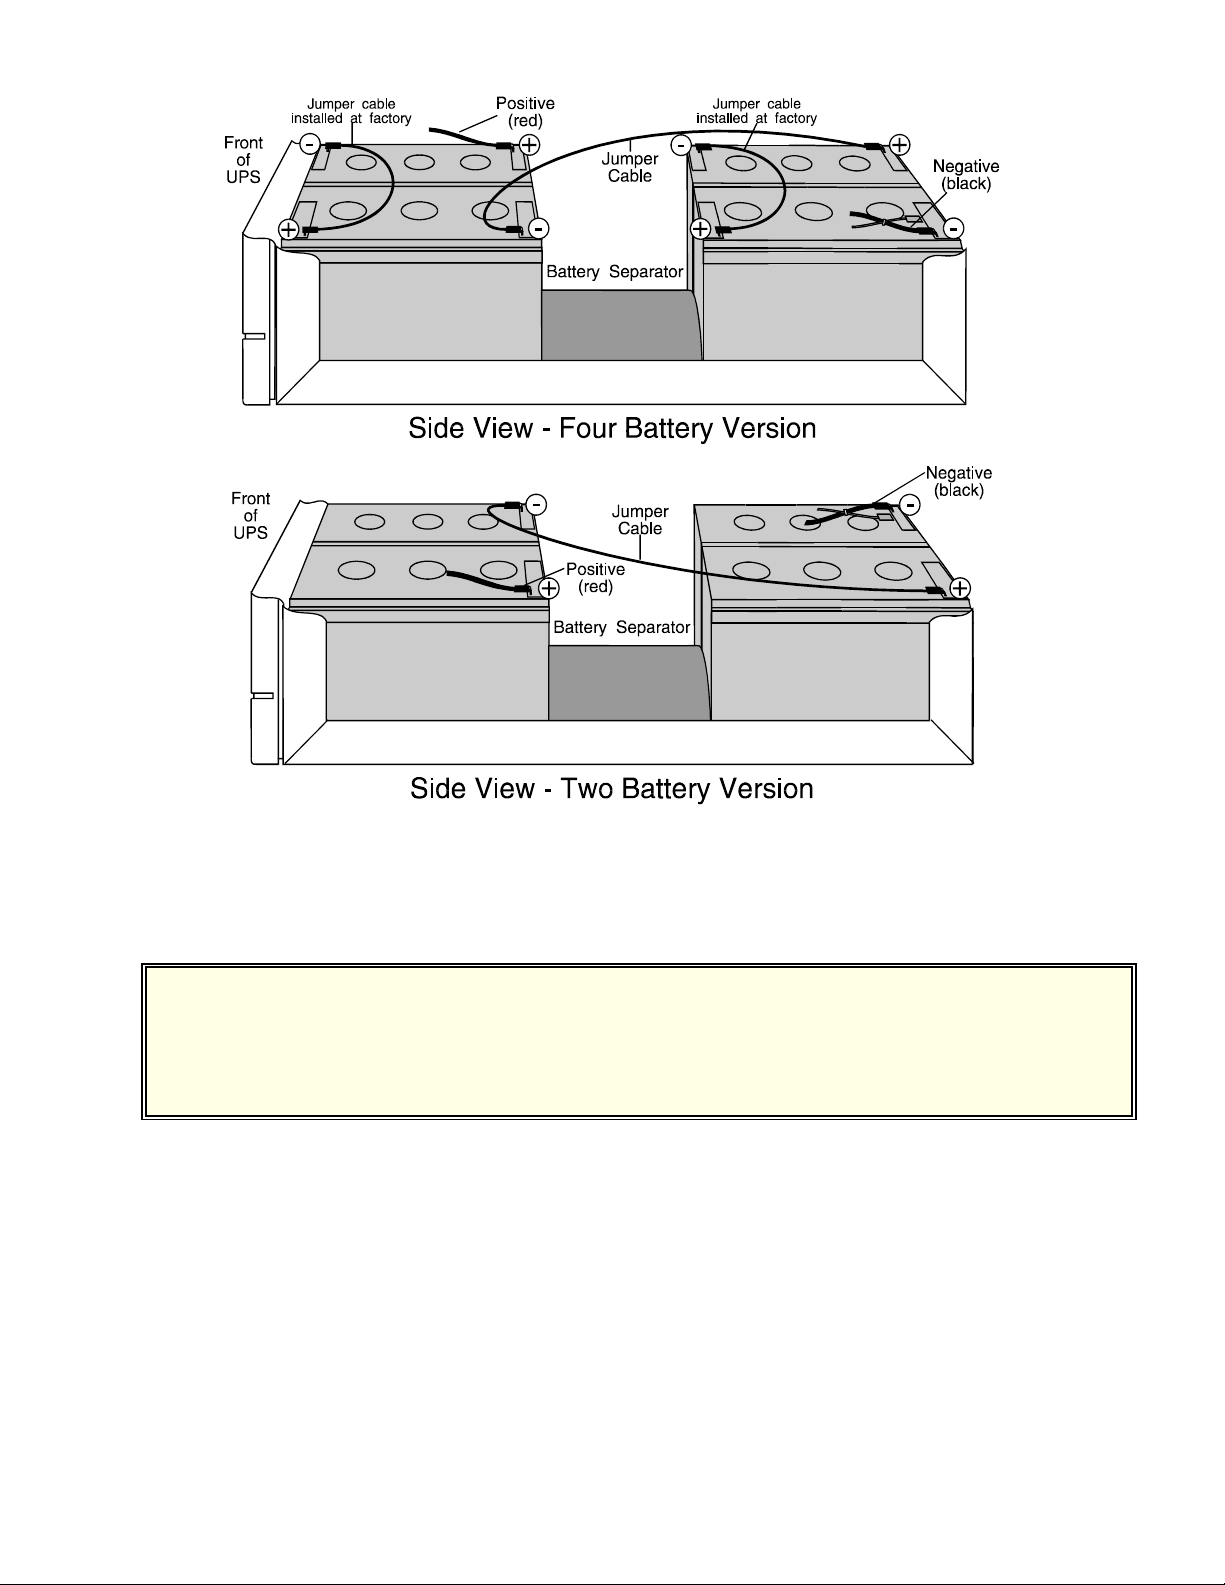
3. If you are installing batteries in the “Four Battery Version,” make sure that the factory-installed jumper wires on
the batteries rest flat against the top of each battery. (See Figure 3 on page 4.) If necessary, use tape to hold the
factory jumper down so that it does not catch on cabinet parts as you slide the batteries in. If you are installing
batteries in the “Two Battery Version,” there are no factory-installed jumpers because there are only two batteries.
CAUTION: Do not put your fingers between two batteries or between a battery and the UPS’ cabinet.
When you slide the batteries, use the wood dowel to hold the battery cables so they won't
catch on the UPS’ cabinet or other parts.
4. Connect the negative end of the jumper cable and the positive (red) battery cable to the first battery and slide it
halfway into the UPS cabinet. Figure 3 shows how the batteries should be arranged and where the battery terminals
should be. Be sure to refer to the “Four Battery Version” if your four batteries have external factory-installed
jumpers. If you have two batteries without external jumpers, use the “Two Battery Version.”
CAUTION: Make sure the positive (red) cable goes to the red terminal and the black jumper cable goes
to the black terminal as shown on the selected diagram.
5. Put the separator between the two batteries.
6. Slide the second battery part of the way into the UPS cabinet. Leave about two inches of room to make the final