Exposure MCX Manuel utilisateur

high delity engineering since 1974
TM
Instruction Manual
CD PLAYER
FA-310108-MCX-CD-instruction.indd 1 1/31/2008 4:39:34 PM

FA-310108-MCX-CD-instruction.indd 2 1/31/2008 4:39:39 PM

PACKAGED CONTENTS
a) MCX CD Player
b) MCX Remote Control Unit
(with batteries) - one unit per MCX system
c) Mains Cable
d) MCX ‘EXLINK’ Cable
e) CD Clamp
Exposure recommends a professional installation of this MCX
component or system by an authorised Exposure dealer.
CD Player
FA-310108-MCX-CD-instruction.indd 3 1/31/2008 4:39:44 PM

panel
REMOTE
Plug a matching remote
receiver into this jack to
extend the range of the
remote control.
ANTENNA
For future radio module
REAR
ANALOGUE OUTPUTS
(BALANCED - XLR / UNBALANCED - RCA)
Use the balanced XLR connector to connect to the pre amplier balanced input.
The unbalanced output can also be used if the following amplier does not have
a balanced input.
DO NOT USE BOTH AT THE SAME TIME.
FA-310108-MCX-CD-instruction.indd 4 1/31/2008 4:39:45 PM

CD Player
MAIN POWER SWITCH
Press this MAINS ROCKER SWITCH
to switch the unit completely ‘on’ or ‘off’.
When the green segment is shown,
the unit is in standby mode - the display
will show ‘PWR DOWN’ and then go out
leaving just the LED on.
POWER CABLE SOCKET
Connect the mains lead provided to this IEC
socket. Insert the mains plug to the power
socket on your wall. Please push both of
the plugs in properly before switching the
power on.
USB
For audio
streaming from
PC.
IN-EXLINK-OUT (RJ45)
For use with EXLINK cable provided to link to other
MCX components. Connect the EXLINK OUT on the
CD player to the EXLINK IN on the MCX Pre Amplier,
to allow syncronised control of the ‘Power On / Off’,
‘Display On / Off’ and ‘Mode’ functions of the entire
MCX system.
SPDIF
OUTPUTS
(BNC /
OPTICAL /
RCA)
• BNC 1
• OPT 1
• BNC 2
• BNC 2
• OPT 2
• RCA IN
INPUT SOCKETS
As well as being a CD player, the MCX can also be
used as a very high quality DAC with inputs selected
by pressing SELECT UP or SELECT DOWN
(on the front panel).
SPDIF - for
use with a DVD
player, satellite
TV receiver or
DVB box, etc.
• AES - Use with matching professional
equipment
FA-310108-MCX-CD-instruction.indd 5 1/31/2008 4:39:46 PM

MODE
When connected via the ‘EX-
LINK’ to the MCX Pre Amplier,
the CD input will be directly
selected when this is pressed.
MENU
Press the ‘MENU’ button to enter the menu system. Use the
SELECT UP / SELECT DOWN buttons to select which entry you
would like to change as below:
• DIG OUT ON / OFF: Press the ‘DISPLAY’ button to select the
desired setting.
• SEL IN: This selects which input is used after mains power on.
Press the ‘DISPLAY’ button until the desired setting is reached.
• VER: Displays the current software version.
• Press ‘MENU’ again to exit.
SELECT UP and
SELECT DOWN
Use these buttons to select
the desired input.
POWER
Use this button on the
front panel to switch the
unit from standby to ‘on’
or ‘off’.
FA-310108-MCX-CD-instruction.indd 6 1/31/2008 4:39:47 PM
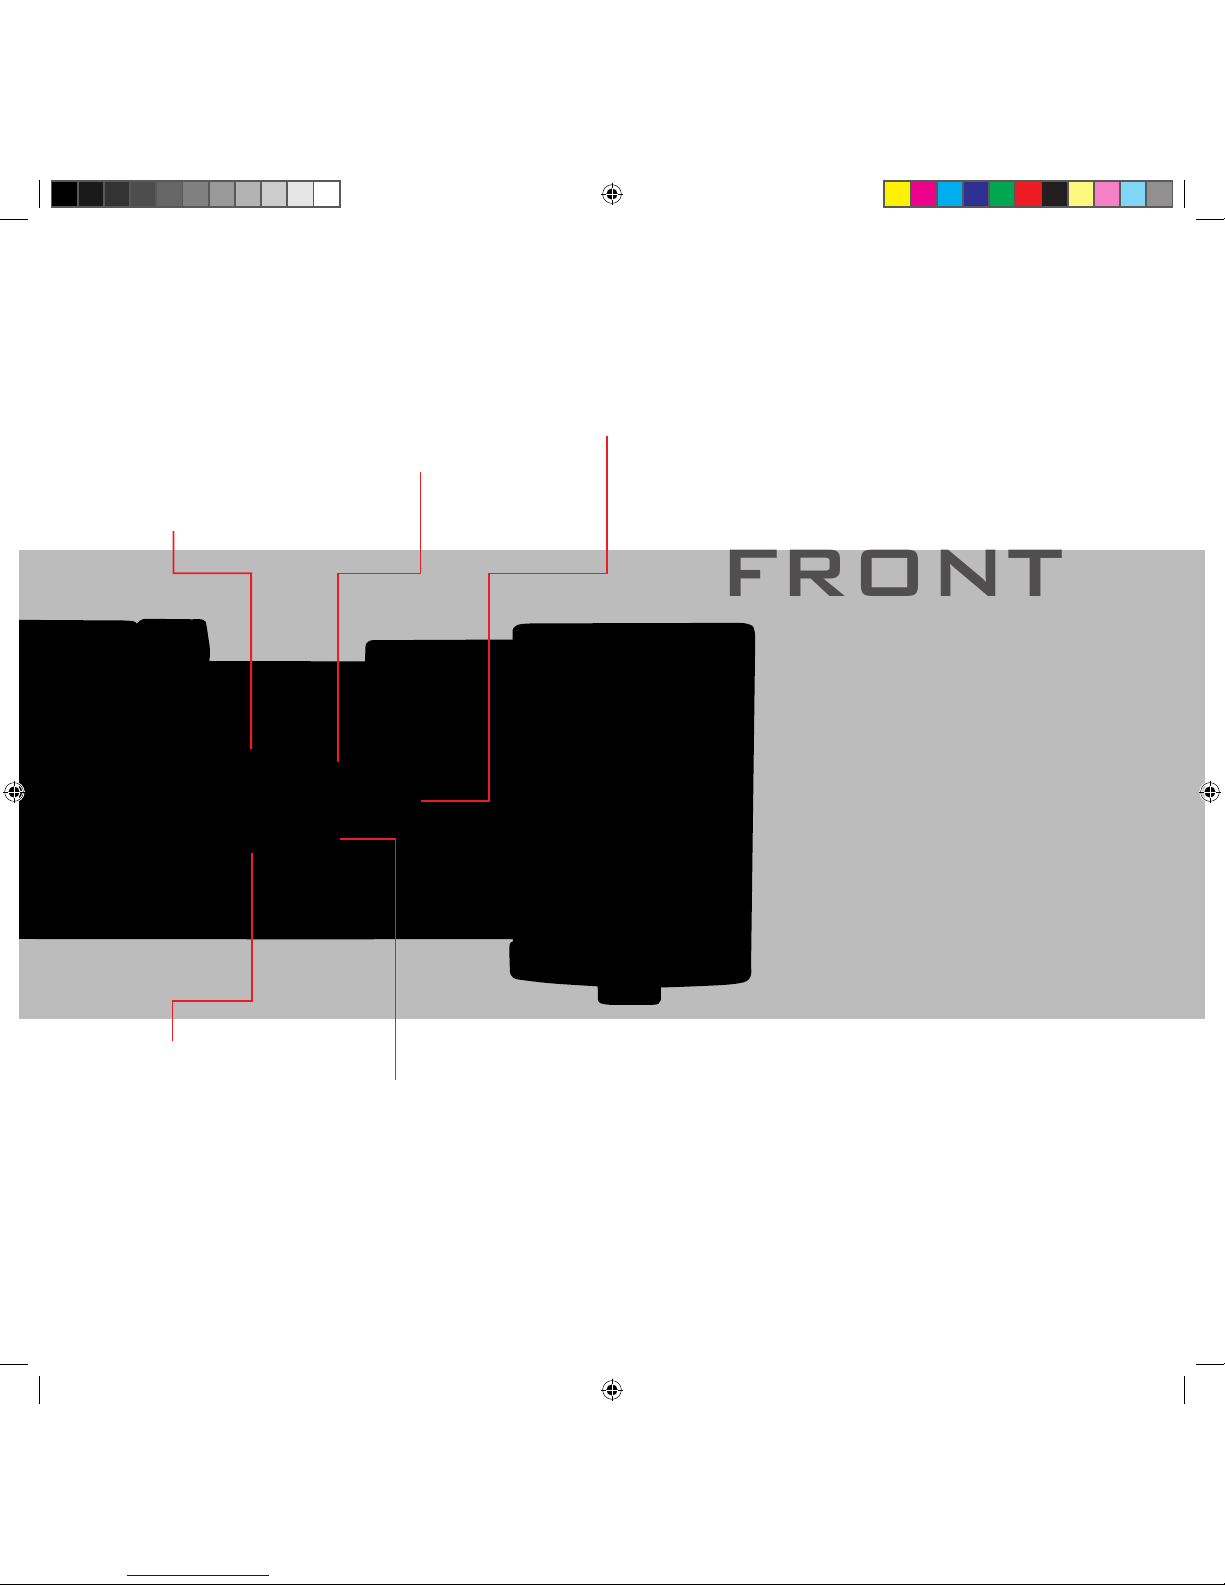
FRONT
DISPLAY
Turns the display ‘on’
or ‘off’ (Also used in
‘MENU’ mode).
PLAY / PAUSE
Starts the CD playback or
pauses playback.
PREVIOUS
Selects the Previous track
on the CD. NEXT
Selects the Next track on
the CD.
panel
CD Player
STOP
Stops the CD.
FA-310108-MCX-CD-instruction.indd 7 1/31/2008 4:39:47 PM

MCX CD PLAYER TOP PANEL (CD LOADING)
Loading a CD: Gently slide the lid towards the back of the unit until it stops. Place the CD disc on the turntable.
Place the clamp on top of the CD to ensure good alignment. Slide the lid closed again. The CD will now be read.
Press ‘PLAY’ to start playback.
FA-310108-MCX-CD-instruction.indd 8 1/31/2008 4:39:50 PM

MCX REMOTE
CONTROL HANDSET
•BUTTONS 1-9 and +10 : direct entry of track numbers
into the CD player. For track numbers of 10 or above, press
the +10 button rst, followed by the desired track number.
•MUTE : ‘mutes’ or ‘de-mutes’ the audio output.
•PRE SEL - and PRE SEL + : use these buttons to step
through the inputs on the MCX Pre Amplier.
•CD SEL - and CD SEL + : steps through the inputs on the
MCX CD player.
•VOL - and VOL + : decreases or increases the volume
level of the MCX Pre Amplier.
•PROG : puts the MCX CD player into program mode to
allow playing tracks in a programmed order.
•RDM : puts the MCX CD player into random play mode.
•DISPLAY : turns the display of the MCX CD player or MCX
Pre Amplier ‘on’ or ‘off’.
• PREV and NEXT : selects the previous or next track when
playing a CD.
•RPT : press once to repeat the whole CD or twice to play
the same track continuously.
•<< and >> : searches rewind (<<) or forward (>>).
• TIME : selects the time display on the CD Player to display
remaining time of the current track, remaining time of the
cd or the current played time of the track.
•PLAY : plays CD
•STOP : stops CD playback
•PAUSE : pauses / resumes playback
•STANDBY : switches the MCX CD player or MCX Pre
Amplier ‘on’ or into ‘standby’ mode.
Specications for the Remote Handset:
Batteries : AAA
Size : 66 x 34 x 218mm (w x d x h)
Weight : 500g (without batteries)
* To replace the batteries on the remote handset, please remove the
case screws on the top and bottom panels of the unit. You can then
slide off the back panel to access the battery compartment.
FA-310108-MCX-CD-instruction.indd 9 1/31/2008 4:39:52 PM

SAFETY
IT IS HIGHLY RECOMMENDED FOR YOUR MCX SYSTEM TO BE PROFESSIONALLY INSTALLED BY YOUR DEALER.
Incorrect installation or inappropriate use of the MCX CD Player may result in injury due to electrical shock.
• Always ensure that the voltage rating on the rear panel of this unit matches that of your local mains supply.*
• Ensure that the mains cable and plug supplied with this unit is also correct (Contact your dealer immediately if this is not the case).
• This unit is protected by a mains fuse, which is accessible as part of the IEC socket on the rear panel.
• Fuse replacement specications:
220/240V units T2.5A fuse
110/120V units T5A fuse
• The Exposure MCX CD Player MUST be earthed.
• Protect this unit against all forms of liquid. Never expose the unit to dripping or splashing, or place objects lled with water,
such as vases, on the unit.
• Unplug the unit from mains when not in use for prolonged periods.
• Do not open this unit - there are NO user serviceable parts inside. Reduce the amplier volume control to minimum before
turning this unit ‘on’ or ‘off’.
• Ensure that this unit is switched off when connecting or disconnecting interconnect cables.
* Contact Exposure Electronics for advice on moving your equipment to another country or territory.
CAUTION
For a long and trouble-free life of your Exposure MCX CD Player, please ensure the following:
• Do not apply labels or stickers to CDs.
• Do not write on CDs.
• Do not use abrasive or solvent-based cleaning uids on the surface of CDs.
• Do not remove the cover of the CD Player or dismantle the case.
• Do not operate the CD Player in a damp environment or allow liquids to enter the unit.
• Do not attempt to bypass the mains fuse or replace the fuse with one of a different specication.
• Do not use abrasive or solvent-based cleaning uids on the CD Player's casing.
FAILURE TO OBSERVE THESE PRECAUTIONARY MEASURES MAY VOID YOUR WARRANTY.
FA-310108-MCX-CD-instruction.indd 10 1/31/2008 4:39:53 PM
Table des matières
Autres manuels Exposure Lecteur CD

Exposure
Exposure 3010S Manuel d'instructions

Exposure
Exposure 3010S2 Manuel d'instructions

Exposure
Exposure Classic CD Player Manuel utilisateur

Exposure
Exposure 2010S Manuel d'instructions

Exposure
Exposure XXII Manuel d'instructions

Exposure
Exposure 2010S2 Manuel d'instructions

Exposure
Exposure 1010 Manuel d'instructions


