Eurofred SW M Series Manuel utilisateur
SW ... M
NL Gebruiksaanwijzing
ES Instrucciones para el uso
CZ Návod k použití
PL Instrukcja obsługi
RUS Инструкция по эксплуатации
UK Instructions for use
DE Bedienungsanleitung
FR Mode d’emploi
DK Brugsanvisning
NO Bruksanvisning

2
GB
Thank you for purchasing your new fridge/
freezer from Eurofred. Please note that
these instructions apply to all fridge/freezers
in the SW range. Illustrations and ttings
may therefore not necessarily correspond
exactly to your model.
Warning
As the refrigerant used in this appliance is a
ammable gas (Isobutane R600a), special
care must be taken to prevent damage
to the refrigerant circuit and piping during
transport and installation.
If damage does occur, avoid sparks or
naked ame in the vicinity of the appliance,
ensure that the room is well ventilated,
disconnect the power supply, and contact
your supplier.
The unit must only be serviced by quali-
ed technicians from an approved service
centre.
Old appliances
Old refrigerators and freezers are often
tted with complicated latches that can
only be opened from the outside. If you
have one of these old units stored away
somewhere, or if you scrap one, remember
to destroy the latch rst in order to prevent
children from being exposed to great dan-
ger by getting locked inside the unit.
Before use
Before operating your new appliance,
please read the following instructions care-
fully as they contain important information
on safety, installation, operation and main-
tenance. Keep the instructions for future
reference.
On receipt, check to ensure that the appli-
ance has not been damaged during trans-
port. Transport damage should be reported
to the local distributor before the appliance
is put to use.
Remove the packaging. Clean the inside of
the cabinet using warm water with a mild
detergent. Rinse with clean water and dry
thoroughly (see cleaning instructions). Use
a soft cloth.
If during transport the appliance has been
laid down, or if it has been stored in cold
surroundings (colder than +5°C), it must be
allowed to stabilise in an upright position for
at least an hour before being switched on.
Contents
Get to know your fridge/freezer........3
Installation and start-up.....................4
Electrical connection.........................6
Reversing the door(s).......................7
Operation and function.....................8
Refrigerator section........................10
Freezer section...............................11
Cleaning and maintenance.............13
Fault nding....................................14
Warranty, spare parts and service..15
Disposal..........................................16

3
GB
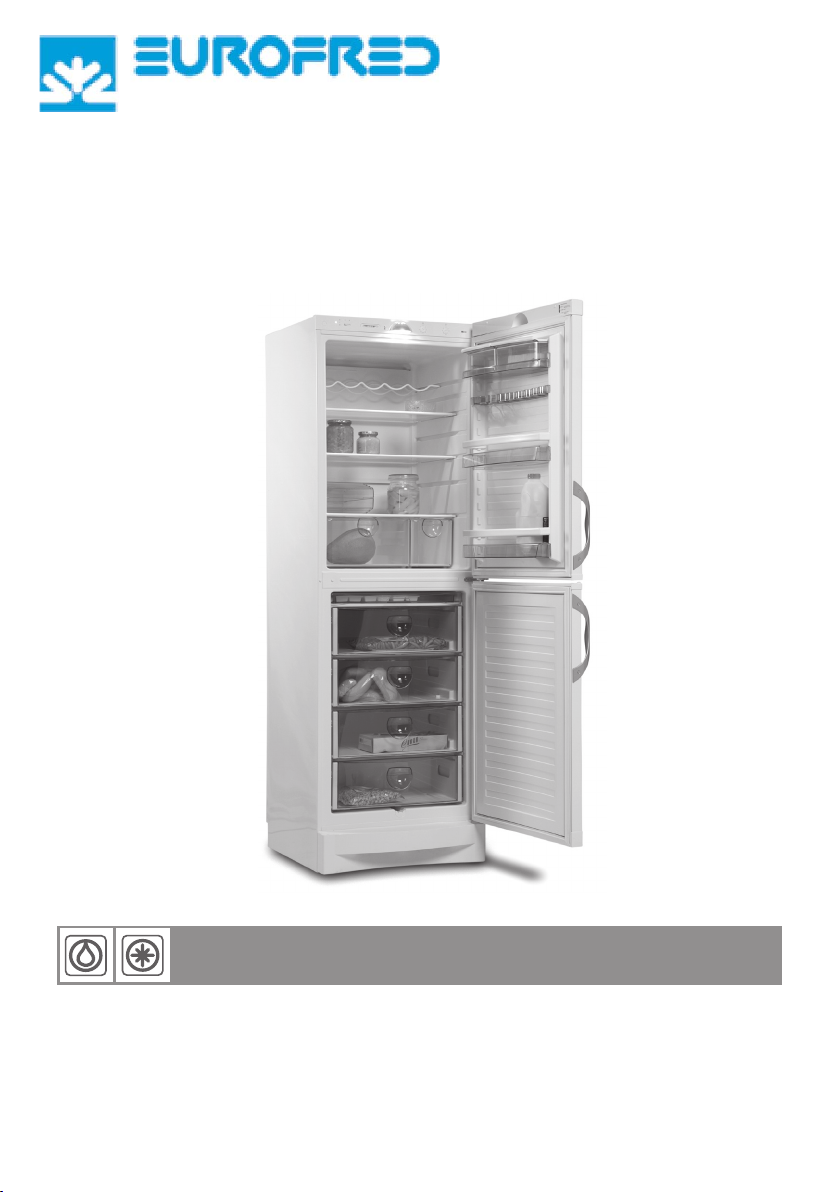
Get to know your fridge/freezer
g. 1
Control panel
Lighting
Shelf with storage boxes
Bottle rack
Glass shelf
Door shelf
Large storage box
Nameplate
Crisper bins
Freezing tray
Sealing strip
Freezer drawers
Door handle
Defrost water drain
Kick plate
Adjustable feet
4
GB
Placement
For safety and operational reasons, the
appliance must not be installed outdoors.
The appliance should be placed on a level
surface in a dry, well ventilated room (max.
75% relative air humidity). Never place the
appliance close to sources of heat such as
cookers or radiators, and avoid placing it in
direct sunlight.
Room temperature
The climate class is stated on the
nameplate (see g. 1 on page 3 and g. 13
on page 15). This species the optimum
room temperature.
Climate class Optimum room tem-
perature
SN +10 ºC to +32 ºC
N+16 ºC to +32 ºC
ST +18 ºC to +38 ºC
T+18 ºC to +43 ºC
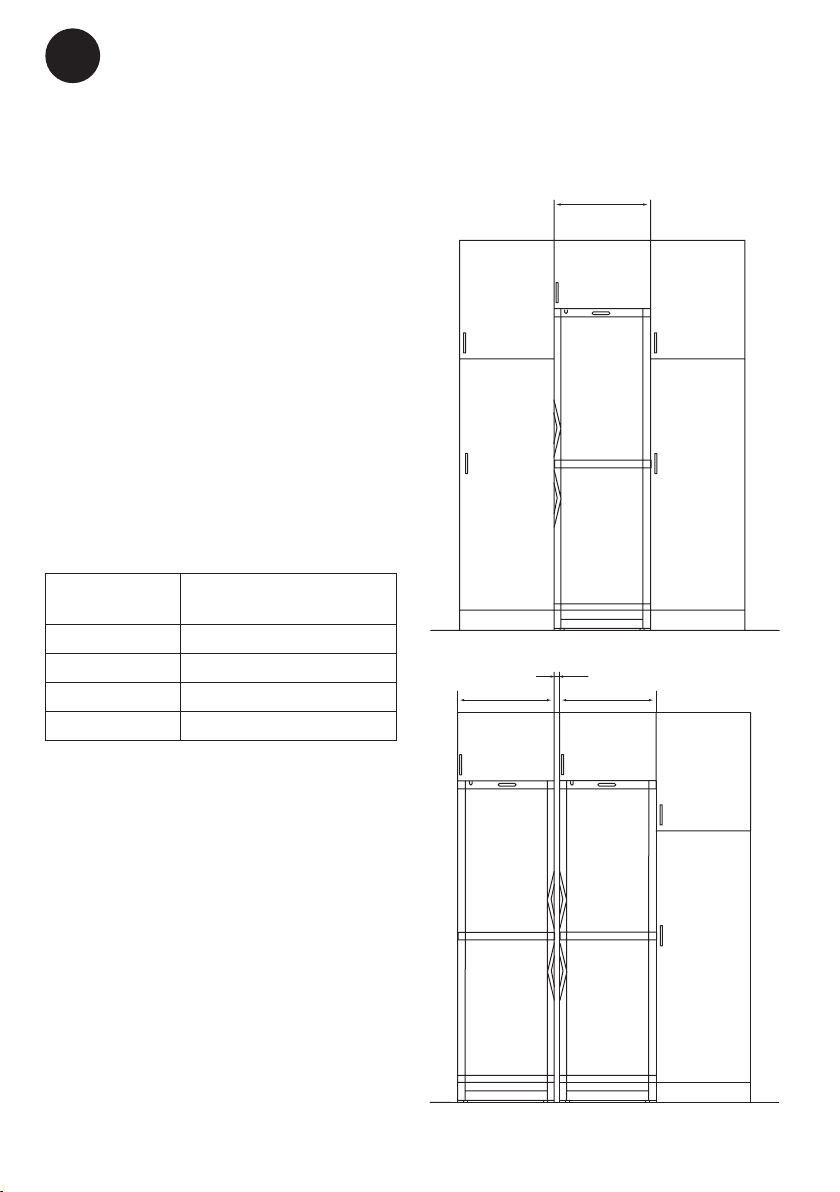
Installation
The surface on which the appliance is to be
placed must be level. Do not use a frame or
similar.
The appliance can be installed as a free-
standing unit against a wall or built into a
kitchen element (g. 2). If two appliances
are placed side by side, there must be at
least 30 mm clearance between them (g.
3).
After installation, the plug should be
accessible.
600 600
600
600 600
30
600 600
600
600 600
30
g. 2
g. 3
Installation and start-up
5
GB
Ventilation
It is important that the appliance be well
ventilated and that air can circulate un-
hindered above, below and around it. The
gures below illustrate how the necessary
air circulation can be ensured (gs 6-7).
If two fridge/freezers are placed side by
side, there must be at least 30 mm clear-
ance between them.
1650/1950
100
100
1560/1860
g. 6 g. 7
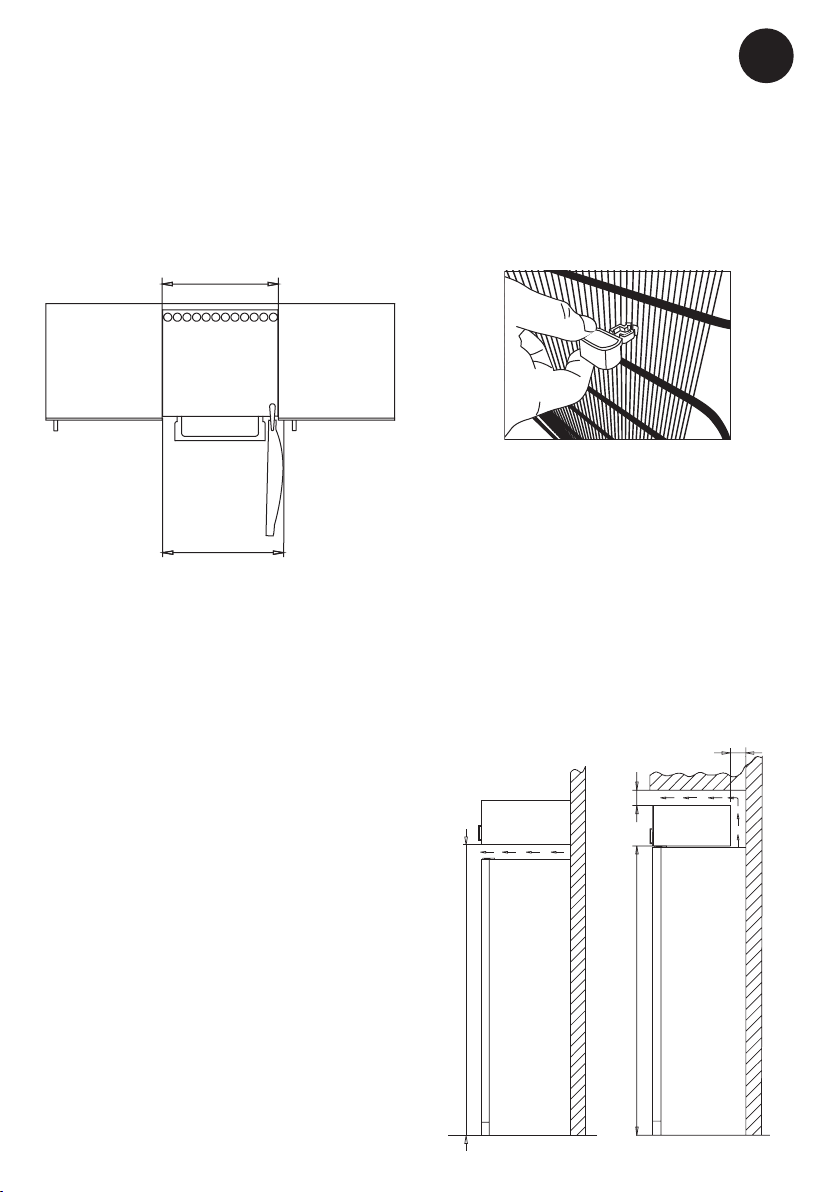
The appliance viewed from
above
If the appliance is placed beside a wall,
there must be sufcient room for the freezer
door to be opened wide enough to allow the
drawers to be pulled out (g. 4).
600
610
g. 4
Special considerations for
climate class ST
The distance pieces on the rear of the
appliance ensure sufcient air circulation.
Fit the two caps supplied with the appliance
as shown in g. 5.
g. 5
6
GB
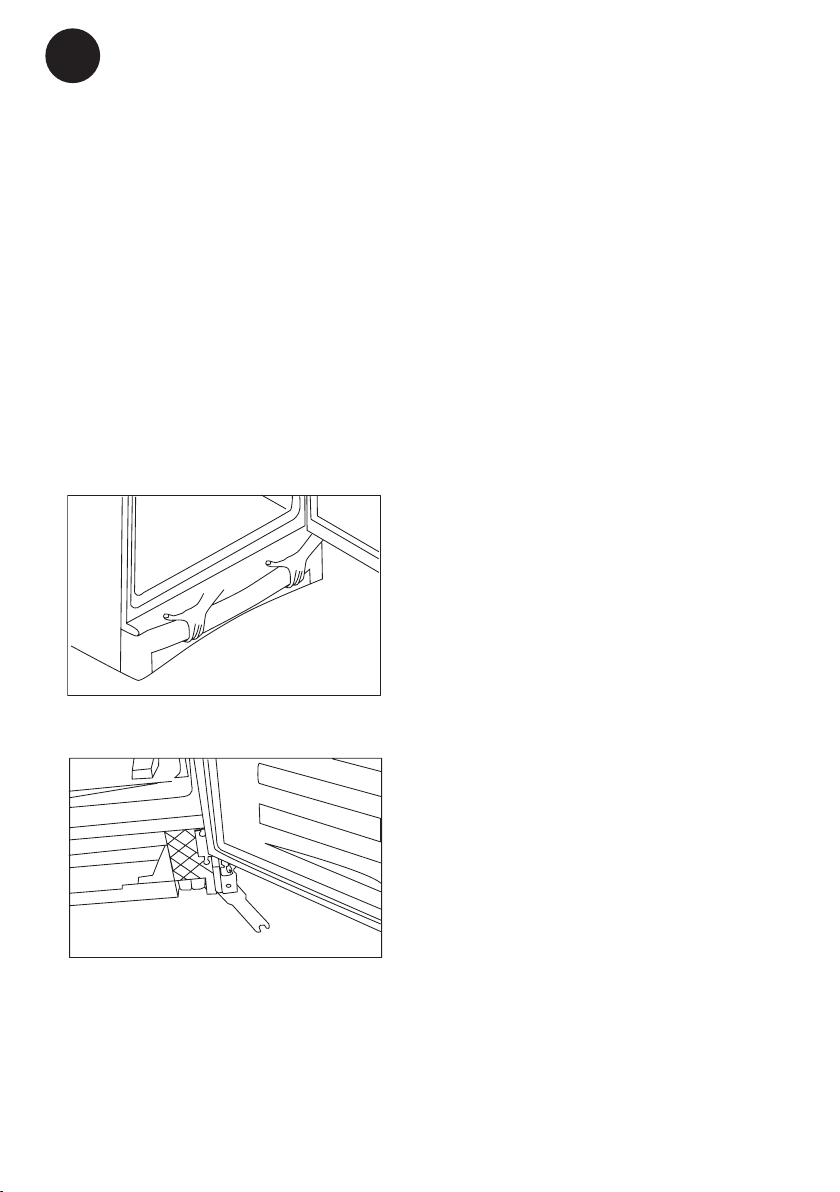
Setting up
It is important that the appliance be
absolutely level. To level the appliance,
remove the kick plate below the door and
screw the adjustable feet up or down (gs
8-9). If necessary, it is possible to adjust the
back feet before the upright is installed. Use
a spirit level to check that the appliance is
absolutely level.
If the appliance is to be placed on a soft
surface, e.g. oorboards or a carpet, it is
best to recheck whether the appliance is still
level after a period of time as the underlying
surface may give under the weight of the
appliance.
g. 8
g. 9
7
GB
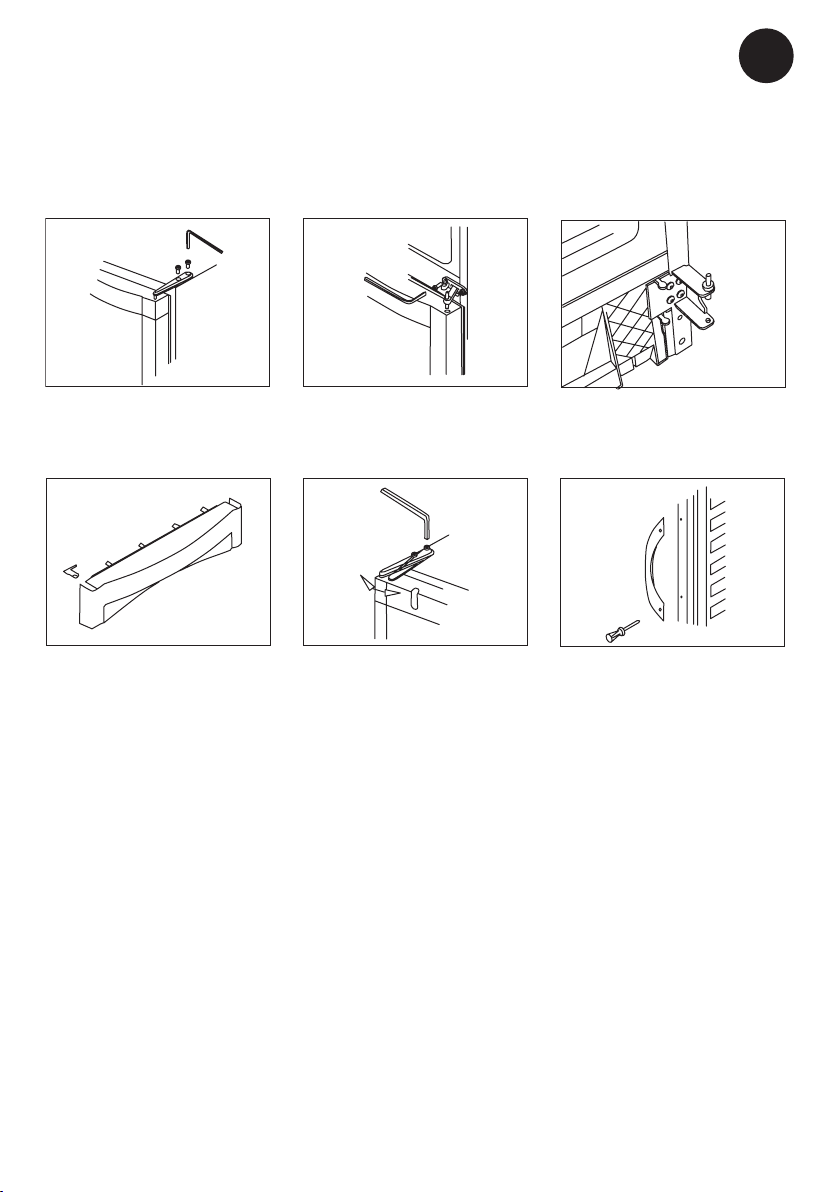
The door(s) can be changed from right-hinged to left-hinged and vice versa as follows:
Reversing the door(s)
1. Remove upper hinge. The hinge will be
reused later as the upper hinge on the
opposite side. Lift off upper door.
2. Remove middle hinge. Lift off lower
door. Ret hinge screws.
4. Move hole cover to opposite side of kick
plate and ret kick plate to appliance.
5. Door adjustment (top): Loosen the two
screws holding the upper hinge in place
and turn the hinge to right or left as
required. Retighten the screws.
6. Move handles to opposite side of doors.
Ret plugs in holes on opposite side of
doors.
3. Remove kick plate. Remove lower
hinge by unscrewing the three screws.
Rotate hinge through 180° and ret on
opposite side.

8
GB
The appliance is intended for connection
to alternating current. The required volt-
age (V) and frequency (Hz) are stated on
the nameplate inside the appliance. Power
must be connected via an independent wall
socket outlet.
Technical data
This appliance complies with CE marking
regulations, directives and standards.
Low Voltage Directive 73/23/EEC.
EMC Directive 89/336/EEC.
Council Directive 92/75/EEC on the en-
ergy labelling of household appliances as
subsequently amended by 94/2/EC and
2003/66/EC. Directive 96/57/EC on energy
efciency requirements, and subsequent
amendments.
Electrical connection
9
GB
Refrigerator section
The thermostat button can be set from 1
(min.) to 7 (max.). A suitable setting must be
found by trial and error. Start by setting the
button to 4. Check the temperature, then
adjust the setting upwards or downwards
as required. Usually, a temperature of
5°C is recommended for items stored in
a refrigerator. To check the temperature,
place a thermometer in a glass of water
positioned in the centre of the cabinet for
12 hours. An average temperature of +5°C
should be found in the centre of the cabinet.
Freezer section
Always maintain correct storage
temperature
The thermostat button can be set from 1
(min.) to 7 (max.). A temperature of -18°C
is recommended for items stored in a
freezer. (Maintaining a temperature lower
than this consumes additional energy.) The
temperature in the freezer is displayed on
the thermometer.
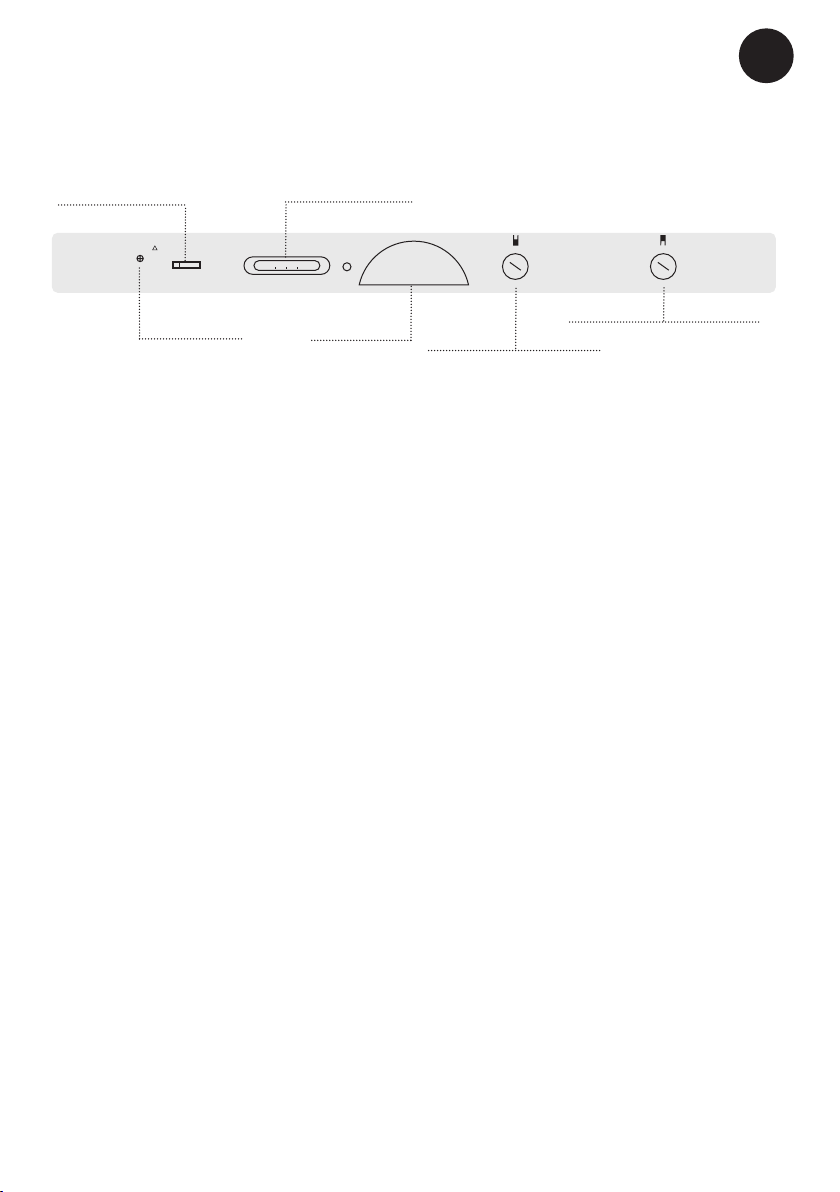
- The control lamp lights green when the
power supply is connected correctly.
- The control lamp lights yellow when Super
Freeze is activated.
01
2
3
4
5
6
7
Thermostat button, freezer
Lighting
Control lamp
S
S
O
I
!
Super Freeze Thermometer
01
2
3
4
5
6
7
Thermostat button, refrigerator
Operation and function
g. 10

10
GB
Glass shelves
The shelves are made of tempered glass
and can be repositioned within the cabinet.
To move the shelves, the door must be
opened 90°. To remove a shelf, pull it
forwards and lower it. The shelf can then be
removed and placed in the desired position.
From the top and downwards, the shelves
are suitable for storing bakery products,
ready-made meals, dairy products, meat
products and sliced meat.
Storage boxes
The storage boxes can either be placed
in the door or on the glass shelves. Their
tight-tting lids prevent the products stored
in them from drying out and saves the need
for further packaging. The boxes are ideal
for storing items such as butter and cheese.
The large storage box is ideal for storing
items such as meat and sliced meat.
Bottle rack
The bottle rack is ideal for both large and
small bottles.
Crisper bins
The crisper bins are ideal for storing fruit
and vegetables. The shelf above the bins
functions as a lid, maintaining humidity and
preventing the items stored in the bins from
drying out.
Glass shelf with slide damper
The slide damper above the crisper bins
allows the temperature and humidity in the
bins to be regulated.
- Opening the damper reduces the
temperature and humidity.
- Closing the damper increases the
temperature and humidity.
Shelves in the door
The shelves in the door are practically
positioned with the box shelf at the top, the
egg holder in the middle and door shelves
at the bottom. They provide ample space for
storing large and small bottles, cartons, jars
and tubs. All shelves can be repositioned.
g. 11
g. 12
g. 13
Ce manuel convient aux modèles suivants
3
Table des matières
Autres manuels Eurofred Réfrigérateur


