PROCEDURE FOR TWO
OUTLET SYSTEMS
Step 9.
With the model L/160 with two outlets, you
can use between one and four torches with
the following procedures:
NOTE: to connect the hoses properly, see
picture BELOW.
ONE TORCH:
Connect the hose to LINE 1 fitting (closest to
the machine), with the shut-off gas valve of
LINE 2 in the “off” position, then select the
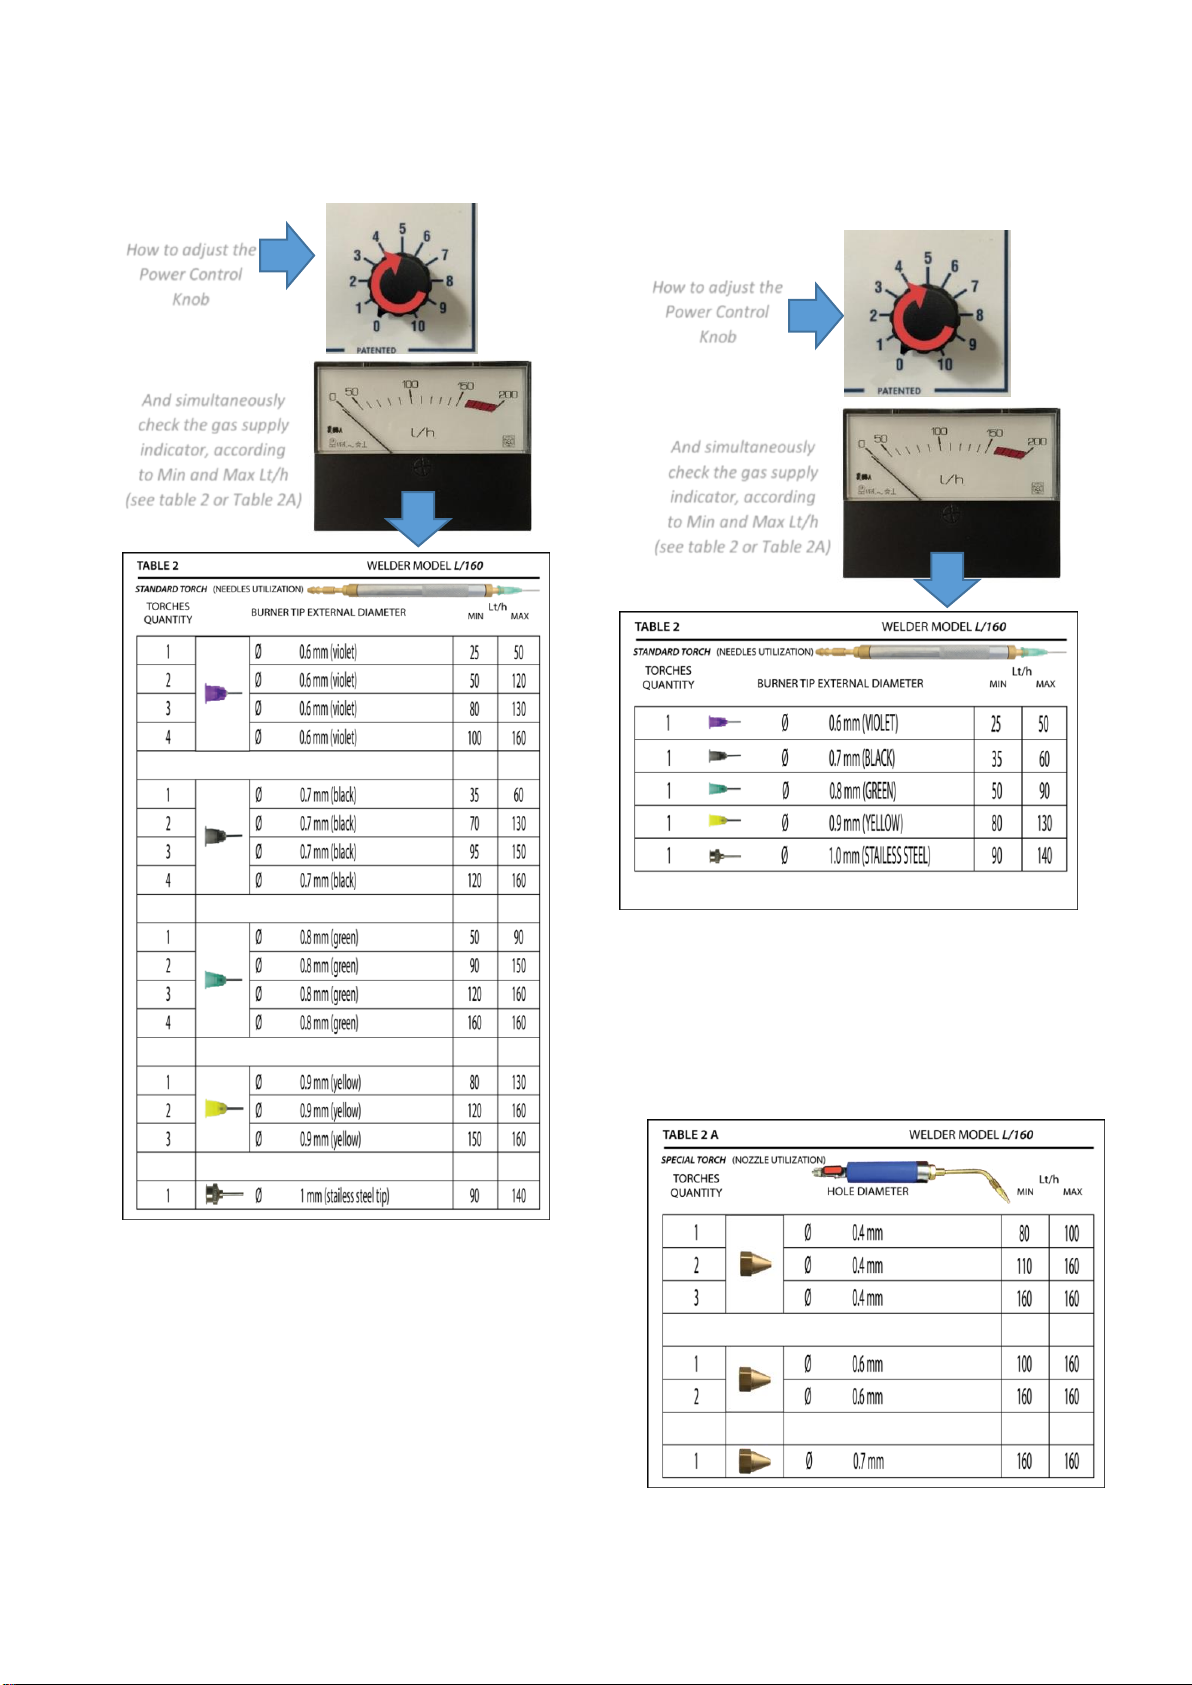
green burner tip (refer to Table 2 –STEP 13)
and light the flame.
TWO TORCHES:
You must use the default LINE 1.
Connect the hose with the two split torches
to LINE 1 fitting (closest to the machine), with
the shut-off gas valve of LINE 2 in the “off”
position, then select the green burner tips
(refer to Table 2 –STEP 13) and light the
flames.
THREE TORCHES:
USE of LINE 1: Connect the hose with the
two split torches to LINE 1 fitting (closest to
the machine).
USE of LINE 2: Connect the hose with one
single hose and torch to LINE 2 by opening
the gas valve in the “on” position, then select
the green burner tips (refer to Table 2 –
STEP 13) and light the flames.
FOUR TORCHES:
USE of LINE 1: Connect the hose with the
two split torches to LINE 1 fitting (closest to
the machine).
USE of LINE 2: Connect the hose with the
two split torches to LINE 2 fitting by opening
the gas valve in the “on” position, then select
the green burner tips (refer to Table 2 –
STEP 13) and light the flames.
NOTE:
TO CONNECT THE HOSES TO THE
FITTINGS, UNSCREW THE FERRULE.
See Picture Below.
Then insert the plastic hose to the fitting,
tightening the ferrule to ensure a proper
and secure connection.
PROCEDURE FOR ONE
OUTLET SYSTEMS
Step 9 a.
NOTE: to connect the hoses properly, see picture
BELOW.
Prepare the special torch making sure the hose is
fitted (#16) to its fitting and the nozzle or burner tip
(refer to Table 2 or Table 2A) is selected and fitted
(#11).
SPECIAL TORCH
Step 9 b.
One Special Torch or Standard Torch (optional).
Connect the hose to the GAS OUTLET fitting, then
select the nozzle or burner tip (refer to Table2 or
Table 2A).
NOTE:
TO CONNECT HE HOSES TO THE FITTINGS, UNSCREW
THE FERRULE.
See Picture Below.
Then insert the plastic hose to the fitting, tightening
the ferrule to ensure a proper and secure connection.