Setting Up
_______________________________________________________
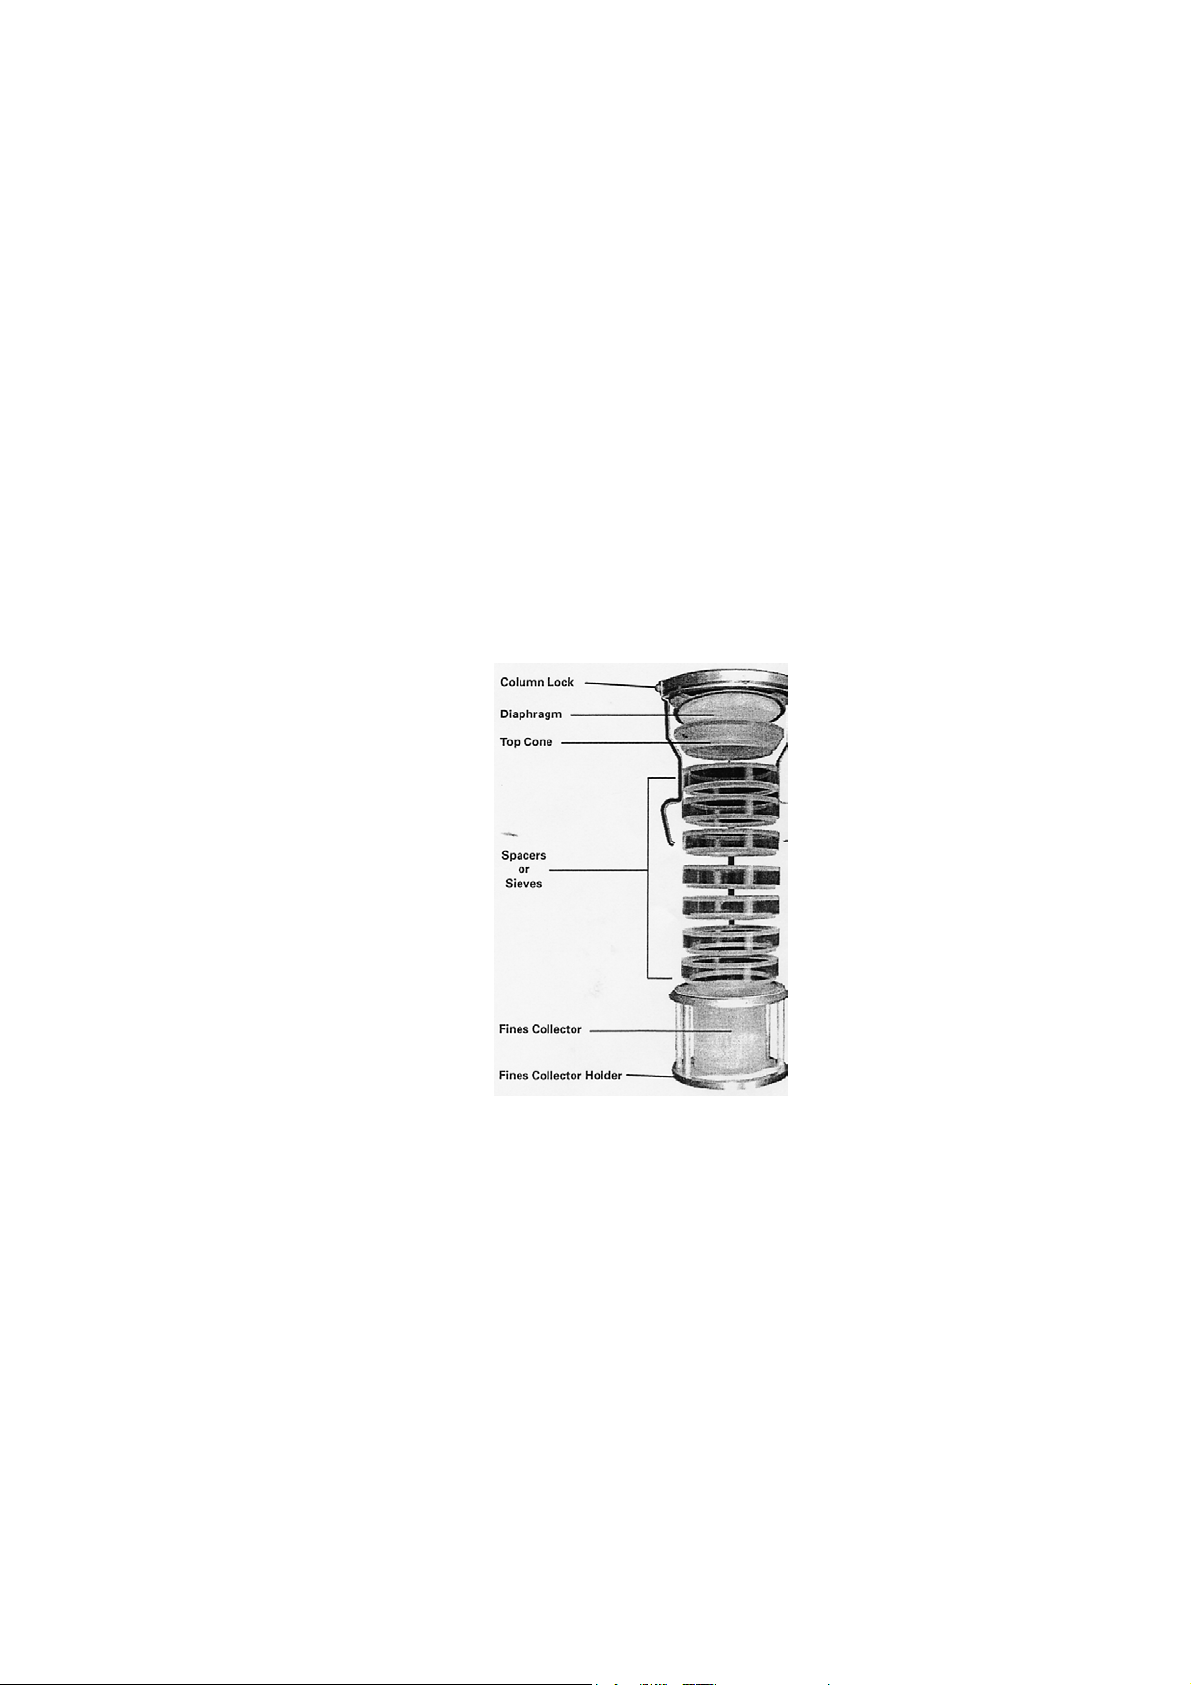
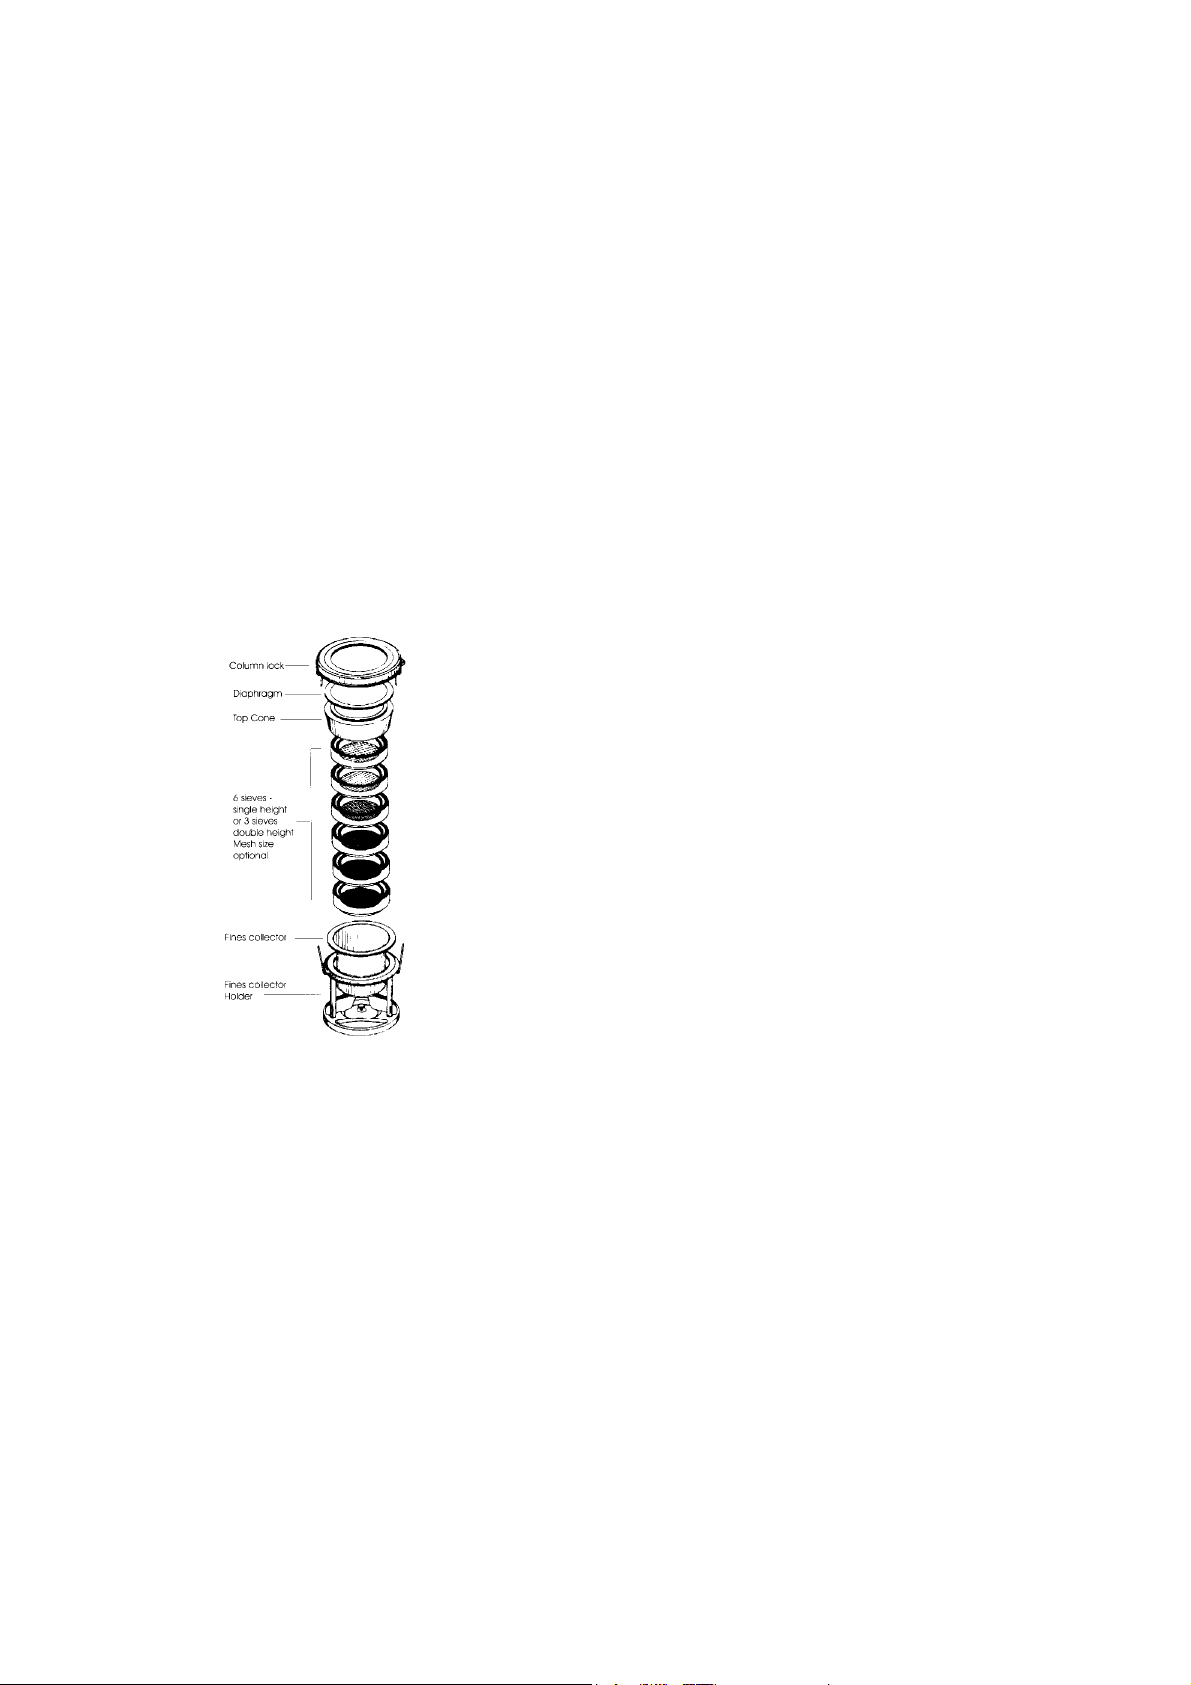
Sieve Stacking
4. Place the sieve stack in the Fines Collector Holder with the Fines
Collector in position.
5. Place the Top Cone on the top sieve or spacer if it is used.
6. Sample material for test is then placed in the top sieve.
7. Position the Diaphragm with the metallic ring downwards on the Top one.
8. Place the Column Lock onto the sieve stack and press own until the latch
bars lock onto the Fines Collector Holder. The sieve stack is ready for
placing in the sift chamber.
9. Disassembling the sieve stack is done by sliding the thumb and forefinger
into the openings between the lowest sieve or spacer and the column
locking arms. While steadying the stack with the other hand, spread the
column locking arms. The spring loaded column lock will release.
Remove the column lock carefully and access can be gained to the rest of
the stacking components.
10. Test times vary with size, density, texture, and quantity of samples. Five
minutes is typical, but sieving time can be as little as 30 seconds under
favorable conditions.
When using woven wire sieves, maximum sample quantities are 10g or
4cc for samples smaller than 38µm, and 20g or 7cc for larger particle
samples. A one gram sample is typical for precision sieving with
electroformed sieves.
- 6 -