Encore ENTRWI-G Manuel utilisateur

54Mbps Wireless LAN
Pocket Access Point
USER MANUAL

Contents
1. Overview ....................................................................................................1
1.1 Product Feature................................................................................1
1.2 System Requirements ......................................................................1
1.3 How to switch within 3 modes...........................................................1
2. Getting Start with Access Point ...............................................................2
2.1 Know the 54Mbps Wireless Network Access Point...........................2
2.2 Connect to the 54Mbps Wireless Network Access Point ..................2
2.3 Quick Setup with Wizard...................................................................3
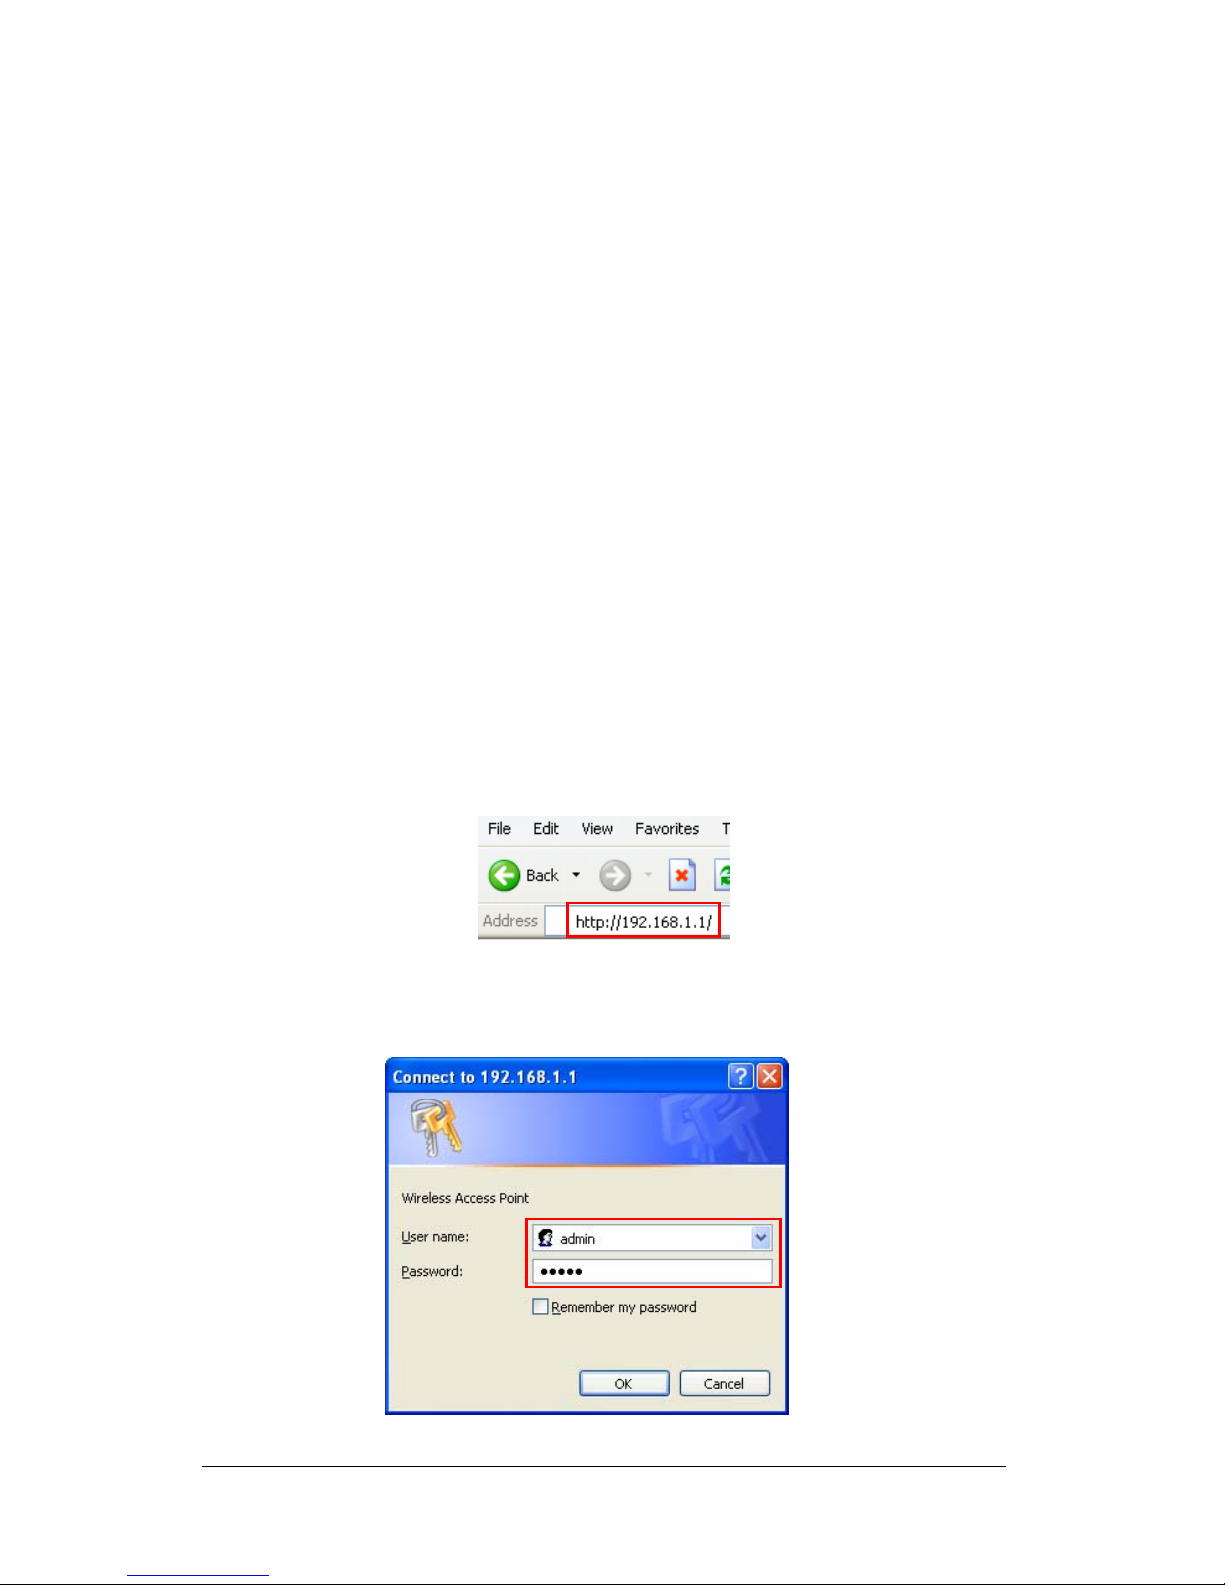
2.3.1 Access the Setting Menu .......................................................3
2.3.2 Setup with Wizard ...................................................................4
3. Configuration Access Point through WEB Browser ..............................8
3.1 Status................................................................................................8
3.2 Basic Setting...................................................................................10
3.3 IP Setting ........................................................................................12
3.4 Advanced Setting............................................................................13
3.5 Security ...........................................................................................15
3.6 Tools ...............................................................................................16
4. Getting Start with Wireless Ethernet Adapter .......................................18
4.1 Know the Wireless Ethernet Adapter ..............................................18
4.2 Connect to the Wireless Ethernet Adapter......................................18
4.2.1 Access the Setting Menu ........................................................19
4.2.2 Setup with Wizard .................................................................21
5. Configuration Wireless Ethernet Adapter through WEB Browser ......24
5.1 Status ..............................................................................................24
5.2 Basic Setting ...................................................................................25
5.3 IP Setting ........................................................................................28
5.4 Advanced Setting............................................................................29
5.5 Security ...........................................................................................30
5.6 Tools ...............................................................................................31
6. Getting Start with Wireless Router ........................................................32
6.1 Know the 802.11g Wireless Router.................................................32
6.2 Connect to the 802.11g Wireless Router ........................................32
6.2.1 Access the Setting Menu .....................................................32
6.2.2 Quick Setup with Wizard......................................................34
7. Configuration Wireless Router through WEB Browser........................41

7.1 LAN Setting ....................................................................................41
7.1.1 LAN & DHCP Server............................................................41
7.1.2 WAN.....................................................................................42
7.1.3 Password .............................................................................43
7.1.4 Time .....................................................................................44
7.2 Wireless.........................................................................................45
7.2.1 Basic ....................................................................................45
7.2.2 WEP.....................................................................................46
7.2.3 Advanced.............................................................................48
7.3 Status.............................................................................................49
7.3.1 Device Information ...............................................................49
7.3.2 Log.......................................................................................50
7.3.3 Log Setting...........................................................................51
7.3.4 Statistic.................................................................................52
7.3.5 Wireless ...............................................................................53
7.4 Routing ...........................................................................................54
7.4.1 Static ....................................................................................54
7.4.2 Dynamic ...............................................................................55
7.4.3 Routing Table .......................................................................56
7.5 Access ............................................................................................57
7.5.1 MAC Filters ..........................................................................57
7.5.2 Protocol Filter.......................................................................58
7.5.3 IP Filter.................................................................................59
7.5.4 Virtual Server .......................................................................60
7.5.5 Special AP............................................................................61
7.5.6 DMZ .....................................................................................63
7.5.7 Firewall Rule ........................................................................64
7.6 Management...................................................................................66
7.6.1 Remote Management ..........................................................66
7.7 Tools ...............................................................................................68
7.7.1 Restart .................................................................................68
7.7.2 Settings................................................................................69
7.7.3 Firmware..............................................................................70
7.7.4 Ping Test ..............................................................................71
2

1. Overview
1.1Product Feature
●3-in-1 function build-in with easily accessible hot-key switch, including
Access Point, Access Point Client and Wireless Router. It’s also the
smallest networking device in the market.
●Low power consumption <less than 460 mA>, and support USB power
adapter which provides the best mobility.
●Compliance with IEEE 802.11g and 802.11b standards
●Compliance with WiFi standard
●Achieving data rate up to 54Mbps for 802.11g and 11Mps for 802.11b with
wide range coverage
●Strong network security with WEP encryption, and PWA-PSK function.
●Quick and easy setup with Web-based management utility.
1.2System Requirements
●Windows 98SE, Millennium Edition (ME), 2000 and XP operating systems
●Microsoft Internet Explorer 5.5 or higher
●At least one RJ-45 Ethernet network adapter installed.
1.3How to switch within 3 modes
●3 modes are AP, Client and wireless RT.
●Switch to the mode user wants with the hot key, then re-plug the power.
●Few seconds later, the device will reboot automatically to the mode user
wants.
●For AP, please use 192.168.1.1 as the default IP to configure the settings.
●For Client, please use 192.168.1.50 as the default IP to configure the
settings.
●For wireless RT, please use 192.168.1.1 as the default IP to configure the
settings, note that the settings must through the wireless connection,
instead of RJ45 cable.
1

2. Getting Start with Access Point
2.1Know the 54Mbps Wireless Network Access Point
Ports:
●Power Receptor
●Reset Button
●RJ-45 Ethernet Port
Cross-over cable is required to connect to computer directly
LEDs:
●Power LED: ON when the unit is powered up
●LAN LED: ON indicates LAN connection; BLINK indicates LAN activity
●WLAN LED: ON indicates WLAN is working; BLINK indicates wireless
activity.
2.2 Connect to the 54Mbps Wireless Network Access Point
Build the Infrastructure Mode
2

In order to setup an Infrastructure of a wireless network such as the example
shown above, user will need the following:
1. A broadband Internet connection.
2. ADSL or Cable modem provided by ISP as part of the broadband connection
installation.
3. A Router that connects to the ADSL/Cable modem for Internet connection
sharing.
4. An Access Point to connect with the Router to form a wireless infrastructure
network.
5. Wireless clients equipped with wireless networking devices such as wireless
PC Card for wireless connection.
2.3Quick Setup with Wizard
2.3.1 Access the Setting Menu
User could start to access the configuration menu anytime by opening a web
browser window and typing the IP address of this access point. The default IP
is 192.168.1.1.
The below window will popup. Please enter the user name and password.
Both of the default is “admin”.
3

Now, the main menu screen is popup.
2.3.2 Setup with Wizard
Setup wizard is provided as the part of the web configuration utility. User can
simply follow the step-by-step process to get Access Point configuration ready to
run in 4 easy steps by clicking on the “Wizard” button on the function menu. The
following screen will appear. Please click “Next” to continue.
4

Step 1: Set Password
User can change the password and then click “Next” to continue.
Step2: Set WLAN Connection
Please type the name of SSID and select the channel. Then, click “Next” to
continue.
5

Step 3: Set Wireless LAN Connection
If user doesn’t want to use “default” as the SSID, user can change SSID here.
User can also choose different channel to avoid noise coming from other
wireless networking devices. Please click “Next” to continue.
Step 4: Set WEP Encryption
If user wants to enable WEP, please click “Enabled”. Then, select the key size
of WEP encryption and enter the key value in the key text box. Please click
“Next” to continue.
6

Step 5: Restart
The Setup wizard is now completed. The new settings will be effective after the
Access Point restarted. Please click “Restart” to reboot the Access Point. If
user does not want to make any changes, please click “exit” to quit without any
changes. User also can go back to modify the setting by clicking “Back”.
7
Autres manuels pour ENTRWI-G
1
Ce manuel convient aux modèles suivants
1
Table des matières
Autres manuels Encore Point d'accès sans fil
Manuels Point d'accès sans fil populaires d'autres marques

D-Link
D-Link DWL-2100AP - AirPlus Xtreme G Manuel utilisateur

Ubiquiti
Ubiquiti NanoStation NSM2 Manuel utilisateur

Cisco
Cisco Aironet 1550 Series Manuel utilisateur

Aruba
Aruba IAP-335 Manuel utilisateur

Advantek Networks
Advantek Networks AWN-AP-54MR Manuel utilisateur

IP-COM
IP-COM AP355 Manuel utilisateur


