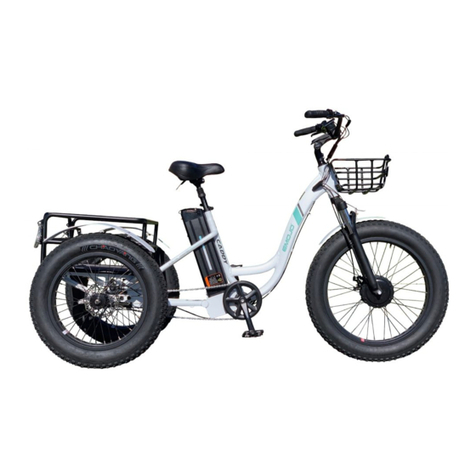
EMOJO LYNX PRO 750 Manuel utilisateur

OWNER’S MANUAL

Instructions
Warnings
Explanatory drawing of the overall bike configuration
Schematic diagram of the electric bicycle
Main technical parameters
Throttle control and gears
Operation stages
P.A.S. Control
Charging your battery
Battery mounting and removal
Front wheel installation and seat adjustment
Brakes
Pedas and tire adjustment
Chain
Commoun faults and maintenance
Troubleshooting
FAQ
Contact us
1
2
3
4
5
6
7
11
12
13
14
15
16
17
18
19
20
9-10
CONTENTS

Instructions
1
1.
Please read the manual carefully before using your EMOJO electric bicy cle.
2.
Make sure all parts are locked tightly, such as the frame joint, handlebar, seat post and pedal, etc. before using. Do
not use electric bicycle before carefully reading the instructions and knowing about the performance of the electric bicycle.
Do not lend the electric bicycle to anyone who does not know how to operate it.
3.
Develop a habit of charging when the power of the battery pack shows a red light. Please charge and maintain the battery
pack consistently to have longer service; if the bicycle is not to be used for a long period, it is suggested to turn power of the
battery pack to the OFF position and charge-discharge the battery once per month.
4.
Frequent braking, starting, uphill, still starting, muddy and uneven ground, overloading of people and goods will assume larger
electricity, thus influencing the travel mileage. If you want to get the best travel mileage, we suggest you follow the following
instructions:
Ride the bicycle to a certain speed by pedaling prior to turning on pedal-assist or throttle power.
Try to decrease the frequency of braking and starting while maintaining safe riding habits.
Please assist with pedal when the slope angle is steep, or the wind speed is fast.
5.
When you lift the battery, please do not insert any metal objects (such as wires, keys, etc) into the charging socket or bridge the
negative and positive poles of the battery cell. This can cause battery short-circuit, resulting in a fire and putting your safety at risk.
6.
This e-bike is not intended to be ridden through water. When the water level inundates the controller, electrical circuitry or
motor hub, it is possible that it will cause short circuit and damage the circuit, please pay attention to avoid burning down the
electronic control system!
7.
The standard load weight of this bike is 230 lbs. (including the cyclist), overloading may cause the travel mileage to decrease,
or cause the spare parts of the bike damage and reduce working life of battery.
8.
Warranty will be void if a non-approved battery charger or other non-original EMOJO spare parts are used.
9.
M
inors,
p
regnant women or anyone that does not have
f
ull de
x
terity o
f
hands and legs should not use this product.
10.
P
lease check the tightening state o
f
f
ront a
x
le, bottom bracket shell, rear a
x
le, etc.
f
re
q
uently in use.
11.
C
hildren younger than
14
should not ride the electric bicycle.

2
Warnings
Please pay attention to the following items for your safety:
Battery warnings
Battery warnings
Disassembling and refitting the bicycle may bring hidden safety hazards
to your electric bike, therefore, causing risk.
Do not keep, approach or store the battery near high heat sources.
Avoid areas near flammable or explosive liquids or gas.
Do not tamper or disassemble the charger. Avoid violent dropping or
smashing it.
Charge your battery in a well ventilated area, free of humidity and far
from flammable or explosive objects.
While charging, there should be no foreign objects on the charger or
the battery shell.
Avoid contact betweent eh conductive objects and the battery poles
at the same time to avoid short-circuit and damaging the battery.
Always keep your hands dry while plugging and unplugging the power
plug and when handling the battery.
The battery is not a toy, keep children away.
Do not disassemble the battery case, do not attempt to make any
modifications or external conections. You will lose your warranty. Do not drop the battery, do not immerse in water and keep it away from
high-humidity areas.
Do not attempt to short-circuit the battery electrodes, which can
damage the battery, the bicycle controller and the charger.
Mak sure to check the set up and stability of the brakes, saddle, frame,
handlebar, wheels , etc. before riding to make sure all is in proper
working condition.
Avoid climbing sharp objects like stairs or rocks which can
damage the tires and wheels.
Do not attach any objects to the handlebar that may obstruct your
vision or handling.
This bicycle is for a single rider, not intended to carry any passengers.
Always wear a helmet.
Downhill speeding should be moderate, please do not apply the front
brake fully when slamming the brakes at high speed to avoid the front
wheel to lock and losing control.
The brakes should not be oiled to avoid causing iffy braking and
endangering your personal safety.
Wear the appropriate protecting apparel when riding under the rain.
Never use an umbrella and/or operate the bicycle with one handl.

Overall Bike Layout
Actual product may slightly differ from this picture
Pedals
Stem
Battery
Electric motor
Transmission chain 7-gear cassette
Seat post
Seat post quick
release lever
3
Quick connectors
Motor power
detachable
connector
Frame folding
mechanism lock
Serial number
Front disc brake
Rear disc brake
Controller
box
Rear rack Stem folding
mechanism lock

Diagram of the Electric Bicycle:
4
48V

Main Technical Parameters
Index
<55
230
Winter::::20
I
Summer::::25
Item
Total Weight lbs.
Load weight (including the Weight of Cyclist) lbs.
Travel Mileage on a single Charge Miles w/pedal
assist Power Consumption on a single Charge
(kilowatt) Power Consumption per Kilometer
(kilowatt) Type
Battery Voltage / Capacity
Motor Type
Motor Rated Output Power
Rated Voltage
Under-voltage
Protection
Controller
Charger
Over-current Protection Model
Duration of Charge
Main Appliance Input Voltage
Main Appliance Output voltage
Charging Current
<0.6
<1.2
Lithium Ion Battery
48v 10.4 Ah
Permanent Magnet DC Hi-Speed Motor 750W
48V
30.5V±0.5V/41.5 V±0.5V
15A±lA/17A±lA
48V 2A
Six to Eight Hours (Instant Charge two to four Hours)
AC110-220±10%50HZ
42±0.2V/54. 6±0.2V
2.0±0.2A
5

Hand Throttle Control
Your electric bike is equipped with a power and throttle control on the right
hand side. To power on your bike first make sure the switch to your battery
is in the ON position.
You control the throttle by pushing with your thumb the paddle, the farther
you push from its resting position, the more power is delivered to the motor
to accelerate. When you want to slow down, you simply release the throttle
and let it return to its resting position and simultaneously apply the brakes.
When the pedal assist mode is set to "0", the pedal assist and throttle function(s) do not engage. When the pedal assist mode is set to "
5
" the pedal
assist function does not engage and the throttle will accelerate the bike forward. The throttle control is operated on the right hand side. You control the
throttle by twisting it from its resting position. The farther the throttle switch is from its resting position, the more power is delivered to the motor to
accelerate e-bike. When you want to slow down, you simply release the throttle and let it return to its resting position and simultaneously apply the
brakes.
Thumb Throttle
6
Gears
This EMOJO electric bike is equipped with 7 mechanical gears. T he first gear is for easier and uphill pedaling, the last gear is for maximum speed on
leveled or downhills. Change gears only when pedaling. The rear wheel contains seven chain sprockets. When the chain is around the largest
sprocket, you are in the 1st gear which is the "lowest" gear. The high gear will have the dérailleur positioned so that the ch ain is directed around the
smallest gear selector and cause it to change gear. Adjustments require fine tunning and should be made by a qualified technician.
Avoid changing gears rapidly from 1st to the 7th gear or vice-versa. If you change multiple gears too quickly, you could have the chain come off the
front sprocket.
Thumb shifter 7-gears cassette

Correct Operation Stages
!
Warning:
"For your safety, please practice in a closed track the first time you ride the GigaByke" After mastering the controls of an electric bicycle, you may
ride on regular roads and follow the traffic rules consciously. Do not let inexperienced people ride the electric bicycle, do not disassemble and
refit the electric bicycle. please pay attention and brake in advance to allow longer braking distance in rainy or snowy weather.
Operation Stages:
Start:
Turn the switch on the battery to the ON position. Turn
the key clockwise. Press the power button (Red button) on top
of the battery to test your battery level. The battery level
indicators will be turned on. 4 bars mean the battery is fully
charged.
Motor On/Pedal Assist
Click the M button on the handlebar control for 2 seconds to turn on the system, start
pedaling
and the electric bicycle will drive forward normally. If you stop pedaling,
the electric motor will stop working, but it will still drive forward a short distance
because of inertia.
B: Throttle only
You can use the thumb throttle only and the bicycle will move without you having to pedal. Click the M button on the handlebar control to turn on
the system, with your right thumb press down the throttle, the further you push the throttle the faster it accelerates. To stop or reduce the speed
release the throttle and apply the brakes the electric motor will stop working, but it will still drive forward a short distance because of inertia.
Note:
A: For your safety concern, please hold the grip tightly with both hands while riding, and please brake in a timely manner when necessary.
B: This bicycle has the function of brake power cut. The brakes will cut off the motor power to ensure safety of riding. Always check your
brakes and cables before riding.
Pull to brake. Brake sensor will shut off motor power.
7
Turn the key to switch the battery on Battery power/
test button

◆ Display Interface
After switching on the E-bike system, the display shows current speed and total
distance except, battery indicator and assistance level
◆To change the indicated information, press the MODE button to show in turn as
follows: Current Speed (Km/h) → Trip Distance (Km) Trip Time (Hour) → Max.
Speed (Km/h) → Avg. Speed (Km/h) → Motor-output (W) →Current Speed
(Km/h).
◆Switching PAS Off: There is a preset setting which allows your bike to cruise at
a steady speed of 3.7 MPH (6Km/h), the letter "P" is shown at the screen. To
engage this cruise control feature press and hold the "-" button for a few
seconds until the letter "P" shows on the screen. To disengage this function
press the brakes.
Pedal Assist Mode Control
Please read the following steps and images to help you
understand how to read and operate all the functions.
Press the power button (M button) on the LCD screen module
located near the left grip on the handlebars to tum it on.
You can adjust the pedal assist power level to have more power
by hitting the [ +] button (right button) and can move to a lower
level power by hitting the [-] button (left button).
When not riding your bike, you can tum off the meter by holding
down the power button (M button) for several seconds.
◆There is a preset setting which allows your bike to cruise at a steady speed of
3.7 MPH (6Km/h), the letter "P" is shown at the screen. To engage this cruise
control feature press and hold the "-" button for a few seconds until the letter "P"
shows on the screen. To disengage this function press the brakes.
◆Manual Clearance Function
Among of all functions, Trip Distance, Trip Time, Max.
Speed and Avg. Speed, can only be cleared manually.
If the above functions need to be cleared, After switching
on the E-bike system and parking the E-bike, please to hold
the MODE button and the DOWN button for 2 s, the above
functions can be cleared at the same time.
8
Ce manuel convient aux modèles suivants
3
Table des matières
Autres manuels EMOJO Vélo