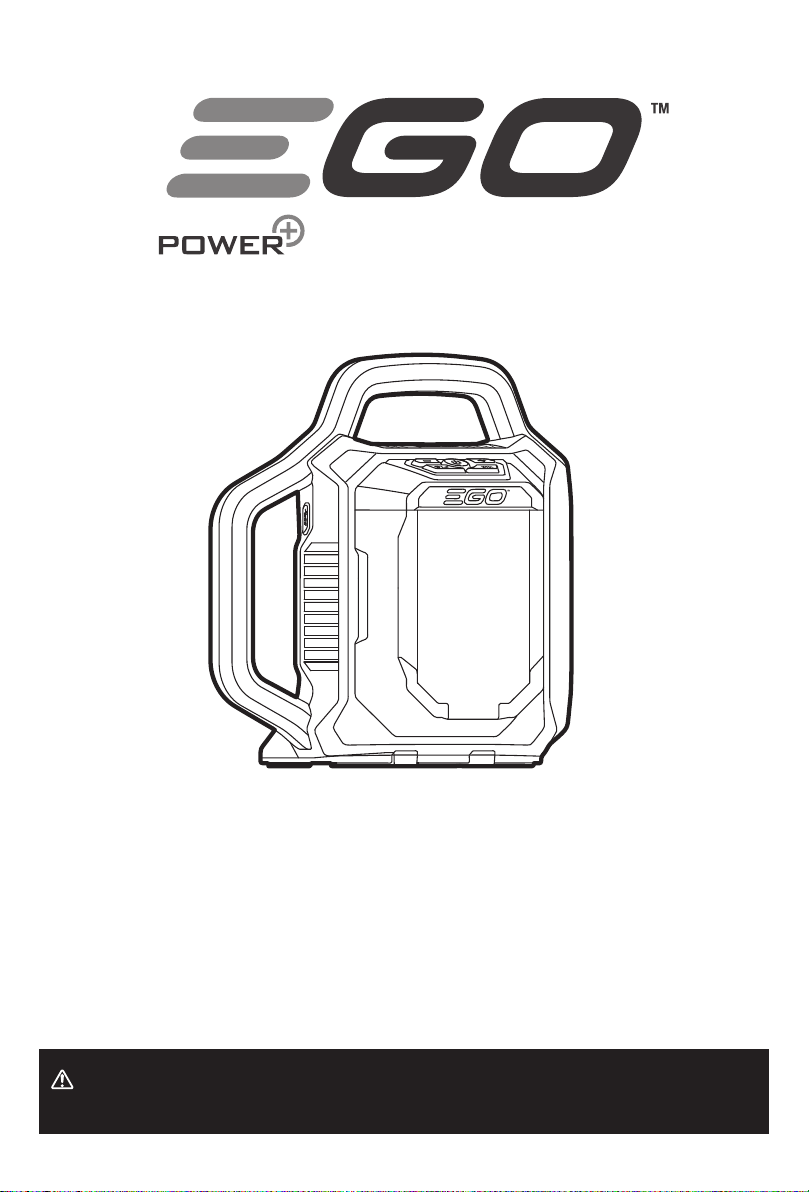
56 VOLT LITHIUM-ION CORDLESS AREA LIGHT — LT0300E6
- Area mode: all three LED panels are illuminated,
- Task mode: only the main (central) LED panel is
illuminated,
- Ambiance mode: only the two peripheral LED
panels are illuminated.
◾When you turn on the light, the light mode will be the
same as the last time you used it.
◾Press and hold the “MODE” button for 3 seconds and
the light will switch to flashing “SOS” mode. Press the
“MODE” button again and the light will return to the
previous brightness setting and panel selection.
NOTE: In “SOS” mode, all 3 LED panels will be flashing,
even if before the “SOS” mode activation only some of the
LED panels were on.
NOTE: When the temperature reaches 100°C, the main
(central) light LED panel will be turned off, and only the
two peripheral LED panels will be turned on to enter the
ambiance mode.
USING THE LIGHT (Fig. D1-D3)
WARNING: Ensure the light is securely installed
to prevent falling object hazard. Failure to follow the
instruction can result in serious personal injury.
◾To hang the light, pull out the hooks located in the
base of the unit and hang the light upside down.
The hook width is 1.7 in. (44 mm). Make sure the
object that the light is hung on is sturdy enough to
support the combined weight of the light and the
battery pack.
◾To mount the light on a tripod (not included), secure
the tripod screw to the tripod mounting hole on the
bottom of the base. The base features a 1/4”-20
threaded hole. Make sure the tripod is placed on a
flat level surface.
WARNING: Make sure the tripod is sturdy enough to
support the combined weight of the light and the battery
pack.
◾For portable illumination, carry the light by the top
handle (Fig. D3).
POWERING USB DEVICES (Fig. E)
The USB-C port provides charging power of 5 Volts DC at
up a combined draw of 1.5 Amperes for your USB devices.
◾Install a battery pack into the area light.
◾Press the power button to turn the light ON.
◾Insert one end of the USB-C cable (not included) into
the USB-C port and the other end into the device that
needs to be powered or charged. The light will begin to
charge/power the device automatically.
◾When the light is not in use, disconnect the devices
from the light, then press the power button to turn it
OFF.
◾Remove the battery pack from the light.
NOTE: If the light is turned off during USB charging
process, the connected USB device will continue charging
for about 2 hours.
WARNING: Runtime of the connected device is
dependent upon the device and the EGO battery capacity.
WARNING: Do not insert a nail, wire, etc. into the
USB-C port. Otherwise a short circuit may damage the
USB-C port.
MAINTENANCE
WARNING: When servicing, use only identical
replacement parts. Use of any other parts may create a
hazard or cause product damage. To ensure safety and
reliability, all repairs should be performed by a qualified
service technician.
WARNING: To prevent serious personal injury,
remove the battery pack from the tool before servicing,
cleaning, or removing material from the unit.
GENERAL MAINTENANCE
Avoid using solvents when cleaning plastic parts. Most
plastics are susceptible to damage from various types
of commercial solvents and may be damaged by their
use. Use a piece of clean cloth to remove dirt, dust, oil,
grease, etc.
WARNING: Do not at any time let brake fluids,
gasoline, petroleum-based products, penetrating oils,
etc. come in contact with plastic parts. Chemicals can
damage, weaken or destroy plastic which may result in
serious personal injury.
TRANSPORTING THE UNIT
1. Turn the light off and remove the battery pack.
2. Fold the hook (if used) back into the base of the light.
3. Carry the light by the top handle.
STORING THE UNIT
1. Turn the light off and remove the battery pack.
2. Fold the hook (if used) back into the base of the light.
3. Store the light in a dry, well-ventilated area, out of
the reach of the children. Do not store the light on or
adjacent to fertilizers, gasoline, or other chemicals.