Echo Audio Echo 2 Manuel utilisateur

ECHO2
User Guide
Version 1.2

Echo 2 User Guide
1
©2012 by Echo Digital Audio Corporation
402 E. Carrillo Street Suite A
Santa Barbara, CA 93101
Echo® is a registered trademark of Echo Digital Audio Corporation.

Echo 2 User Guide
2
Important Safety Instructions
Please read the following safety instructions completely. It is very important to heed all
warnings and follow all instructions while operating the Echo 2.
Do not use the Echo 2 near water or any heat sources such as heaters, stoves, or
amplifiers.
Protect the power cord from being damaged in any way.
Only use attachments/accessories specified by Echo.
Unplug the Echo 2 during lightning storms and when not being used for long periods of
time.
If the Echo 2 requires servicing for any reason, please contact Echo customer service.
Please protect your hearing by avoiding excessive volume from the
headphones/earphones connected to the Echo 2.

Echo 2 User Guide
3
Contents
INTRODUCTION............................................................................................................. 4
P
ACKAGE
C
ONTENTS
..................................................................................................... 4
ECHO 2 CONNECTIONS ............................................................................................... 5
I
NPUTS
......................................................................................................................... 5
M
AIN
O
UTPUTS
............................................................................................................. 6
H
EADPHONE
O
UTPUT
.................................................................................................... 6
P
OWER
......................................................................................................................... 7
USB............................................................................................................................. 7
TOUCH PANEL .............................................................................................................. 8
I
NPUT
S
ELECTION
.......................................................................................................... 9
P
HANTOM
P
OWER
......................................................................................................... 9
L
EVELS
....................................................................................................................... 10
M
AIN
M
UTE
................................................................................................................. 11
EZ
T
RIM
..................................................................................................................... 12
I
NPUT
M
ONITORING
..................................................................................................... 12
H
EADPHONE
R
OUTING
................................................................................................. 13
S
AVING
S
ETTINGS
....................................................................................................... 13
USING ECHO 2 WITH A COMPUTER ......................................................................... 14
M
AC
OS
X.................................................................................................................. 15
W
INDOWS
................................................................................................................... 16
ASIO ......................................................................................................................... 17
SPECIFICATIONS ........................................................................................................ 19
A
NALOG
I
NPUTS
.......................................................................................................... 19
A
NALOG
O
UTPUT
......................................................................................................... 19
C
ONVERTERS
.............................................................................................................. 19
D
IMENSIONS
............................................................................................................... 19
WARRANTY ................................................................................................................. 20
DECLARATIONS OF CONFORMITY........................................................................... 21

Echo 2 User Guide
4
Introduction
Thank you for choosing the Echo 2. We think you’ll find it to be a flexible, high-quality
tool for live or studio performance.
The Echo 2's touch controls, built-in studio grade preamps, and compact design make it
an ideal personal mixer. No additional hardware is required; you don't need a
microphone preamp or an instrument direct box. Simply connect your instrument or
microphone directly to the Echo 2, mount the Echo 2 on your microphone stand using
the included bracket, and you have complete control over your mix at your fingertips.
For more information, please see the "Echo 2 Connections" and "Touch Panel" sections
of this user guide.
In addition to working as a standalone live mixer, the Echo 2 is also a USB audio
interface. It's great for recording, mixing, mastering, or just listening to a playlist. The
separate headphone and main outputs are also ideal for DJ software. For more
information, please refer to the "Using Echo 2 with a Computer" section of this user
guide.
We encourage you to register your product online at:
http://www.echoaudio.com/support/register.php
Registering gives us key information so that we may handle problems faster and inform
you about upgrades and other news. Thank you in advance for registering.
We hope you enjoy the Echo 2.
Package Contents
When you opened the box, you should have found the following:
•The Echo 2 device
•A universal power adapter
•A high-speed USB 2.0 cable
•Two 28” TRS to XLR female adapter cables
•A microphone stand bracket

Echo 2 User Guide
5
Echo 2 Connections
The main inputs and outputs are the four jacks on the rear of the Echo 2:
Inputs
The Echo 2 has two ¼” TRS (Tip-Ring-Shield) balanced input jacks labeled “IN1” and
“IN2”. The inputs will accept virtually any type of analog signal, such as guitars,
keyboards, microphones, line level signals, or mixer boards. Each input has a built-in,
acoustically transparent, quiet, studio-grade preamp.
You can plug a microphone directly into the Echo 2 without using an external preamp.
The Echo 2 provides phantom power for condenser microphones. If your microphone
has an XLR connector, use the included adapter cable.
You can also connect guitars, keyboards, or other equipment using ¼” cables.
Whenever possible, use balanced, shielded cables to limit external interference.
Unbalanced signals such as those from RCA connectors and guitars should be
connected using mono cables.
Once you have connected the inputs, set the appropriate mode for the input using the
touch panel. This will set up the internal preamp to match the incoming signal.
If you prefer to use an external preamp, simply connect the preamp directly to the
Echo 2’s input, and set it for line level with unity gain. This will preserve any unique
sonic coloration or nuance.

Echo 2 User Guide
6
Main Outputs
There are two output jacks, labeled “OUT L” and “OUT R”. These are standard low
impedance, balanced outputs that can be connected directly to a mixer board or
powered speaker.
Headphone Output
The front jack is a high quality stereo headphone output:
The touch panel controls the headphone volume. Please refer to the Touch Panel for
more information on using the touch controller.

Echo 2 User Guide
7
Power
The Echo 2 may be powered either from a computer over the USB cable, or with the
included power adapter. The adapter plugs into the DC power jack on the right side as
shown below:
Please note that the Echo 2 must be powered with the external AC adapter whenever
phantom power is switched on.
USB power can be noisy, resulting in audible ground hum, or decreased audio
performance. If you are experiencing these problems, try using the external power
adapter.
USB
When used for digital audio recording and playback, the Echo 2 connects to a computer
using the USB mini-B jack on the rear of the case. The Echo 2 requires a cable that
has been certified for USB 2.0 high-speed operation.

Echo 2 User Guide
8
Touch Panel
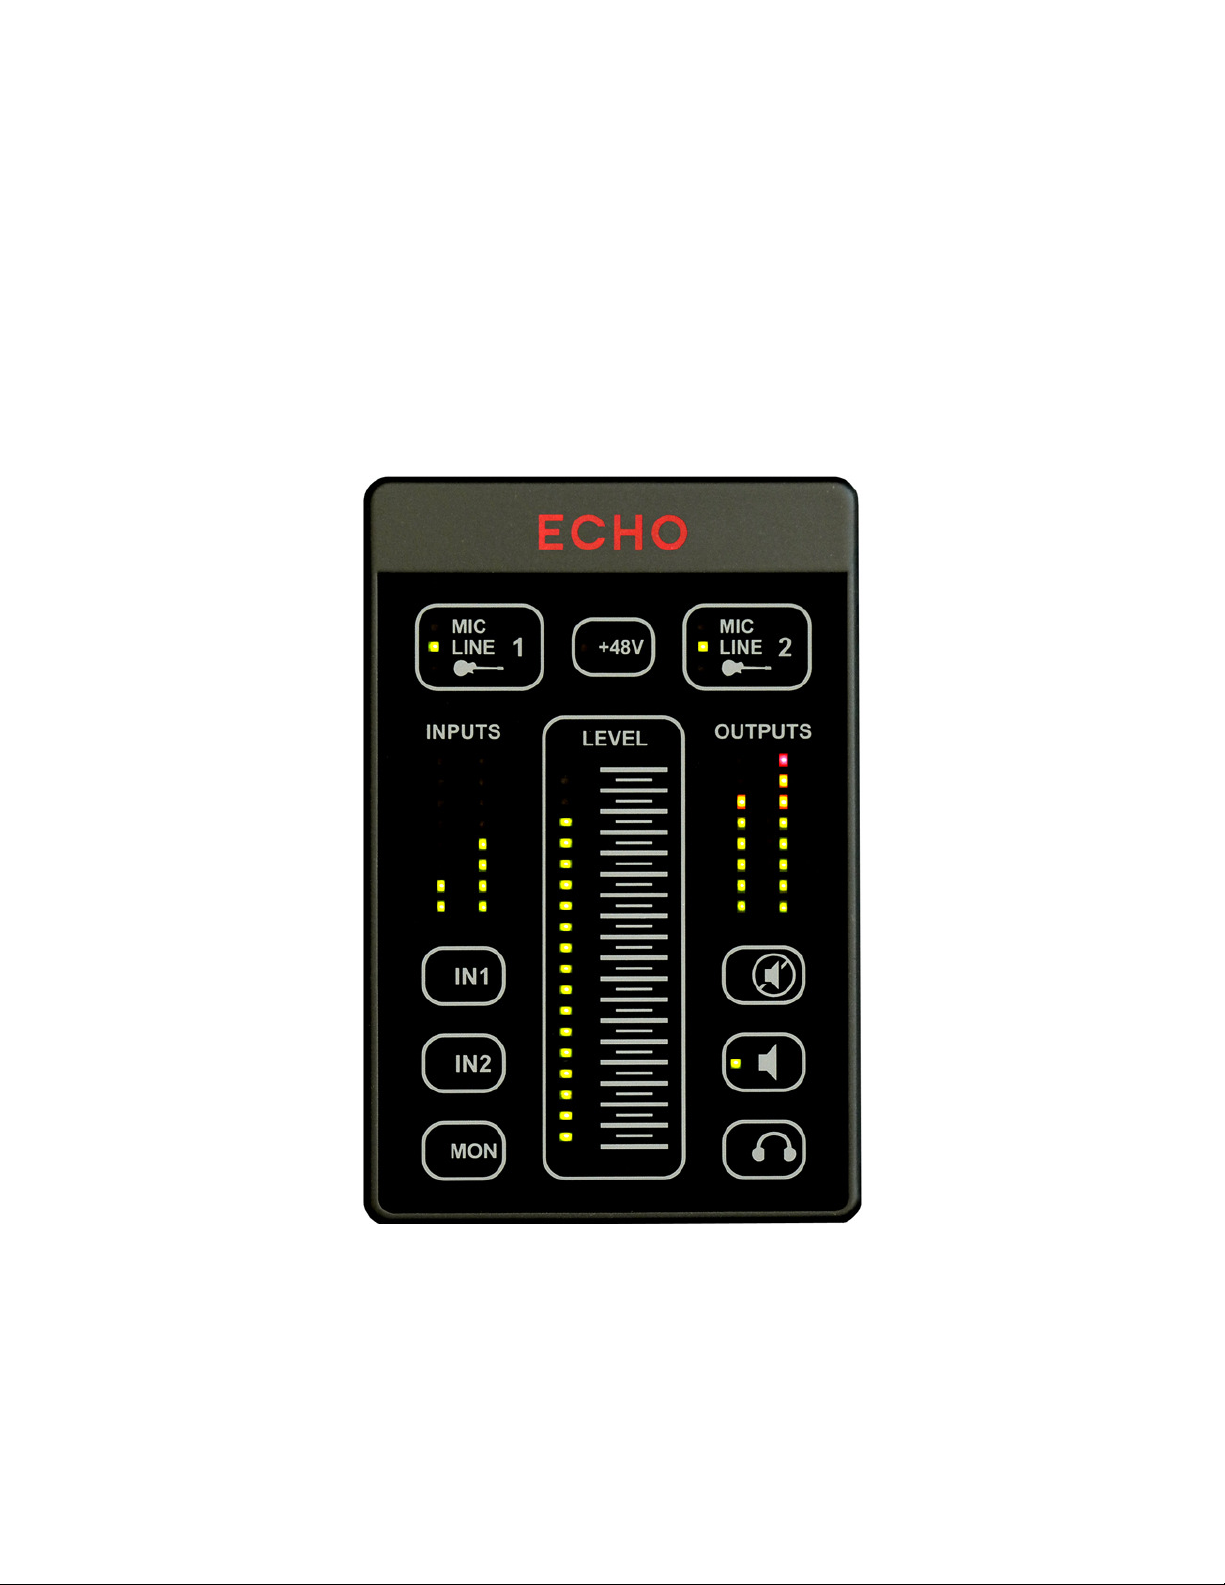
The touch panel controls the Echo 2's built-in mixer.
The panel uses capacitive touch technology to sense the touch of a finger. A light touch
is all that is needed: the panel can’t differentiate between a light or hard press. The
active area for each touch control is in the center of the rounded gray rectangle to the
right of the LED indicator. For the slider, the active area is directly beneath the
horizontal gray lines.
To avoid accidental activation, each control must be touched for approximately half a
second before the touch will be recognized. Some functions, such as EZ trim, are
activated by a “long” touch of approximately two seconds.
The front panel is scratch resistant, but can be scratched by hard or sharp objects.
Care should be taken to protect it. Clean only with a soft, damp cloth.

Echo 2 User Guide
9
Input Selection
Each input can be switched between one of three modes. Pressing either input button
will cycle between MIC, LINE, and GUITAR. The default input type is LINE. Any time a
cable is unplugged from the input jack, the input will revert to this setting.
Changing the input type resets the input gain to 0 dB to avoid any potential audio
feedback.
Phantom Power
Condenser microphones typically require power to operate. This is commonly known as
phantom power, or +48 volts. The Echo 2 can provide phantom power when one of the
inputs is set to MIC. To turn on phantom power, press the +48V button.
If there are two microphones connected, phantom power will be provided to both
simultaneously. To protect external equipment, phantom power is turned off whenever
an input is set to LINE or GUITAR. In addition, phantom power will be turned off when
the Echo 2 first powers up.
Again, please note that phantom power requires powering the Echo 2 with the external
power adapter.
If you're unsure how to set up your inputs, please refer to the following table:
Signal source Echo 2 input mode +48V
Dynamic microphone MIC OFF
Condenser microphone MIC ON
Keyboard LINE n/a
Mixer board LINE n/a
MP3 player/iPod LINE n/a
Guitar with passive pickups GUITAR n/a
Guitar with active pickups LINE n/a
External preamp LINE n/a
Autres manuels pour Echo 2
1
Table des matières
Autres manuels Echo Audio Équipement d'enregistrement
Manuels Équipement d'enregistrement populaires d'autres marques

Strymon
Strymon NIGHTSKY Manuel utilisateur

Mitsubishi Electric
Mitsubishi Electric 16CH DIGITAL RECORDER DX-TL5000U Manuel utilisateur

Tews Technologies
Tews Technologies TPMC465 Manuel utilisateur

Honeywell
Honeywell Excel 50 Manuel utilisateur

SeaLevel
SeaLevel COMM+8.LPCI Manuel utilisateur

Arturia
Arturia AUDIOFUSE STUDIO Manuel utilisateur