Dish TV A2 Manuel utilisateur

Quick Start Guide
Dish TV A2
Freeview Recorder
Dish TV Technologies LTD
www.dishtv.co.nz [email protected]
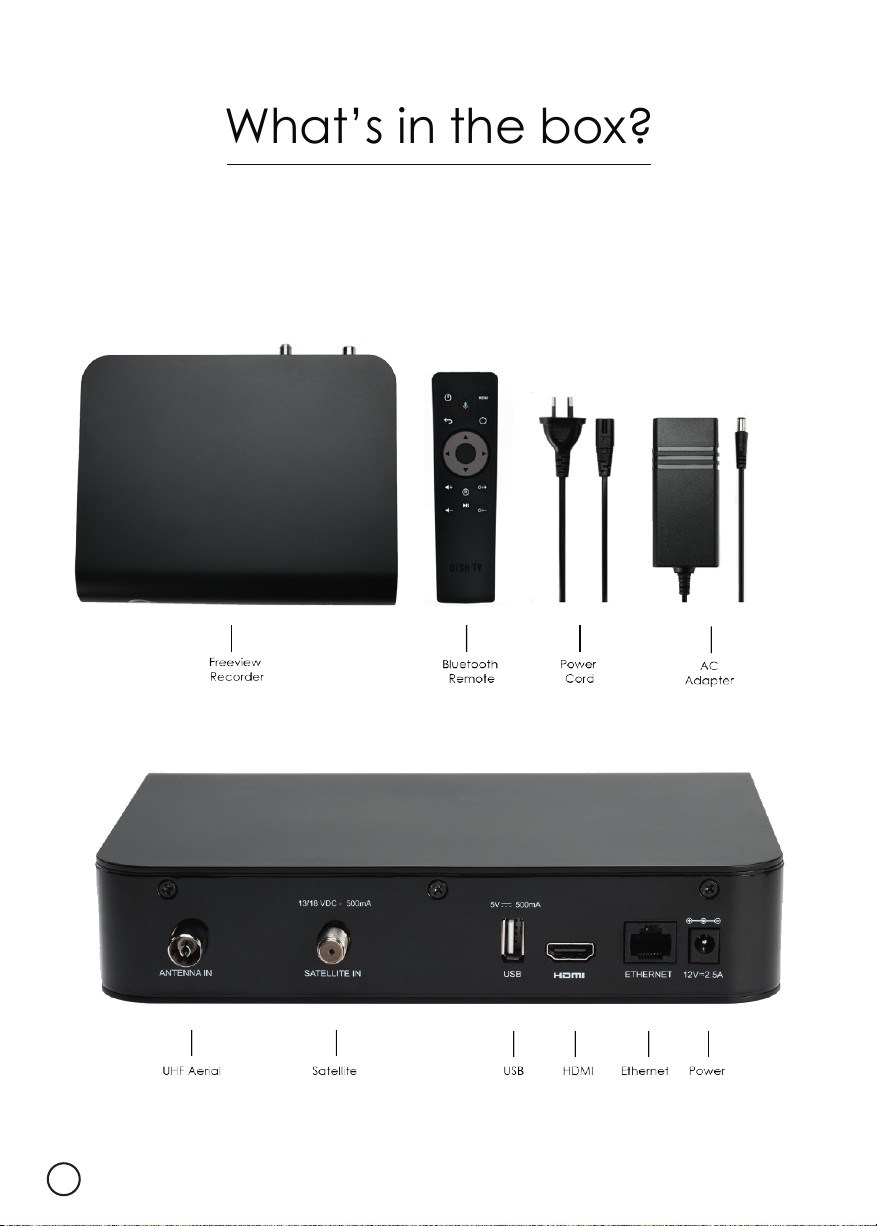
What’s in the box?
HDMI cable not provided
01
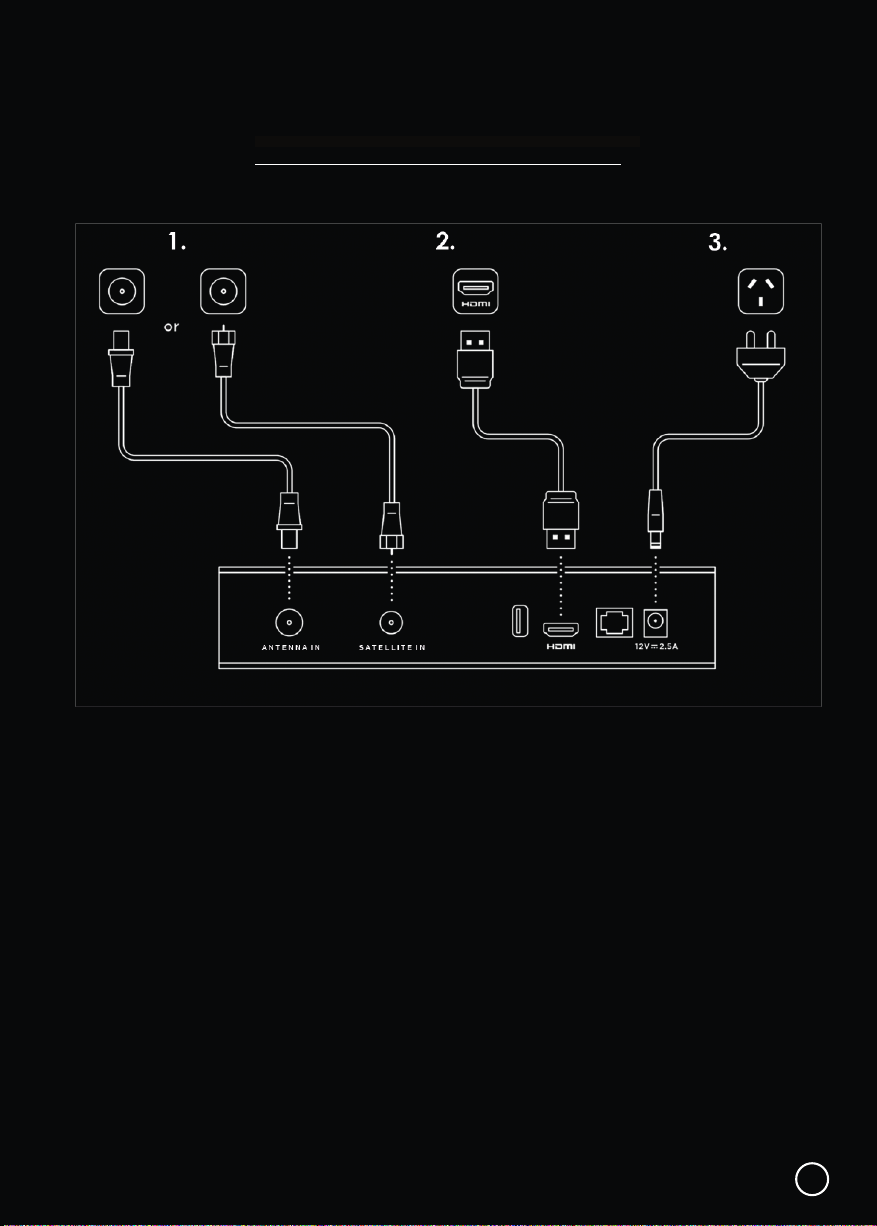
Set up in 5 steps
STEP 1: Connect UHF aerial or satellite cable from your wall port
to the recorder
STEP 2: Connect a HDMI cable from the recorder to your
TV’s HDMI port
STEP 3: Plug into power socket and switch on at the wall
STEP 4: Insert batteries into the Bluetooth Remote
STEP 5: Follow the on-screen instructions
TIP: If you have an ethernet cable handy, connect your recorder
to your router / modem for a reliable broadband connection.
02
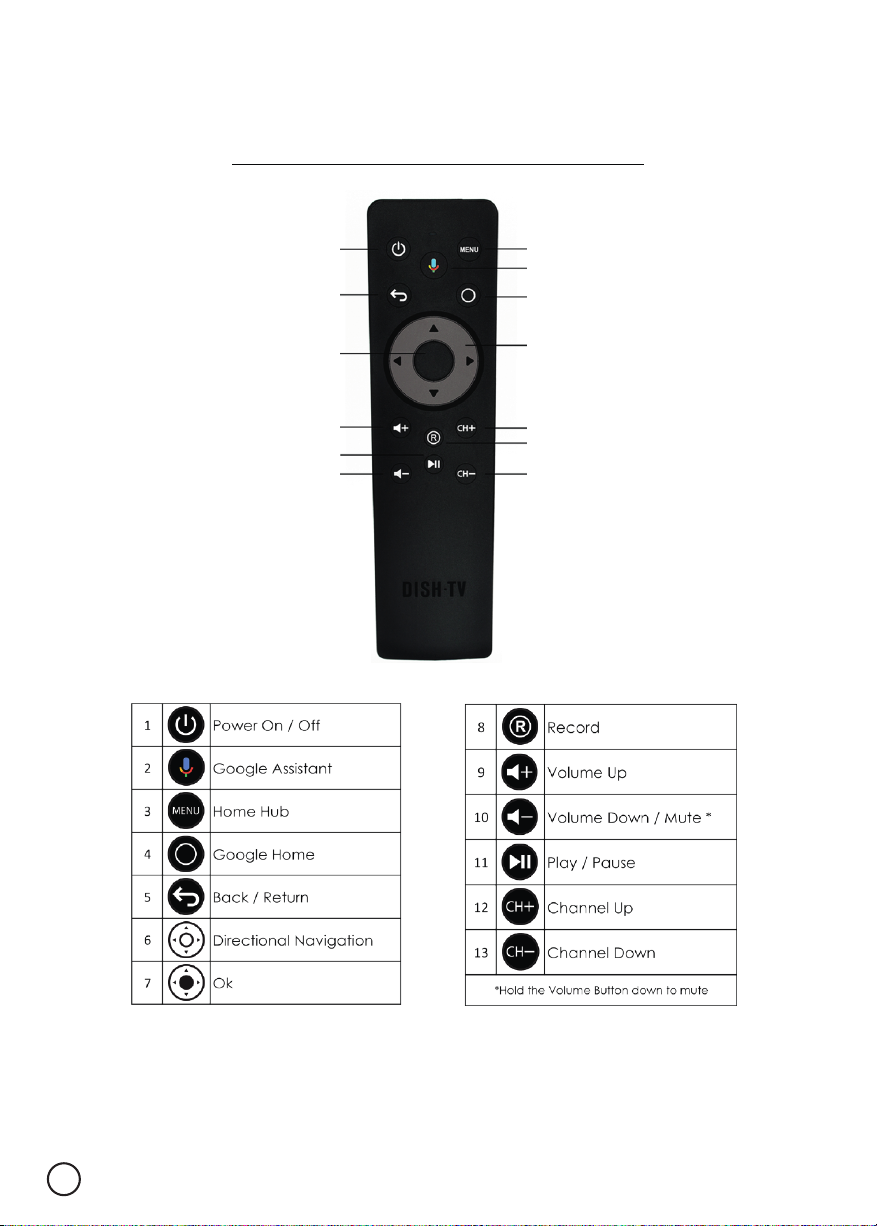
Bluetooth Remote
TIP: You can use your voice to search for content!
Press the Google Assistant button and speak into the remote.
3
4
2
6
12
8
13
1
5
7
9
11
10
03
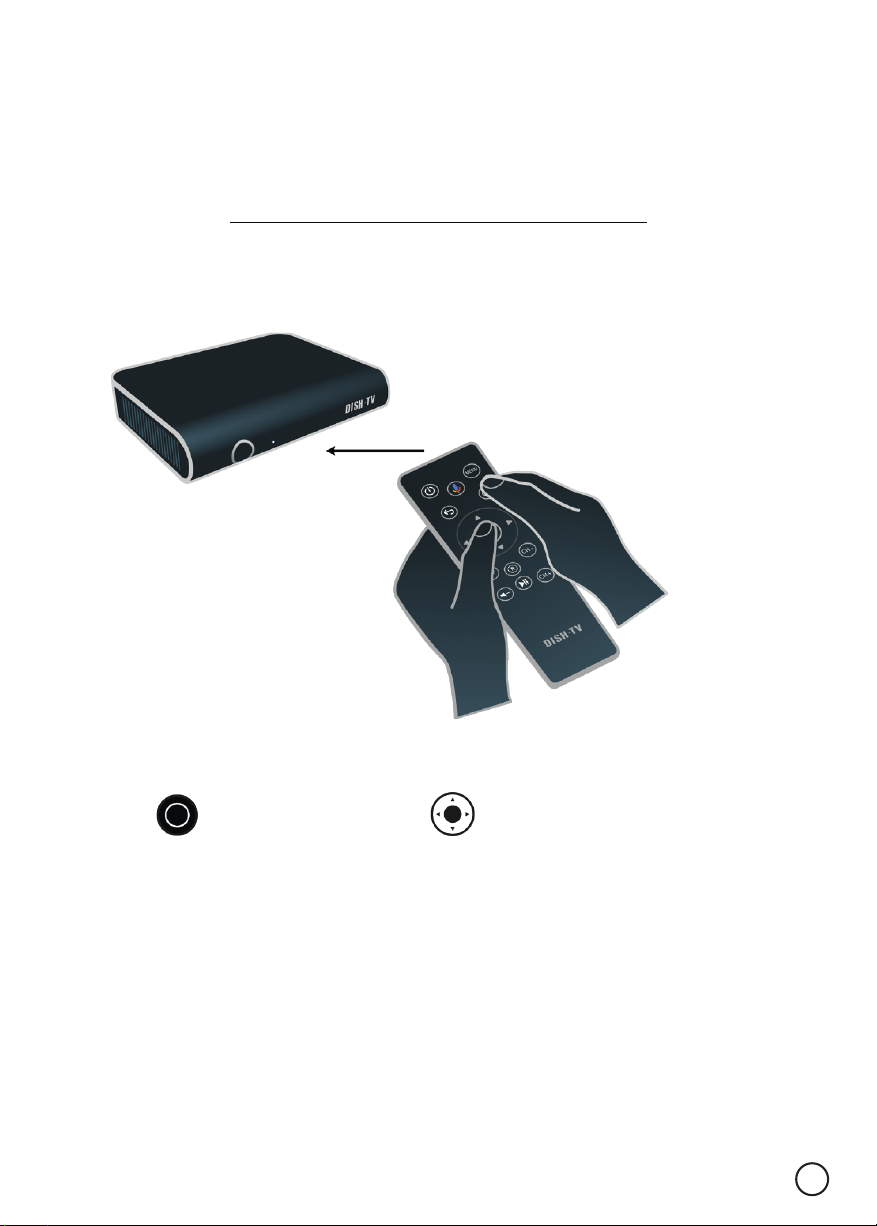
Connecting the
Bluetooth Remote
When prompted on the screen, stand about 20 cm away
from the recorder to connect the Bluetooth Remote.
At the same time, hold down the Google Home
button and the OK button
When in pairing mode the indicator LED turns on solid
When pairing is in progress the LED flashes
Once pairing is complete, the LED turns off
TIP: Thanks to Bluetooth, you don’t have to point your remote at your
recorder. It will pick up your commands from anywhere in the room!
20cm
04

Why connect to the Internet?
05
Please connect the Dish TV A2 the Internet. This is critical to the correct operation of
your Dish TV A2.
Once connected to the Internet, the Dish TV A2 will receive automatic software updates
and the following benefits, to ensure you are getting the best Freeview experience!
• Access to Freeview On Demand.
• Stream Freeview Live TV.
• Over 5000 apps to explore and download on Google Play.
• Stream content to your TV with Chromecast built-in.
How do I connect to the Internet?
If you’ve connected an Ethernet cable to your Dish TV A2, this will happen automatically.
Alternatively, connect to a WiFi Network when prompted as part of the initial set up.
If you skipped connecting to a Wi-Fi Network, or would like to connect to another Wi-Fi
Network, go to Home > Settings > Network.
Will I be using my data?
You will not be using data for Watching / Recording Live TV through your Dish TV A2,
if done via a Satellite Dish or UHF Aerial.
When you are streaming Freeview On Demand, this will typically use data, exactly how
much will depend on the quality of the video offered by each broadcaster’s service. The
higher the video quality (indicated by a higher bit rate), the higher your data usage. But
typically, one hour of video at medium quality will use about 750MB of data.
When connected to the Internet, browsing and searching the TV Guide in Freeview On
Demand will use a very small amount of data. If you browsed an hour a day for a month,
it'll add up to about 600MB (that's about 6% of a very modest 10GB per month plan).
How do I track my data use?
Your Internet Service Provider (ISP) may have some tools to help you track how much
data you use, some also offer alerts when you're about to exceed your plan. So check
with your ISP if you'd like more detailed tracking on how much data you use.
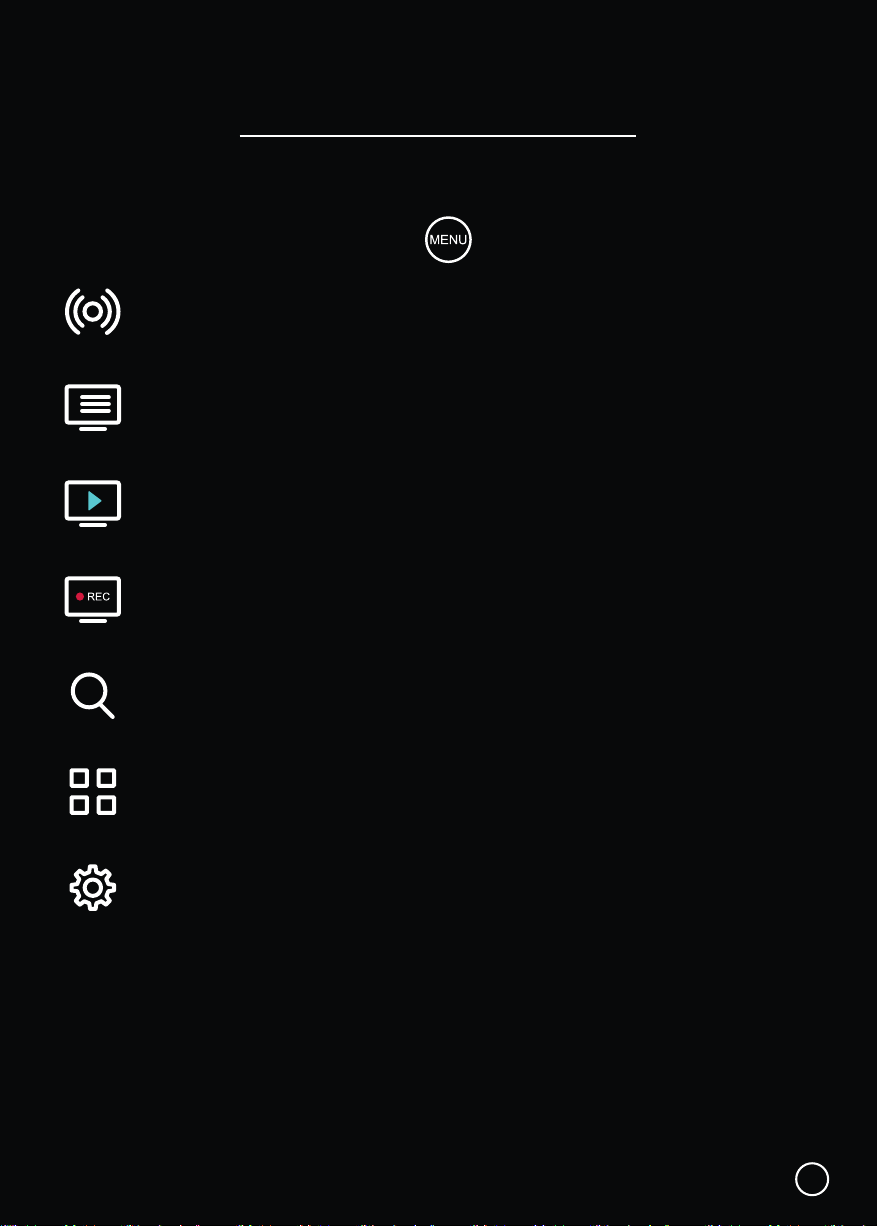
The Home Hub brings everything together in one place.
While watching Live TV, press the MENU button to open the Home Hub Menu.
Live TV: Access Freeview Live TV channels.
TV Guide: Browse what’s on across the next eight days.
On Demand: TV Shows, Movies, Docos and Boxsets, all free to stream...
Recordings: Watch & manage your recorded TV Shows and Movies.
Search: Find Live TV & On Demand content.
Apps: Access apps from Android TV home.
Settings: Broadcast settings and help.
Just below the Home Hub icons, is a belt for Featured Apps, with Apps you can choose
to subscribe to.
Below that are Featured Shows on Freeview On Demand, which are free to view.
Home Hub Menu
06

07
You can Pause & Rewind Live TV with your Dish TV A2.
Live Pause
To Pause the Channel you’re watching, press the Play / Pause button.
Press it again, to continue watching.
Rewind
To Rewind Live TV, press ◄ LEFT on the Remote.
Press ◄ LEFT again to Rewind faster.
Press the Play / Pause button to Play.
To Fast Forward, press ► RIGHT on the Remote.
Press ► RIGHT again to Forward Faster.
To exit Live Pause, press the Back / Return button.
If you want to record the TV Show / Movie that was on Live Pause, select
SET TO RECORD & CONTINUE.
TIP: When you change Channel, Pause & Rewind are reset back to Live TV.
Live Pause & Rewind
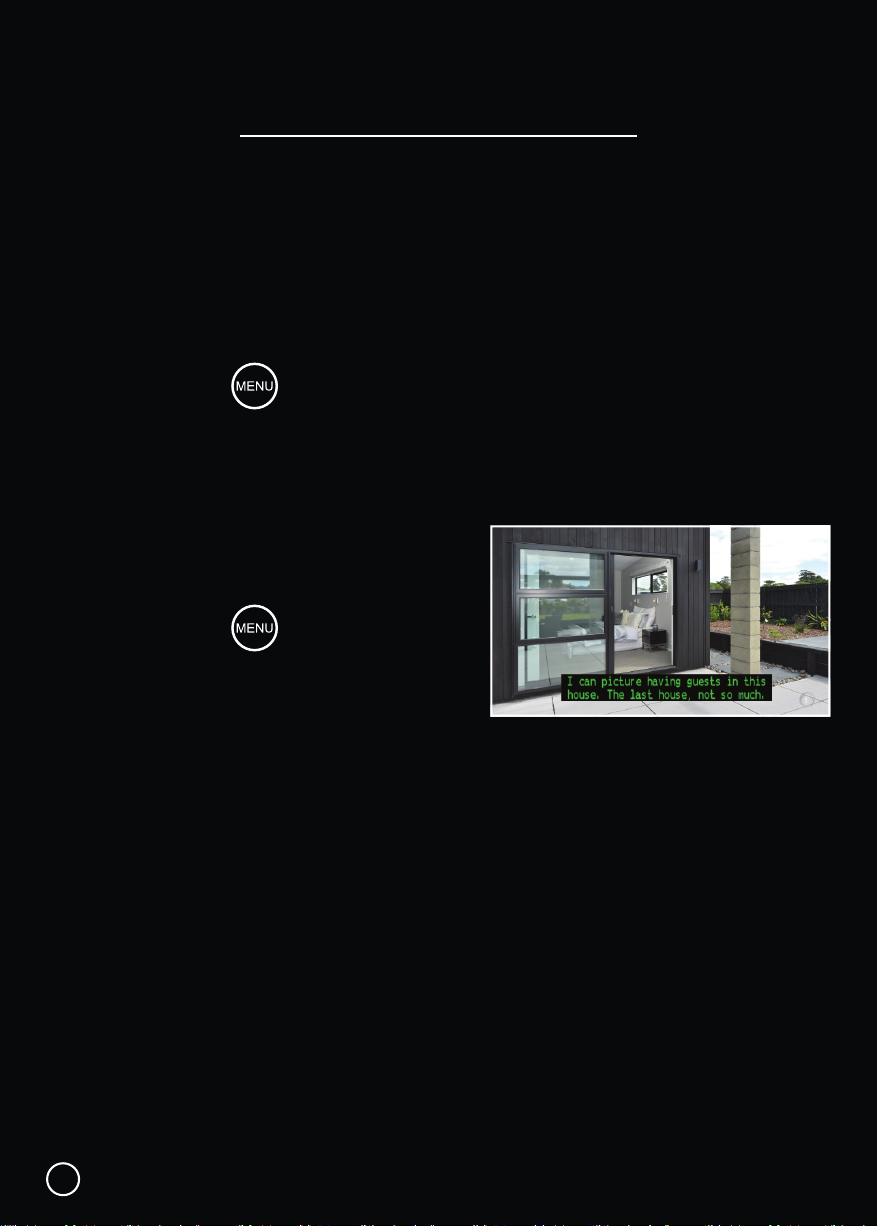
Mini Guide
While watching Live TV, press the OK button to open the Mini Guide, displaying
what’s on now and coming up next.
Use the Mini Guide to quickly browse through channels, or go directly to a channel.
Press ◄ LEFT for the TV Guide and Freeview On Demand.
Press ▲ UP or ▼ DOWN to explore other channels.
Select a TV Show that’s on now to change the channel, or one that’s on later
to see more information, access On Demand content, or set a Recording.
TV Guide
The TV Guide provides schedules for the next eight days, with detailed show information.
A preview of what’s currently playing on Live TV will display on the TV Guide, while you
browse.
Access the TV Guide via the Mini Guide or Home Hub.
Press ▲ UP or ▼ DOWN to explore other channels.
Select a TV show that’s on now to change the channel.
Select a TV show that’s on later to see more information, and access On
Demand content for that TV show, set a Recording or Series Link.
TIP: Record a TV Show directly from the Mini / TV Guide, by selecting a TV Show, then
RECORD. You will receive a prompt for EPISODE or SERIES, if available. Alternatively,
some content is EPISODE only, like Movies.
Mini Guide & TV Guide
08
Broadcasters work with organisations such as Able NZ to make the content you find on
Freeview as accessible as possible for all. This means they provide Audio Descriptions
as well as Subtitles for selected Movies and TV shows.
Audio Description
Audio Descriptions are helpful for those who are visually impaired, narrating the selected
Movie/TV show with what’s happening on screen in between spoken dialogue.
1. Press the MENU button to display the Home Hub Menu.
2. Follow the steps according to the Home Hub Menu.
• Select Menu → Settings → Advanced Settings → Audio → Audio Description.
Subtitles
This feature is helpful to those who are hearing
impaired, often a written rendering of the dialog,
displayed at the bottom of the screen.
1. Press the MENU button to display the
Home Hub Menu.
2. Follow the steps according to the Home Hub
Menu.
• Select Menu → Settings → Advanced Settings → Video → Subtitles.
Audio & Subtitles
09
Autres manuels pour A2
1
Table des matières


