
Damp2Dry PACD200 Manuel utilisateur

200 PINT
Before using your
commercial dehumidifier,
please read this manual
carefully and keep it
for future reference,
along with your receipt.
Your Source for Home Comfort
FOR MODEL:
PACD200
COMMERCIAL
DEHUMIDIFIER
USER MANUAL
DEHUMIDIFIER


-1-
General Information.................................................................................. 1
Important Safety Instructions.................................................................... 2
Structure Diagram .................................................................................... 3
Setup Instructions................................................................................ 4 – 5
Control Panel....................................................................................... 6 – 7
Operating Instructions .............................................................................. 8
Maintenance...................................................................................... 9 – 10
Troubleshooting...................................................................................... 11
Error Codes ............................................................................................ 12
Purchase/Maintenance Records ............................................................ 13
• Please DO NOT dispose of any packaging until you have
checked that the appliance is operational.
• After removing the packaging, ensure the contents are intact
and complete. In the unlikely event of missing parts, contact
Consumer Services at 877-365-6274.
• DO NOT leave children unattended with any of the packaging
as it is a potential source of danger.
• Disposal of all packaging must be carried out responsibly,
safely, and in accordance with your local regulations.
• ALWAYS recycle the packaging material where possible.
• When using any electrically powered product, basic safety
precautions should always be followed.
• Please read these instructions carefully and in full before using
the product.
TABLE OF CONTENTS
GENERAL INFORMATION

-2-
WARNING - to reduce the risk of re, electrical shock or
injury to persons or property:
1. Always operate the product from a power source of the same
voltage, frequency and rating as indicated on the product
identication plate.
2. To minimize shock and re hazards, proper grounding is important.
The power cord is equipped with a three-prong grounding plug for
protection against shock hazards. Never cut off the third prong.
3. Your unit must be used in a properly grounded wall receptacle. If
the wall receptacle you intend to use is not adequately grounded or
protected by a time delay fuse or circuit breaker, have a qualied
electrician install the proper receptacle.
4. Do not use extension cords or an adapter plug with this unit. If it is
necessary to use an extension cord, use an approved heavy duty
extension cord only (available at most local hardware stores).
5. Do not operate this product with a damaged power cord plug. If
the supply cord is damaged it must be replaced by qualied repair
person in order to avoid hazard.
6. To reduce the risk of electric shock, do not expose the unit or exible
cord to moisture of any kind.
7. Turn off and unplug from the power socket when not in use, before
assembling or before cleaning.
8. The dehumidier is not intended for use by young children without
supervision. Young children should be supervised to ensure that they
do not play with the dehumidier.
9. Disabled persons and the elderly may require assistance with set up
and usage.
10. Do not place objects on the product or allow objects to obstruct the
inlet or outlet openings; do not operate in close proximity to walls,
curtains, etc.
11. Use of attachments or accessories not recommended or sold by the
product distributor may cause injury to persons or damage to property.
12. This product is intended for normal, light commercial use only.
13. Contact a qualied service technician for repair or maintenance of
this unit. Do not attempt to dismantle the appliance.
14. Do not operate the appliance on a metal surface.
15. Do not use the appliance in articially hot or humid conditions or
allow it to be used in a hazardous environment.
16. Do not clean the appliance with organic solvent.
17. This instruction manual is an integral part of the appliance and
should be stored for future reference. It must accompany the unit in
event of ownership transfer or for reference by a service engineer.
IMPORTANT SAFETY INSTRUCTIONS

-3-
DO NOT OBSTRUCT THE AIR INLET OR OUTLET.
WARNING
NOTE: You will need to install
the handle. Six bolts are
included for the installation.
STRUCTURE DIAGRAM
6 Bolts for securing the handle
6 Bolts for securing the handle

-4-
IMPORTANT
Place dehumidier in the upright position. When transporting a
dehumidier to site, allow the dehumidier to stand upright for
30 minutes before switching ON. This is necessary to allow the
refrigerant system to stabilize and avoid system damage.
SETTING UP THE DEHUMIDIFIER:
Operate the dehumidier in an enclosed area as this creates a drying
chamber. Close all doors, windows and areas that open to external areas
to maximize the dehumidier’s water removal efciency. Keep trafc
through the drying chamber to a minimum. Place the dehumidier in the
center of the room, away from walls and furnishings. DO NOT allow the
airow to be obstructed.
Illustration of correct positioning for best performance.
SETUP INSTRUCTIONS
-5-
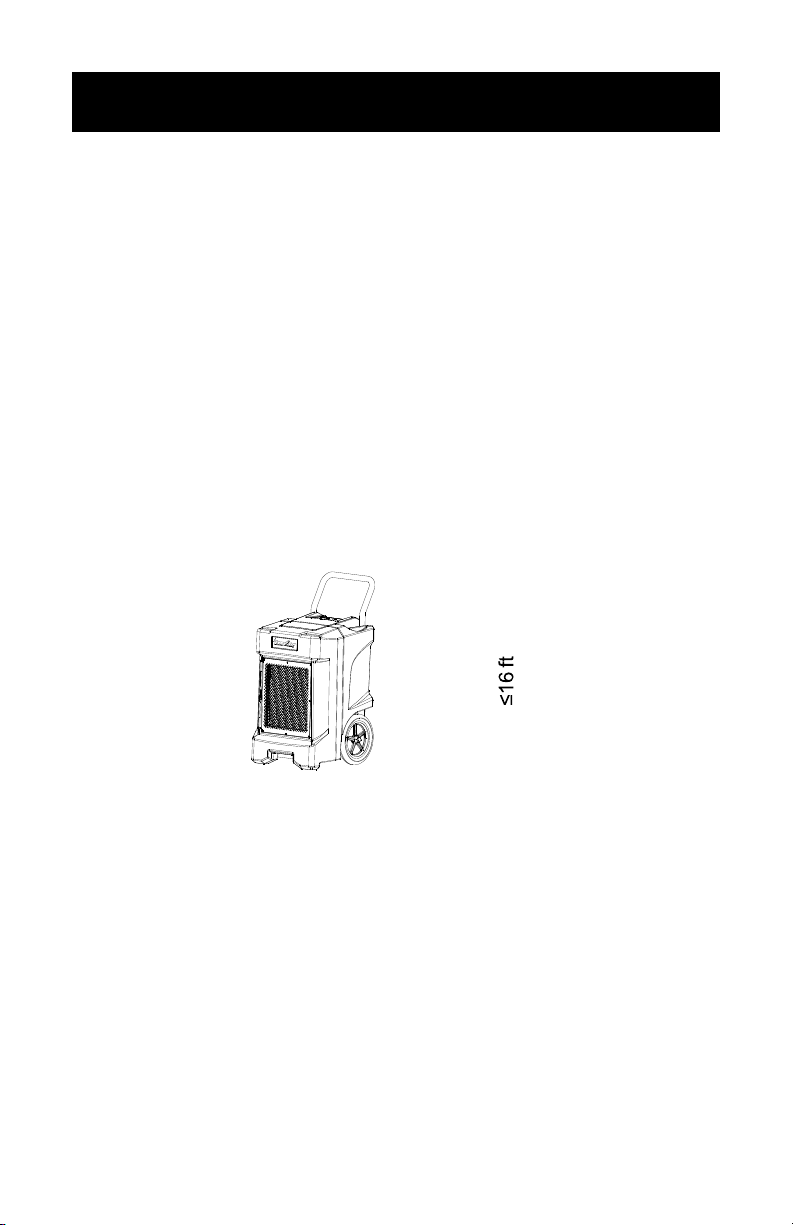
NOTE: The drain hose for the ejector pump is 25 ft long and can drain
up to 16 ft vertically. Attempting to push water vertically more than 16
ft vertically may cause water backup in the pump, which can result in
leakage. See image above.
DRAINAGE:
The dehumidier pump connects to a plastic drainage hose. The hose
is stored on the back of the appliance. Uncoil the entire hose, ensuring
there are no kinks or restrictions, and place the unattached end into a
drain or run outdoors.
Ensure that draining running to the outdoors does not create a hazard
that could cause someone to slip.
Water drains MUST be checked regularly when used.
SETUP INSTRUCTIONS (continued)

-6-
ON/OFF: Press the key to turn the unit ON or OFF.
PURGE: Press the key to empty water from the pump reservoir.
During normal operation the pump purges automatically when the
reservoir is full. Use “PURGE” before moving the machine to avoid
water spillage. The pump will close automatically after 40 seconds of
continuous operation.
and : Press and keys to set or adjust humidity in the
range of 26% and 90%. When the environmental humidity is below 26%,
“CO” will be displayed.
Defrost Indicator: The unit begins to defrost when the defrost indicator
illuminates; the unit has stopped defrosting when the light is no longer
illuminated. When defrosting is complete, the unit begins to dehumidify
again automatically.
1. ON/OFF Key
2. UP and DOWN Keys
3. Purging Indicator
4. Defrosting Indicator
CONTROL PANEL
5. PURGE Key
6. HUMIDITY and TIME Display
7. TIME Key
8. Operating Indicator

-7-
TIME: Press this to display working hours and total working time.
• After starting operation, the display will show the humidity setting
(left) and current humidity (right). Humidity setting can be changed by
pressing “Up” or “Down.”
• Time settings are based on minutes. For example, if the display shows
“0000:50,” this means that the unit has worked for 50 minutes since
powered on. If you want to view the total working time, press “T” again
and the display will show this for 10 seconds, then return automatically
to the original working hours. (Pressing “T” before the 10 seconds can
also return the display to the original working hours.)
• If the unit is powered on but not in operation, the LED will not display
anything. If “T” is pressed once, the working hours from the previous
time the unit ran will display for 10 seconds. Within the 10 seconds, if
“T” is pressed again, the total working time will display for 10 seconds.
If there is no action within those 10 seconds, the LED will automatically
shut off.
• If “T” is pressed when LED displays the total working time, the LED
will shut off immediately. The current working time will be deleted by
pressing and holding down “T” for 5 seconds; the time will be reset, but
the deleted time will be added into the total working time.
NOTE: The total working time cannot be deleted. If the time is beyond
the range of what the LED can show, it will be deleted and restart
from zero.
NOTE: If a power outage occurs while the unit is powered on, the unit
automatically resumes operation at the most recent settings when power
is restored.
Error Messages (E1, E2, E3, E4): See the troubleshooting guide at the
back of this manual for meanings/assistance.
CONTROL PANEL (continued)

-8-
General Use:
Press the ON/OFF key to turn the unit on. It will begin working
automatically.
After use, press ON/OFF key to turn the unit off. Water pump will turn
on automatically for 40 seconds to drain the remaining water in the unit,
then turn off automatically.
Key Lock Function
If the keys of “T” and “P” are pressed for 2 seconds simultaneously, the
defrost light will continue to illuminate at the speed of 50 Hz and all of
the keys on the control panel will lock. The control panel can then be
unlocked by pressing the “T” and “P” keys together again for 2 seconds.
Vent Hose Function
To speed up drying in very damp place, use a plastic pipe (vent hose)
with a diameter larger than 6.7 inches. Attach the vent hose to the
exhaust ring (see below) to expedite drying by directing the heat
(exhaust) toward the wet area..
OPERATING INSTRUCTIONS
Vent Hose
(not included)
ATTENTION:
• DO NOT switch the power OFF by disconnecting at the main
socket outlet.
• To avoid water spillage, DO NOT move the dehumidier for at least
3 minutes after turning the power OFF.
Table des matières
Autres manuels Damp2Dry Déshumidificateur


