Craig CCR9029 Manuel utilisateur

DIGITAL CAMCORDER WITH CAMERA
HD 1080P Action Camera & Video Recorder
DIGITAL CAMCORDER WITH CAMERA
HD 1080P Action Camera & Video Recorder
Model: CCR9029
PLEASE READ BEFORE OPERATING THIS EQUIPMENT.
Owner's Manual
Size: 148.5(W) x 210(H)mm (A5)

FCC INFORMATION:
This equipment meets the limits for a class B digital device. Pursuant to Part 15 of FCC
rules. Only the cable supplied ith the camcorder should be used. Operation ith other cables
is likely to result in interference to radio and TV reception and could void the user's
authorization to operate this equipment. This device complies ith Part 15 of the FCC Rules.
Operation is subject to the follo ing t o conditions:
1) This device may not cause any harmful interference.
2) This device must accept any interference received, including interference that may cause
undesired operation. Modifications not authorized by the manufacturer may void the user’s
authority to operate this unit.
FCC NOTICE:
This equipment has been tested and found to comply ith the limits for a class B digital device,
pursuant to Part 15 of the FCC Rules. These limits are designed to provide reasonable
protection against harmful interference in a residential installation. This equipment generates;
uses and can radiate radio frequency energy and, if not installed and used in accordance ith
the instructions, may cause harmful interference to radio communications. Ho ever, there is no
guarantee that interference ill not occur in a particular installation.
If this equipment does cause harmful interference to radio or television reception, hich can be
determined by turning the equipment on and off, the user is encouraged to try to correct the
interference by one or more of the follo ing measures:
Reorient or relocate the receiving antenna.
Increase the distance bet een the equipment and receiver.
USER INFORMATION:
Changes or modifications not expressly approved by the party responsible for compliance

could void the user's authority to operate the equipment.
Never try to take pictures hen operating a motor vehicle or hile alking.
Never try to open the case of the camcorder or attempt your o n repairs. Al ays leave
service to authorized repair facilities.
Physical damage and malfunction of this unit can cause the image data stored in its memory
to be deleted. Be sure to al ays keep backup copies of data by transferring to a personal
computer.
In an environment ith electrostatic discharge, the user may have to reset the unit.
Do not leave the camcorder in places subject to extremely high temperatures, such as a
sealed vehicle or in direct sunlight.
Do not touch or press the display or lens.
Copyright Information:
All rights reserved. No part of this publication may be reproduced, transmitted, stored in a
retrieval system, or translated into any language in any form by any means, optical, electronic,
recording, or other ise, ithout the ritten permission of our company.
We reserve the right to revise this manual and to make changes to any or all parts at any time,
ithout obligation to notify any person or entity of such revisions and changes.
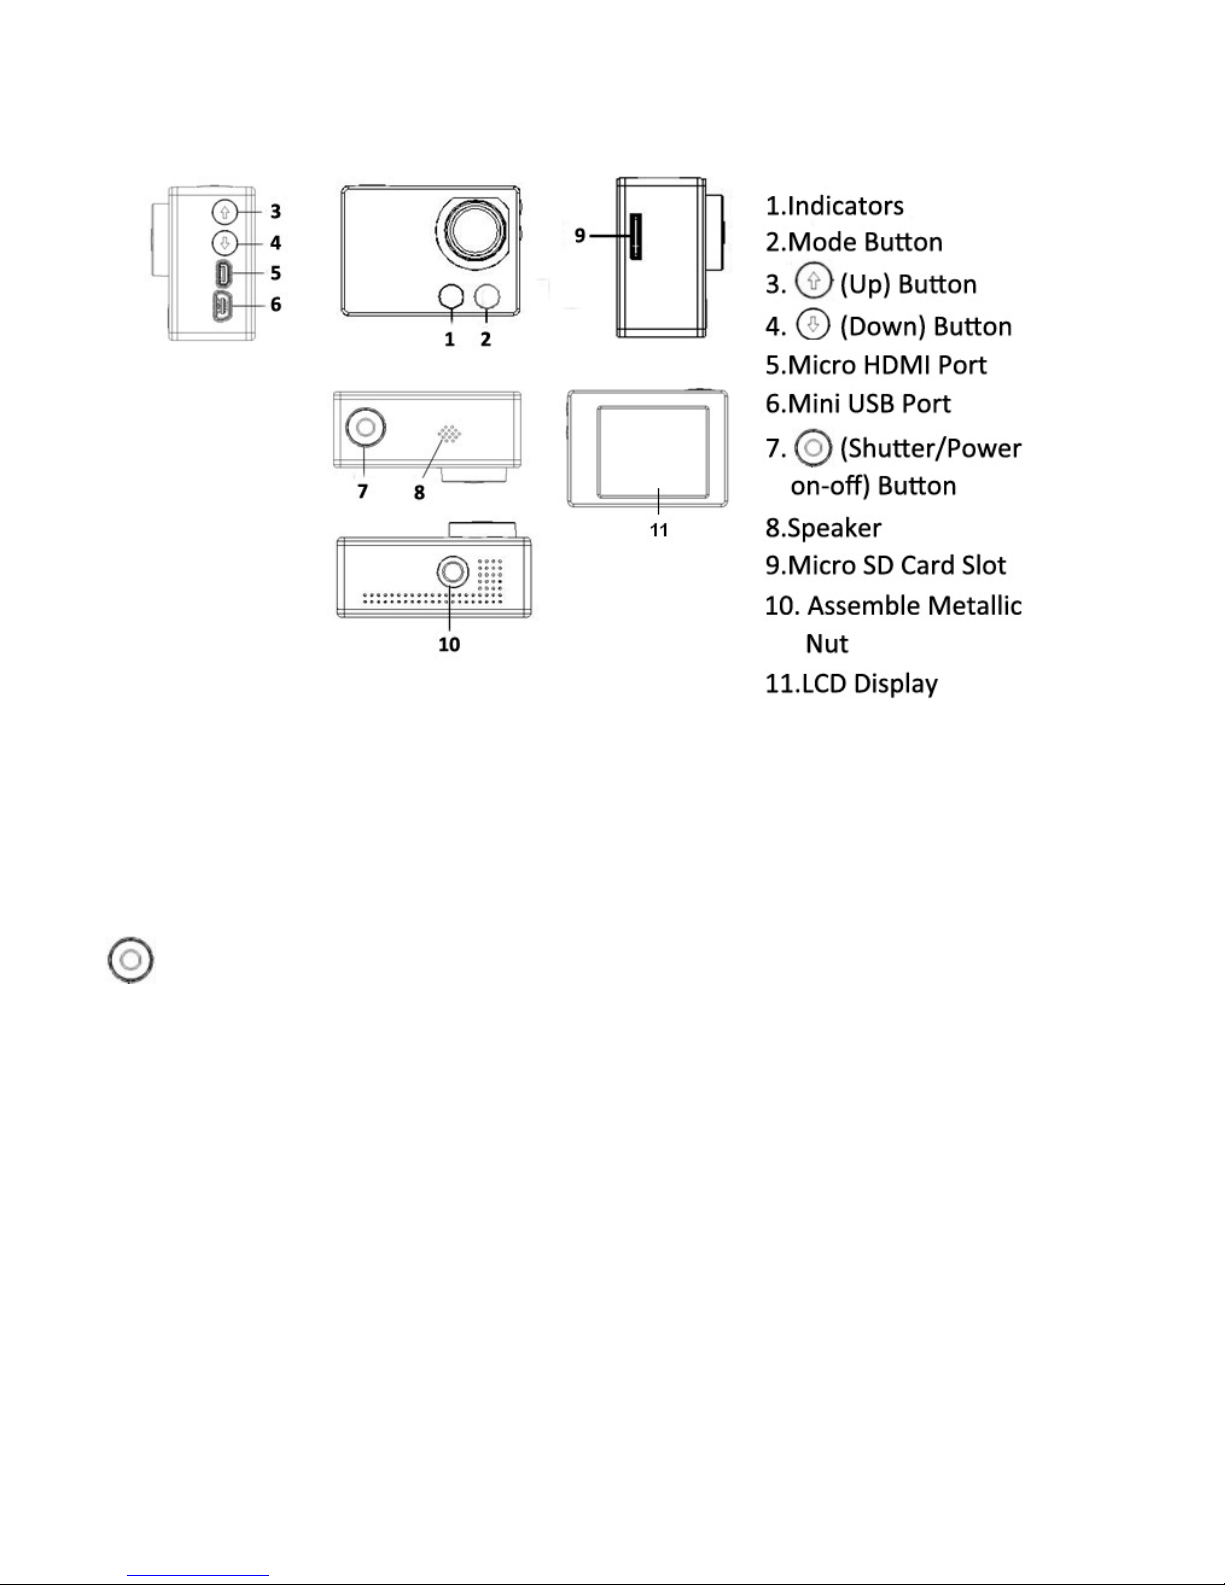
Location of controls: Mini USB ort: For built-in rechargeable battery recharging; files upload; ebcam.
Micro HDMI ort: To connect to Television.
Micro SD Card Slot: To insert an external Micro SD Card for extension memory.
(Shutter/ ower on-off) Button:
Press to po er on the unit.
To po er off, press and hold the button approximate 3 seconds until “Bye-Bye” appear
on the display then release the button.
In video taking mode, press to start recording. Press again to stop.
In photo capture mode, press to capture the photo.
In menu, press to confirm the settings.
Mode Button:
Press repeatedly to change the capture modes. After pressed, the menu ill appear on the
display. Touch the correspondence buttons on the display to set or reset the settings.

In the setting menu, press to return to previous menu. Press repeatedly until all menu
disappear on the display to exit.
Buttons:
In capture mode, press repeatedly to zoom in or out.
In setting menu, press to move the cursor on it up or do n.
In playback mode, press to skip file for ard or back ard.
reparation:
1. Battery installation
Take out the unit from the ater proof case:
Unlock by slide the s itch to the direction as the arro marking on it as the figure belo :
Lift up the lock then take out the unit as the figures belo :
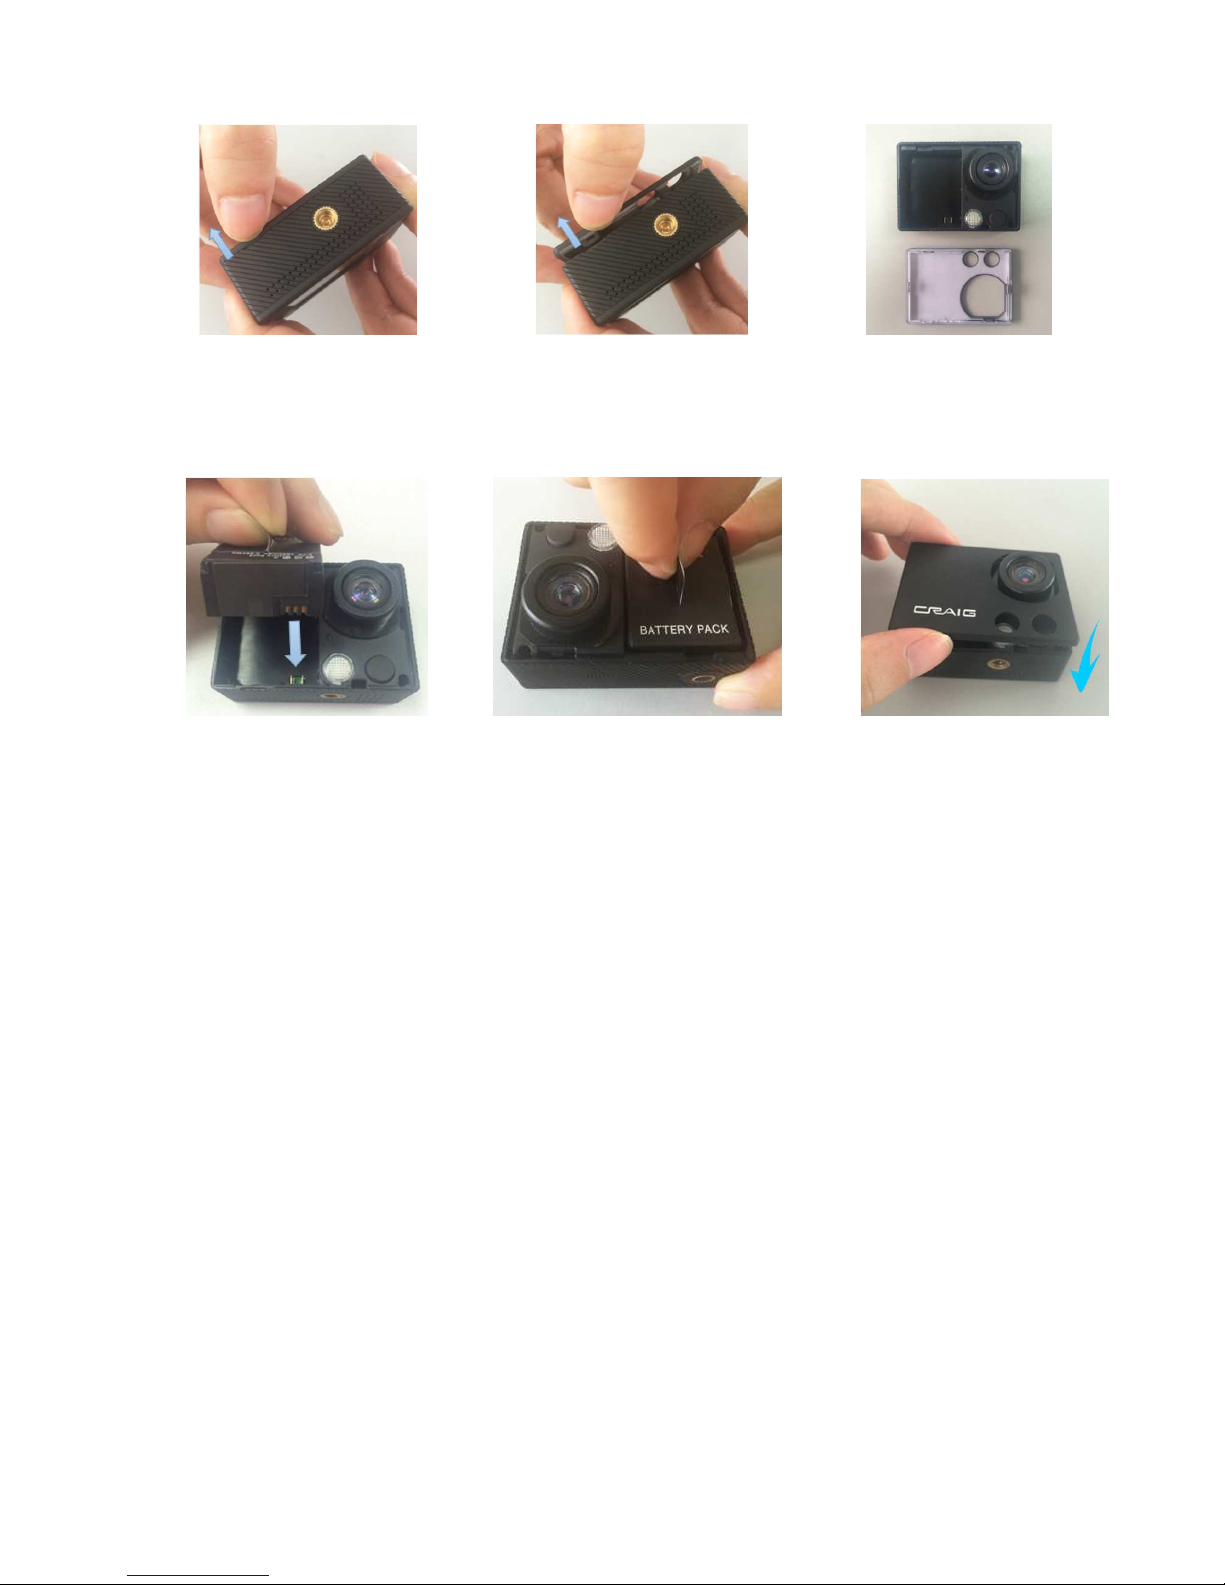
Open the cabinet:
Fig. A Fig. B Fig. C
Install the battery as the figures belo , then replace the cabinet:
Fig. D Fig. E Fig. F
2. Recharge:
Recharge the battery in first time use or hen battery lo indicator “lo battery” appear on
the display as belo :
Connect the small plug from the supplied USB connection cable to the Mini USB Port on
the unit.
Connect the other end to the USB Port on the Personal Computer or USB Charger having
DC 5V 1A output. During charging, the Red Indicator on the front of unit ill illuminate.
When finished, it ill not light.
Notes:
Your battery ill last longer if you follo ing these simple guidelines for charging for and
storing it.
A. Recharge and store the battery ithin the temperature range of 5°C~35°C (40°F~95°F).
B. Do not over charge (longer than 24 hours). Excessive charging or discharging may shorten
the battery's life.
C. Battery life naturally shortens slo ly over time.
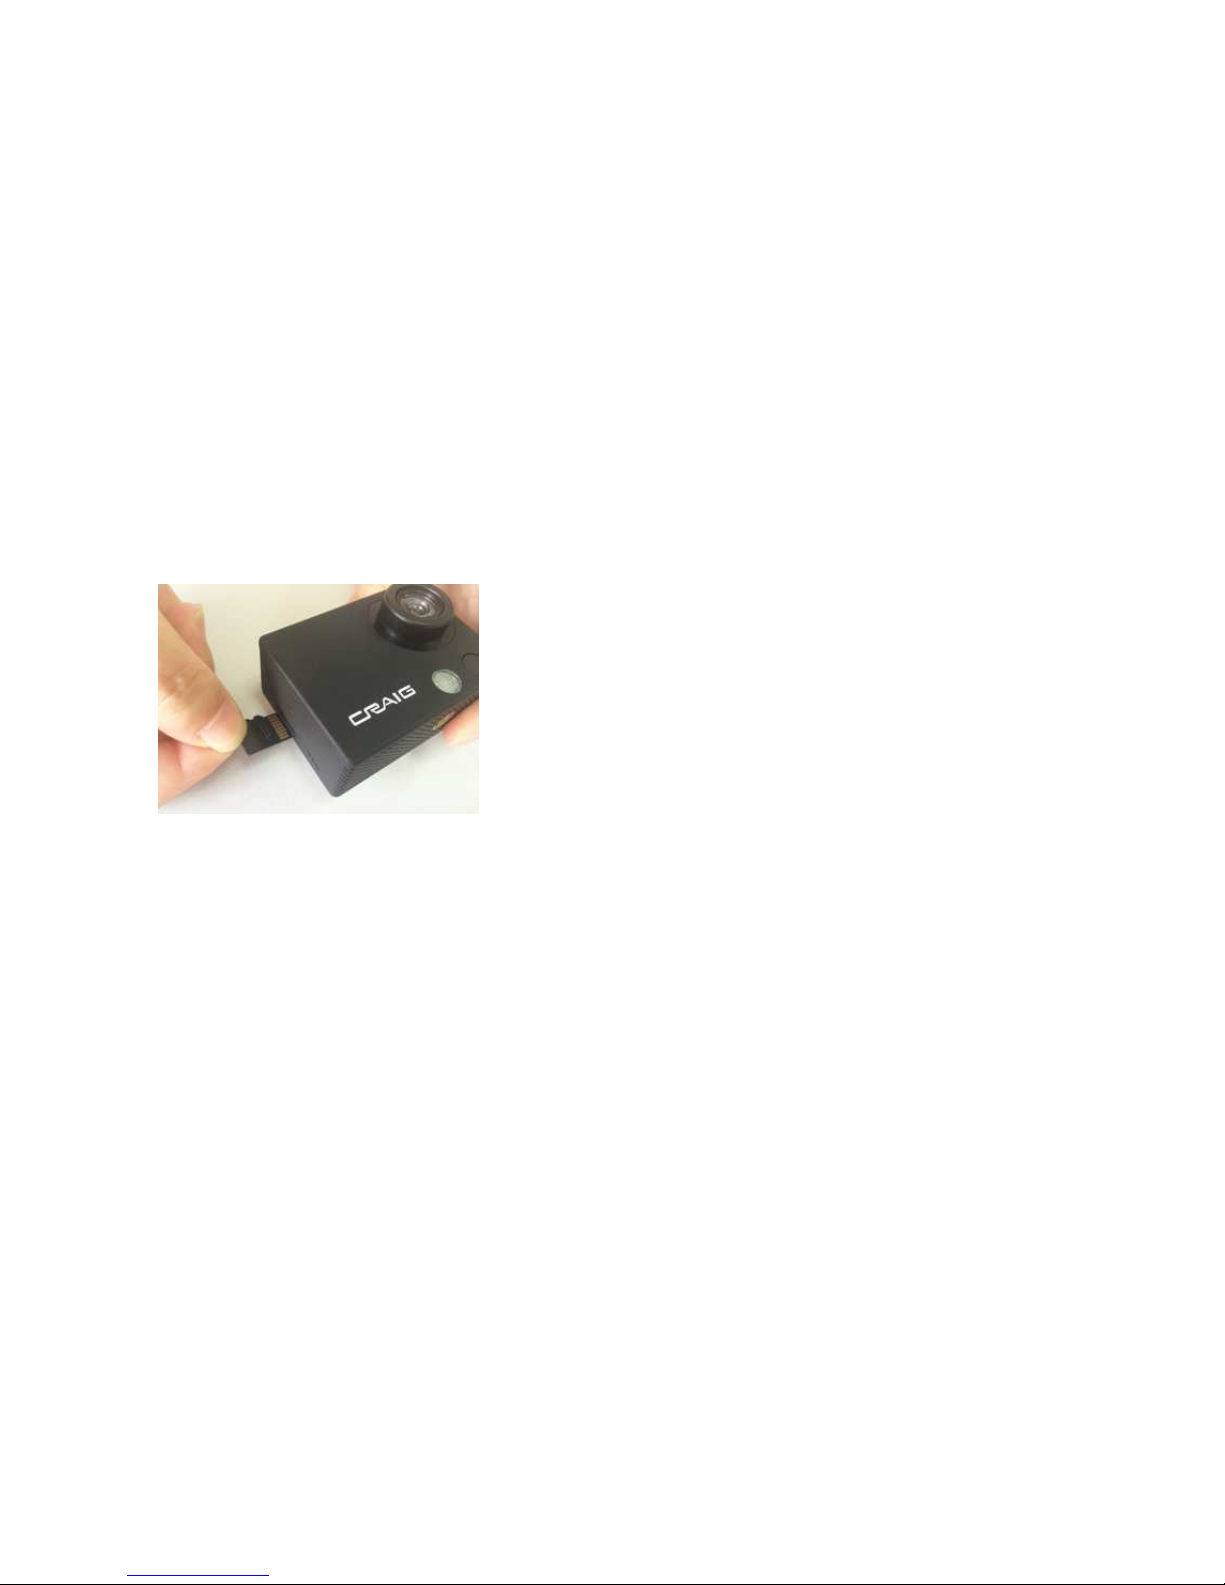
3. Micro SD Card installation:
Insert a Micro SD Memory Card (up to 32G; Class 4, not included) into the Micro SD
Card Slot as the figure belo before start use:
To take out the card, press the card until “Click” sound is heard then slide it out.
Notes:
Before insert or replacing the Micro SD Card, make sure the unit has been po ered off.
When inserting the Micro SD Card, make sure the direction you selected is correct.
Never insert violently to avoid damaging the card or the unit. If it doesn’t ork, please
check if the direction is correct.
When the card is used for the first time, or it has been used in other device, it may need
format through the Computer.
Important: Formatting the SD Card will delete all the files on the card. Upload the
files to your computer before formatting the card.
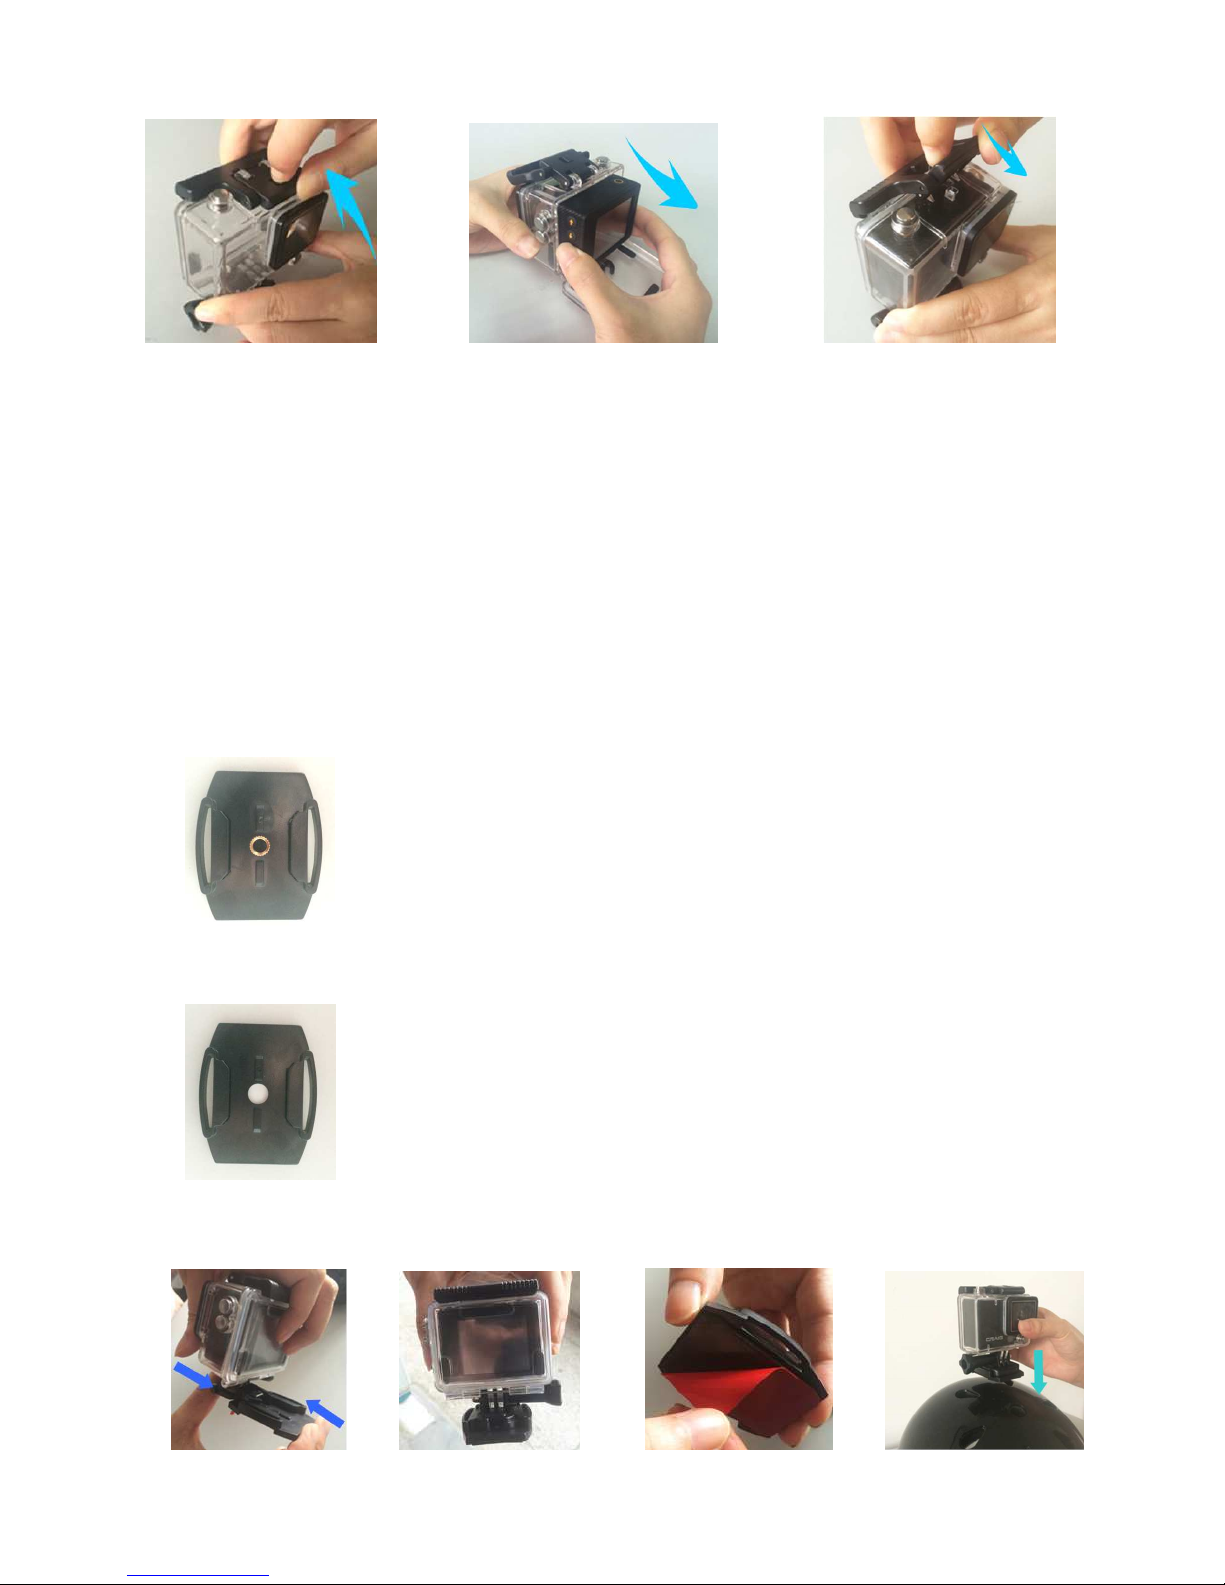
4. Replace the unit into the water proof case as the figures below:
Fig. 1 Fig. 2 Fig. 3
Note: For the best result of water proof, always put the unit into the water case and make
sure it is completely closed and locked.
5. Mountings:
Mounting the camera on the top of the helmet ith the supplied assembly’s kit as the
figures belo :
Select the Mount ith the nut to mounted on the skateboard or surfboard
hich equipped assemble scre . Then assemble/stuck the unit on it as follo s figures.
Select the Mount ithout the nut to mounted on the helmet. Then
assemble/stuck the unit on it as follo s figures.
Fig. 1 Fig. 2 Fig. 3 Fig. 4

Fig. 5
Mount the camera on the handle of bicycle/motorcycle ith the supplied assembly’s kit
as the figures belo :
(Take out the unit from the ater proof case as the previous procedures before
assemble.)
Fig. 1 Fig. 2 Fig. 3 Fig. 4
O ERATION
General:
1. Press the Button on the top of unit to po er on. The display and the Blue Indicator
(on front of unit) ill illuminate.
2. Press the Mode Button on the front of the unit repeatedly to select the desire mode as desire
as belo . Or, touch the display. The selection indo “ ” ill pop up. Touch the desired
button to enter.
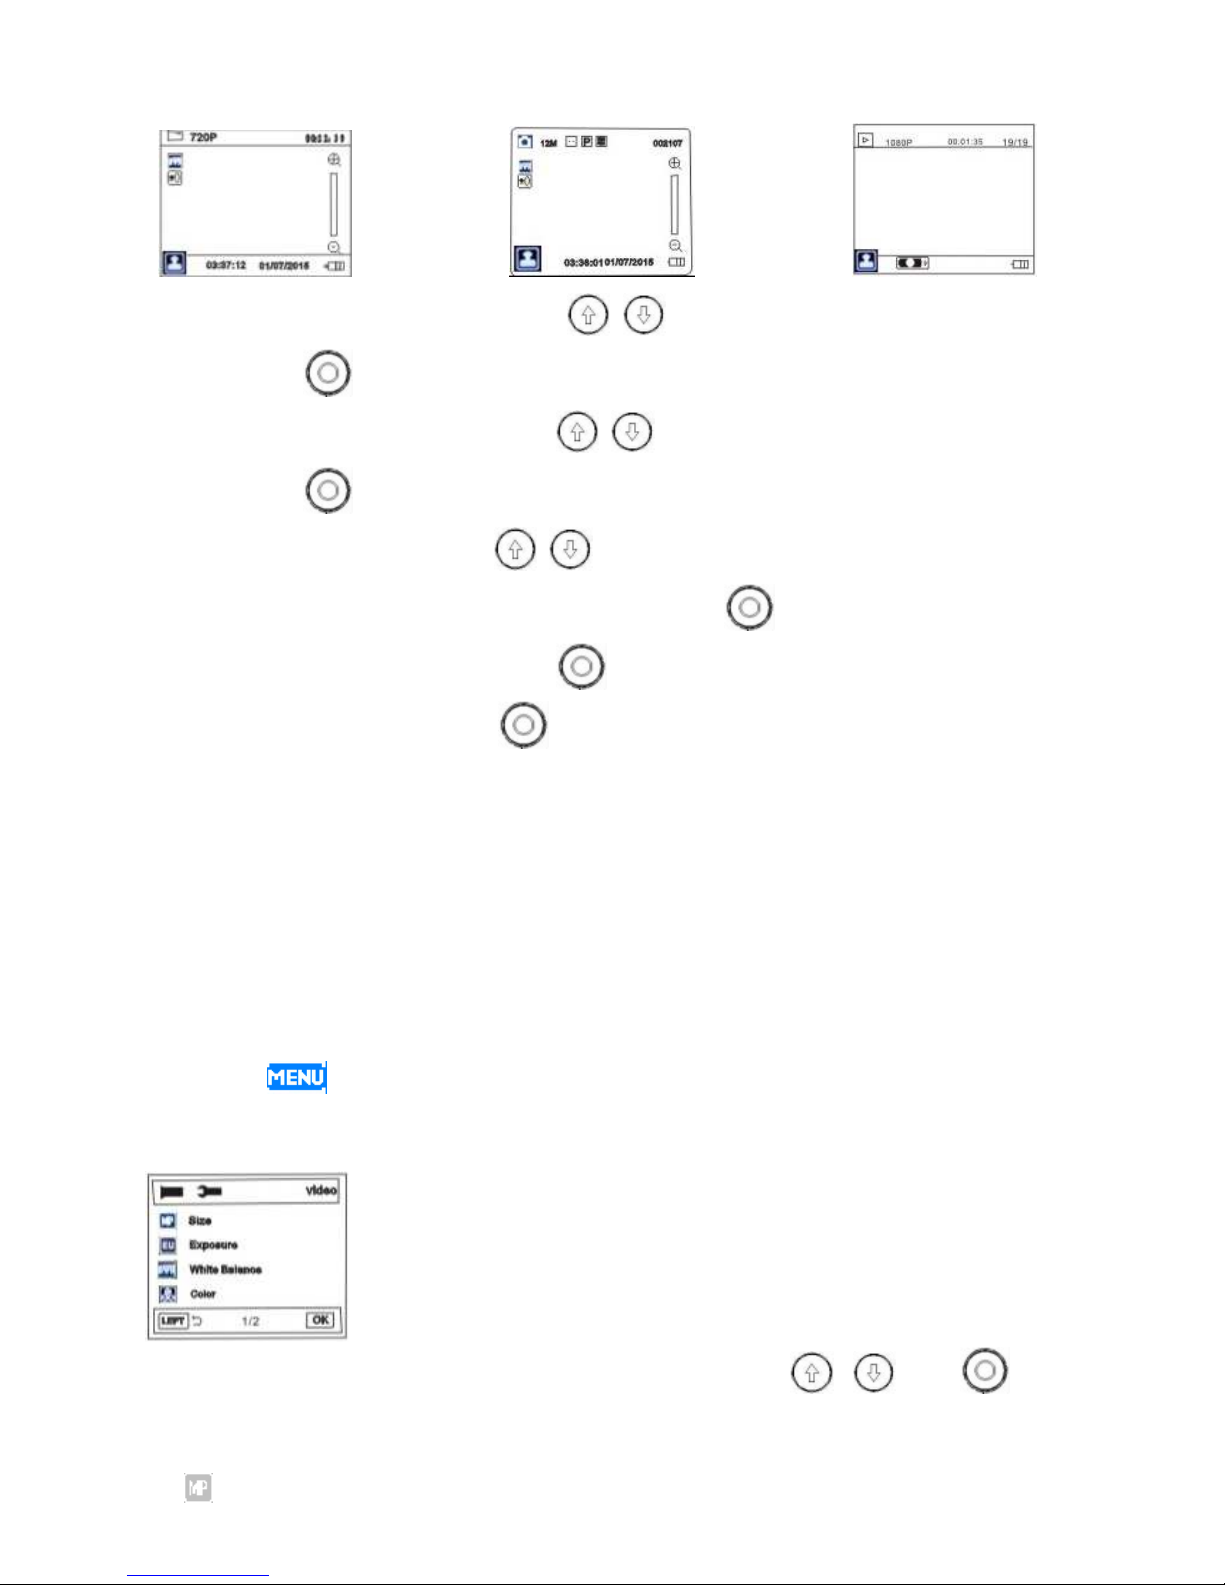
Video Recording mode Picture Capture Mode Playback Mode
In Video recording mode, press the (Up or Do n) Button to zoom in or out.
Press the Button to start recording. Press again to stop.
In Picture capture mode, press the (Up or Do n) Button to zoom in or out.
Press the Button to capture.
In Playback mode, press the (Up or Do n) Button to select the taken
picture/video file for ard or back ard. Press the Button to start playback.
During video playback, press the Button to pause. Press again to resume.
3. To po er off, press and hold the Button approximate 3 seconds until “Bye=Bye”
appear on the display then release the button. The display and Blud Indicator ill not light.
Setting Menu:
Video:
1. Po er on the unit and enter to Video recording mode as previous procedures.
2. Touch the “ ” Button on the screen, the setting menu ill appear on the screen as
follo s:
3. Touch the correspondence button on the display or press the ; and buttons
on the unit to set or reset the settings as the on screen instructions as belo :
Size:
Table des matières
Autres manuels Craig caméscope

Manuels caméscope populaires d'autres marques


Panasonic
Panasonic AG-HMC152EN Manuel utilisateur

Insignia
Insignia NS-DCC5HB09 - Camcorder - 720p Manuel utilisateur

MYDLINK
MYDLINK DCS-6100LH Manuel utilisateur

Sony
Sony video Hi8 Handycam CCD-TR555 Manuel utilisateur

SECURECOM
SECURECOM V-5014B Manuel utilisateur

Panasonic
Panasonic HDC-SD100 Manuel utilisateur


