Comfort Contego T800 Manuel utilisateur

Comfort Contego
User Manual
Please read the user manual
before using this product.
Comfort Contego R800
Receiver
Comfort Contego T800
Transmitter
h
earin
g

2
3
Contents Page
Introduction 3 - 5
This is included 6 - 7
Getting started 8 - 11
Charging 8
Functions - receiver 12 - 14
Functions - transmitter 14 - 15
Menu 16 - 17
Symbols receiver 18 - 19
Symbols transmitter 20 - 21
Radio range and channels 22
Using the neck loop/headphones 23
Areas of use
Conversations 24
Lectures 25
In a shop 26
Meetings 27
Dinner 28
At home 29
In the car 30
Watching TV 31
Special functions 32
Troubleshooting 33
Safety instructions 34
Service, guarantee and technical data 35
Introduction
Congratulation’s on your choice of the Comfort Contego. In the bag you
will nd everything you need to improve your grasp of speech in all kinds
of situations. It is easy to use and works regardless of whether you have
a hearing aid or not. The sound is transmitted digitally which gives an
extremely good speech reception. Comfort Contego is almost impossible
to intercept as the receiver and transmitter are paired using a coded key.
Please read through this user manual before you use the product.

4
5
For conversations
at home or at work
At a restaurant
Watching TV
With a directional
microphone on
the receiver.

6
7
This is included
Bag
Receiver - Contego R800 Transmitter - Contego T800 Neck loop with or
extension cable
Headphones
Sound Kit Power supply
Earphones
Alternatives

8
9
Getting started
Charging
Comfort Contego contains a rechargeable battery. Charge the
transmitter and the receiver for at least 4 hours before using them
for the rst time.
An empty battery takes about 4 hours to charge. When the battery
is charged you can use the unit for up to 16 hours. The transmitter
can be charged during use.
To charge:
When the battery is being charged the battery symbol on the dis-
play blinks. When the battery symbol is full Comfort Contego is
fully charged and charging ceases. You can not change the battery
yourself - get in touch with your retailer.
Use only the Comfort Audio AB charger that is supplied.
Starting to use the Comfort Contego
1. When the Comfort Contego is fully charged - start the receiver
by pressing the button for about 2 seconds.
2. Then connect the neck loop and turn the hearing aid to the
T-position. Use the headphones instead of the neck loop if you
don’t use hearing aids.

10
11
3. Picking up sound via the built in microphones in the receiver.
Set the audio level by means of the right hand volume controller.
(see page 12) (Note! Start listening at a low volume.)
Select the directional or omni-directional microphone with the ar-
row buttons in the middle (see page 12). Place the receiver on a ta-
ble or aim it at the person you want to listen to. Choose directional
or omni-directional settings depending on the situation. Normally
in noisy surroundings directional setting is preferred.
4. Picking up sound by means of transmitter.
When the distance between you and the speaker /sound source is
longer, let the person you want to hear use the transmitter.
Set the audio level by means of the left hand volume controller.
(see page 12) (Note! Start listening at a low volume)
(When the transmitter or receiver is turned on, the most recent set-
tings for volume and microphone type are automatically selected)

12
13
Functions - Receiver, Comfort Contego R800 Functions R800
The most important functions can be accessed without needing to
go into the menu. (For menu see page 16.)
Volume controller receiver
(internal microphones)
By pressing the plus sign you
increase the volume on the
receiver microphone
By pressing the minus sign
you decrease the volume on
the receiver microphone
Directional microphone
With the uppermost arrow
you select the directional
microphone
Omni-directional
microphone
With the lower arrow you
select the omni-directional
microphone
Clip on the back
Plug for neck loop/headphones
Power switch
On/Off
Display
Microphones
Menu/OK
Charging
Volume
controller,
receiver
Volume
controller,
transmitter
Omni-directional
microphone setting
Directional
microphone
setting

14
15
Functions Receiver R800
Volume controller
(transmitter)
By pressing the plus sign you
increase the volume from the
transmitter microphone.
By pressing the minus sign
you decrease the volume from
the transmitter microphone.
Functions Transmitter T800
Directional microphone
With the uppermost arrow
you select the Uni-direc-
tional microphone.
Omni-directional
microphone
With the lower arrow you
select the omni-directional
microphone.
Clip on the back
Line in
On/off
Microphones
Menu/OK
Functions - Transmitter, Comfort Contego T800
Omni-directional
microphone setting
Charging
Display
Directional
microphone
setting
By pressing the uppermost
arrow you increase the
line in amplication.
By pressing the lower ar-
row you decrease the line
in amplication.
Line in unattached Line in attached

16
17
Channel settings
The transmitter and receiver are set on the same channels when you
receive the product. To change channels choose Channel in the menu
and press OK, navigate between the channels by using the arrows up
and down. To choose a channel press OK.
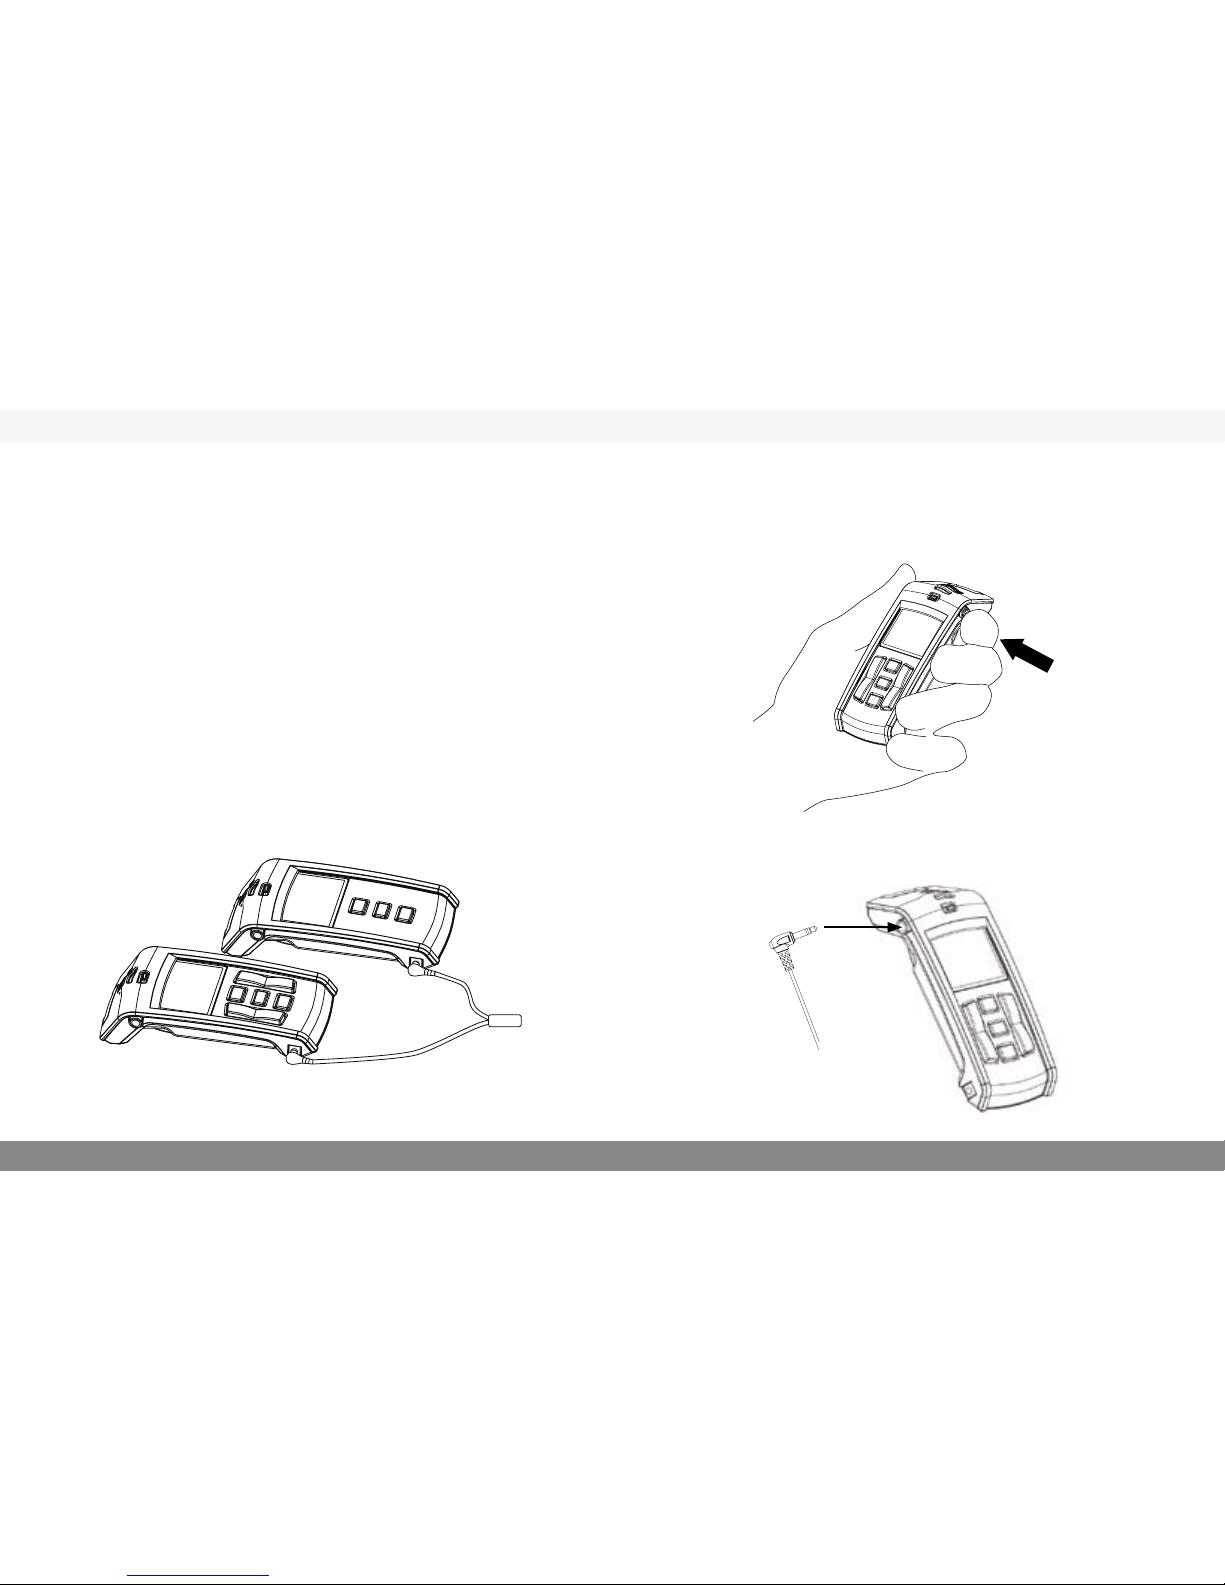
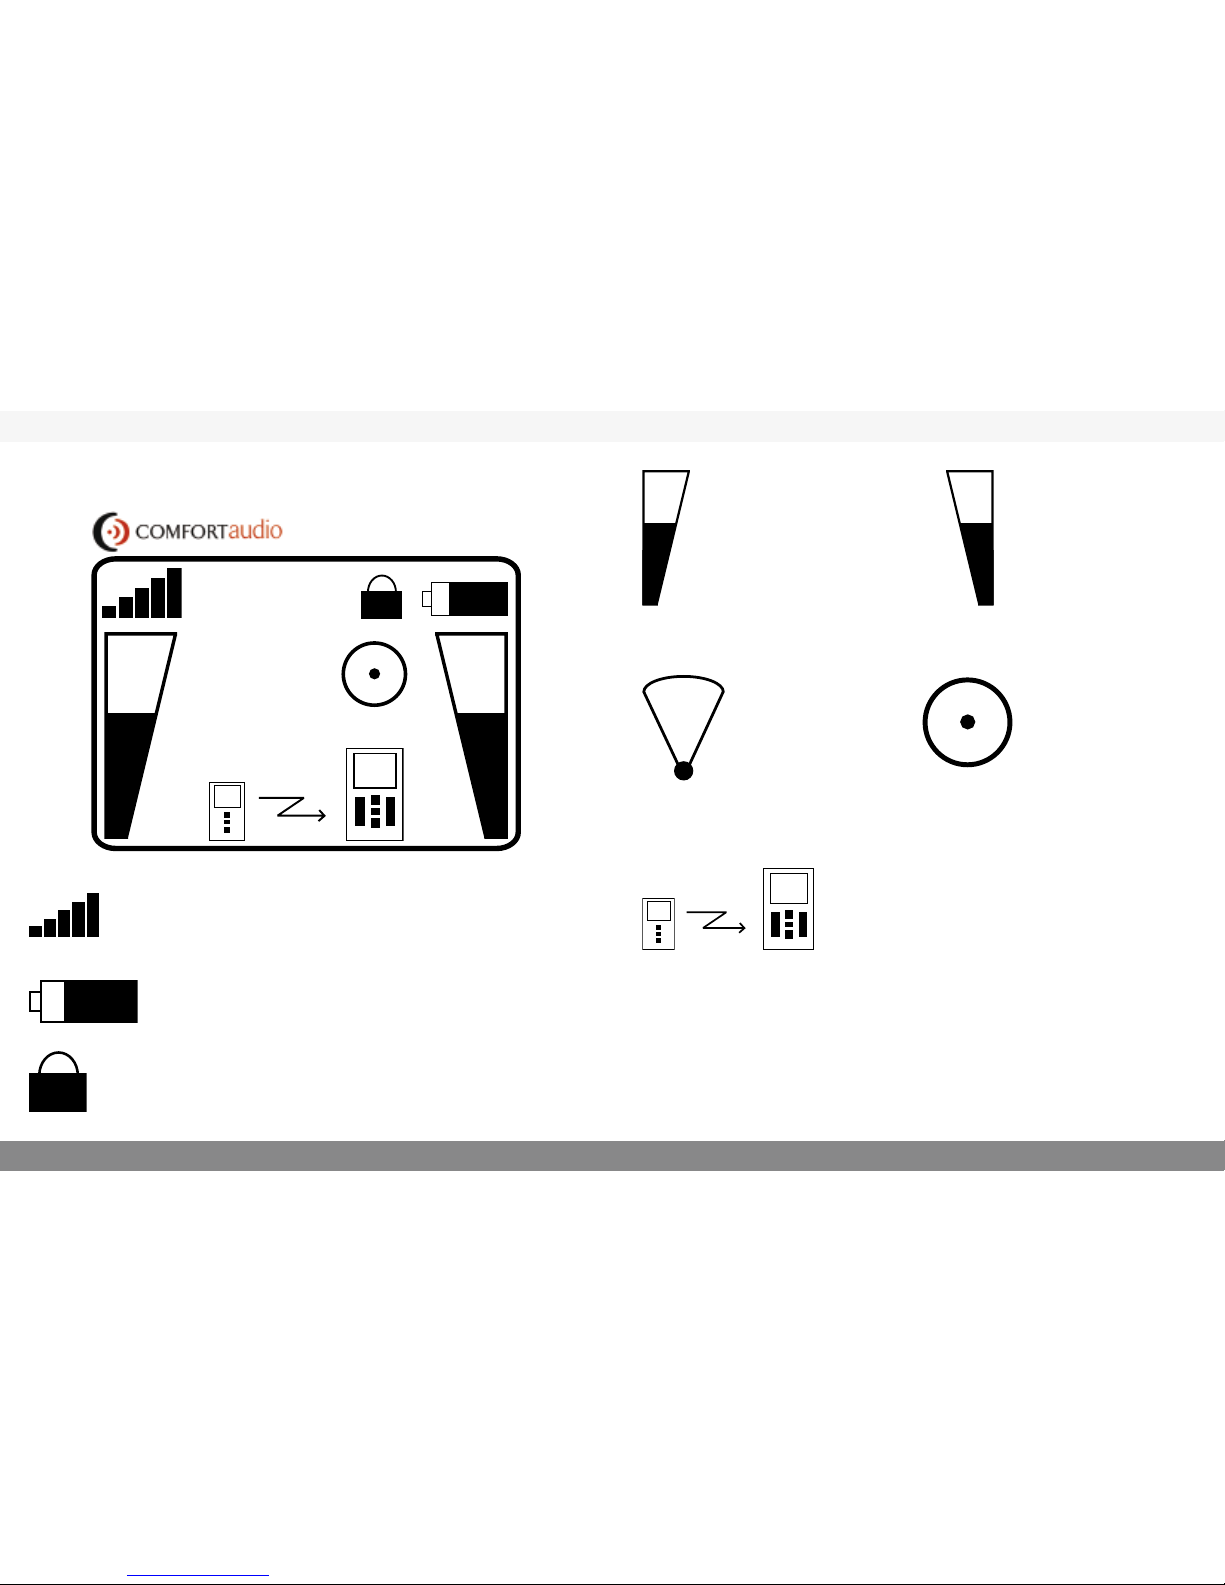
Pairing
In order to use the receiver and the transmitter they must be paired.
(When you receive them they are already paired). Conrm that both
the transmitter and receiver are charged and ON. Press MENU key
on the transmitter and receiver. Scroll to PAIR and press OK (Menu
Key). A new menu will show. Press pair. The unit will display “Wait
for receiver/transmitter”. Press OK on the transmitter. In a few sec-
onds the Units will PAIR and display “Pairing Complete”.
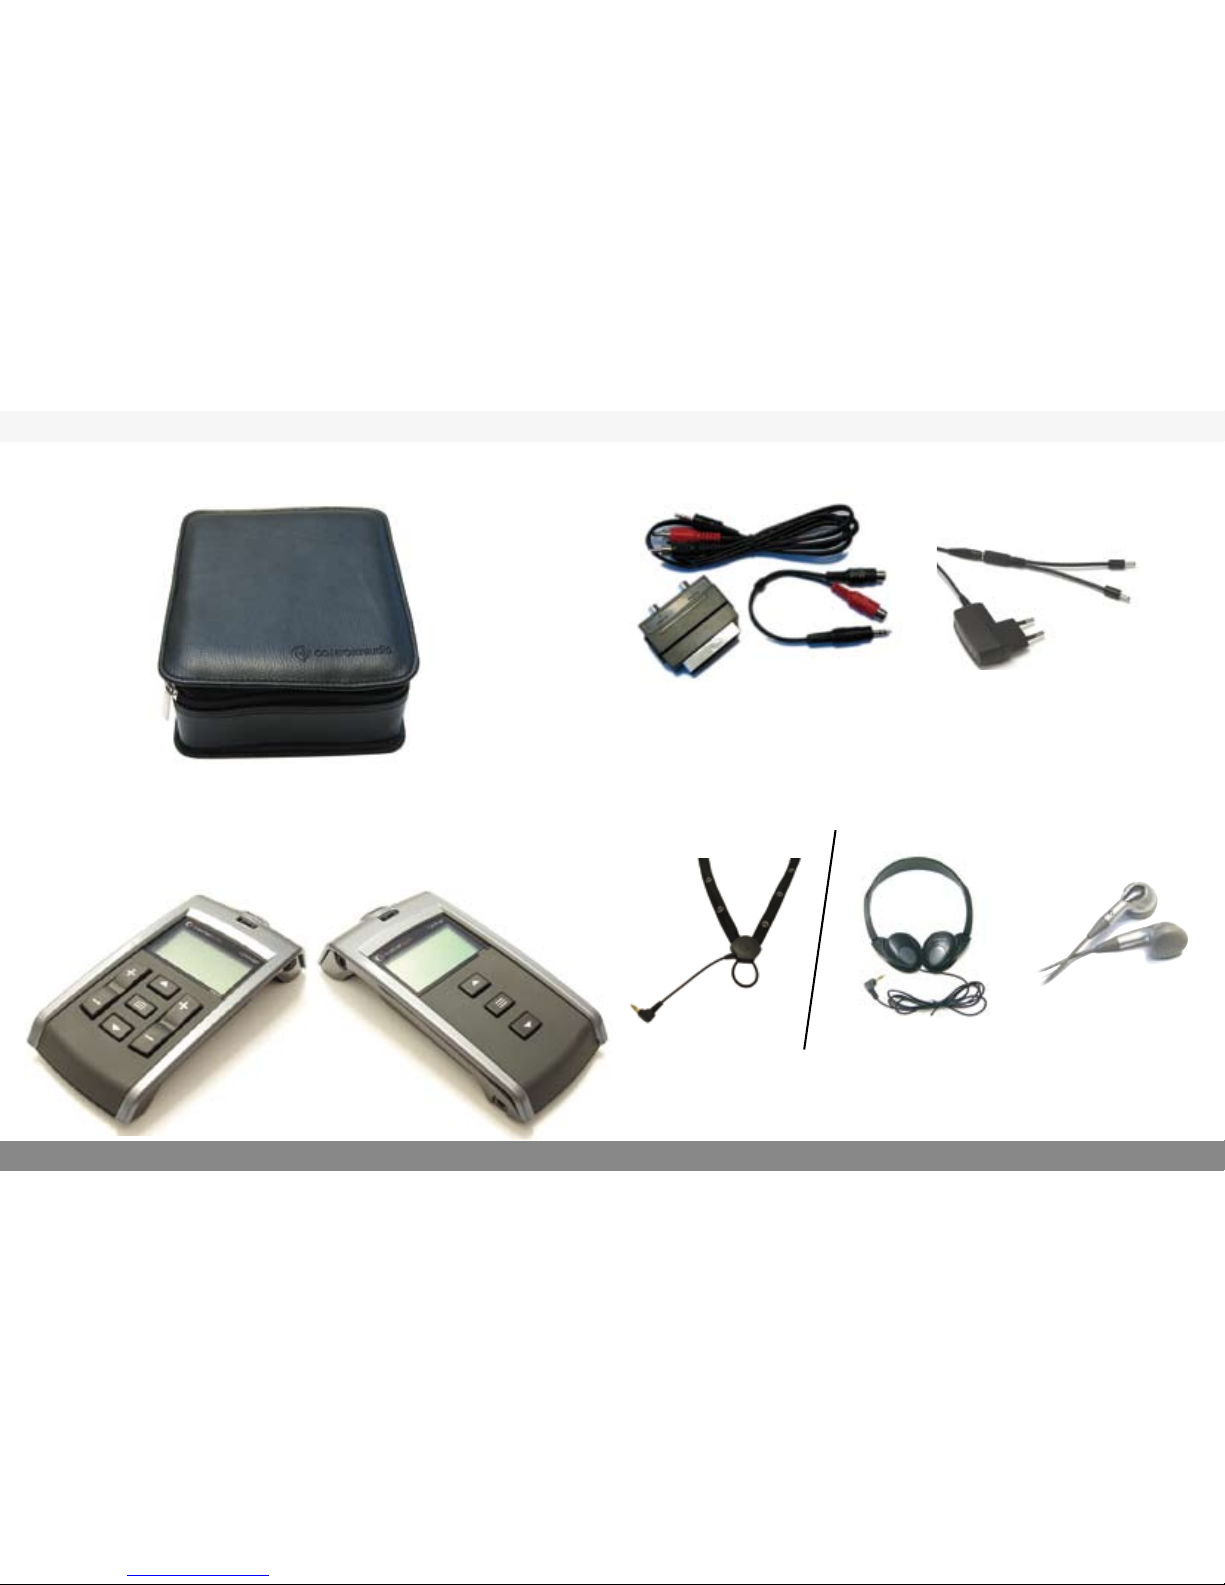
Line in
Here you choose if you want to use a external sound source. When
you receive the Contego it is on “Line in” (The microphone setting
is only to be used if you use our accessory TV-microphone)
Language
Select the language with the arrows. Press OK.
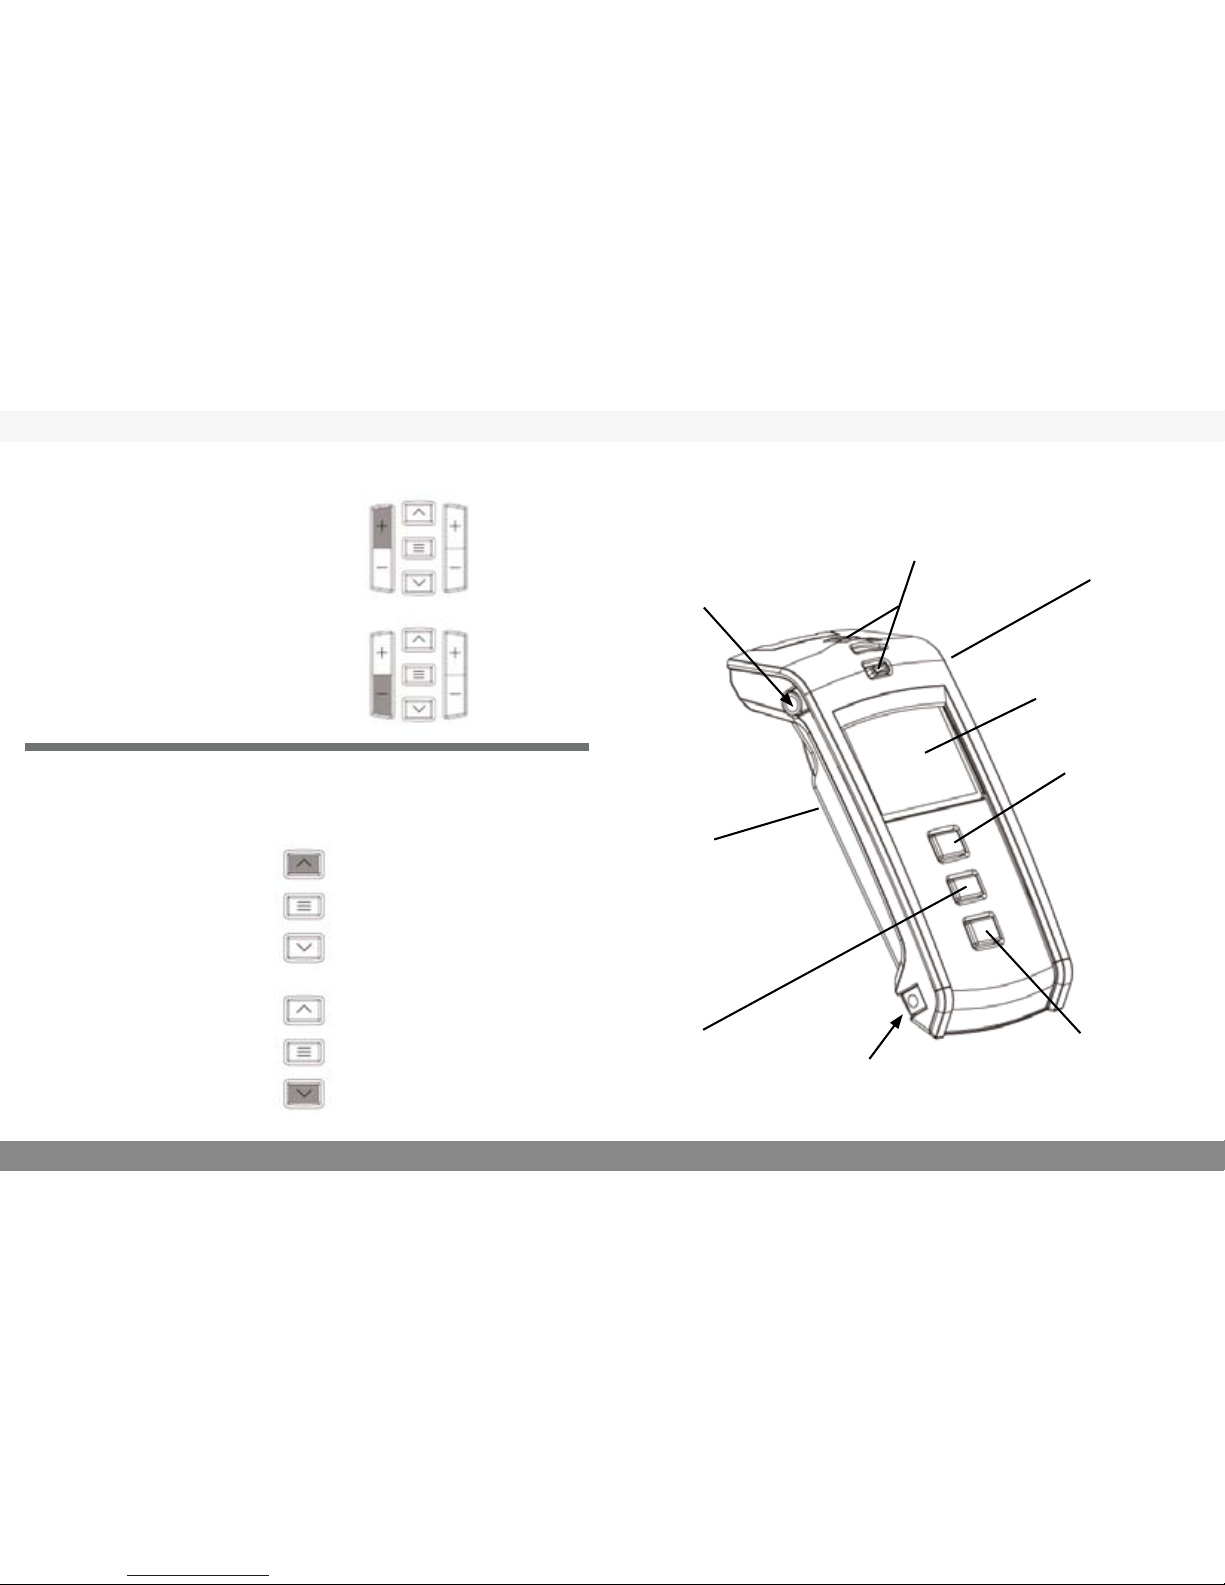
Key lock
When you are in the menu selection “Lock Keys” and press Menu/
OK you lock the keys. To unlock them press the up and down
arrow keys simultaneously.
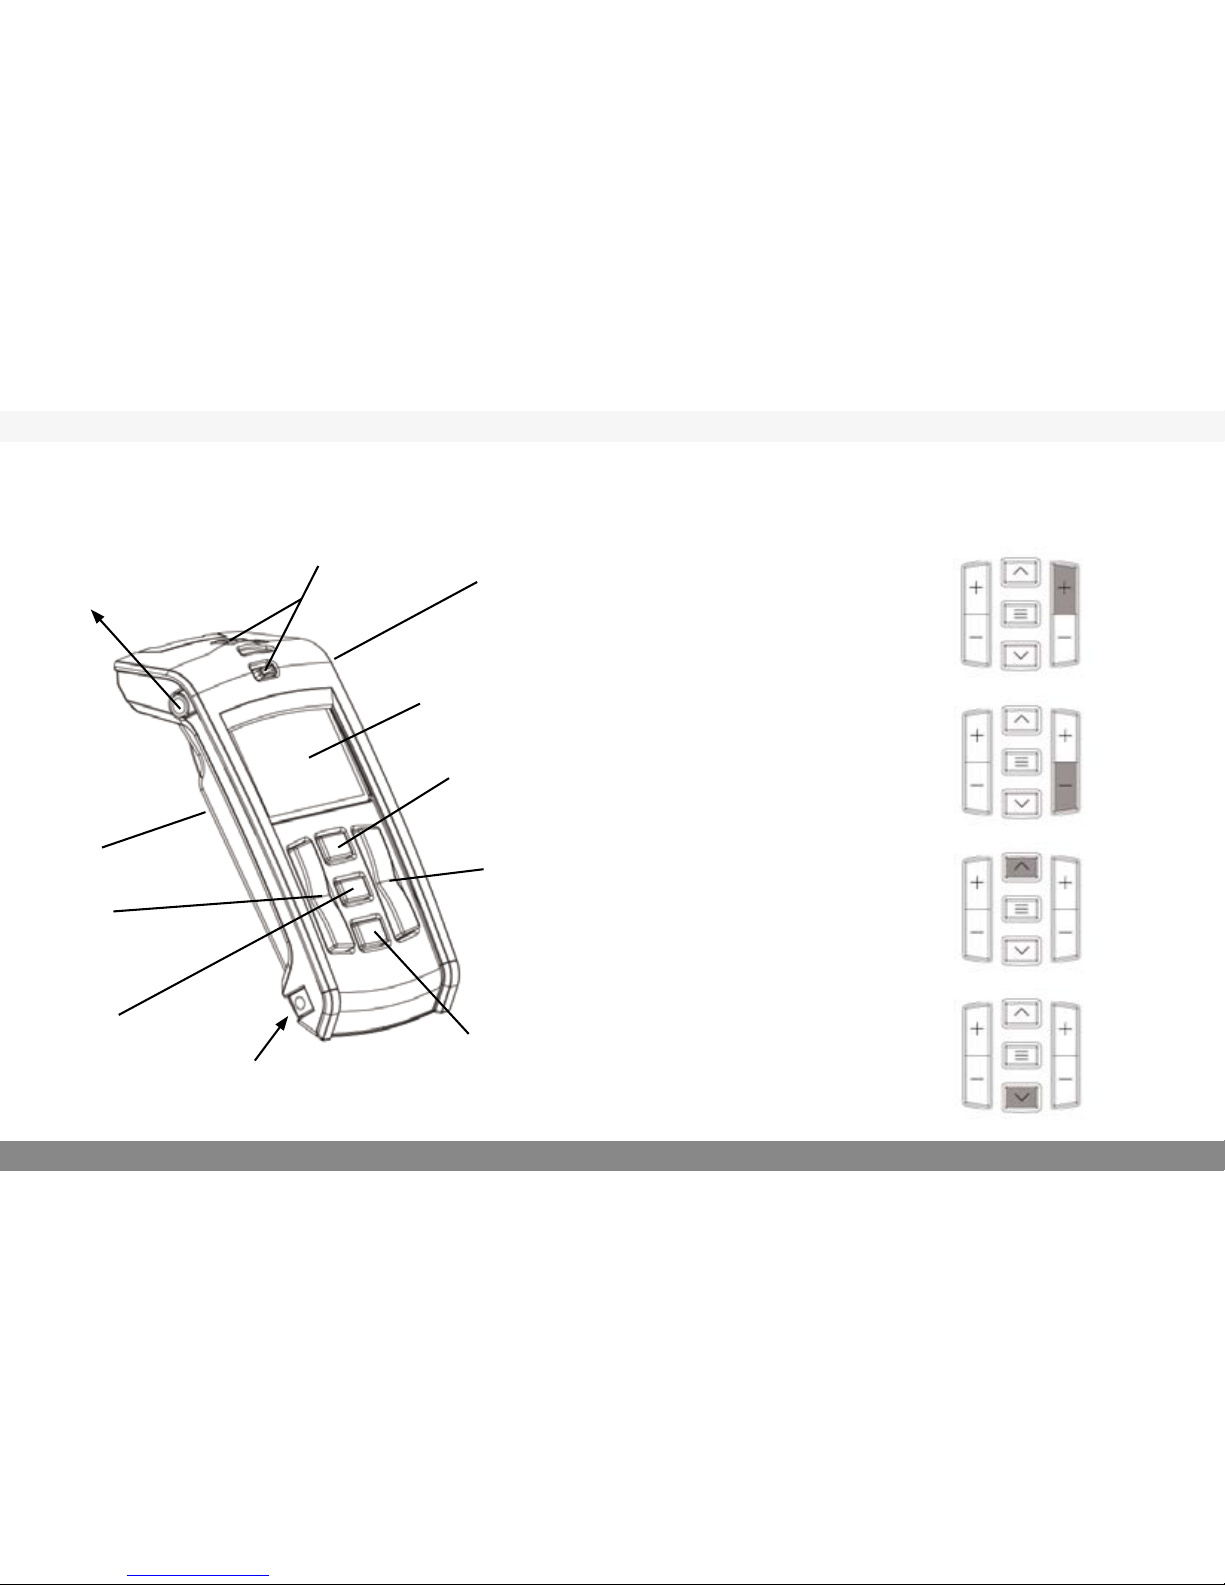
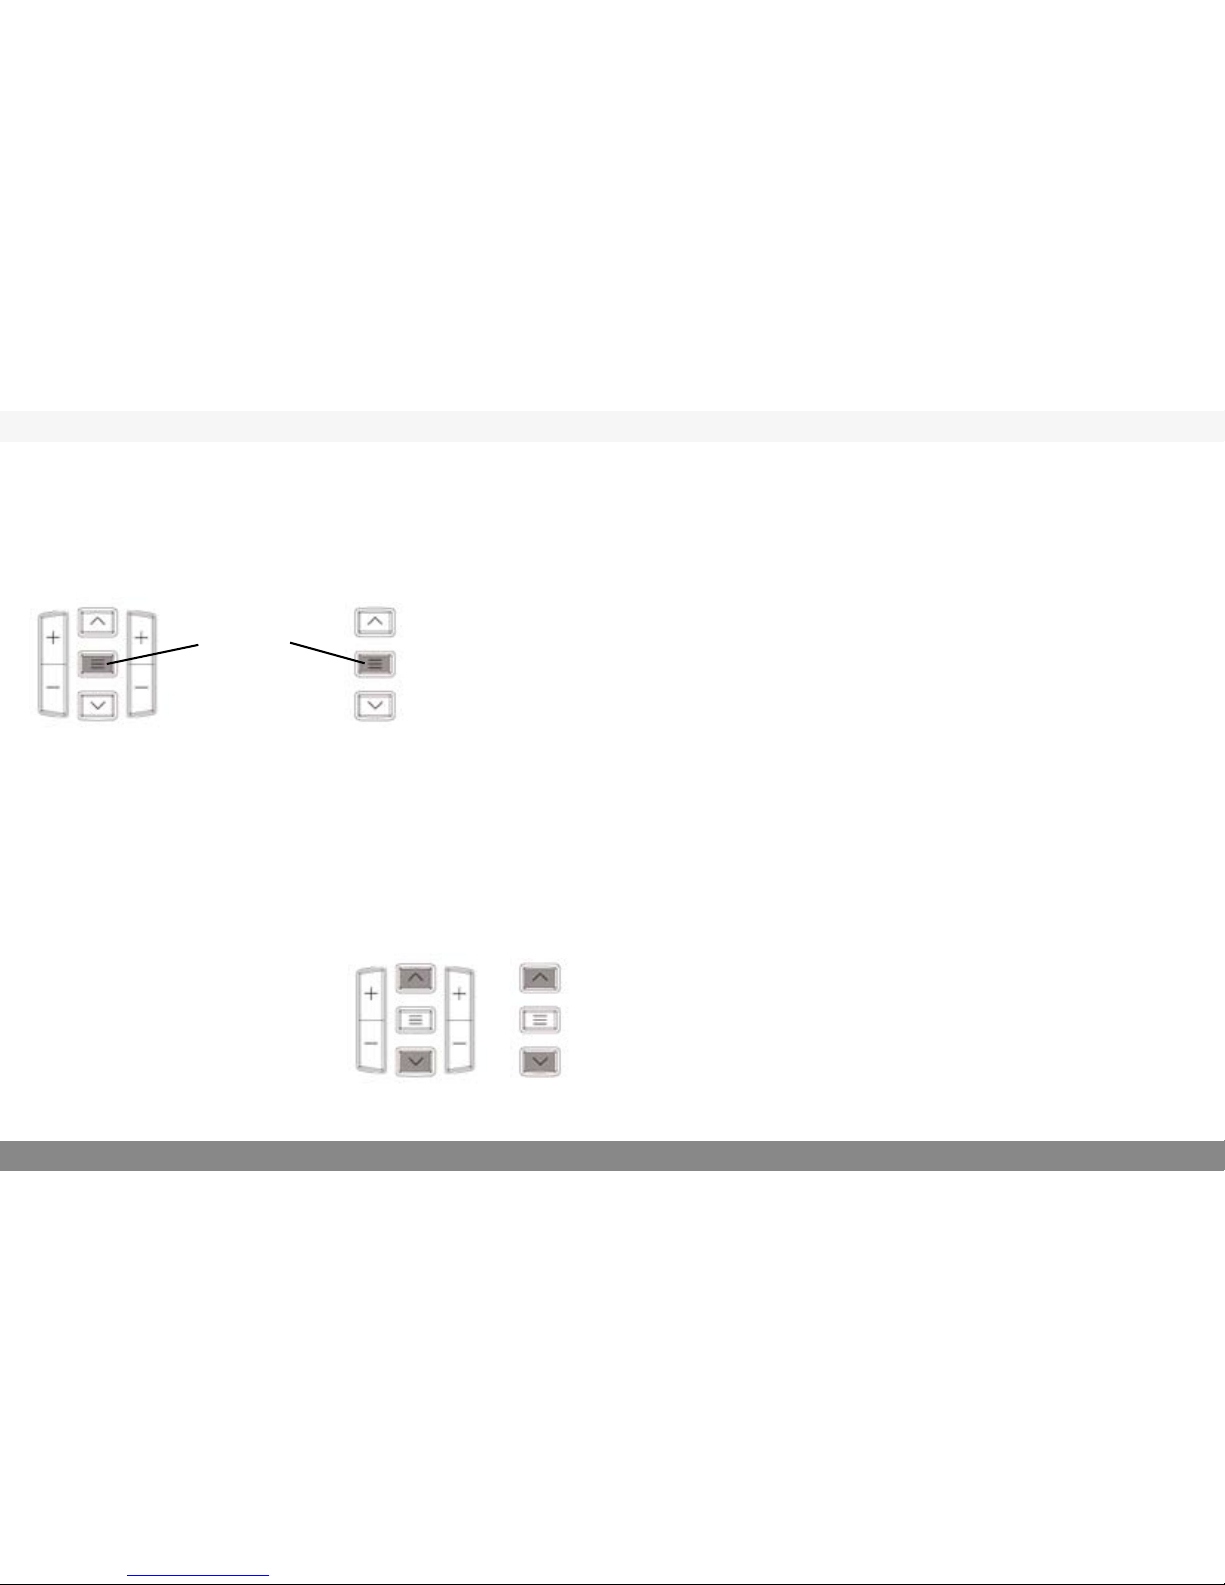
Menu Receiver and transmitter
Press and hold the Menu/OK button for a short moment to access
the menu:
Choices displayed on the transmitter:
Back
Channel
Pairing
Line in
Language
Key lock
You select the function by navigating
up or down with the arrow buttons
To make a selection, press Menu/OK
To return, also press Menu/OK
Menu/OK
Receiver Transmitter
Choices on the receiver:
Back
Pairing
Language
Key lock

18
19
R800
Contego
Display Symbols on the Receiver, Comfort Contego R800
9
9
9
9
CH:1
CH:1
Signal strength
Shows how strong the signal between the
receiver and the transmitter is.
Battery status
Shows the current battery capacity.
Key Lock
When the padlock is showing the key lock is
activated. (see page 17).
Volume transmitter
The bar display and
the number beside it
show the volume on
the transmitter.
Directional micro-
phone setting
With the directional
microphone setting
you receive a direc-
tional microphone
aimed at a limited
area.
Volume receiver
The bar display and
the number beside it
show the volume on
the receiver.
Omni-directional
microphone setting
With the omni-
directional micro-
phone setting you
can cover a larger
area.
Channel
The number shows which chan-
nel the receiver is set on. (The re-
ceiver and transmitter must be on
the same channel in order to be
able to work together.) When the
exclamation mark “!” is displayed
it means that you are transmitting
on a frequency that you must apply
for permission to use.
Transmission
Shows that there is contact
between the receiver and the
transmitter. If the receiver
and transmitter are too near
one another “Too close” is
displayed
Table des matières


