Cobra 69654 Instructions de montage

Visit our website at: http://www.harborfreight.com
WITH NIGHT VISION
Owner’s Manual & Safety Instructions
Save This Manual Keep this manual for the safety warnings and precautions, assembly,
operating, inspection, maintenance and cleaning procedures. Write the product’s serial number in the
back of the manual near the assembly diagram (or month and year of purchase if product has no number).
Keep this manual and the receipt in a safe and dry place for future reference. 22c
When unpacking, make sure that the product is intact
and undamaged. If any parts are missing or broken,
please call 1-888-866-5797 as soon as possible.
Copyright©2022 by Harbor Freight Tools®. All rights reserved.
No portion of this manual or any artwork contained herein may be reproduced in
any shape or form without the express written consent of Harbor Freight Tools.
Diagrams within this manual may not be drawn proportionally. Due to continuing
improvements, actual product may differ slightly from the product described herein.
Too ls r eq ui red f or a ss emb ly a nd s er vic e ma y no t be i ncl ud ed .
Read this material before using this product.
Failure to do so can result in serious injury.
SAVE THIS MANUAL.

Page 2 For technical questions, please call 1-888-866-5797. Item 69654
WARNING SYMBOLS AND DEFINITIONS
This is the safety alert symbol. It is used to alert you to
potential personal injury hazards. Obey all safety messages
that follow this symbol to avoid possible injury or death.
Indicates a hazardous situation which, if not avoided,
will result in death or serious injury.
Indicates a hazardous situation which, if not avoided,
could result in death or serious injury.
Indicates a hazardous situation which, if not avoided,
could result in minor or moderate injury.
Addresses practices not related to personal injury.
Important Safety Information
Read all safety warnings and instructions.
Failure to follow the warnings and instructions may result in
electric shock, fire and/or serious injury.
Save all warnings and instructions for future reference.
Installation Safety
1. Keep children and bystanders away
while installing a camera. Distractions
can cause you to lose control.
2. Do not overreach when installing
this product. Keep proper footing
and balance at all times. This enables
better control in unexpected situations.
3. Wear ANSI-approved safety
goggles during installation.
4. This product is not a toy. Mount
it out of reach of children.

Page 3For technical questions, please call 1-888-866-5797.Item 69654
Operation Safety
1. Do not operate electrically powered
products in explosive atmospheres,
such as in the presence of flammable
liquids, gases, or dust. Electrically
powered products create sparks
which may ignite the dust or fumes.
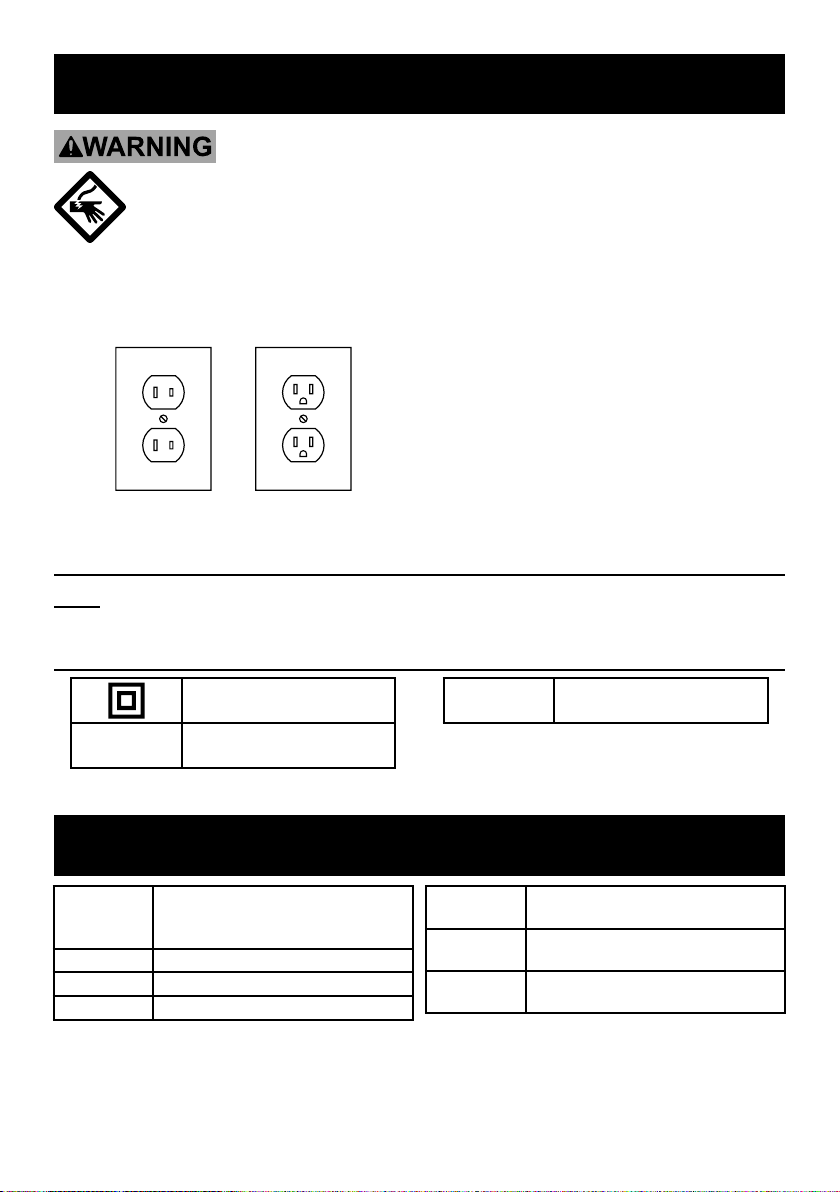
2. The adapter must match the outlet.
Never modify the plug in any way.
Unmodified plugs and matching outlets
will reduce risk of electric shock.
3. Do not expose the Power Adapter of
this product to rain or wet conditions.
Water entering the Power Adapter will
increase the risk of electric shock.
4. Do not abuse the Power Cord. Never
use the cord for unplugging the plug
from the outlet. Keep cord away
from heat, oil, sharp edges or moving
parts. Damaged or entangled cords
increase the risk of electric shock.
5. The warnings, precautions, and
instructions discussed in this instruction
manual cannot cover all possible
conditions and situations that may
occur. It must be understood by the
operator that common sense and
caution are factors which cannot
be built into this product, but must
be supplied by the operator.
Service Safety
1. Product service must be performed
only by a qualified technician.
2. When servicing a product, use
only identical replacement parts.
3. Maintain this product with care.
Keep this product clean. Do not use
a damaged product. Tag damaged
products “Do not use” until repaired.
4. Disconnect the Power Adapter
from the power source before
making any adjustments, changing
accessories, or storing this product.
Such preventive safety measures
reduce the risk of electric shock.
5. Maintain labels and nameplates
on the camera. These carry
important safety information. If
unreadable or missing, contact
Harbor Freight Tools for a replacement.
SAVE THESE INSTRUCTIONS.

Page 4 For technical questions, please call 1-888-866-5797. Item 69654
Grounding
TO PREVENT ELECTRIC SHOCK AND DEATH FROM
INCORRECT GROUNDING WIRE CONNECTION:
Check with a qualified electrician if you are in doubt as to whether the
outlet is properly grounded. Do not modify the power cord plug provided
with the camera. Never remove the grounding prong from the plug. Do not use the
camera if the power cord or plug is damaged. If damaged, have it repaired by a
service facility before use. If the plug will not fit the outlet, have a proper outlet
installed by a qualified electrician.
Figure A: Outlets for 2-Prong Plug
1. The included adapter does
not require grounding.
2. The adapter may be used in either
of the 120 volt outlets shown in the
preceding illustration. (See Figure A.)
Extension Cords
Note: Do not use an extension cord with this item’s adapter.
Symbology
Double Insulated
VAC Volts Alternating Current
AAmperes
Specifications
Power
Adapter
100-240 VAC / 50-60 Hz / 0.3A Input
6.1VDC-12VDC / 0.1-1.5A /
12W Output
Resolution 1024 x 480
Cable 80 feet
Angle 90º up and down, 360º side to side
Night Vision
Type Infrared LED’s with Low Light Sensor
Image Type Daylight: Color
Infrared: Black & White
Operating
Temperature 14 ºF to 122 ºF

Page 5For technical questions, please call 1-888-866-5797.Item 69654
Installation Instructions
Read the ENTIRE IMPORTANT SAFETY INFORMATION section
at the beginning of this manual including all text under
subheadings therein before set up or use of this product.
TO PREVENT SERIOUS INJURY FROM ELECTRIC SHOCK:
Unplug the Power Adapter from its electrical outlet before installation.
Components
Camera Camera
Phone Jack
Power
Adapter
Cable
Modular
Jack
Yellow
Video Plug
White
Audio Plug
Adapter
Jack
Black
Power Plug
Drywall
Anchors
Mounting
Screws
Before Mounting
1. Before mounting the Security Camera,
test the camera by connecting all
the cables and making sure that the
unit functions properly as described
in the following Set Up section.
2. When planning the mounting
location and angle of the Camera,
consider the following:
a. Do not mount the Camera in
bright or direct sunlight.
b. At night windows can reflect back
into the Camera, interfering with
the image. Test the Camera in the
intended location before mounting.
c. Choose a location high enough so
that it is out of reach of children
and others who might tamper
with the unit, but still covers the
desired viewing area adequately.
d. Take into consideration the length of
the cable and the need to place the
Modular Jack in a safe, dry location.
Do not expose the Modular Jack
to weather. Route the cord so
as to avoid a tripping hazard.

Page 6 For technical questions, please call 1-888-866-5797. Item 69654
Mounting
1. Adjust the Camera to the desired angle:
a. Remove adhesive pad and insert
a screwdriver (sold separately)
into the center of the Camera
Base and loosen the bolt.
b. Adjust the angle of the Camera,
then tighten the bolt.
c. Replace the adhesive pad.
Camera Base
Note: The adhesive pad can be used
instead of the screws for indoor locations.
Do not use adhesive pad to mount
outdoors, it is not weatherproof.
2. Mount the Camera to the chosen
location, using the three included
Screws through the three holes
in the Camera Base.
Camera Screws
Camera Base
WARNING! TO PREVENT
SERIOUS INJURY: Check for
hidden wiring before securing.

Page 7For technical questions, please call 1-888-866-5797.Item 69654
Cable Connection
1. Connect the Camera Phone Jack
to the Modular Jack.
Modular Jack
2. Insert the Yellow Plug of the Cable into
the Television/Monitor’s Video Input Port
(Television/Monitor sold separately).
3. Insert the White Plug of the Cable
into the Television/Monitor’s
Audio Input Port.
4. Insert the Black Plug of the Cable into
the Power Adapter’s cable connector.
5. Then, plug the Power Adapter
into the nearest 120 volt,
grounded, electrical outlet.
CAUTION! The Power Adapter MUST
be used indoors in a clean, dry location.
Camera
Television/Monitor (not included)
Power Adapter
Cable

Page 8 For technical questions, please call 1-888-866-5797. Item 69654
Operating Instructions
Read the ENTIRE IMPORTANT SAFETY INFORMATION section
at the beginning of this manual including all text under
subheadings therein before set up or use of this product.
1. Turn on the television/monitor and
set to video/AV mode. The camera’s
view should appear on the screen.
2. The Camera will operate continuously
(day and night) while the
Power Adapter is plugged in.
3. When not using the Camera, unplug the
Power Adapter from the electrical outlet.

Page 9For technical questions, please call 1-888-866-5797.Item 69654
Inspection, Maintenance, and Cleaning
Procedures not specifically explained in this manual must
be performed only by a qualified technician.
TO PREVENT SERIOUS INJURY FROM ELECTRIC SHOCK:
Unplug the Power Adapter from its electrical outlet
before inspection, maintenance, or cleaning.
1. BEFORE EACH USE, inspect the
general condition of the Camera.
Check for loose screws, misalignment
or binding of moving parts, cracked
or broken parts, damaged electrical
wiring, and any other condition
that may affect its safe operation.
If a problem occurs, have the problem
corrected before further use.
Do not use damaged equipment.
2. WEEKLY: Wipe off Camera Lens with
a soft, clean, moist cloth. Then dry.
Troubleshooting
Problem Possible Causes Probable Solutions
Camera does not work. 1. No power at outlet.
2. Cables not properly
connected.
1. Check power at outlet.
2. Check that all cables are
securely connected.
Poor image quality. Camera lens is dirty. Clean Camera lens.
View undesirable. Camera out of adjustment. Adjust Camera up, down, left, and
right to obtain desired view.
Image on the television
is upside down.
Camera not mounted correctly. Reposition camera mount to mounting holes
at the top rear of the camera (see page 8).

Page 10 For technical questions, please call 1-888-866-5797. Item 69654
Parts List and Diagram
Part Description Qty
1 Camera 1
2 Power Adapter 1
3 Cable 1
4 Screw Kit (3 screws and 3 anchors) 1
1
2
4
3
Record Product’s Serial Number Here:
Note: If product has no serial number, record month and year of purchase instead.
Note: Some parts are listed and shown for illustration purposes only, and are not available
individually as replacement parts. Specify UPC 193175459985 when ordering parts.
Table des matières
Autres manuels Cobra Caméra de sécurité


