5
Rack Installation
The SL Series are rack mountable. The rack you use should be a double door rack where you can
open the front and rear panel. When mounting the amplier into the rack, please make sure that
there is enough space around the amplier for the clear ow of cool air and the exhaust of hot air.
Be careful when mounting the amplier into the rack. Put the heaviest products into the lower part
of the rack. Be aware that fastening the amplier with four screws on the front panel is not
sufcient to absorb impact from road transit vibrations, additional support may be required.
Inputs
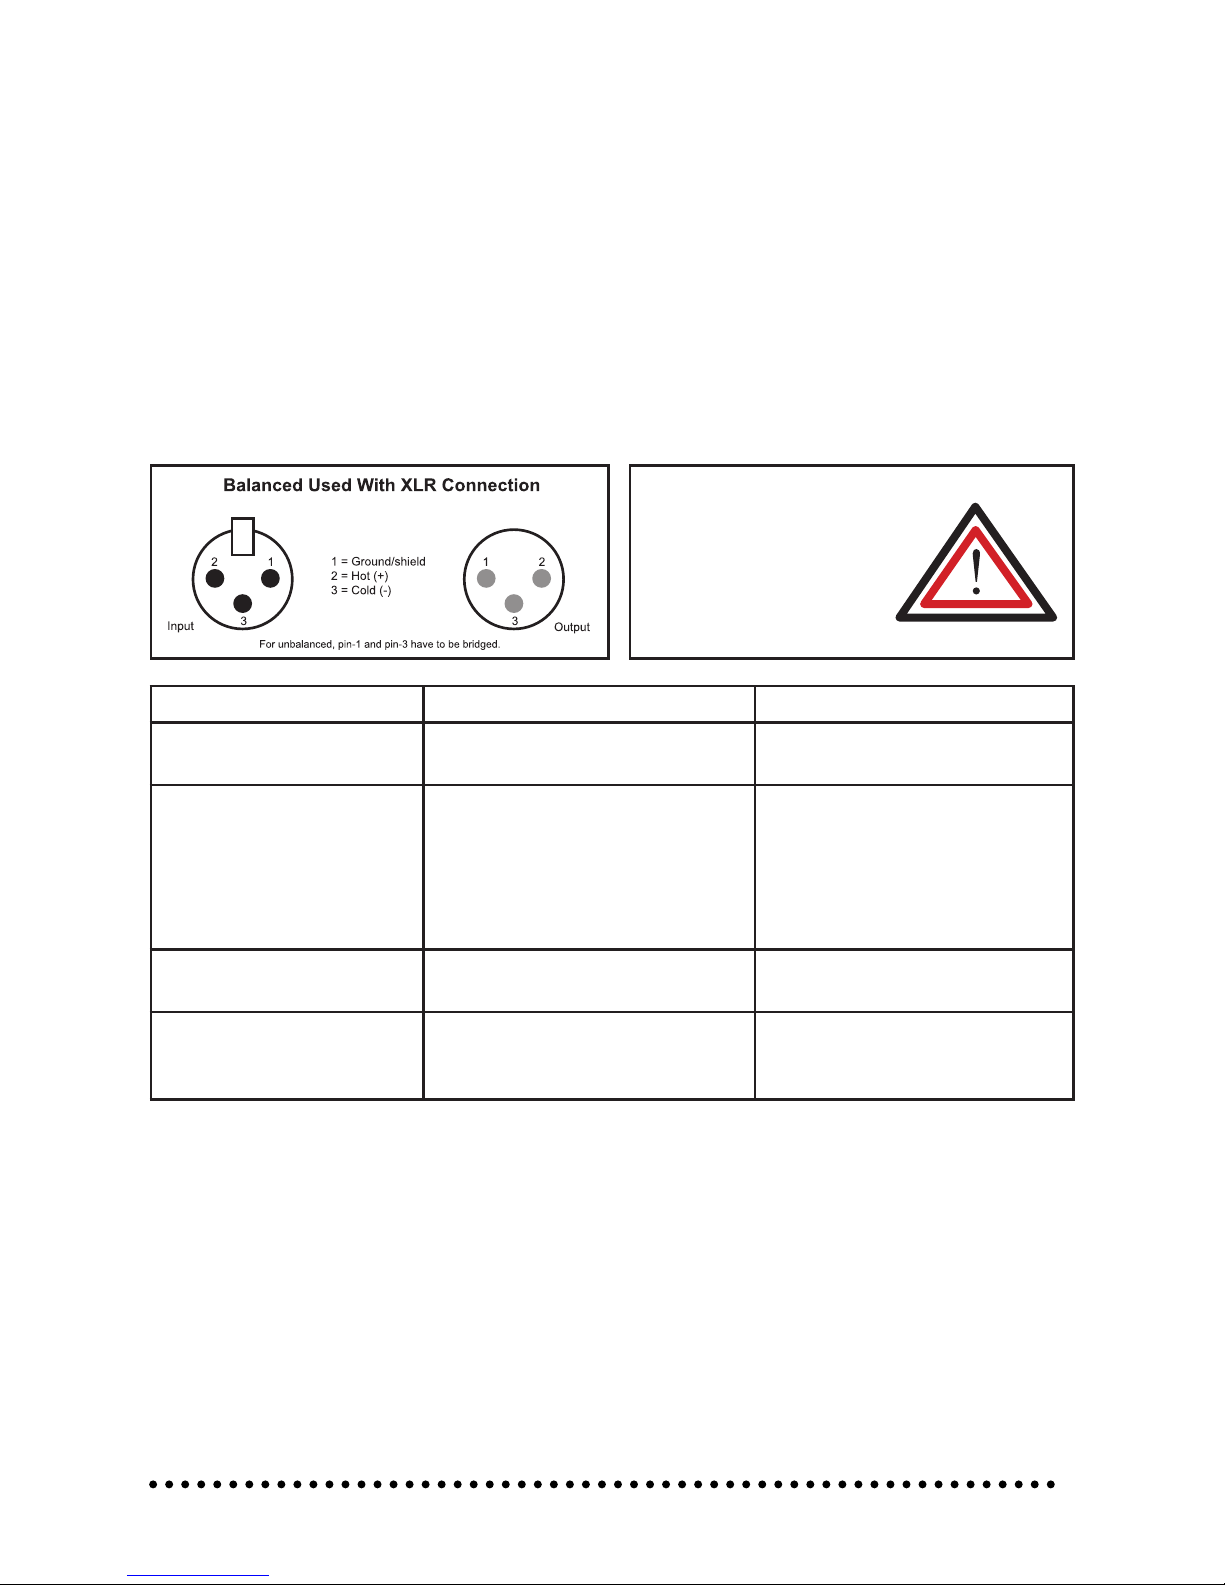
Short cables runs improve the sound quality remarkably. Input cables should be short and direct,
since high frequencies will mostly be absorbed if the cables are unnecessarily long. Besides that
a longer cable may lead to humming and noise problems. If the cable runs are unavoidable, you
should use balanced cables.
Outputs
The high damping factor of your amplier supplies a clear sound reproduction. Unnecessarily long
and thin cables used for low impedance (4-16Ω) speakers will inuence the damping factor and
thus the low frequencies in a negative way.
Identication:
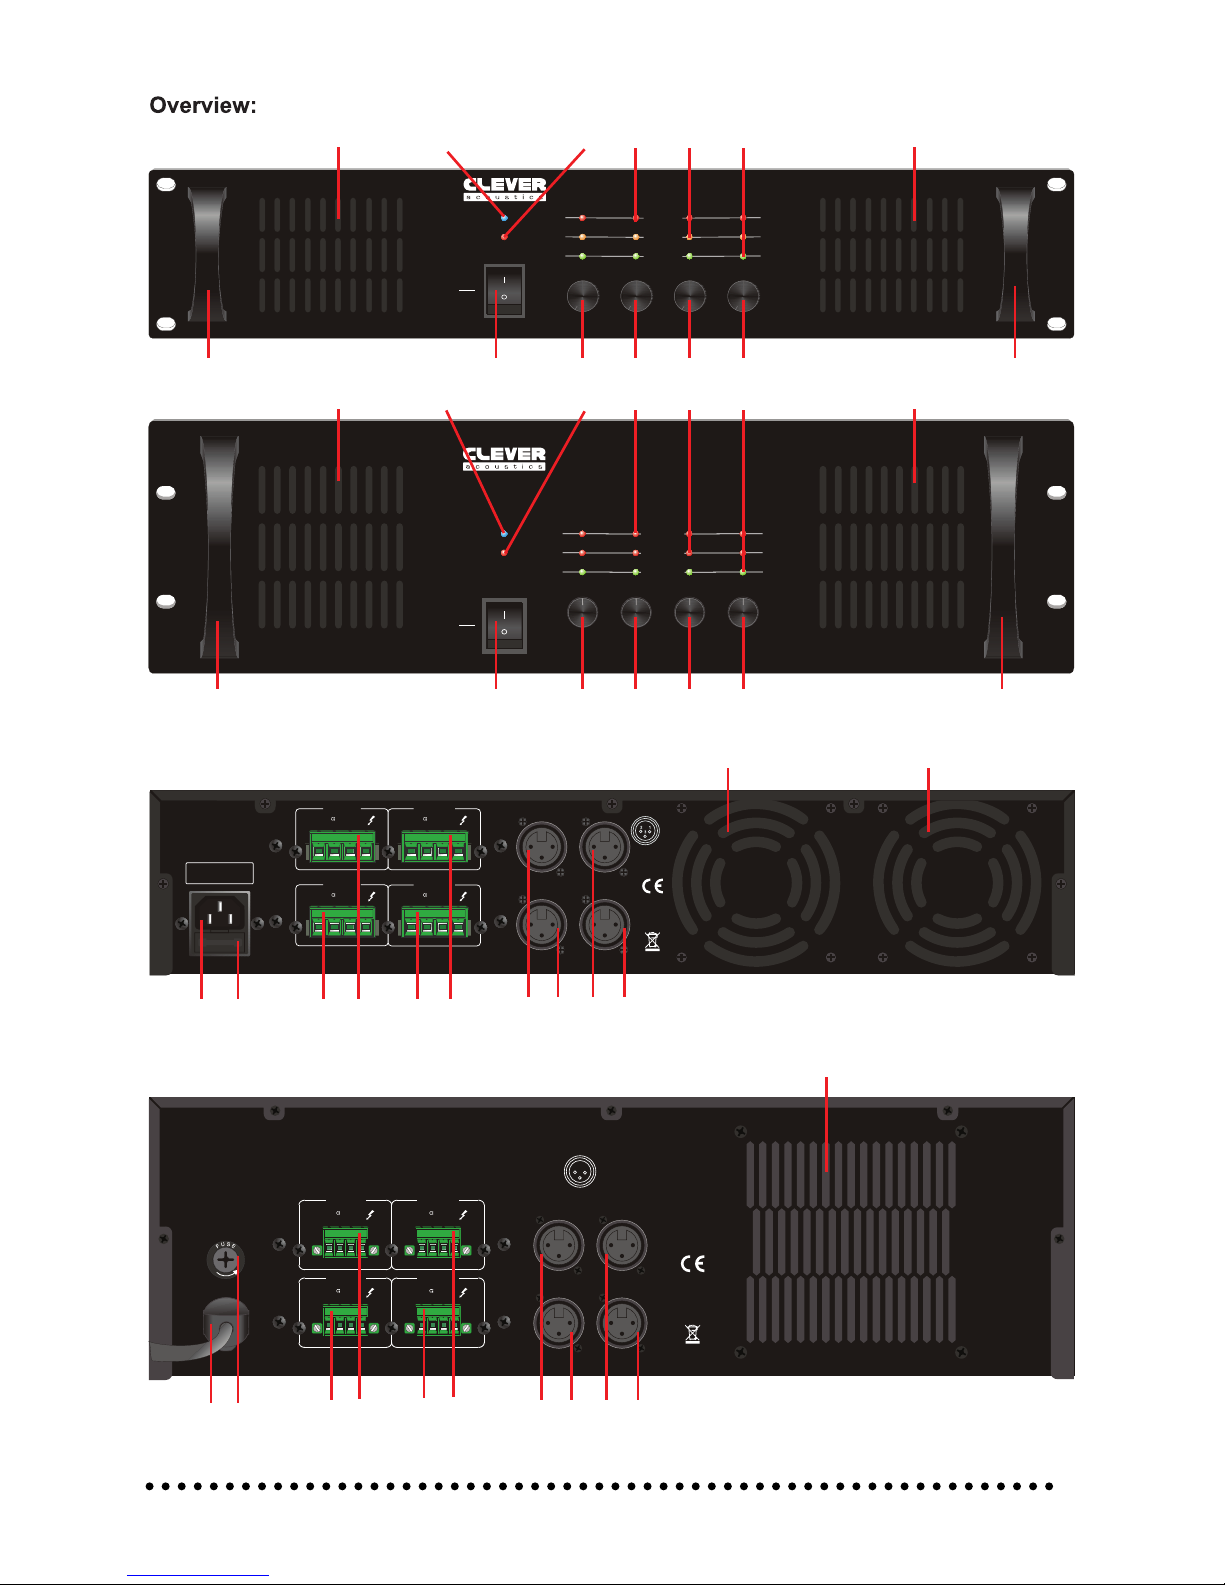
1. Power LED - This LED will illuminate once the amplier is switched on and is ready for use.
2. TEMP LED - Temperature LED will illuminate when overheating. Switch off the amplier
and leave to cool down.
3. PROT LED - This LED will illuminate when the unit goes into protect mode. Switch off the
amplier and check the output connections for faults or short circuits before powering on and
resuming operation.
4. CLIP LED - This LED will ash when the output signal starts to distort. At this point turn the
master volume anti-clockwise to prevent damage.
5. SIGNAL LED - This LED will light up when signal is being received .
6. Fan vent - Do not obstruct, keep clear of dust.
7. On/off power switch - Use the switch to power the unit on or off.
8. CH1 volume control - Use this control to increase or decrease the volume of channel 1.
9. CH2 volume control - Use this control to increase or decrease the volume of channel 2.
10. CH3 volume control - Use this control to increase or decrease the volume of channel 3.
11. CH4 volume control - Use this control to increase or decrease the volume of channel 4.
12. Carry handles
13. Fan vent - Do not obstruct, keep clear of dust.
14. Power input - 240V 50Hz.
15. Mains fuse - If the mains fuse requires replacement, use the same type and value as
originally supplied.
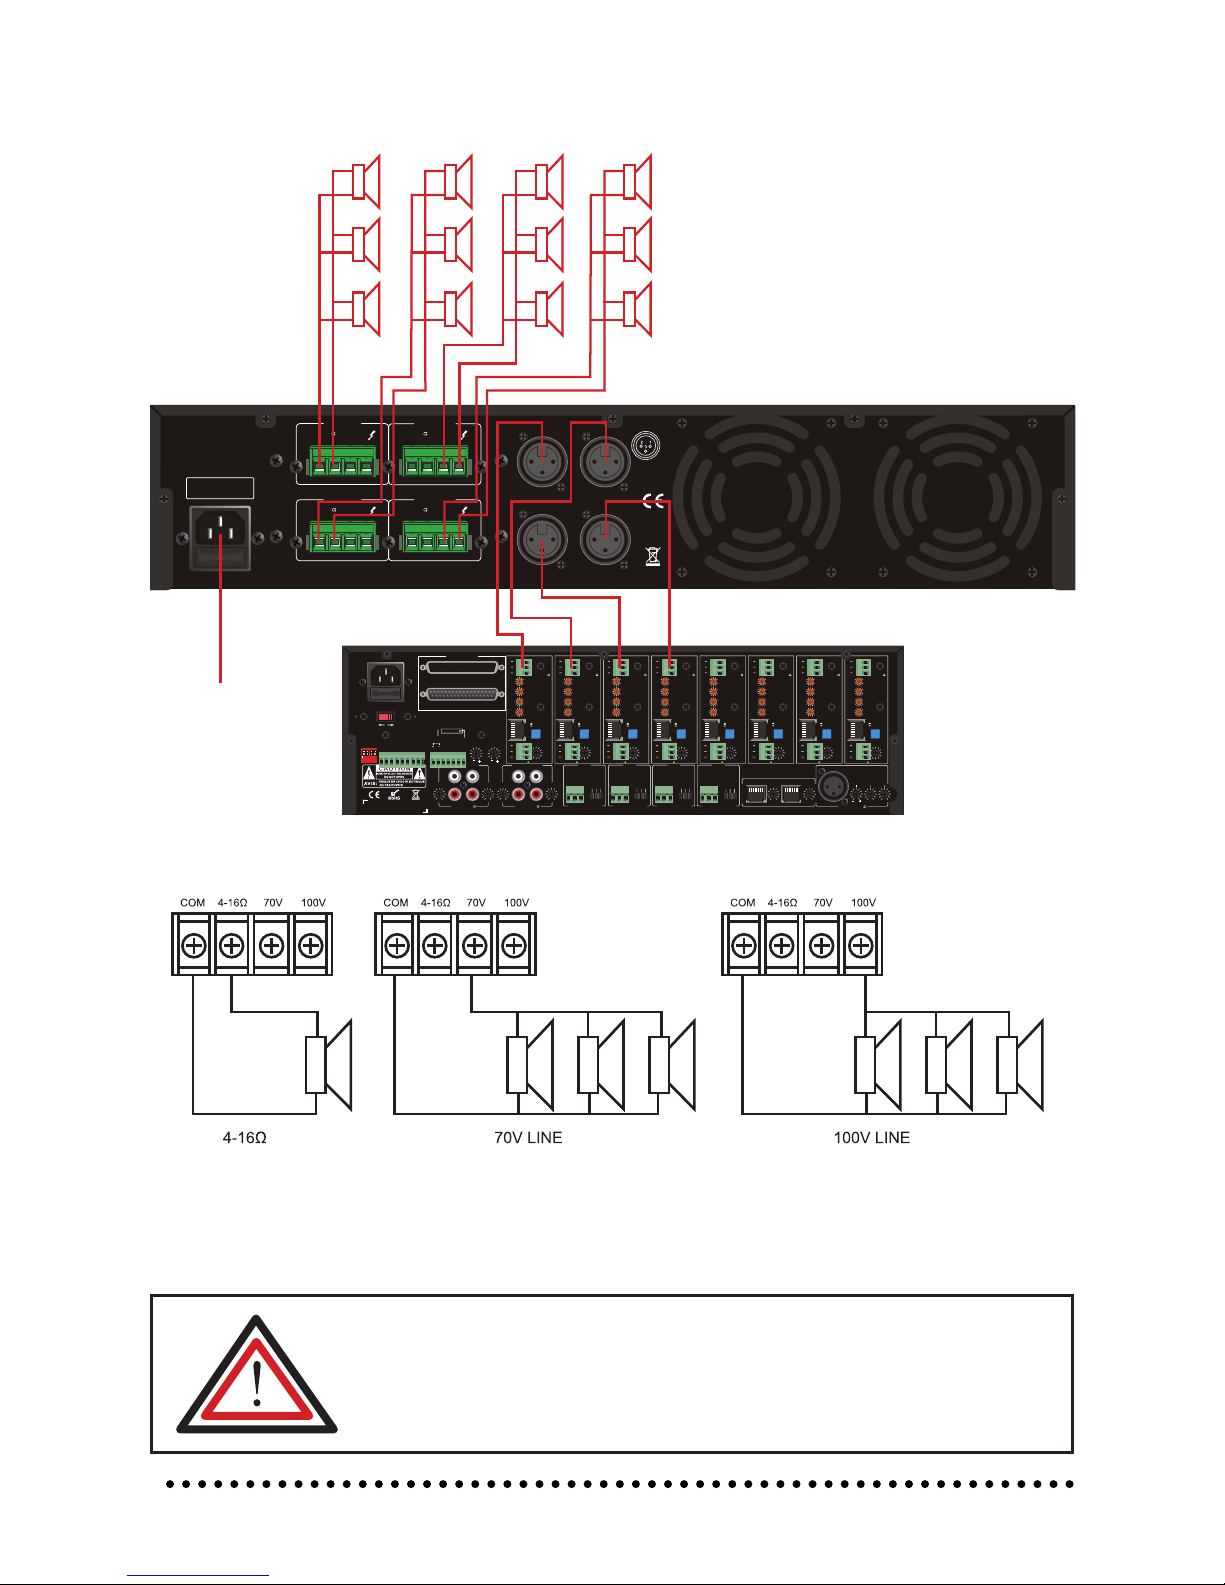
16. CH1 loudspeaker output terminals - Connectors for 4-16Ω or 70V and 100V speakers.
17. CH2 loudspeaker output terminals - Connectors for 4-16Ω or 70V and 100V speakers.
18. CH3 loudspeaker output terminals - Connectors for 4-16Ω or 70V and 100V speakers.
19. CH4 loudspeaker output terminals - Connectors for 4-16Ω or 70V and 100V speakers.
20. CH1 XLR signal input - Use this to connect signal input from mixer ampliers.
21. CH2 XLR signal input - Use this to connect signal input from mixer ampliers.
22. CH3 XLR signal input - Use this to connect signal input from mixer ampliers.
23. CH4 XLR signal input - Use this to connect signal input from mixer ampliers.