Clas Ohlson 31-9744 Manuel utilisateur
EnglishSvenskaNorskSuomiDeutsch
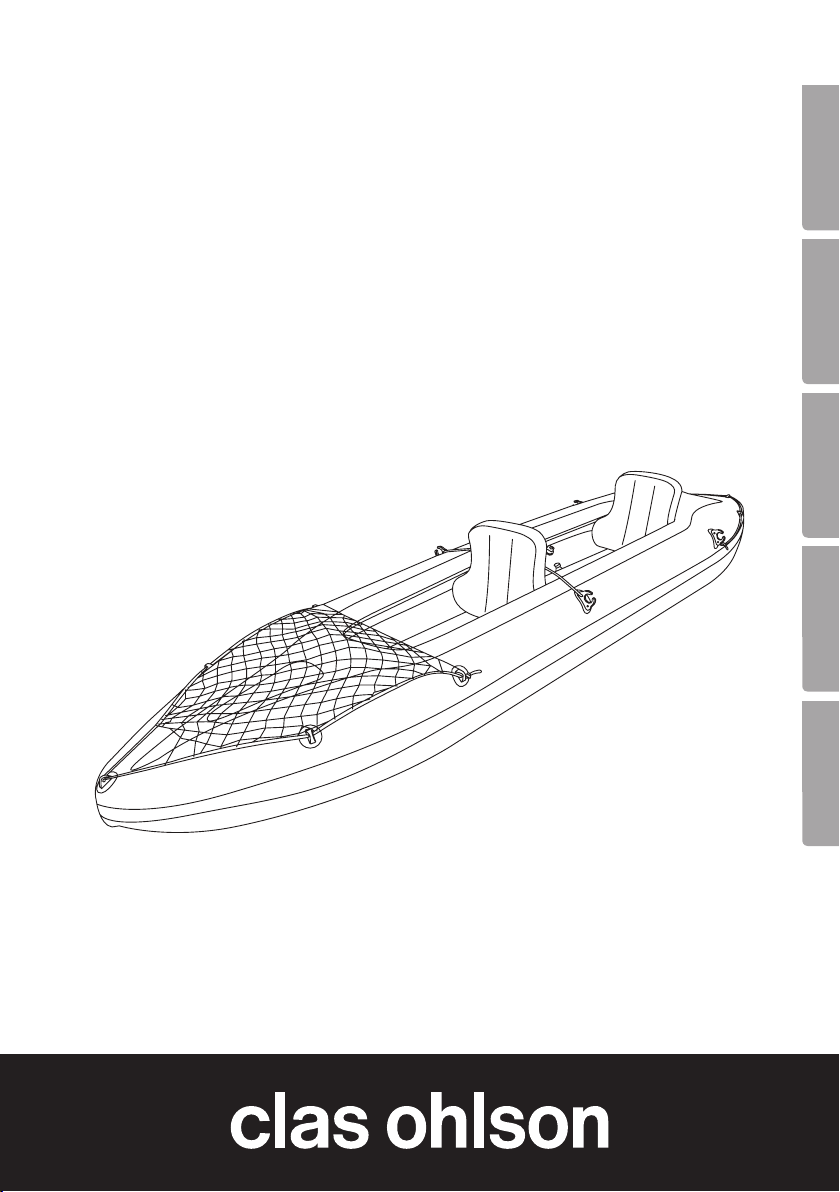
2 Person Inflatable Kayak
Kajak 2 personer
Kajakk 2 personer
Kajakki, 2 hengen
Kajak 2 Personen
Art.no
31-9744 Ver. 20190201

2

3
English
2 Person Inflatable Kayak
Art.no 31-9744
Please read theentire instruction manual before use and then save it for future reference.
We reserve theright for any errors in text or images and any necessary changes made to technical data.
In theevent of technical problems or other queries, please contact our Customer Services
(see address details on theback).
Safety
No protection
against drowning.
Max air pressure
0.05 bar.
Prohibition:
No diving. Do not use in
offshore wind.
Do not use
in offshore
current.
Do not use
in white
water.
Do not use
in breaking
waves.
Fully inflate all
chambers in
thecorrect order
1, 2, 3, etc.
Note:
Use alife jacket. Max load 160 kg. Provides floating
stability.
Theproduct
requires
balance.
Warning:
0.05 bar
max.
160 kg
100%
1
+

4
English
• Designate aperson to be responsible for safety.
• This is not alife saving device.
• Never leave theproduct in water when not in use.
• Never tow theproduct behind any kind of vehicle.
• Anadult must blow up theair chambers in numerical order. Too high apressure can cause
thechambers and/or thewelded seams to break.
• Each user is required to have alife jacket. It is particularly important that children and persons
who cannot swim wear alife jacket.
• Enter thekayak in themiddle. Be careful when you stand up and always sit for maximum stability.
• As thekayak can tip over under anunbalanced load, it is important to spread theweight of
thepassengers and any accessories evenly.
• Do not use theproduct if you suspect apuncture or leak.
• Never let children use theproduct without supervision. Make sure there is adult supervision if
children are present and if there are persons who cannot swim.
• Thetotal number of persons and total weight must not exceed thedetails specified on
therating plate of theproduct. Exceeding theload capacity constitutes a risk to safety.
• Regularly check all thesafety requirements. Never use theproduct on your own.
• Always follow thesafety instructions to avoid drowning and serious injuries.
Package contents
• 1×inflatable kayak
• 2×backrests
• 1×foot rest
• 2×paddles
- 6×tubes
- 4×blades
- 4×couplings
- 12×locking rings
• 1×cargo restraint net
• 4×painter lines (3 lengths)
• 1×foot pump
• 1×storage case
5
English
1
3
1
2
3
4
5
6
7
8
9
10
1
3
1
3
1
3
11
12
13
14
14
18
15
15
15
16
16
17
17
16
16
16
16
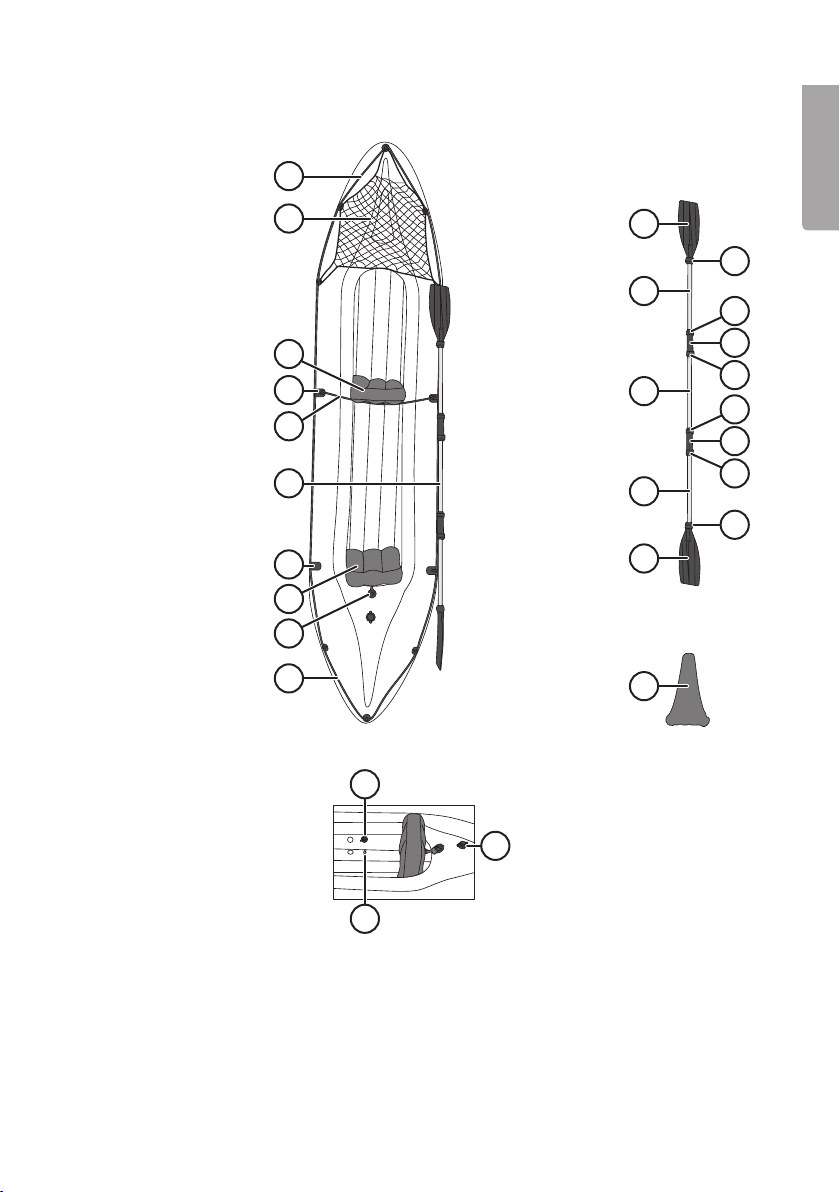
Product description
Inflatable Kayak
1. Rope
2. Cargo net
3. Back rest, front
4. Front paddle holder
and bracket for front
back rest
5. Support line for
front back rest
6. Paddle
7. Rear paddle holder
8. Back rest, rear
9. Fastening eye for
rear back rest
10. Rope
11. Valve for air chamber 1
12. Valve for air chamber 3
13. Valve for air chamber 2
14. Blade
15. Tube
16. Locking ring
17. Coupling
18. Footrest

6
English
3
1
Installation/Inflating
Preparations
• Make sure that theproduct is placed on alevel surface and that it is free from stones,
shards of glass and other sharp objects.
• Only use afoot pump or hand pump to inflate theproduct.
Note: Do not use compressed air; theproduct cannot withstand high pressures.
Inflatable Kayak
1. Roll out thekayak on aflat surface with theunderside downwards.
2. Remove thevalve cap (11)
on air chamber 1.
3. Insert thenozzle of thefoot
pump into thevalve and
pump up theair chamber.
4. Screw thecap back on.
5. Repeat steps 1−3 for
theother air chambers.
Note
Next to valves for air chambers 1 and 2 is amark to indicate
air pressure. When thedistance in theindication is 10 cm (tape
measure) thecorrect air pressure has been reached.
6. Lift thevalve (12) of air
chamber 3 and pull off
thecap.
7. Insert thelarger nozzle
of thefoot pump into
thevalve and pump up
theair chamber.
8. Press thecap firmly down
and push thevalve into
theair chamber.
7
English
Footrest
1. Roll out thefootrest on aflat surface with thevalve facing upwards.
2. Lift thevalve on thefootrest
and pull off thecap.
3. Insert thesmaller nozzle of
thefoot pump into thevalve
and pump up theair chamber.
4. Pull out thenozzle, close
thecap and push thevalve
into theair chamber.
5. Place thefootrest into
thecockpit and push
it with thetip first into
thebow of thekayak.
Backrest×2
1. Roll out thebackrest (3 and 8) on aflat surface with thevalve facing upwards.
2. Lift thevalve on
thebackrest and pull off
thecap.
3. Insert thelarger nozzle
of thefoot pump into
thevalve and pump up
theair chamber.
4. Pull out thenozzle, close
thecap and push thevalve
into theair chamber.
Important
Make sure that all thevalves are properly closed after inflation.
5. Place thefront backrest (3) in thecockpit in line with
the2 paddle holders (4) on thesides of thekayak.
Note: Thewider part of thebackrest must be pointed
downwards and thebackrest must be positioned with
thefastening eye towards thestern of thekayak.
6. Pull thesecond shortest rope through thefastening eye
on therear of thebackrest and securely tie theends of
thecord in the2 paddle holders.
8
English
7. Position therear backrest (8) furthest back in thecockpit
and fasten it securely with theshortest rope between
thefastening eye (9) of thebackrest and thestern.
Note
Thewider part of thebackrest must be pointed downwards
and thebackrest must be positioned with thefastening eye
towards thestern of thekayak.
8. Pull one of thelonger ropes through thefastening eyes in thebow and securely tie theends
to therear eyes.
9. Attach thecargo net through theeyes in thebow.
10. Pull theremaining long rope through thefastening eyes in thestern and securely tie theends
to therear paddle holders.
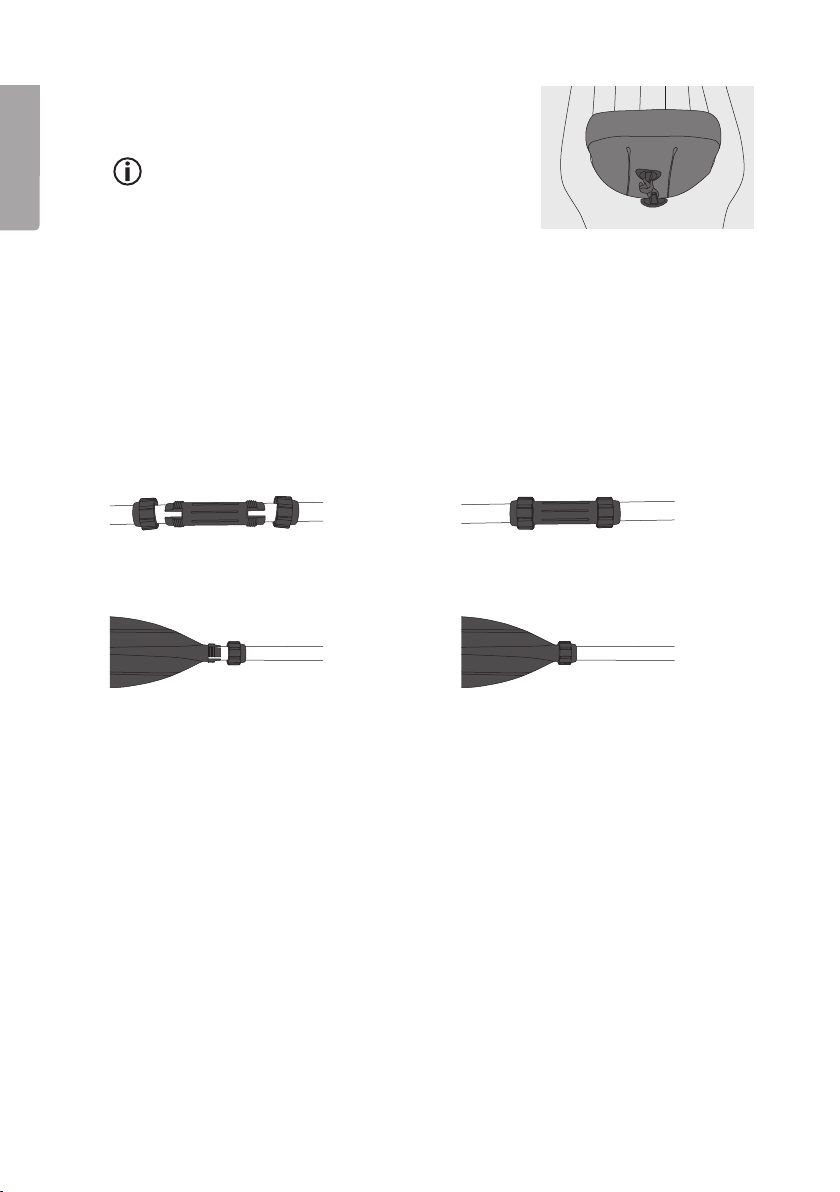
Paddle×2
1. Place thetubes (15), theblades (14), thecouplings (17) and thelocking rings (16) on aflat surface.
2. Push atube into both ends of acoupling.
Thetubes should be pushed in as far as
they can go.
3. Screw alocking ring at each end.
Tighten them to lock the tubes together.
4. Connect anadditional coupling and atube.
5. Place alocking ring onto one of
thetube ends.
6. Push theend of thetube into one of
theblades. Push it in as far as it can go.
7. Tighten thelocking ring to fasten
theblade.
8. Repeat steps 6−8 for theother end and
thepaddle is ready.
9. Repeat steps 2−8 to assemble
thesecond paddle.
To deflate
Air chambers 1 and 2
1. Remove thecap from thevalve.
Air chamber 3, backrest and footrest.
1. Remove thevalve cap.
2. Pinch the valve to open thenon-return valve.
9
English
Instructions for use
• Use thekayak in smaller streams/lakes with awind speed of max 6 m/s and awave height
of max 0.5 m.
• Wear apersonal floatation device.
• Take thefoot pump and repair kit with you on longer trips.
• Always remain seated in thekayak during atrip.
• Avoid travelling far away from land or on large, open unprotected areas.
• Do not paddle close to stones or other sharp objects. Take care that there are no stones or
sharp objects when getting in and out of thekayak.
• Watch out for bathers near beaches.
Care and maintenance
• Rinse theproduct with water and clean it if necessary with adamp cloth.
Use only mild cleaning agents, never solvents or corrosive chemicals.
• If theproduct is not to be used for along time:
- Empty all theair out of theproduct and make sure that it is clean and dry before putting
it away for storage in acool, dark place but no colder than +5°C.
- Make sure that no sharp objects or edges can damage theproduct.
- Store theaccompanying parts in theincluded bag.
Repairs
You can repair smaller holes with a repair kit, suitable for inflatable plastic products, which you can
buy in camping and hardware stores. Follow the instructions that come with the repair kit carefully.
Handy tip
Find thehole by spraying amild soap solution or spray paint on thesurface where you suspect aleak.
Troubleshooting
If it seems that air has leaked out from one day to another it does not mean that it is due to theleak.
• Make sure that all thevalves are properly tightened and closed.
• If warmer air was used to inflate theproduct than thecurrent temperature this can be
areason for thechange in pressure.
• If thevalves and thetemperature difference can be excluded, then you should look for leaks.
Spray amild soap solution over thesurfaces and look for bubbles.

10
English
Responsible disposal
Theproduct should be disposed of in accordance with local regulations.
If you are unsure how to proceed, contact your local council.
Specifications
Size 350×78×52 cm
Max load capacity 160 kg
Max number of users 2
Operating temperature −5 to 60 °C
Max air pressure 0.05 bar (0.725 psi)
Table des matières
Langues :
Autres manuels Clas Ohlson Bateau

Manuels Bateau populaires d'autres marques

Raymarine
Raymarine ST70 Instrument Manuel utilisateur

Pro-Line Boats
Pro-Line Boats Pro Line 19 Sport Manuel utilisateur

Jeanneau
Jeanneau CAP CAMARAT 8.5 CC Manuel utilisateur

Tiara Yachts
Tiara Yachts C49 2024 Manuel utilisateur

Monterey Boats
Monterey Boats Sport Yacht 330 Manuel utilisateur

J
J 105 Manuel utilisateur

PURSUIT
PURSUIT OS 335 Manuel utilisateur

Boston Whaler
Boston Whaler CONQUEST 345 Manuel utilisateur

Jeanneau
Jeanneau SUN ODYSSEY 41 DS Manuel utilisateur

Meridian
Meridian 490 Pilothouse Manuel utilisateur

Advanced Elements
Advanced Elements AdvancedFrame Expedition AE1009 Manuel utilisateur

Robo Marine Indonesia
Robo Marine Indonesia GEOMAR Manuel utilisateur


