Centrix HDVS Camera Manuel utilisateur

HDVS Camera
For Firmware release V1.0.4.*
Manual

Product name: Network Camera v3.1.0.4
Release Date: 2012/01/11
Manual Revision: V1.0.4.x

Feature Model Name
All Series
All Series
All Series
All Series
All Series
All Series
All Series
All Series
All Series
All Series
All Series
All Series
All Series
All Series
All Series
All Series
All Series
All Series
All Series
All Series
FB Series
FD Series
Vandal Dome Series
SD Card Series
Video Server Series
Bullet Series
Wireless model
Wireless model
Wireless model
(W)GP-100-CB, C2100
(W)GP-100-CB, C2100
(W)GP-100-CB, C2100
Camera
Video
Audio
Privacy Mask Control
IP Settings
UPnP
DDNS
HTTP/HTTPS
Multicast
EasyLink
Basic Settings
Advanced Settings
Wi-Fi Protected Setup
Event Settings
Motion Detection
PIR
FTP Settings
E-mail Settings
Samba Settings
HTTP Settings
Digital Output (DO)
Audio Clip(*)
Video Clip
LED Light(*)
Storage Management
Language
User Management
IP Filter
Firmware Upgrade
Configuration
Reset to Default
Reboot
System Log
Date and Time
Save File Fodler
Device Information
Live View
Camera/Video/Audio
Network
Wireless
Event
Notifications
SD Card
Maintenance
System

Table of Contents
Authentication................................................................................................................ . 5
Installing the Plug-In ....................................................................................................... 5
Live View ..................................................................................................................... ... 6
Configuration ................................................................................................................. . 8
Camera/Video/Audio ................................................................................................ 8
Camera............................................................................................................. 8
Video ............................................................................................................... 11
Audio .............................................................................................................. 13
Privacy Mask Control(*).................................................................................. 14
Network .................................................................................................................. 15
IP Settings ...................................................................................................... 15
UPnP.............................................................................................................. 16
DDNS (dynamic domain name service).......................................................... 16
Multicast ......................................................................................................... 19
EasyLinkTM ..................................................................................................... 20
Wireless(*).............................................................................................................. 21
Basic Settings................................................................................................. 21
Advanced Settings ......................................................................................... 24
Wi-Fi Protected Setup .................................................................................... 24
Event Settings ................................................................................................ 25
Motion Detection ............................................................................................ 28
Digital Input (DI)(*).......................................................................................... 29
PIR(*).............................................................................................................. 29
Notifications............................................................................................................ 30
FTP Settings................................................................................................... 30
E-mail Settings ............................................................................................... 30
Samba Settings .............................................................................................. 31
HTTP Settings ................................................................................................ 31
Digital Output (DO) (*) .................................................................................... 32
Audio Clip(*) ................................................................................................... 32
Video Clip ....................................................................................................... 33
LED Light (*)................................................................................................... 34
SD Card.................................................................................................................. 35
Storage Management (*) ................................................................................ 35
Maintenance........................................................................................................... 36
Language ....................................................................................................... 36
User Management.......................................................................................... 36
IP Filter........................................................................................................... 37
Firmware Upgrade.......................................................................................... 37
Configuration .................................................................................................. 38
Reset to Default.............................................................................................. 39
Reboot............................................................................................................ 39
System ................................................................................................................... 40
System Log .................................................................................................... 40
Date and Time................................................................................................ 40
Save File Folder ............................................................................................. 41
Device Information........................................................................................................ 42
5
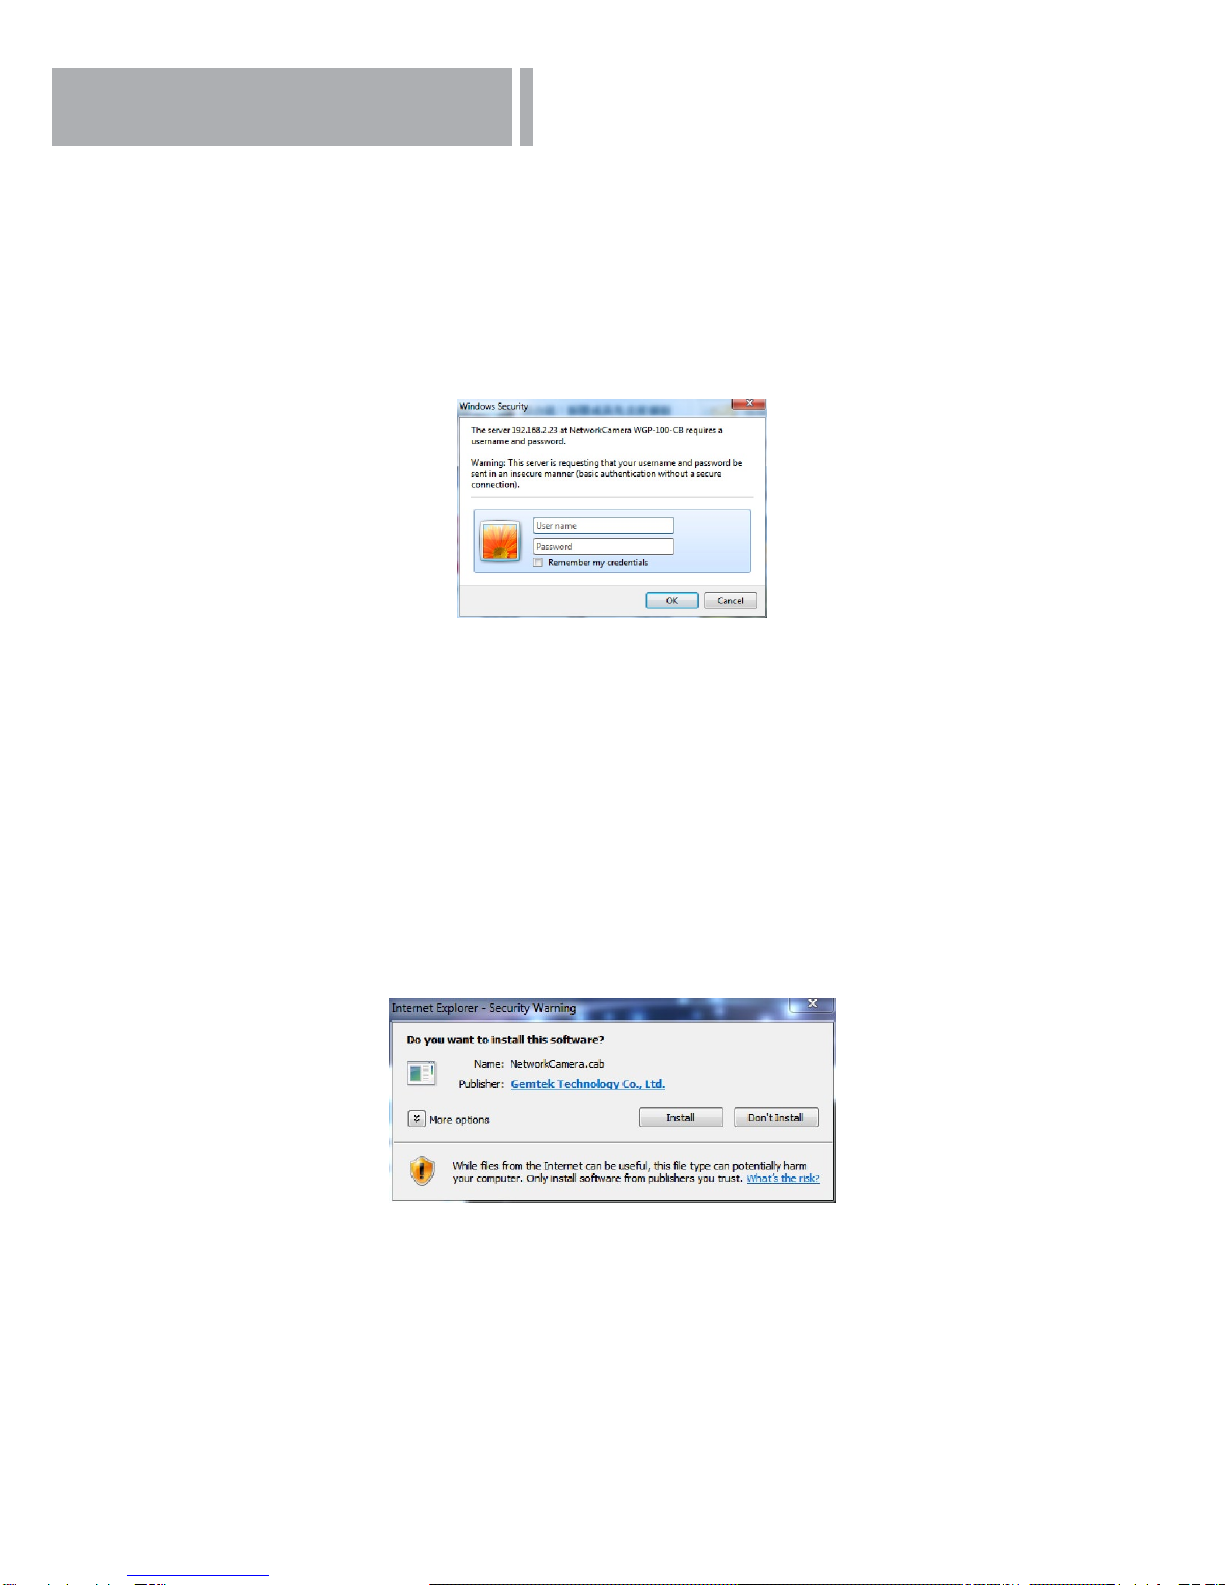
Authentication
To access the camera’s live view, open a web browser and enter the IP address of the camera.
A dialog window will pop requesting a username and password. As stated on the previous page,
for the default username and password for the Administrator are assigned as “admin/admin”.
For accounts other than the administrator’s account, the user can choose to remember the
password for future convenience. It is not recommended to check this box when viewing the
camera feed from a public computer.
NOTE – If an error occurred or the plug-in fails to install, it is because the version of the Electronic
Signature is newly released and the VeriSign has not been submitted to Microsoft Windows update
for validation. Therefore, plug-in will not have its root certicate. If IE discovers that there is no root
certicate after the user’s PC connects to the camera, it will automatically redirect to VeriSign Web
site to download and install the latest root certicate to make the installation successfully. If the
user’s computer is able to connect to camera but unable to access the internet, then the installation
will fail because the computer will not be able to download the latest root certicate. This problem
can be resolved if computer can be connect to the internet and the camera at the same time and will
not recur when Windows update patches become available.
Installing the Plug-In
For the initial access to the camera in Windows, the web browser may prompt the administrator
for permission to install a new plug-in for on Internet Explorer. Permission request depends on
the Internet security settings of the user’s PC or notebook. If the highest security level is set, the
computer may prohibit any installation and execution attempt. This plug-in has been registered for
certicate and is used to display the video in the browser. Click on install to proceed. If the web
browser does not allow the administrator to continue the installation, check the Internet security
option and lower the security levels or contact the networking supervisor or IT for help.

6
Live View
NOTE - (*) These are optional features. Please refer to the Product List for the full list of optional
features available for the product.
Live View is the default page that opens when accessing the camera. Live video is displayed directly
in the browser window.
•Stream1~2 Channels
The network camera offers simultaneous several streams for optimized quality and bandwidth.
Go to Conguration → Camera/Video/Audio → Video to congure the codec compression and
video resolution or refer to the Video conguration page.
•HTTP/TCP/UDP protocol
HTTP – This unicast method can be used to traverse rewalls. Firewalls are commonly congured
to allow the HTTP protocol, thus allowing RTP to be tunneled.
TCP - This protocol guarantees the complete delivery of streaming data and provides better
video quality. The downside of using this protocol is that the quality of its real-time effect is less
than that of the UDP protocol.
UDP - This protocol allows for more real-time audio and video streams. However, network packets
may be lost due to network burst trafc and images may be broken. Activate UDP connection
time-sensitive responses are more important than video quality.
LED Control(CB-series Professional only) – Use the drop-down menu to adjust the brightness
of the camera’s LED.
Recording on/off - Displays the status of recording video
MIC on/off - Displays the status of the MIC volume
Speaker on/off - Displays the status of the Speaker
MD on/off - Displays the status of Motion Detection

7
•Brightness - Drag the slider bar to adjust the image brightness level.
•Mic volume - Drag the slider bar to adjust the microphone volume.
•Speaker volume - The built-in speaker will play sound from an audio clip from the computer
microphone when it is enabled.
•Play or Stop - Play or stop the video.
•Recording - Record video to a computer.
•Snapshot - Capture and save still images.
•Digital Zoom - Enable the digital zoom operation.
• Mirror - Horizontally reect the display of the live video.
• Flip - Vertically reect the display of the live video.
•Real Size - View the object in real size. Press it again to switch back to normal mode.
•Full Screen - Switch to full screen mode. Press the “Esc” key to return to normal mode.
•Motion Detection - Enable the motion detection alert function.
•Mute – Turn off the sound.
•Talk(*) – To communicate through the camera using the computer MIC.
•Set Default – Reset to default settings.
NOTE
1. The <Camera Control Panel> functions have no effect on the recorded video. Whatever changes
are made to the <Camera Control Panel> will not be applied to the recorded video.
8
Conguration
Click <Conguration> on the main page to change the camera settings pages.
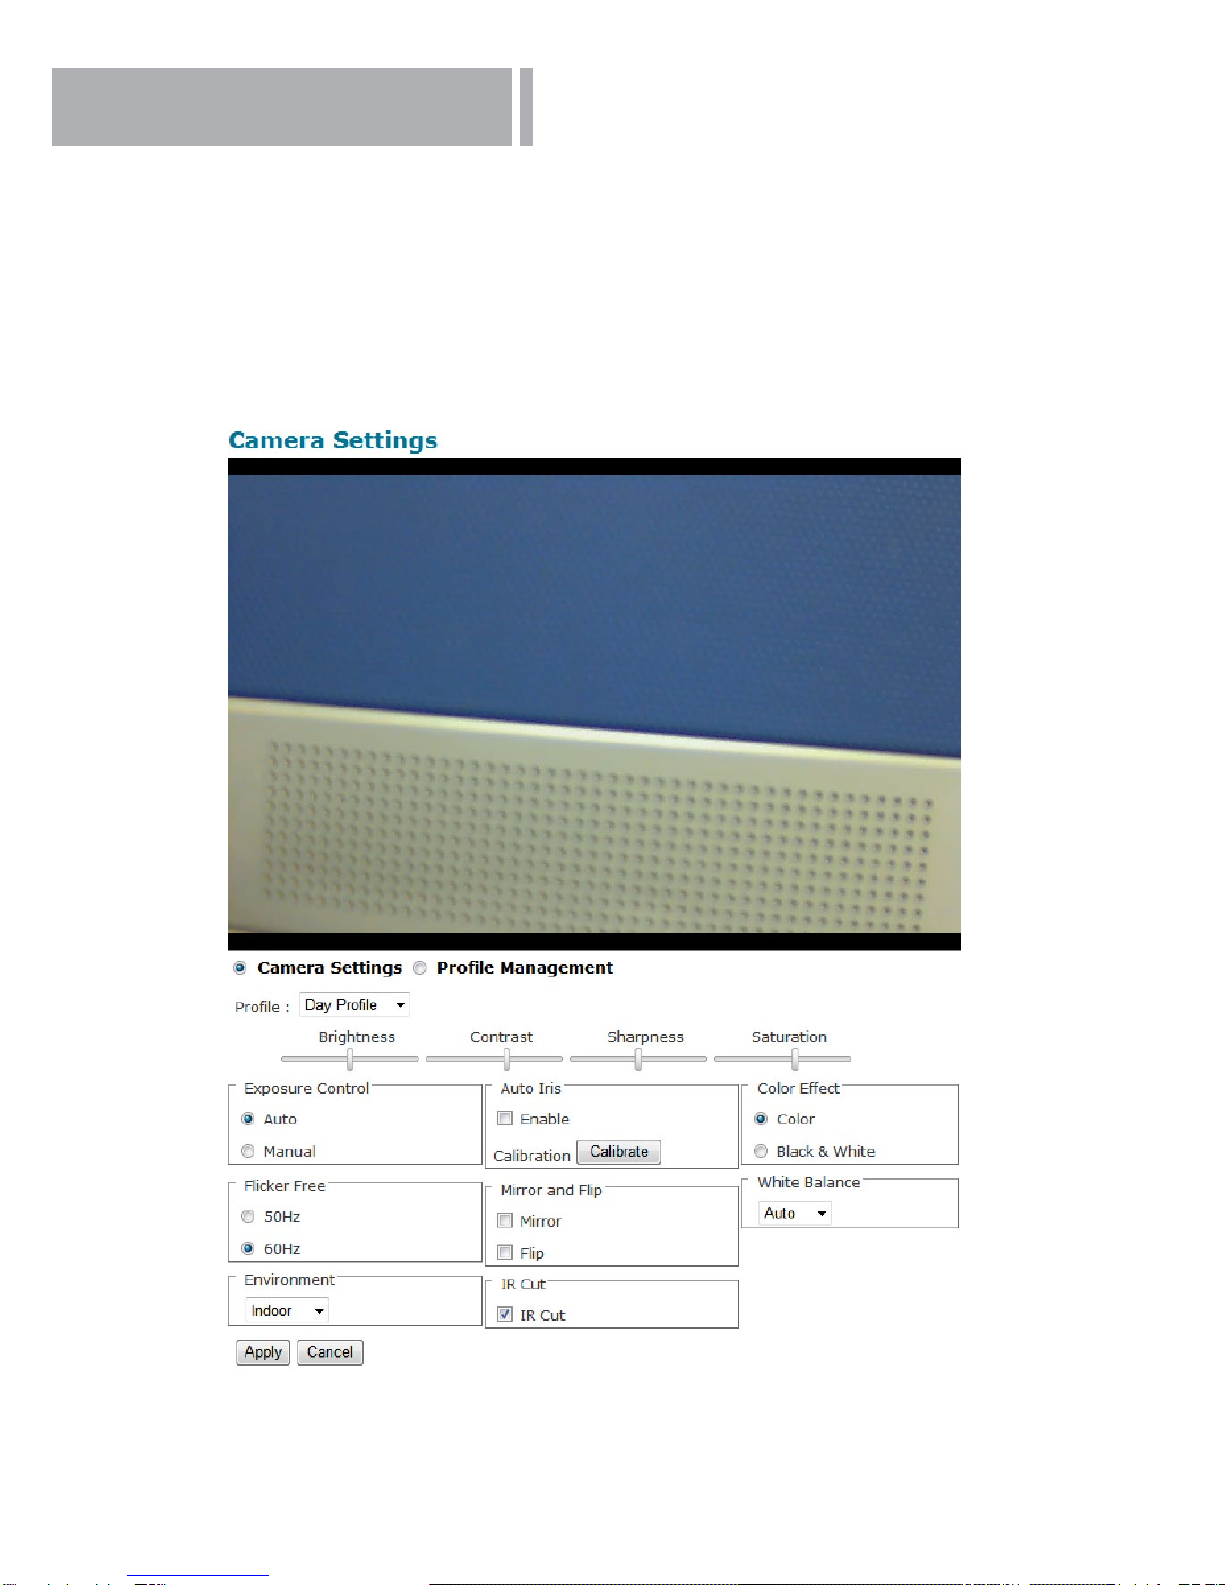
Camera/Video/Audio
Camera
* NOTE - Only Administrators can access the Conguration page
Prole – Up to ve proles can be created for different lighting environments. Day and night
are default proles and users can create up to three additional proles. Select a prole from the
drop-down menu or select different icons to change prole settings.

9
Brightness - Drag the bar to adjust the image brightness level from -5 to +5.
Contrast - Drag the bar to adjust the image contrast level from -5 to +5.
Sharpness - Drag the bar to adjust the image sharpness level from -5 to +5.
Saturation - Drag the bar to adjust the image saturation level from -5 to +5.
Exposure Control
Auto: The camera will automatically control exposure.
Manual: Select this option to dene the exposure manually
Flicker-Free – Eliminates the problem of icker.
Mirror and Flip
Mirror - Enable to horizontally reect the display of the live video.
Flip - Enable to vertically reect the display of the live video.
Environment –Select outdoor or indoor mode based on the conditions.
IR Cut (*) (Only available with models with a IR Cut) – Deactivate or activate the IR cut lter
Color Effect - Select to display color or black and white video streams.
White Balance - White balance is a camera setting that adjusts for lighting in order to make Black
& white.
Prole Management: Proles can be scheduled to change at scheduled times or under different
lightening changes.
Always- Select Always to use a single prole. Select the prole from the drop down menu.

10
Day & Night (*) (Only available with models with a light sensor Mode) - Select Day & Night to schedule
two proles for day and night. Select proles from the drop down menu for the Day and Night Proles.
Digital Inputs (*) (Only available with models with a DI terminal) - Select Digital Input to have the prole
management controlled by an external sensor. Select proles from the drop down menu. Proles will
change according to different trigger voltage levels.
Click Apply to apply settings or Cancel to cancel changes.
Schedule – Select Schedule to schedule specic time periods for different proles.
Ce manuel convient aux modèles suivants
3
Table des matières
Autres manuels Centrix Caméra de sécurité


