Casera TR-06Q Manuel utilisateur

47L Bar Fridge
Instruction Manual
Model number: TR-06Q
After sales support AU: 1300 886 649 NZ: 0800 836 761
N13275


Contents
General Safety Instructions 1
Parts and features 4
Getting started 5
Operating Instructions 8
FAQ’s 9
Other useful information 10
Specifications 12

1
2
Your safety and the safety of others is very important.
We have provided many important safety messages in this manual and on your appliance.
Always read and obey all safety messages.
This is the Safety Alert Symbol. This symbol alerts you to potential hazards that can
kill or injure you and others. All safety messages will follow the Safety Alert Symbol and
either the words “DANGER”, “WARNING” or “CAUTION”.
Danger means that failure to heed this safety statement
may result in severe personal injury or death.
Warning means that failure to heed this safety
statement may result in extensive product damage,
serious personal injury, or death.
Caution means that failure to heed this safety
statement may result in minor or moderate personal
injury, or property or equipment damage.
Caution: Flammable Gas means that there is a risk of
fire as the appliance contains a flammable refrigerant.
All safety messages will alert you to what the potential hazard is, tell you how to reduce the chance
of injury, and let you know what can happen if the instructions are not followed.
General Safety Instructions
CAUTION:
Flammable Gas

1
2
Always follow basic safety precautions and accident prevention measures when using an electrical
appliance, including the following:
Electrical safety
• Plug the bar fridge into a 220-240V, 50Hz, 3-prong power outlet that is properly earthed
to the ground in accordance with Australian standards and local codes. Do not remove the
grounding prong. If unsure, consult a qualified technician. Improper use of the grounded plug
can result in the risk of electric shock.
• The outlet voltage and circuit frequency must correspond to the voltage stated on the
appliance rating label.
• Do not use an adaptor; do not use an extension cord.
• We strongly recommend you connect the bar fridge to a separate circuit serving only this
appliance. This provides the best performance and also prevents overloading the house wiring
circuits that could cause a fire hazard from overheating.
• Use a power point that cannot easily be turned off accidentally by a switch or pull chain.
• Do not kink, pinch or damage the power cord. Position the cord out of the way so no one steps
on or places anything on the cord or against it. Secure the cord behind the unit so it is not left
exposed or dangling to prevent accidental injury.
• Do not use a cord that shows cracks or abrasion damage along its length or at either end. If
the supply cord is damaged, it must be replaced by the manufacturer or its service agent.
Contact the after sales support line.
• Never unplug the unit by pulling the power cord; always grip the plug firmly and pull straight
out from the socket.
• Any electrical work required for the installation of this appliance should be carried out by a
qualified electrician.
Cleaning and maintenance
• Unplug the bar fridge or disconnect the power before cleaning or servicing. Failure to do so
can result in electric shock, injury or death. Do not connect or disconnect the electric plug
with wet hands.
• Never clean this appliance with flammable fluids. Do not store or use petrol or other
flammable vapours or liquids in the vicinity of this or any other appliance. The fumes can
create a fire hazard or explosion.
• Do not use solvent based or abrasive cleaning agents.

3
4
• Do not use mechanical devices or other means to accelerate the defrosting process. Never use
a sharp or metal instrument to remove frost as it may damage the cooling system and will void
the warranty. We recommend using a plastic scraper.
• Do not attempt to repair or replace any part of the bar fridge unless it is specifically
recommended in this manual. Refer all other servicing to a qualified technician, or contact the
after sales support line for advice on repair or replacement.
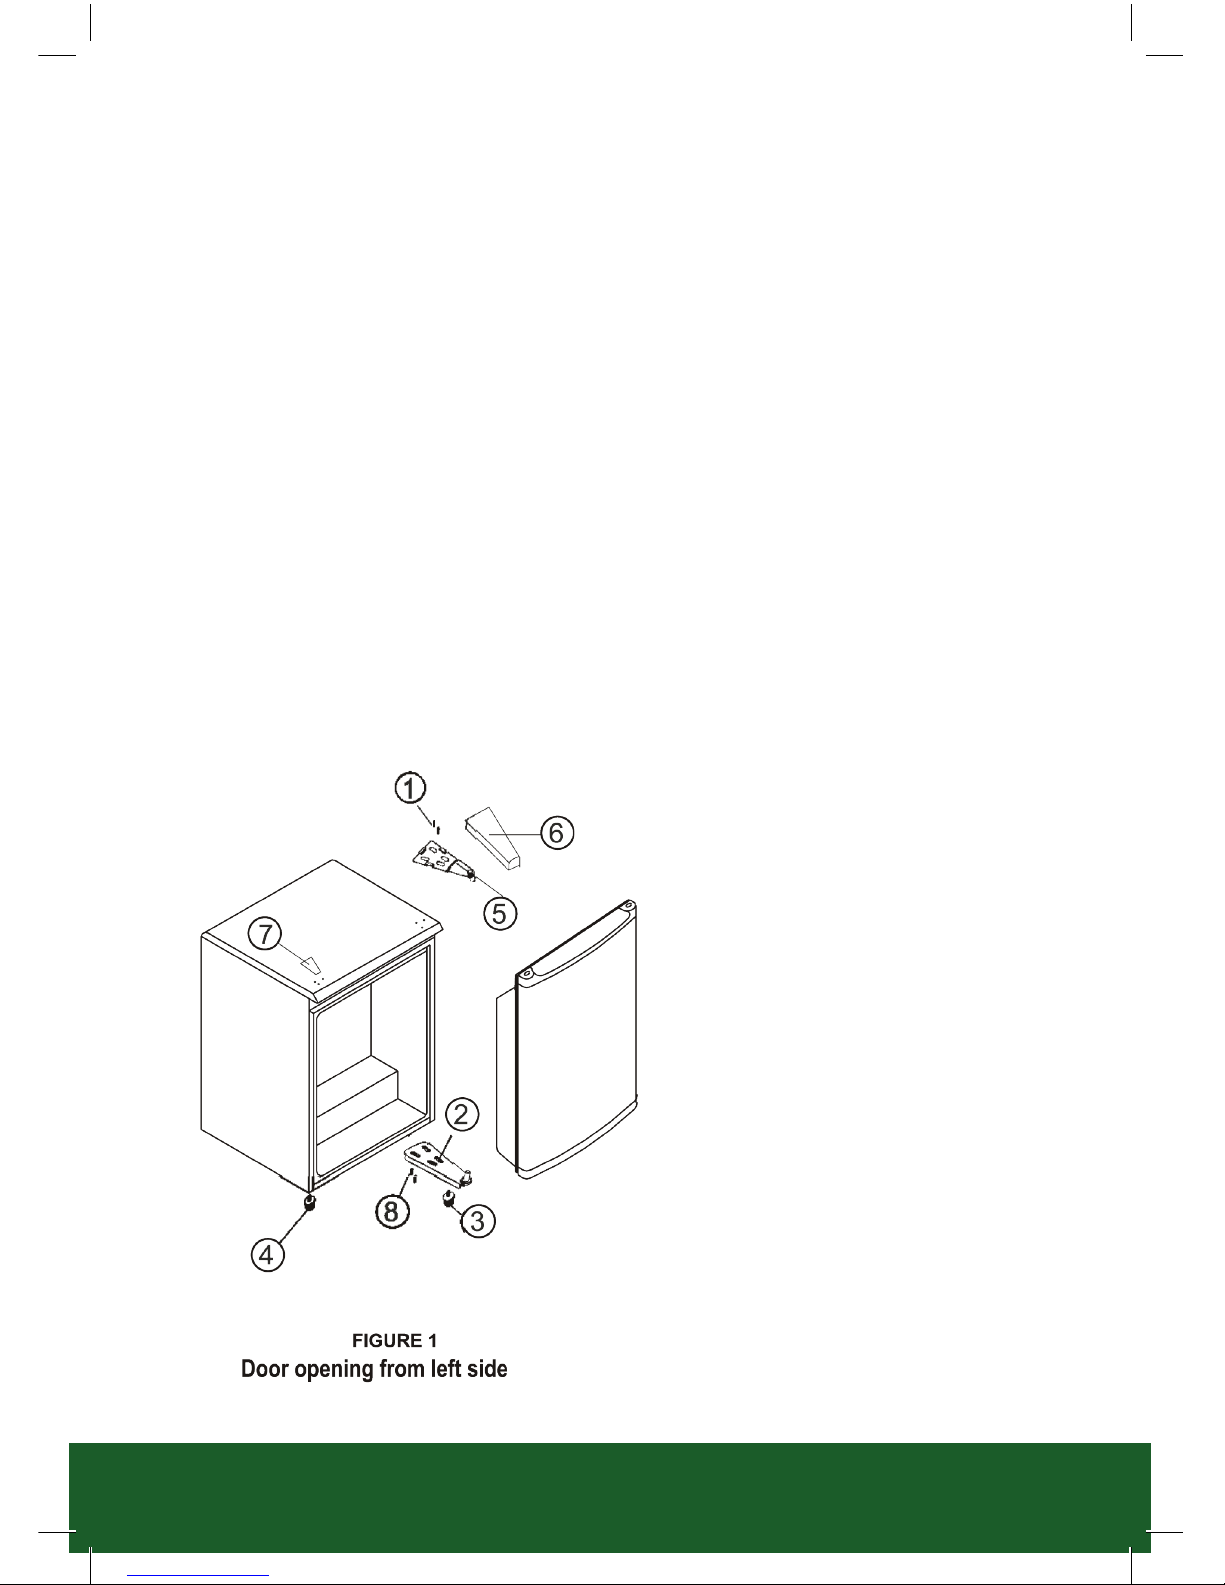
Installation
• This appliance is heavy, take care when moving it. Use two or more people to move and install
the bar fridge. Failure to do so can result in back or other injury.
• Install the appliance in an area protected from elements such as wind, rain, water spray or
drips. Do not install it next to an oven, grill or other source of high heat.
• To ensure proper ventilation for your bar fridge, the front of the unit must be completely
unobstructed. Keep any ventilation openings in the appliance enclosure or in the built-in
structure clear of obstructions.
• Choose a well ventilated area with temperatures above 16˚C and below 32˚C.
• Do not damage the refrigerant circuit.
• The appliance must be installed level in order to ensure it works properly.
• Make certain that the pipes are not pinched, kinked or damaged during installations. Check for
leaks after connection.
Usage conditions and restrictions
• The refrigerator must be installed with all electrical, water and drain connections in accordance
with state and local codes.
• Do not use this appliance for any other than its intended purpose.
• Do not attempt to alter or modify this appliance in any way.
• Do not use electrical type appliances inside the food storage compartments of the appliance,
unless they are of the type recommended by the manufacturer.
• The appliance is not intended for use by persons (including children) with reduced physical, sensory or
mental capabilities, or lack of experience and knowledge, unless they have been given supervision or
instruction concerning use of the appliance by a person responsible for their safety.
• Children should be supervised to ensure that they do not operate, play with or crawl into the appliance.
General Safety Instructions continued

3
4
1. Temperature control knob
2. Chiller compartment
(including the ice tray)
3. Drip tray
4. Removable shelf
5. Levelling legs
6. Dairy compartment
7. Bottle rack
NOTE: The storage containers shown are only for illustrative purposes,
and not included with the purchased product.
Responsible disposal
• At the end of its working life, observe any local regulations regarding the disposal of electrical
consumer goods and dispose of the appliance appropriately for recycling and recovery of the
refrigerant. Contact your local authorities for advice on recycling facilities in your area.
• Before discarding your bar fridge, disconnect it from the power supply and cut off and render
any plug useless.
WARNING! Risk of child entrapment! Remove the door and leave the shelves in place so that
children cannot easily climb inside.
Parts and features
5
1
6
7
2
43

5
6
Before using the bar fridge
• Remove all packaging materials from around and inside the appliance and dispose of them
responsibly. Plastic wrapping can be a suffocation hazard for babies and young children, so
ensure all packaging materials are out of their reach.
• Check to ensure you have all of the following parts:
1 x Drip tray
1 x Shelf
1 x Ice tray
• Before connecting the unit to the power source, let it stand upright for approximately two
hours. This will reduce the possibility of a malfunction in the cooling system from handling
during transportation.
• Clean the interior surface with lukewarm water using a soft cloth.
Installing the bar fridge
• This appliance is designed to be freestanding only and should not be recessed or built-in.
• Place the bar fridge on a floor that is strong enough to support it when it is fully loaded. To
level the fridge, adjust the levelling feet at the bottom of the fridge.
• Leave a 10–15cm clearance between the back and sides of the fridge and any wall or other
appliance, which allows proper air circulation to cool the compressor and condenser.
• Locate the unit away from direct sunlight and sources of heat (stove, heater, radiator,
etc.). Direct sunlight may affect the acrylic coating and heat sources may increase power
consumption. Extreme cold ambient temperatures may also affect fridge performance.
• Avoid locating the fridge in moist areas.
• Plug the fridge into an exclusive, properly installed, grounded wall outlet. Do not under
any circumstances cut or remove the third (ground) prong from the power cord. For advice
concerning power connection and/or grounding, contact a certified electrician or the after
sales support line.
• After plugging the appliance into a wall outlet, allow the unit to cool down for 2–3 hours
before placing food in the refrigerator compartment.
NOTE: Make sure you read and follow all safety advice concerning installation in the General Safety
Instructions section.
Reversing the door swing of your appliance
This fridge has the capability of the door opening from either the left or right side. When you
purchase the unit the door will open from the right side. If you want to open the door from the
left side, follow the instructions below and on the following page to reverse the door swing (the
numbers in brackets refer to the parts in the illustrations).
Getting started

5
6
NOTE: Keep all the parts you remove for re-installation of the door on the other side.
1. Remove the upper hinge cover (6) first
2. Remove the two screws (1) that hold the upper hinge (5) (right side) to the frame. Take away
the upper hinge (5).
3. Lift the door and place it on a padded surface to prevent scratching.
4. Remove the two screws (8) that hold the lower hinge (2) remove the lower hinge (2).
5. Remove the left front leg (4) and transfer it to the right side.
6. Remove the hole-cover plate (7) to the right side.
7. Install the lower hinge (2) onto the left side of the lower frame with the two screws through the
opposite two screws (8).
8. Set the door in its place making sure it sits on the door seat at the lower hinge (2).
9. While holding the door in the closed position, secure the upper hinge (5) on the top left hand
side with the two screws (1) through the opposite two holes. Do not tighten the two screws (1)
until the top of the door is leveled with the counter top.
10. 10. Install the upper hinge cover (6) on the upper hinge.
1. Screw
2. Lower hinge
3. Leveling legs
4. Leveling legs
5. Upper hinge
6. Upper hinge cover
7. Hole cover plate
8. Opposite two screws

7
8
Setting the temperature control
• Your unit has only one control for regulating the temperature in the compartment. It is located
on the upper right hand side of the compartment.
• The first time you turn the unit on, set the temperature control to the highest position: “6”.
After 24 to 48 hours, adjust the temperature control to the setting that best suits your needs.
The setting of “3” should be appropriate.
• To turn the appliance off, turn the temperature control to “Off” (this stops the cooling cycle
but does not shut off the power to the unit) and disconnect the power supply cord from the
wall outlet.
NOTE: If the unit is unplugged, turned off or has lost power, you must wait three to five
minutes before restarting the unit. If you attempt to restart before this time delay, the unit will
not start.
Getting started continued
1. Screw
2. Lower hinge
3. Leveling legs
4. Leveling legs
5. Upper hinge
6. Upper hinge cover
7. Hole cover plate
8. Opposite two screws
Table des matières


