Cannon HG20 Manuel utilisateur

PUB. DIE-310B
Instruction Manual

2
Introduction
Important Usage Instructions
WARNING!
TO REDUCE THE RISK OF ELECTRIC SHOCK, DO NOT REMOVE COVER (OR
BACK). NO USER SERVICEABLE PARTS INSIDE. REFER SERVICING TO
QUALIFIED SERVICE PERSONNEL.
WARNING!
TO REDUCE THE RISK OF FIRE OR ELECTRIC SHOCK, DO NOT EXPOSE THIS
PRODUCT TO RAIN OR MOISTURE.
CAUTION:
TO REDUCE THE RISK OF ELECTRIC SHOCK AND TO REDUCE ANNOYING
INTERFERENCE, USE THE RECOMMENDED ACCESSORIES ONLY.
CAUTION:
DISCONNECT THE MAINS PLUG FROM THE SUPPLY SOCKET WHEN NOT IN USE.
The Mains plug is used as the disconnect device. The Mains plug shall remain readily operable to disconnect the
plug in case of an accident.
While using the compact power adapter, do not wrap it or cover it with a piece of cloth, and do not place it in
confined narrow spaces. Heat may build up, the plastic case may deform and it could result in electric shock or fire.
CA-570 identification plate is located on the bottom.
Using any device other than the Compact Power Adapter CA-570 may damage the camcorder.
European Union (and EEA) only.
These symbols indicate that this product is not to be disposed of with your household waste,
according to the WEEE Directive (2002/96/EC), the Battery Directive (2006/66/EC) and/or your
national laws implementing those Directives.
This product should be handed over to a designated collection point, e.g., on an authorized
one-for-one basis when you buy a new similar product or to an authorized collection site for
recycling waste electrical and electronic equipment (EEE) and batteries and accumulators. Improper handling of
this type of waste could have a possible impact on the environment and human health due to potentially hazardous
substances that are generally associated with EEE. Your cooperation in the correct disposal of this product will
contribute to the effective usage of natural resources.
For more information about the recycling of this product, please contact your local city office, waste authority,
approved scheme or your household waste disposal service or visit www.canon-europe.com/environment.
(EEA: Norway, Iceland and Liechtenstein)

3
Trademark Acknowledgements
• The SD logo is a trademark. The SDHC logo is a trademark.
• Microsoft, Windows and Windows Vista are trademarks or registered trademarks of Microsoft Corporation in the United States and/or
other countries.
• Macintosh and Mac OS are trademarks of Apple Inc., registered in the U.S. and other countries.
• HDMI, the HDMI logo and High-Definition Multimedia Interface are trademarks or registered
trademarks of HDMI Licensing LLC.
• “AVCHD” and the “AVCHD” logo are trademarks of Matsushita Electric Industrial Co., Ltd. and Sony
Corporation.
• Manufactured under license from Dolby Laboratories.
“Dolby” and the double-D symbol are trademarks of Dolby Laboratories.
• Other names and products not mentioned above may be trademarks or registered trademarks of their
respective companies.
• This product is licensed under AT&T patents for the MPEG-4 standard and may be used for encoding MPEG-4 compliant video and/or
decoding MPEG-4 compliant video that was encoded only (1) for a personal and non-commercial purpose or (2) by a video provider
licensed under the AT&T patents to provide MPEG-4 compliant video. No license is granted or implied for any other use for MPEG-4
standard.

4
Enjoying High-Definition Video with your
Camcorder
Preserve your most treasured memories, be it unforgettable scenery or cherished
moments spent with family and friends, with high-definition video recordings of a
quality second only to actually being there.
What is High-Definition Video?
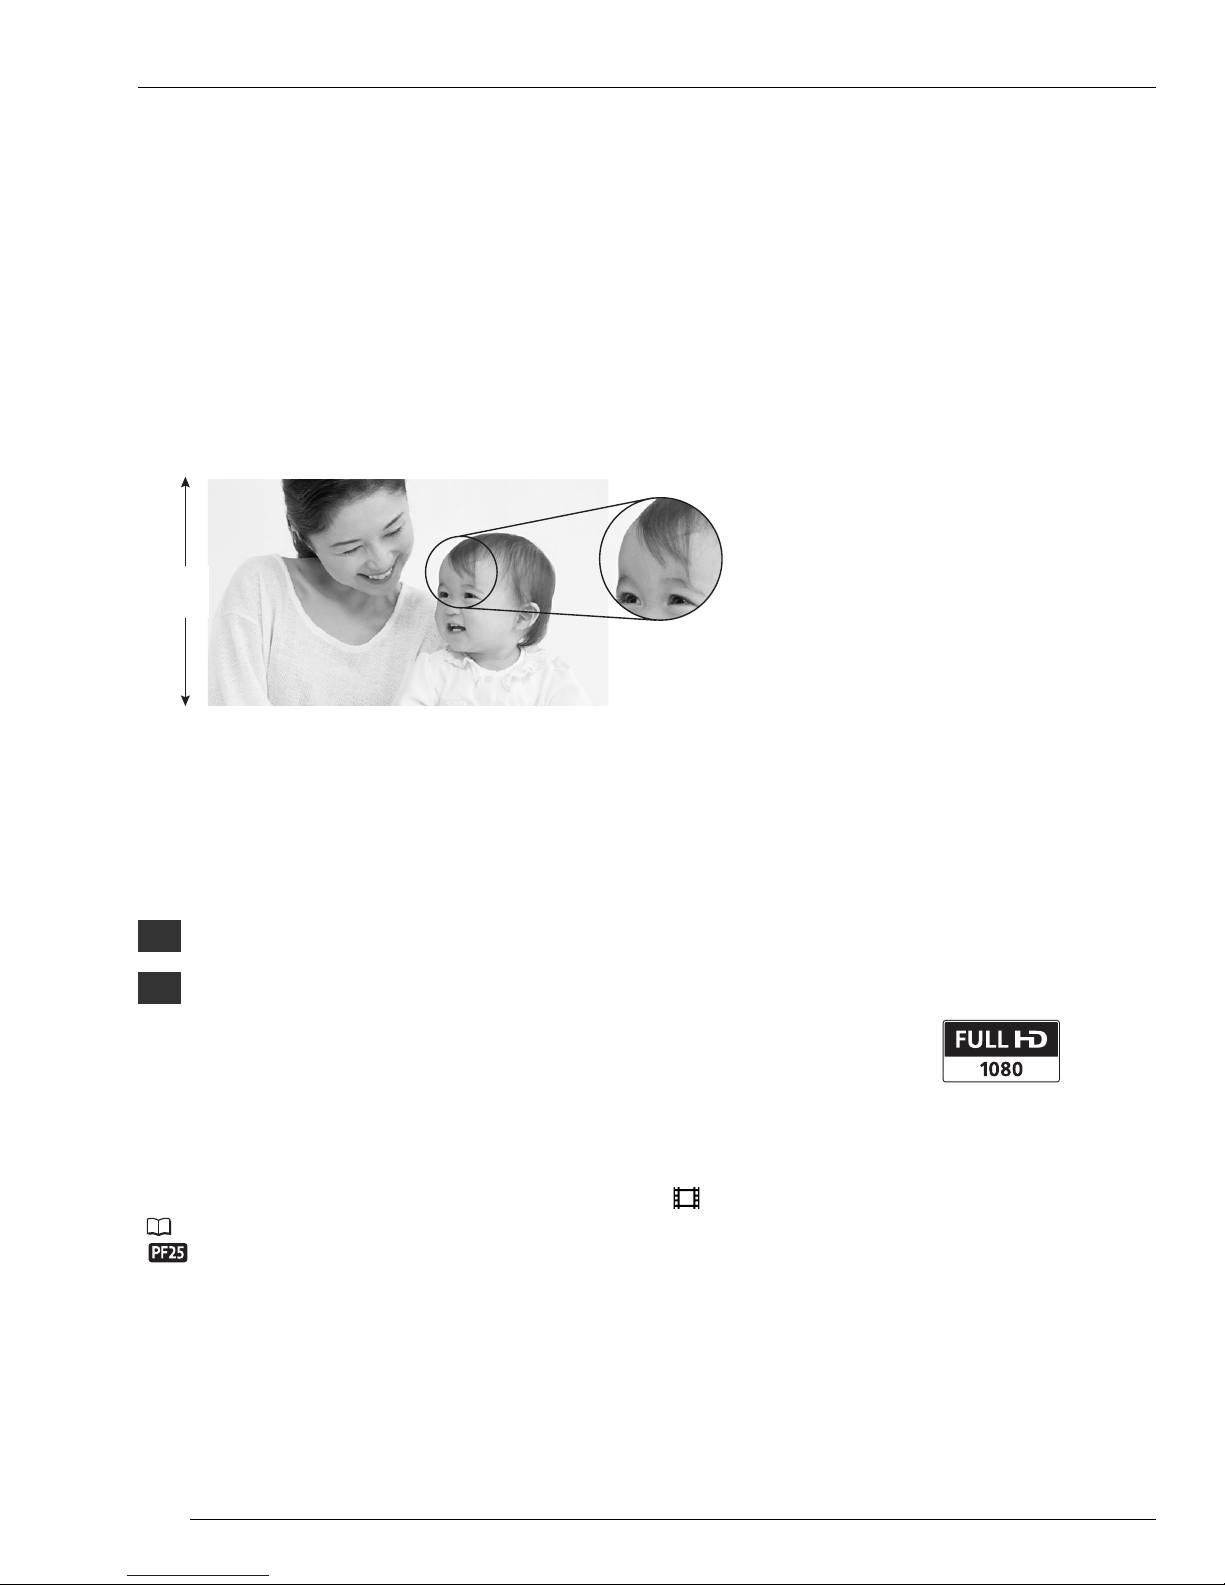
Your camcorder features a full high-definition image sensor (Full HD CMOS) that captures
video at a resolution of 1,920 x 1,080 pixels1. This results in video recordings of
unparalleled high quality, fine detail and lifelike vivid colors.
How does full high definition compare with standard-definition TV broadcasts?
Approximately 5 times the number of pixels.
Almost 90% more scanning lines.
“Full HD 1080” refers to Canon camcorders compliant with high-definition
video composed of 1,080 vertical pixels (scanning lines).
What is Cinema Mode?
Give your recordings a cinematic look by using the [ Cine Mode] recording program
( 45). Combine this recording program with the 25 fps progressive frame rate
[PF25] to get the enhanced effect of the 25p Cinema Mode.
Capture the finest detail,
like the movement or shine
of a single strand of hair
1,080
lines
5
1.9
1Video is recorded at this resolution only when the recording mode is set to MXP or FXP mode.
In other recording modes, the picture is resized to 1,440 x 1,080 pixels before being recorded.
Even in that case, the picture captured is detailed enough to render richly detailed recordings.

5
Enjoying High-Definition Video with your Camcorder
What are the advantages of a hard disk?
Your videos and photos are recorded on the built-in hard disk or commercially available
SD/SDHC memory cards2using AVCHD specifications3. This Double Media recording
system gives you longer recording times for more high-definition videos and photos.
• You can shoot approximately 11 hours ( 120 GB HDD) or 5.5 hours ( 60 GB
HDD) of video in MXP mode, which offers the highest video quality under AVCHD
specifications.
• The camcorder records video and photos in unused space on the recording media so
you need not worry about accidentally recording over important videos.
• You can immediately access the scenes you want to play back from an index menu.
• You can easily manage your video and photo collections with the supplied editing
software: ImageMixer 3 (movies) and DIGITAL VIDEO Solution Disk (photos).
Can I play back my high-definition video on other
devices?
Needless to say, you can connect your camcorder to an HDTV to enjoy your recordings
with family and friends ( 79). You also have the following options:
• You can easily play back video recorded on the memory card by inserting the
memory card directly into AVCHD-compatible TV sets and HDD or DVD recorders
that feature an SD/SDHC memory card slot4. For details, refer to the instruction
manual of your TV or digital video recorder.
• You can play back AVCHD discs of your recordings created using the optional
DW-100 DVD Burner (80) on the DVD Burner itself or on AVCHD-compatible
DVD players or Blu-ray Disc players5.
2For details about memory cards that can be used with this camcorder refer to Using a Memory
Card ( 29).
3AVCHD is the new standard for recording high-definition video. With AVCHD specifications the
video signal is recorded using MPEG-4 AVC/H.264 compression and the audio signal is
recorded in Dolby Digital.
4Depending on the device used, correct playback may not be possible even if the device is
AVCHD-compatible. In such case, play back the recordings on the memory card using the
camcorder.
5AVCHD discs containing scenes recorded in MXP mode cannot be created with the optional
DW-100 DVD burner. Use the supplied software ImageMixer 3 to back up such scenes.

6
Important Notes About the Hard Disk Drive
Your hard disk camcorder allows you to shoot and store many hours of video.
However, there are differences between recording onto a hard disk and recording
onto other media. Make sure to follow the points below when using your camcorder.
For more details, refer to Handling Precautions ( 113).
Back up your recordings periodically
Make sure to transfer your movies and photos
to an external device such as a computer or
digital video recorder ( 80) and back them
up regularly and especially after making
important recordings. Canon shall not be
liable for any loss or corruption of data.
Do not subject the camcorder to
vibrations or strong impacts
The hard disk is a high-precision device.
Vibrations, strong impacts or dropping the
camcorder may result in permanent data loss.
Keep the drop sensor activated
whenever possible
The drop sensor ( 96) detects when the
camcorder is dropped and activates a
protection mechanism to help prevent hard
disk damage. Turning this function off will
disable the mechanism. Even if this function
is set to [ On] and the camcorder is
dropped, hard disk damage can occur.
Do not disconnect the power source
while the camcorder is on
Always turn the camcorder off before
removing the battery or compact power
adapter.

7
Important Notes About the Hard Disk Drive
Do not turn off the camcorder while the
camcorder is on and the ACCESS
indicator is on or flashing or while the
camcorder is in standby mode
Doing so may result in hard disk damage or
permanent data loss.
Use the camcorder within its operating
temperature range
If the camcorder's temperature becomes too
hot or too cold, recording/playback may stop
in order to prevent hard disk damage.
Do not use the camcorder at high
altitudes
Turning on or using the camcorder in places
with low atmospheric pressure, such as at
altitudes higher than 3,000 m, may result in
hard disk damage.
Initialize the hard disk when movies
cannot be recorded/played back
normally
As movies are recorded and deleted over
time, hard disk fragmentation may occur,
which may reduce performance. Initialize the
hard disk should this happen.
Protect personal information on the
hard disk
When the hard disk is initialized or recordings
are deleted, stored data is not physically
erased. Remember this when disposing of the
camcorder or giving it to another person.

Table of contents
8
Introduction
4 Enjoying High-Definition Video with your Camcorder
6 Important Notes About the Hard Disk Drive
12 About this Manual
14 Getting to Know the Camcorder
14 Supplied Accessories
15 Components Guide
18 Screen Displays
Preparations
21 Getting Started
21 Charging the Battery Pack
22 Preparing the Wireless Controller and Accessories
24 Adjusting the Position and Brightness of the LCD Screen
25 Basic Operation of the Camcorder
25 The Button: Mode or Flexible Recording
26 Joystick and Joystick Guide
26 Using the Menus
28 First Time Settings
28 Setting the Date and Time
28 Changing the Language
29 Changing the Time Zone
29 Using a Memory Card
29 Memory Cards Compatible for Use with the Camcorder
30 Inserting and Removing a Memory Card
31 Selecting the Recording Media
31 Initializing the Hard Disk or Memory Card

9
Table of contents
Video
32 Basic Recording
32 Shooting Video
33 Selecting the Video Quality (Recording Mode)
34 Zooming
35 Quick Start Function
35 Reviewing and Deleting the Last Scene Recorded
36 Basic Playback
36 Playing Back the Video
38 Changing the Index Screen Selection
39 Selecting Scenes by Recording Date
40 Selecting the Playback Starting Point from the Movie Timeline
41 Selecting Recordings from the Index Screen
42 Deleting Scenes
43 Advanced Functions
43 Special Scene Recording Programs
44 Changing the Shutter Speed and Aperture
45 Cinema Mode: Giving a Cinematic Look to your Recordings
46 Self Timer
46 Manual Exposure Adjustment and Automatic Backlight Correction
47 Manual Focus Adjustment
48 White Balance
49 Image Effects
50 Digital Effects
51 On-Screen Displays and Data Code
51 Audio Recording Level
52 Using Headphones
53 Using the Mini Advanced Shoe
54 Using an External Microphone
55 Using a Video Light
55 Playlist and Scene Operations
55 Dividing Scenes
56 Editing the Playlist: Adding, Moving and Deleting Playlist Scenes
58 Copying Scenes

10
Photos
59 Basic Recording
59 Taking Photos
60 Selecting Photo Size and Quality
61 Deleting a Photo Right After Recording It
61 Basic Playback
61 Viewing Photos
63 Deleting Photos
64 Additional Functions
64 Magnifying Photos during Playback
64 Flash
65 Histogram Display
65 Drive Mode: Continuous Shooting and Exposure Bracketing
66 Taking Photos while Recording Movies
(Simultaneous Recording)
67 Light Metering Mode
67 Capturing a Photo from the Playback Scene
68 Protecting Photos
68 Copying Photos
69 Other Functions You Can Use when Taking Photos
70 Printing Photos
70 Printing Photos (Direct Print)
71 Selecting the Print Settings
73 Trimming Settings
74 Print Orders
External Connections
76 Terminals on the Camcorder
77 Connection Diagrams
79 Playback on a TV Screen
80 Saving and Backing Up Your Recordings
80 Backing Up Your Recordings on a Computer
80 Authoring High-Definition (AVCHD) Discs and Photo DVDs
84 Copying your Recordings to an External Video Recorder
84 Transferring Photos to a Computer (Direct Transfer)
87 Transfer Orders
Ce manuel convient aux modèles suivants
1
Table des matières
Manuels caméscope populaires d'autres marques

Panasonic
Panasonic AG-HMC152EN Manuel utilisateur

Insignia
Insignia NS-DCC5HB09 - Camcorder - 720p Manuel utilisateur

MYDLINK
MYDLINK DCS-6100LH Manuel utilisateur

Sony
Sony video Hi8 Handycam CCD-TR555 Manuel utilisateur

SECURECOM
SECURECOM V-5014B Manuel utilisateur

Panasonic
Panasonic HDC-SD100 Manuel utilisateur