10
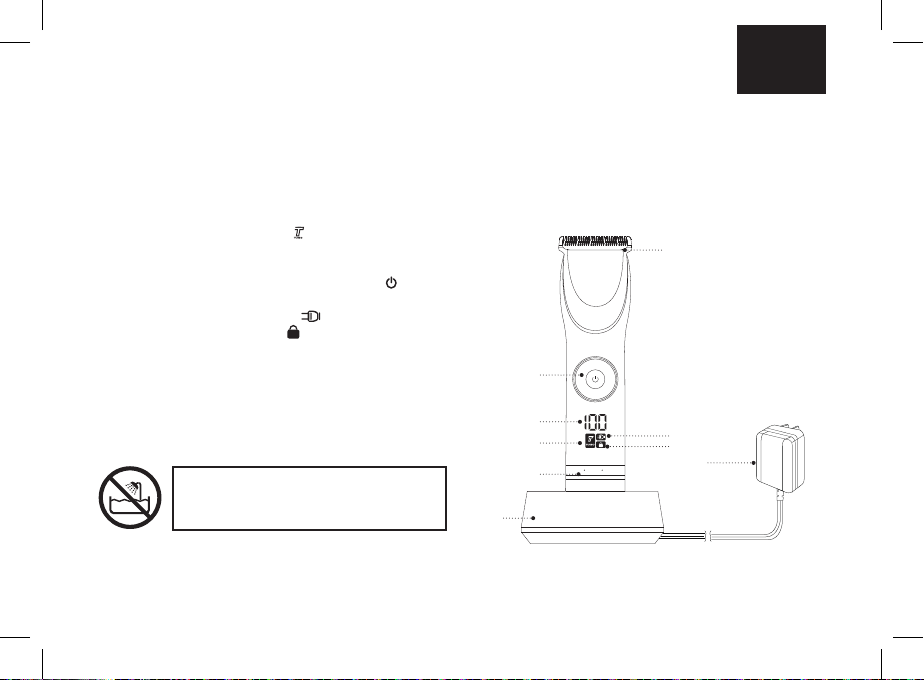
button (5) « » for 5 seconds, the symbol
(8) « » will light up. To switch the locking mode
o, press and hold the button (5) « » again for 5
seconds, the symbol (8) « » will go out.
STEP TWO
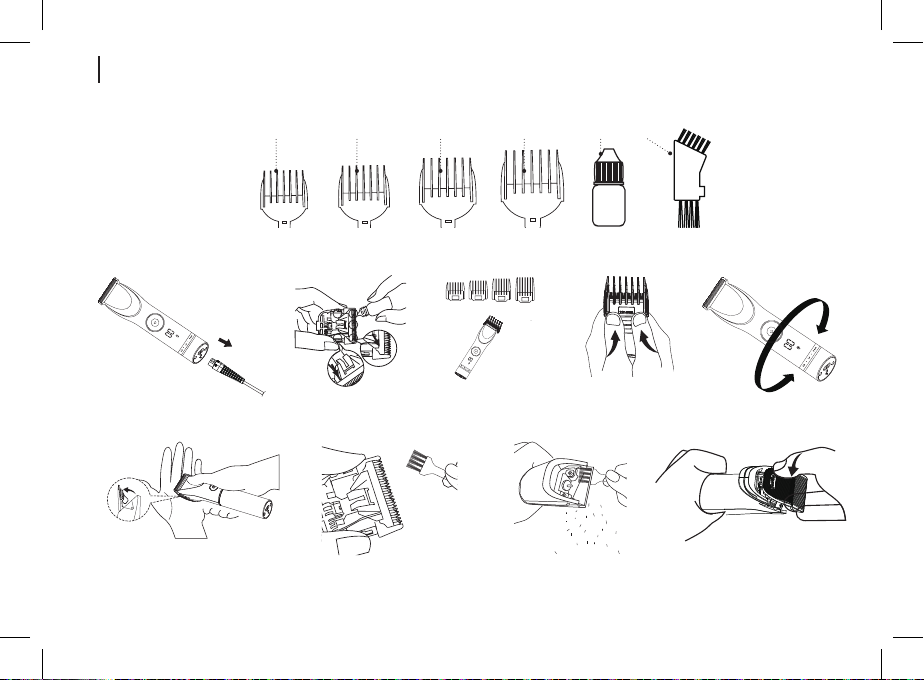
• Switch the hair clipper o, then set the attachment
comb (13), switch the hair clipper on and continue
cutting hair near top of the head.
STEP THREE
• Switch the hair clipper o, set the attachment comb
(10 or 11) for shorter hair and cut hair on the temples.
Switch the hair clipper o, then set the attachment
comb (12 or 13), switch the hair clipper on and
continue cutting hair towards the top of the head.
STEP FOUR
• Cut the hair from the top of the head towards the
crown against the hair growth direction.
• Use the attachments (10 or 11) for short haircut
(3-6 mm). To leave slightly longer hair use the
attachments (12 or 13) (9-12 mm).
• To leave longer hair, take hair locks between your
ngers and cut it using the hair clipper. Lift the hair
locks with the comb and cut them along the comb.
• Comb the hair to reveal uneven locks.
STEP 5
• In the nal stage of hair styling remove the installed
attachment comb (10, 11, 12 or 13) from the clipper,
turn the blades of the clipper towards the hair and
trim hair on the temples and neck carefully. Before
creating the contour, comb the hair above ears.
Slightly bend back the person’s ear so it will not get
in the way of cutting hair. Do not press the clipper
strongly, there is danger of injuries or cuts when open
blades come in contact with skin.
• Notes: — without using the attachment combs (10,
11, 12 or 13), for a short haircut, you can change the
remaining hair length in the range from 0.8 mm to
2 mm, to change the remaining hair length turn the
lower part of the hair clipper body (4) (pic. 5).
• After you nish cutting hair, switch the hair clipper o
by pressing the button (5) « ».
• Remove the installed attachment comb (pic. 4), clean
it from hair, remove the blade block (6) (pic. 6) and
clean it (pic. 7) with the brush (15). Clean the inner
cavity under the blade block (6) (pic. 8).
• Lubricate the blade block (6) (pic. 2).
• Install the blade block (6) back to the installation
place (pic. 9).
CLEANING AND CARE
• After you nish using the hair clipper, switch it o. If
the hair clipper is powered by the adapter (9), unplug